| KIT #: | 61042 |
| PRICE: | $24.00 |
| DECALS: | Three options |
| REVIEWER: | Francisco Santoro |
| NOTES: |
| HISTORY |
"While Thunderbolt and Lightning adherents might hotly contest the claim, the Mustang has been rated as the best all-around United States fighter to serve in quantity in the Second World War. Operationally, all three fighters had formidable tallies and each was indispensable in its own sphere. Since each was so different in origins and technical features from the others, there seems no yardstick with which to compare them closely, but from the British viewpoint the Mustang stands out because it was built to conform to RAF requirements and because British technicians can modestly claim thereafter to have influenced its operational development to a considerable degree.
 At the turn of the year 1944/45, a new Mustang
variant was coming into service, though rather later than originally planned. At
the main North American plant at Inglewood, California, more drastic
improvements to visibility for the pilot had been planned than could possibly
have been made on active service. An unfinished P-51B airframe was taken from
the production line and rebuilt to accomodate a "teardrop" Typhoon type sliding
hood, resulting in changes to the rear fuselage structure and repositioning of
equipment. The new lowered rear decking lines were "moulded" into the main
fuselage contoursby again using the iconic lofting process, and the alterations
to the forward nose lines and windscreen originally envisaged were incorporated.
Armament alternatives were the usual four 50 caliber guns with 490 rounds apiece
or six 50 caliber wing guns with 270 rounds for the four outer weapons and 380
rounds for the two inner. The latter armament soon became standard, but because
of the extra weight and restressing underwing loads initially were restricted to
two 500 lbs bombs and two 75-gallon drop tanks or equivalents, a recommendation
often ignored in operational squadrons.
At the turn of the year 1944/45, a new Mustang
variant was coming into service, though rather later than originally planned. At
the main North American plant at Inglewood, California, more drastic
improvements to visibility for the pilot had been planned than could possibly
have been made on active service. An unfinished P-51B airframe was taken from
the production line and rebuilt to accomodate a "teardrop" Typhoon type sliding
hood, resulting in changes to the rear fuselage structure and repositioning of
equipment. The new lowered rear decking lines were "moulded" into the main
fuselage contoursby again using the iconic lofting process, and the alterations
to the forward nose lines and windscreen originally envisaged were incorporated.
Armament alternatives were the usual four 50 caliber guns with 490 rounds apiece
or six 50 caliber wing guns with 270 rounds for the four outer weapons and 380
rounds for the two inner. The latter armament soon became standard, but because
of the extra weight and restressing underwing loads initially were restricted to
two 500 lbs bombs and two 75-gallon drop tanks or equivalents, a recommendation
often ignored in operational squadrons.
Factory designations for the D series were NA-106, NA-109 and NA-122 from the Californian plant and NA-111 and NA-124 from production in Texas. From the former plant, 281 were supplied to the RAF as Mustang IVs serialled KH641-670, KM493-743; additionally and example (TK589) was sent for evaluation. This test aircraft delivered in June 1944 was in a finishing style then being used for operations against the V-bombs to obtain maximum speed-unpainted, with all joints filled in to provide a continuous smooth surface. From this time onwards, both in the Army Air Force and RAF, Mustangs were frequently to be seen in natural metal finish. Since it was a conspicuous finish, with speed replacing concealment as the Allies gained ascendancy in the air and camouflage no longer prime consideration, there ensued a spate of gaudy markings.
Similar to the P-51D but built in Dallas and fitted with an aeroproducts airscrew was the P-51K (NA-111), of these 597 were allocated to the RAF serialled KH944-947, KH671-870,KM100-492 and TK586 as Mk IVAs.
 The D-6 was a specialised
tactical-reconnaissance version for the USAAF carrying oblique and vertical
cameras in the rear fuselage while retaining full armament. The D-20 was the
model supplies to Sweden in April 1945 as their J26. The D-10-NA and all Dallas
D models introduced additional fin area in the form of a fillet between the aft
decking and fin to increase directional stability throughout the speed range, as
foreshadowed during the original Rolls Royce Merlin conversion trials in
England. The fillet had not been necessary on the B and C versions, but the
reduced side area at the rear on the D models no doubt influenced its eventual
incorporation as a production item. Modification kits were distributed so that
all Ds could be fitted with this fillet, but the decision was left to a large
extent with local commanders.
The D-6 was a specialised
tactical-reconnaissance version for the USAAF carrying oblique and vertical
cameras in the rear fuselage while retaining full armament. The D-20 was the
model supplies to Sweden in April 1945 as their J26. The D-10-NA and all Dallas
D models introduced additional fin area in the form of a fillet between the aft
decking and fin to increase directional stability throughout the speed range, as
foreshadowed during the original Rolls Royce Merlin conversion trials in
England. The fillet had not been necessary on the B and C versions, but the
reduced side area at the rear on the D models no doubt influenced its eventual
incorporation as a production item. Modification kits were distributed so that
all Ds could be fitted with this fillet, but the decision was left to a large
extent with local commanders.
Additional radio, including an MN-26C radio compass (fitted retrospectively to many machines), was also introduced at about the same time as the fin fillet, as well as attachment points for a cluster of three "bazooka" RP (rocket projectile) tubes beneath each wing."
| THE KIT |
 Tamiya's P-51B comes in a top opening box with
Captain Dominic Gentile's aircraft flying on the boxart. Inside the box there're
three sprues, two in dark grey and one in clear. There´s also included a bag of
two policaps for the propeller.
Tamiya's P-51B comes in a top opening box with
Captain Dominic Gentile's aircraft flying on the boxart. Inside the box there're
three sprues, two in dark grey and one in clear. There´s also included a bag of
two policaps for the propeller.
Instructions are typical Tamiya, of the foldable type and perfectly clear. There´re 10 construction steps.
There're also three decal options:
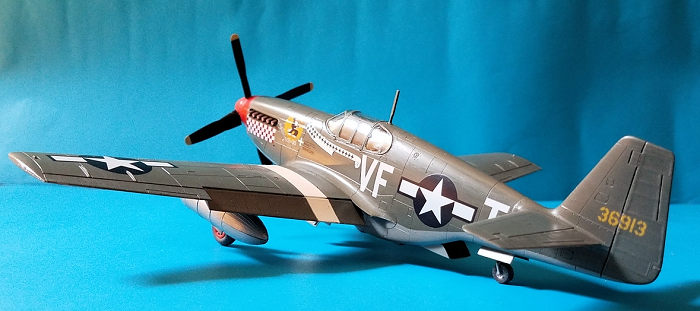
Captain Dominic Gentile's P-51B VF*T, 336th FS, 4th FG. Painted in Olive Drab and Neutral Grey.
Lieautenant William Hovde's P-51B YF*I, 358th FS, 355FG. Painted in Olive Drav and Neutral Grey.
P-51B SQ*G, 339th FS, 504th FG. Painted in natural metal.
| CONSTRUCTION |
 I first prepainted all the cockpit parts with
interior green (Revell 48) and left them to dry. While the cockpit parts were
drying, I tackled the wings, which were separated from their sprues and cleaned
up. I opened the holes for the drop tanks at this moment, and after that, I
glued the top and bottom of the wings together.
I first prepainted all the cockpit parts with
interior green (Revell 48) and left them to dry. While the cockpit parts were
drying, I tackled the wings, which were separated from their sprues and cleaned
up. I opened the holes for the drop tanks at this moment, and after that, I
glued the top and bottom of the wings together.
Back to the cockpit, I glued all the parts together, painted the radio equipment black, and glued the cockpit to one fuselage side. Then I glued the other fuselage half, and taped both halves with some tape while the glue dried. While that was happening, I painted the smaller parts on the sprues, such as the wheel hubs (white and then red), fuel tanks in silver, landing gear struts in silver, and tyres in Revell 78 Tank Grey.
With the fuselage dry, I glued the wings to it and have a fully built aircraft after two building hours.
| COLORS & MARKINGS |
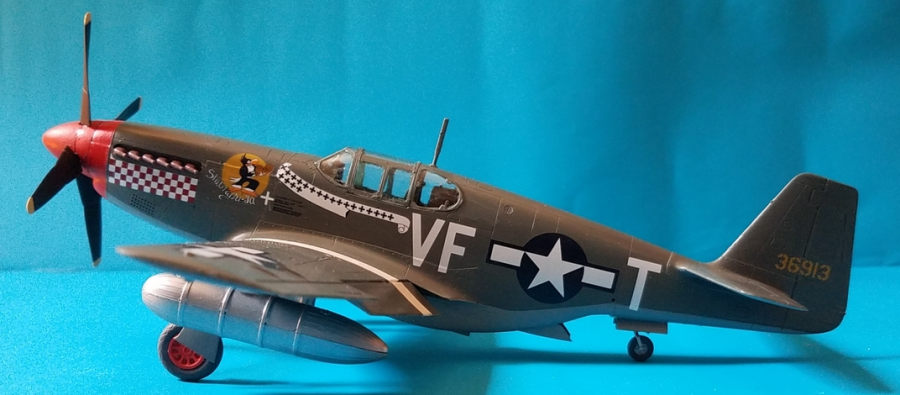
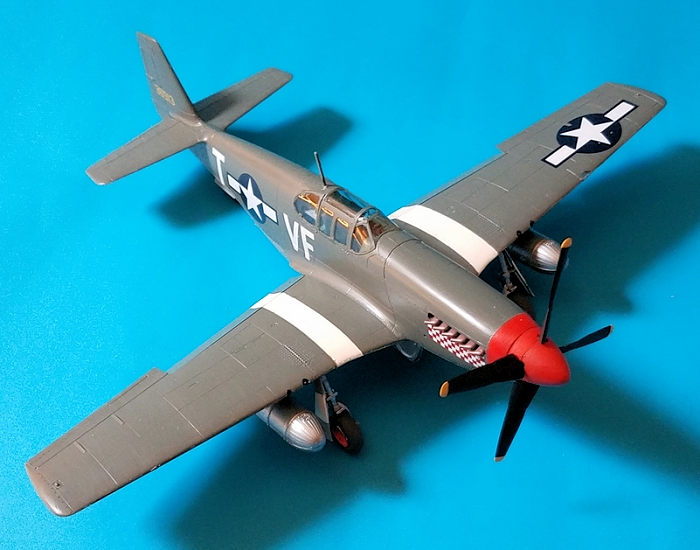
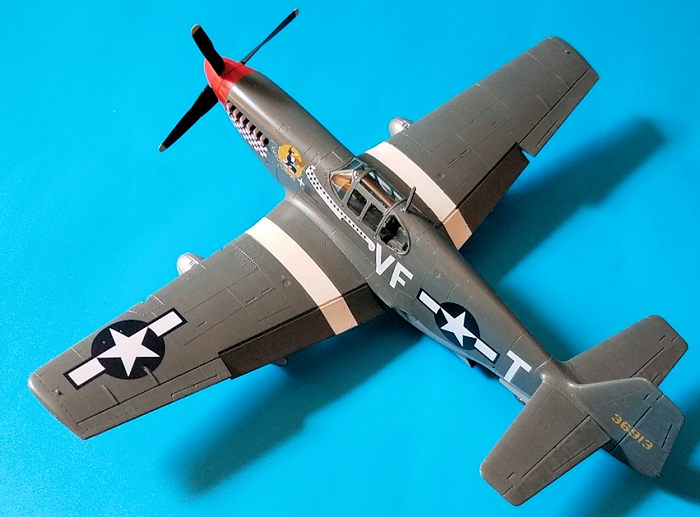
I had chose to paint my kit as Dominic
Gentile´s mount. This was a simple scheme, Olive Drab over Neutral grey with
white bands over the wings with a red nose. I first painted the nose white, and
then painted the red. The nose was then masked. The white bands on the wings
were painted and then masked, soon after I pain ted the Olive Drab (Revell 66).
After that colour was dried, I masked it and painted the undersides with Neutral
Grey (Revell 43). I then painted the wheel wells in Interior Green (Revell 48).
Once all the surfaces were dry, I gloss coated the entire plane with Revell´s
gloss varnish to prepare the model for the decals.
ted the Olive Drab (Revell 66).
After that colour was dried, I masked it and painted the undersides with Neutral
Grey (Revell 43). I then painted the wheel wells in Interior Green (Revell 48).
Once all the surfaces were dry, I gloss coated the entire plane with Revell´s
gloss varnish to prepare the model for the decals.
People say Tamiya decals are thick and are better binned, replacing them with aftermarket decals. Tamiya decals are thick, but are perfectly usable. The trick is to sink them in hot water (a tip given to me on Britmodeller), they'´ll become flexible enough to (somewhat) sink into the panel lines. I began decalling by applying the fuselage starts, then the radio calls, then the stars over the wings. The last decals to be applied were those of the nose. When the decals were thoroughly dry, I gave the aircraft two coats of Revell's matt varnish.
Final parts consisted on the landing gear struts, wheels, fuel tanks, tailwheel and propeller. The landing gear struts were glued first and left to dry. Then I glued the wheels, which hubs were painted in red. After that, I glued the paper fuel tanks. The clear parts were masked and then glued with clear glue. The propeller was the final part to be added. It was painted in black with a red propeller hub.
| CONCLUSIONS |
I really like these Tamiya kits, low part counts, easy assembly and perfect fit. You can't go wrong when buying a Tamiya kit.
| REFERENCES |
Classic Aircraft No.3 P-51 Mustang: Their history and how to model them by Roy Cross and Gerald Scarborough
29 June 2020
Copyright ModelingMadness.com. If you would like your product reviewed fairly and fairly quickly, please
contact
the editor or see other details in the
Note to
Contributors. Back to the Main Page
Back to the Review
Index Page
Back to the Previews Index Page