Airfix 1/48 P-51D Mustang
| KIT #: | A05131 |
| PRICE: | $29.95 |
| DECALS: | Two options |
| REVIEWER: | Dan Lee |
| NOTES: | Leading Edge Decal Sheet 4880 |
| HISTORY |
The history of the P-51D has been done better in other Modeling Madness articles so I will avoid rehashing that, but instead focus on the subject of the build.
 The RCAF didn't get many P-51s
during World War II, but received them during the end of the war as No 441 and
442 squadrons were equipped with Mustang IIIs and IVs to help with long range
bomber escort. After the war, the RCAF received 88 more Mustangs to compliment
the surviving ones, equipping two regular squadrons and six auxiliary squadrons.
They flew with the RCAF till the mid 60s when they were scrapped, sold off as
private warbirds or sent to museums.
The RCAF didn't get many P-51s
during World War II, but received them during the end of the war as No 441 and
442 squadrons were equipped with Mustang IIIs and IVs to help with long range
bomber escort. After the war, the RCAF received 88 more Mustangs to compliment
the surviving ones, equipping two regular squadrons and six auxiliary squadrons.
They flew with the RCAF till the mid 60s when they were scrapped, sold off as
private warbirds or sent to museums.
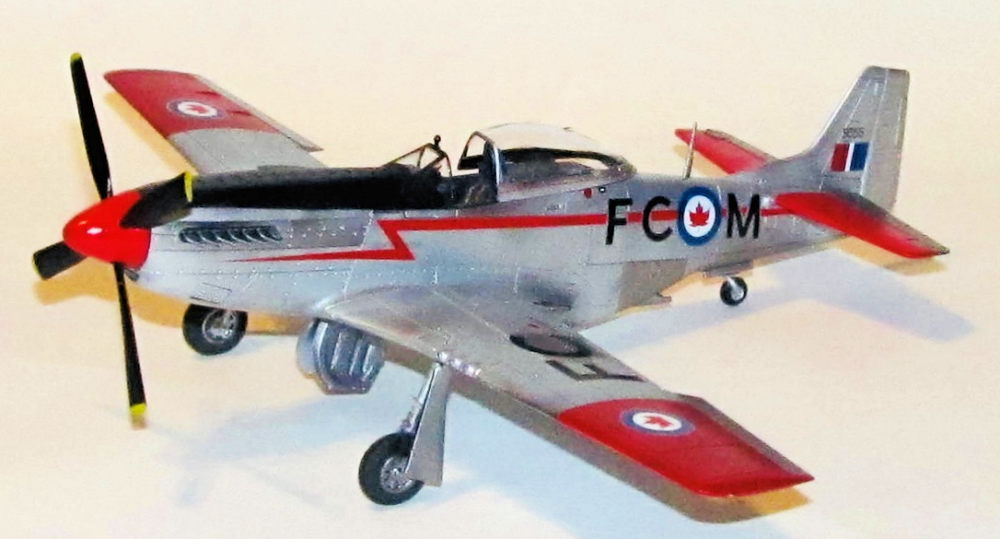
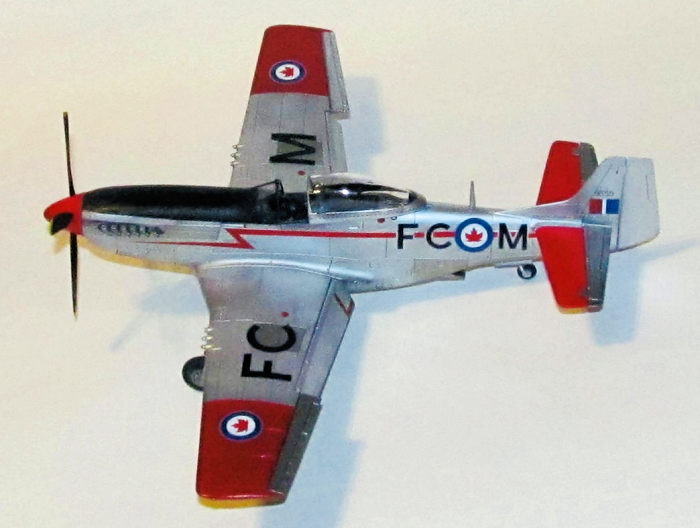
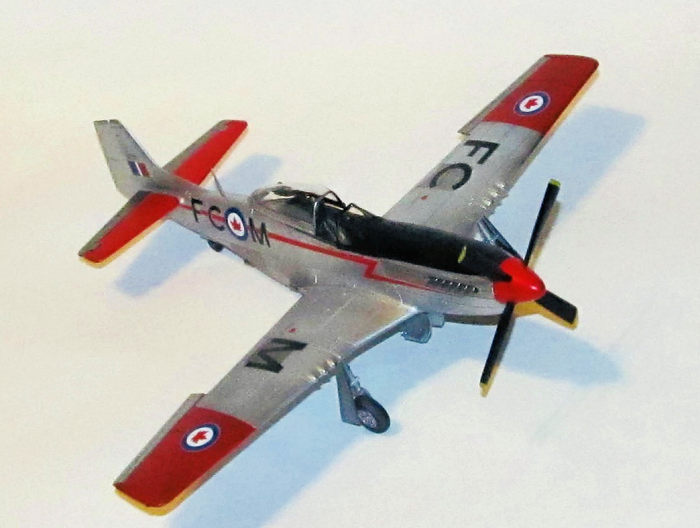
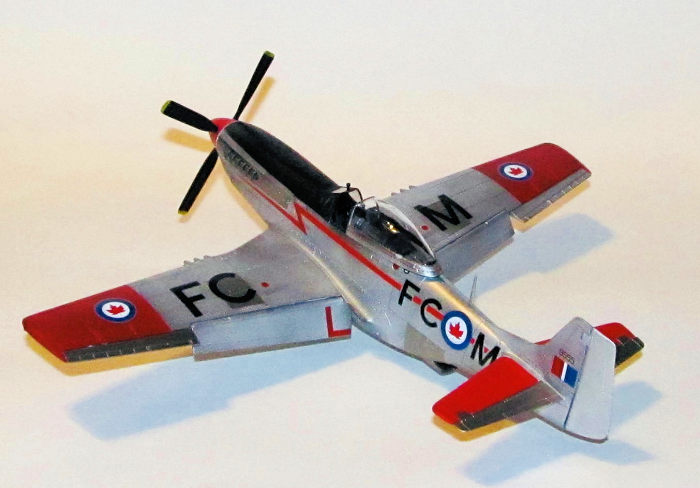
Several Mustangs including the markings of this model served with the Central Experimental and Proving Establishment detachment stationed at RCAF Station Namao (later known as CFB Edmonton.)
| THE KIT |
See Tom Cleaver's first review of the Airfix Mustang for a preview of what is in the kit. It pretty much sums up what is in the kit.
| CONSTRUCTION |
It all began with the cockpit sidewalls being painted Tamiya Flat black (post war interior color) with various details picked out in with a toothpick dipped in white, yellow or red paint. The instrument panel, radio and floor was sprayed with Tamiya flat black while the floor and certain areas were brush painted Tamiya silver to show wear. I painted the kit supplied seat belts (molded with the seat) tan and silver. The various cockpit stencils were added to the cockpit as listed in the instructions.
 I painted the interior grills and
radiators with Tamiya metallic grey and then sprayed the interior of the intake
and exhaust Vallejo dark aluminum.
I painted the interior grills and
radiators with Tamiya metallic grey and then sprayed the interior of the intake
and exhaust Vallejo dark aluminum.
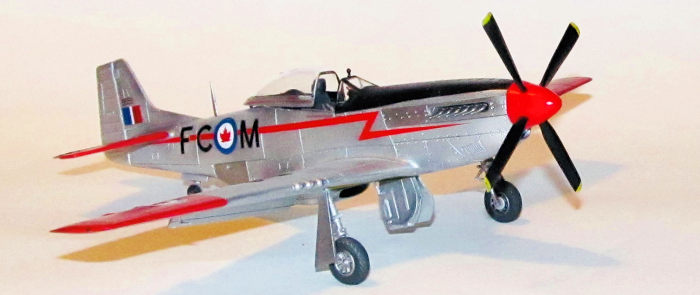
Instead of the kit prop, I used an Ultracast resin with non cuffed squared off tip Hamilton Standard prop and corrected hub which is accurate for a post war RCAF Mustang. The resin prop is a typical Ultracast set as the parts were easy to remove from the resin cast stubs and assemble with the prop hub is separate from the blades. I sprayed the prop tips and prop hub flat white and then sprayed the prop tips Gunze chrome yellow and the prop hub Tamiya gloss red. I masked off the tips and then sprayed the blades Tamiya flat black. The propellor blades had a small dot of CA glue placed on the end and inserted into the holes in the hub. I drilled out a 1/8” hole about 1/2” deep in the middle of the propeller hub so that it could fit the plastic peg and spin.
The wheel wells were airbrushed with a 50/50 mix of Tamiya flat yellow and flat yellow green. The fine details were painted using Vallejo Metal Color Silver and a fine tipped brush.
 The interior parts and tail fin
were added to the main fuselage parts as per instructions and then most of the
fuselage were glued together using CA glue instead of regular glue to eliminate
the dreaded phantom seam that can ruin a NMF. The seams were sanded and polished
when the CA glue cured.
The interior parts and tail fin
were added to the main fuselage parts as per instructions and then most of the
fuselage were glued together using CA glue instead of regular glue to eliminate
the dreaded phantom seam that can ruin a NMF. The seams were sanded and polished
when the CA glue cured.
I used CA glue to glue the leading edges and used Tamiya Extra Thin glue for the internal joins again to eliminate the phantom seam. When the CA glue was cured, I sanded it smooth and polished the seams with 3200 and 3600 grit polishing cloths. Second, I left off the ailerons and flaps because I know that I would somehow break them.
I then attached the wings to the fuselage. I glued the forward bottom piece to the plane using Tamiya extra thin glue in the fuselage portion and CA glue (again to eliminate the phantom seam) for the leading edges that form the forward portion of the wheel well. Yet again I sanded and polished the leading edges when the glue was dry. The flaps and ailerons were left off till painting was completed.
| COLORS & MARKINGS |
I masked off the interior with tape and the wheel wells using the closed landing gear door piece. I started spraying the wing areas, and stabilizers designated by the instructions for the insignia red wing areas flat white and then painted them Gunze insignia red or Tamiya Gloss red. I had some problems with coverage with Gunze Insignia Red on the wing tips so I used Tamiya Gloss Red for the rest which is why you see two tones of red. Certain red areas were masked off in preparation for the NMF. The canopy and windscreen were masked off and painted Tamiya Flat black.
I sprayed Vallejo Black acrylic
primer on the plane and canopy in light coats and it sat for a couple of days to
cure. When I was ready, I sprayed on several very light coats of Vallejo white
aluminum. In my experience, I have found that I have to do this to prevent the
metal paint from running or blotching. I don't think Vallejo
 Metal Colors are as
good as lacquer metallic paint and it has similar quirks to other metallic
paints, but it has a lot of pluses as it is a lot more forgiving, more durable
in handling and much less toxic (before I could only paint NMF aircraft outside
in the summer due to the fumes.) The rudder was painted with Tamiya
XF-11 chrome silver to represent the Aluminum doped fabric rudder.
Metal Colors are as
good as lacquer metallic paint and it has similar quirks to other metallic
paints, but it has a lot of pluses as it is a lot more forgiving, more durable
in handling and much less toxic (before I could only paint NMF aircraft outside
in the summer due to the fumes.) The rudder was painted with Tamiya
XF-11 chrome silver to represent the Aluminum doped fabric rudder.
When the main paint coat was dry I masked off part of the nose and painted the area around the exhausts with a light coat of Vallejo Steel. The wing gun hatches were masked off and painted dark aluminum. Next, I masked off the lower areas of the nose and sprayed on Tamiya flat black for the anti-glare panel and the windscreen. The various parts like the wheels, stabilizers, ailerons, flaps, landing gear doors, top portion of the rear fuselage and wheels were painted as per the decal sheet markings. When the paint was dry, I sprayed on a couple of light coats of Gunze Clear on the plane, parts and propeller in preparation for the decals.
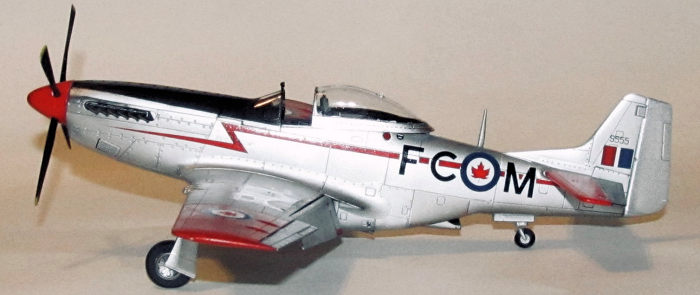
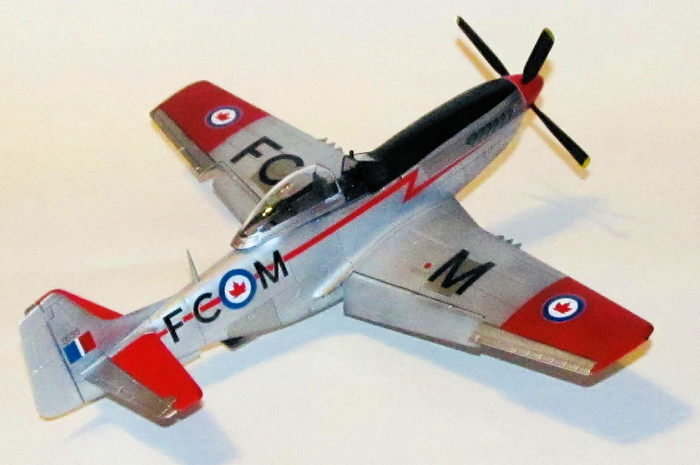
I used the Leading Edge Decal Sheet 4880 markings for the CEPE detachment at RCAF Station Namao. I was kind of disappointed I didn't need the resin Direction Finder antenna for this particular Mustang.
The Leading Decals are excellent. I used some Microsol and Microset to get them to snuggle down into the details but that was it. The decals did not have any problems sticking, folding or breaking up. All the stencils came from the decal sheet.
I did not use any weathering at all as these planes were kept in excellent shape by RCAF ground crew. I sprayed on Xtracrylix Satin finish for the final coat. The Vallejo metallic coat worked as advertised as it didn't change color or tone unlike other metallic paints.
| FINAL CONSTRUCTION |
 The canopy,
stabilizers, pitot tube, rudder, flaps and exhausts were added to the model
after painting but before the decals.
The canopy,
stabilizers, pitot tube, rudder, flaps and exhausts were added to the model
after painting but before the decals.
I added the wheels, doors and door extensions to the landing gear. The completed landing gear were press fit into the wheel wells and at the right angle for a Mustang D. I found these parts to have a bit less fine detail than the Meng parts, but they are much easier to assemble than the Meng landing gear.
I snapped the windscreen into place, but the fit is a lot better than the Meng P-51D Mustang. However, the rear canopy doesn't sit as well or accurately as the Meng P-51D. I shaved a bit of the inside rails down, but it still didn't fit perfectly. The radio antenna was added as well. Lastly I brush painted all the landing and ID lights with various colors of Tamiya clear paints.
| CONCLUSIONS |
I was glad I finished the kit, but
more for the markings though as I wanted to use markings from the Leading Edge
decal sheet for a while.
Here is what I thought of the Airfix P-51D based on my experience:
 The Pros
The cockpit is detailed enough for most modelers including a resin/PEholic like myself (the separate molded seat belts are a nice touch.) Like the Meng kit, it was designed to eliminate some of the seams to be filled/sanded but not as well done as the Meng. Again, like the Meng it has the separate gun sections which helps taking care of the leading edge seams. Finally the Airfix kit keeps the dihedral of the wings and the correct angle of the landing gear, both notoriously tricky to keep in the Tamiya kit.
The Cons
The rear canopy doesn't fit down on the fuselage as it could have. Also certain details such as the landing gear are softer than the Meng kit. The Airfix Mustang isn't as detailed as the Meng kit, but it also doesn't have the Meng's fit and build issues which is a plus based on my experience.
If you want to build a lot of Mustangs and don't mind some soft details or want to put together an almost hassle free Mustang then I recommend the Airfix which is a great deal for the price. If you prize accuracy above ease of build and price then the Meng is probably what you want.
23 April 2018
Copyright ModelingMadness.com
If you would like your product reviewed fairly and fairly quickly, please contact the editor or see other details in the Note to Contributors.
Back to the Main Page Back to the Review Index Page Back to the Previews Index Page