Monogram 1/48 P-51D Mustang
| KIT #: | 85-5241 |
| PRICE: | $10-15.00 or so |
| DECALS: | 2 options |
| REVIEWER: | Emmett Baker |
| NOTES: |
| HISTORY |
Considered by many to be the best fighter aircraft of WWII, The
P-51D mustang represents the most numerically produced version of the P-51
Mustang. The original XP-51 featured a Allison engine, razorback fuselage, and
an air scoop on top of the engine, all features retained on the P-51A/A-36
aircraft. The A-36 was
 the dive bomber version of the P-51A, having hardpoints
under the wing, and dive brake on both top and bottom of the wing. The P-51B
featured a Packard-built Rolls-Royce Merlin V-12, (which moved the air scoop to
the underside of the nose), which greatly improved high altitude performance and
range. The P-51D, the subject of this article, is perhaps the most well known of
the P-51 series, having a cut-down rear fuselage, and a new “bubble” canopy for
good all round vision. The P-51D/K came next, and were the same aircraft with a
few small differences: the D was from the Inglewood CA plant, the K from the
Dallas TX plant. Other, smaller differences include propeller type, and some
small shape differences It became the most numerically produced mustang, having
8,200 built. After the P-51D/K came the P-51H, and a host of other
“light-weight” mustangs(P-51F,G,J and M), having basically nothing, past a basic
resemblance, to the older A,B,C,D and K mustangs totaling 15,586 built (of all
types). As if the mustang line could not get any longer, along came the F-82
twin mustang, which was originally to be essentially two P-51 fuselages bolted
onto a new center section, and the standard outer wing panels attache
the dive bomber version of the P-51A, having hardpoints
under the wing, and dive brake on both top and bottom of the wing. The P-51B
featured a Packard-built Rolls-Royce Merlin V-12, (which moved the air scoop to
the underside of the nose), which greatly improved high altitude performance and
range. The P-51D, the subject of this article, is perhaps the most well known of
the P-51 series, having a cut-down rear fuselage, and a new “bubble” canopy for
good all round vision. The P-51D/K came next, and were the same aircraft with a
few small differences: the D was from the Inglewood CA plant, the K from the
Dallas TX plant. Other, smaller differences include propeller type, and some
small shape differences It became the most numerically produced mustang, having
8,200 built. After the P-51D/K came the P-51H, and a host of other
“light-weight” mustangs(P-51F,G,J and M), having basically nothing, past a basic
resemblance, to the older A,B,C,D and K mustangs totaling 15,586 built (of all
types). As if the mustang line could not get any longer, along came the F-82
twin mustang, which was originally to be essentially two P-51 fuselages bolted
onto a new center section, and the standard outer wing panels attache d. It was
not built this way though, as the F-82 had very few parts in common with any of
the Mustangs, regardless of the model.
d. It was
not built this way though, as the F-82 had very few parts in common with any of
the Mustangs, regardless of the model.
The P-51 had a long service record, flying in WWII, Korea, and many other smaller wars and skirmishes. In WWII, it shot down roughly anything the Axis put up against it, including the occasional Me 262, Me 163, and a C-47. Seriously, look it up. It’s a neat story. It also flew escort for the heavy bombers, and about anything else needed. In Korea, it flew close air support and bombing missions that the new jets could not do effectively. It served with over 25 air forces around the world. Even today, there are many P-51s around the world with around 200 still registered with the FAA, in addition to the many in static displays in museums across the world.
| THE KIT |
This is the Monogram 1/48 P-51 mustang that i’m sure many have
built. First molded in 1977, the kit features four sprues of parts. I
should start by saying that this kit is not up to modern (2018) standards. That
being said, the kit is still very nice, and well worth the build. All of the
main parts are very accurate in shape and outli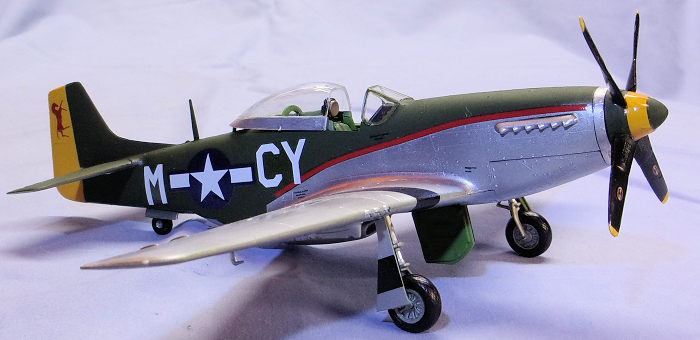 ne, and they feature very good,
for the time, interior detail. The wheel wells in the wing are well molded and
look right for scale. The side walls of the cockpit feature enough detail so
that you can make it look good. One thing about the interior that I was
surprised Monogram got correct was the wood floor of the cockpit.
ne, and they feature very good,
for the time, interior detail. The wheel wells in the wing are well molded and
look right for scale. The side walls of the cockpit feature enough detail so
that you can make it look good. One thing about the interior that I was
surprised Monogram got correct was the wood floor of the cockpit.
The kit features a small number of options, such as whether you want to have shrouds around the exhaust pipes or not. You can also pose the canopy open or closed as well as open up the wing gun bays, and leave off the shroud around the lower area of the engine. Airfix and Tamiya have came out with their own more recent 1/48 P-51D kits, but the old Monogram version still builds nicely.
| CONSTRUCTION |
Construction began with painting all of the interior areas (cockpit, wheel wells, engine bay, gun bay, etc) zinc chromate green. Once dry, I painted the small details with a fine brush, as well as also using a colored pencil to pick out details on the instrument panel.
 Once everything was painted, the cockpit was assembled, and glued inside
the starboard fuselage, which was mated to the port fuselage shortly after.
Once everything was painted, the cockpit was assembled, and glued inside
the starboard fuselage, which was mated to the port fuselage shortly after.
The upper wing surfaces were glued to the lower wing. The wings and elevators were glued to the fuselage as was the frontal part for the under fuselage radiator scoop. Once the basic assembly was finished, I began filling the seams. The worst area is around the radiator scoop, and on the underbelly of the fuselage. I did manage to get it smooth, but completely wiped out the surface detail in doing so. Sadly I did not have the tools to correct it. Oh well, you win some, and you lose some.
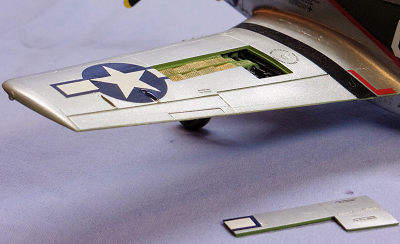
In preparation for painting, I decided I would temporarily install the gear doors, engine, gun bay panels, and anything else that could save me some repainting later with blue poster putty. This worked well for painting, but had some unintended consequences later.
| COLORS & MARKINGS |
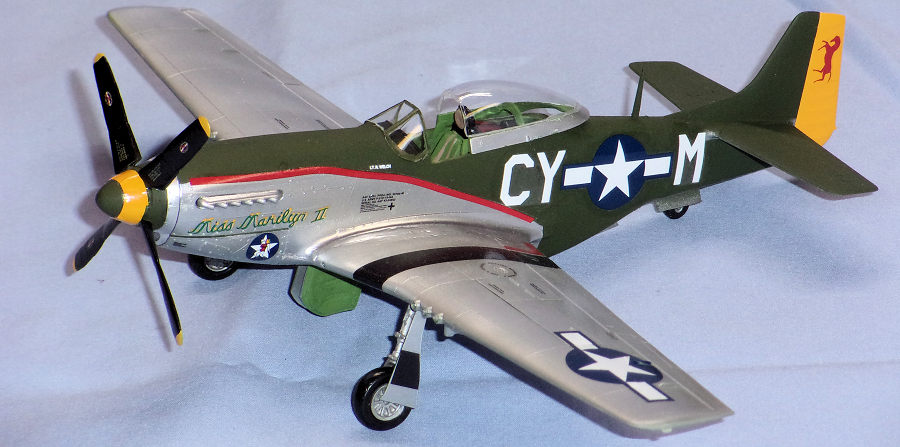
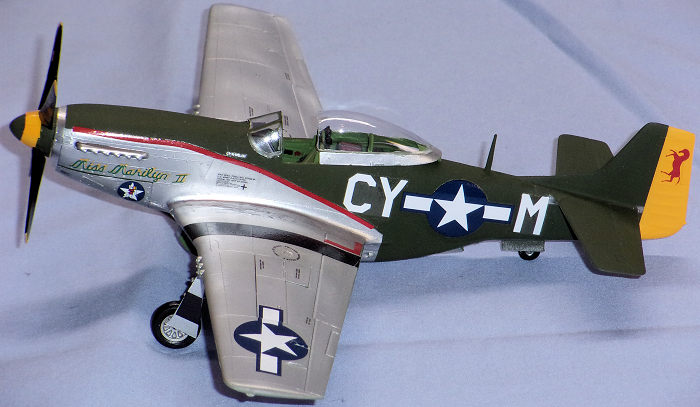
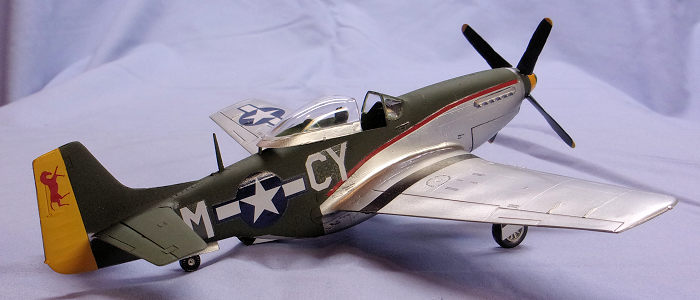
 As for markings, I chose the “Miss Marilyn II” flown by 1st Lt.
E. Robert Welch marking set from the sheet as they looked nice, and were
something out of the ordinary. To this end, I first painted the rudder Testors
flat yellow. I then masked off the rudder, then sprayed the top and sides of the
fuselage, as well as the tops of the horizontal stabilizers Testors flat dark
green. After this, I masked off the dark green, and sprayed the rest of the
aircraft with Glidden aluminum paint, the same type used in my B-36 Review.
As for markings, I chose the “Miss Marilyn II” flown by 1st Lt.
E. Robert Welch marking set from the sheet as they looked nice, and were
something out of the ordinary. To this end, I first painted the rudder Testors
flat yellow. I then masked off the rudder, then sprayed the top and sides of the
fuselage, as well as the tops of the horizontal stabilizers Testors flat dark
green. After this, I masked off the dark green, and sprayed the rest of the
aircraft with Glidden aluminum paint, the same type used in my B-36 Review.
Once I had finished painting, I removed the “loose” panels, and
other bits from the aircraft. I had read that p oster putty “sticks to itself
better than anything else”. WRONG! I had a terrible time cleaning the smallest
of crevices with an hobby knife, and if you look at it closely, you can still
see a small hint of where the poster putty had been. You learn something new
everyday, I guess. (Your editor has had much success with Silly Putty and
has used the same 'egg' for over 10 years).
oster putty “sticks to itself
better than anything else”. WRONG! I had a terrible time cleaning the smallest
of crevices with an hobby knife, and if you look at it closely, you can still
see a small hint of where the poster putty had been. You learn something new
everyday, I guess. (Your editor has had much success with Silly Putty and
has used the same 'egg' for over 10 years).
I put the decals onto the aircraft over two days. Day one was stencils and other small, difficult decals. Day two was putting the actual Miss Marilyn II markings on. Nearly all of the decals went on well with the exception of the three yellow and green checkered decals around the nose that were doomed to lay flat on the nose, they were unable to conform to the compound curves of the nose.
| FINAL CONSTRUCTION |
Final construction was, like most things in this kit, quite
basic. The only things I had to do was finish painting and assembling the
wheels (Testors flat black, and steel), and attach them to the landing gear
legs. Once those had dried, I attached them and the pitot tube to the underside
of the wing. I allowed the landing gear to
 dry before attaching the landing gear
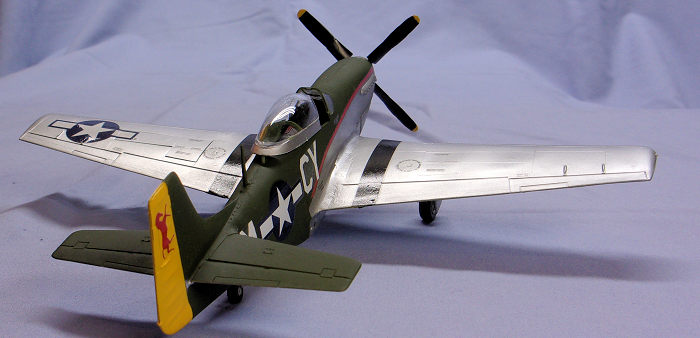
doors. Basing that this is a D model mustang, the center gear doors should be
displayed open. (The Allison powered Mustangs had a cable and latch system
that allowed these to remain closed
while on the ground. Once the engine shut down, the inner doors would slowly
bleed open, the time this took depended on how well the pneumatic system was
sealed. Ed) (The USAF museum’s P-51 has the inner gear doors displayed
incorrectly). Once everything on the bottom had dried, I then turned the Mustang
right side up and attached the front windshield part of the canopy. I decided to
leave the bubble canopy, gun bay panel, and engine bay panel loose, so that I
have several different ways of displaying it if I feel like doing so later on.
Once the canopy was dry, the build was complete
dry before attaching the landing gear
doors. Basing that this is a D model mustang, the center gear doors should be
displayed open. (The Allison powered Mustangs had a cable and latch system
that allowed these to remain closed
while on the ground. Once the engine shut down, the inner doors would slowly
bleed open, the time this took depended on how well the pneumatic system was
sealed. Ed) (The USAF museum’s P-51 has the inner gear doors displayed
incorrectly). Once everything on the bottom had dried, I then turned the Mustang
right side up and attached the front windshield part of the canopy. I decided to
leave the bubble canopy, gun bay panel, and engine bay panel loose, so that I
have several different ways of displaying it if I feel like doing so later on.
Once the canopy was dry, the build was complete
| CONCLUSIONS |
While the kit is old, and has been superseded by newer kits, the Monogram P-51D still builds into a nice model if you put the proper time and effort into it. I am looking forward to building a Airfix P-51D “soon”, simply to compare and contrast the two. It will be interesting to see how much affect 40 years has had on the quality and detail of the molding industry.
| REFERENCES |
http://www.americanairmuseum.
https://www.scalemates.com/
https://en.wikipedia.org/wiki/
14 January 2019
Copyright ModelingMadness.com
If you would like your product reviewed fairly and fairly quickly, please contact the editor or see other details in the Note to Contributors.