Tamiya 1/48 P-47D Razorback
| KIT #: | 61086 |
| PRICE: | 114$ |
| DECALS: | Two options |
| REVIEWER: | Francisco Santoro |
| NOTES: | My first P-47 in any scale ever. |
| HISTORY |
 From
the instructions: "In May 1941, while the war was raging in Europe, a single
engine fighter weighting over 4 tons made its first flight. This revolutionary
was the XP-47B, prototype of the P-47 Thunderbolt, of which a total of 15683
units would be built in all. The experimental aircraft was a equipped with a
2000hp radial R2800 engine. Even when equipped with eight 12,7mm machineguns,
this prototype was able to reach 633km/h. In January 1942, just after the US
went to war, the production of the P-47B began. It was followed by the P-47C,
which incorporated various improvements and from April 1943, by the P-47D. The
P-47D was equipped with an R2800-59 engine featuring a water injection system,
and could generate up to 2300hp in an emergency combat scenario. Ducts on the
sides and below the fuselage connected to the supercharger placed behind the
pilot's seat and contributed to the plane's massive form. Many subtypes of the
P-47D, desginated D-1 to D-40 were produced, but the first versions were called
"Razorbacks," because of their sharp edged dorsal fin running from the canopy to
the upper fuselage. The P-47D, which equipped many units such as the 65th
Fighter Group of the 8th Air Force, was used to escort B-17 and B-24 bombers.
Whereas the Spitfire could not go beyond the coasts of continental Europe, the
P-47 accompanied the bombers as far as the Western part of Germany. After the
introduction of the longer range P-51 in Autumn 1944, the P-47 came to be used
for ground attack missions because of its robustness and its 1 ton payload
capacity. The concept of the P-47 had a great influence on the development of
its successors, such as the F-84 Thunderjet and the F-4 Phantom II."
From
the instructions: "In May 1941, while the war was raging in Europe, a single
engine fighter weighting over 4 tons made its first flight. This revolutionary
was the XP-47B, prototype of the P-47 Thunderbolt, of which a total of 15683
units would be built in all. The experimental aircraft was a equipped with a
2000hp radial R2800 engine. Even when equipped with eight 12,7mm machineguns,
this prototype was able to reach 633km/h. In January 1942, just after the US
went to war, the production of the P-47B began. It was followed by the P-47C,
which incorporated various improvements and from April 1943, by the P-47D. The
P-47D was equipped with an R2800-59 engine featuring a water injection system,
and could generate up to 2300hp in an emergency combat scenario. Ducts on the
sides and below the fuselage connected to the supercharger placed behind the
pilot's seat and contributed to the plane's massive form. Many subtypes of the
P-47D, desginated D-1 to D-40 were produced, but the first versions were called
"Razorbacks," because of their sharp edged dorsal fin running from the canopy to
the upper fuselage. The P-47D, which equipped many units such as the 65th
Fighter Group of the 8th Air Force, was used to escort B-17 and B-24 bombers.
Whereas the Spitfire could not go beyond the coasts of continental Europe, the
P-47 accompanied the bombers as far as the Western part of Germany. After the
introduction of the longer range P-51 in Autumn 1944, the P-47 came to be used
for ground attack missions because of its robustness and its 1 ton payload
capacity. The concept of the P-47 had a great influence on the development of
its successors, such as the F-84 Thunderjet and the F-4 Phantom II."
| THE KIT |
 There're
a total of five bags. Three have the main parts molded in a darkish grey hard
plastic, one has the clear parts, and the last one has the two rubber poly caps
that allow the propeller to spin. The pieces don't present any signs of flash,
and a quick test fit of the fuselage halves showed no signs of trouble.
There're
a total of five bags. Three have the main parts molded in a darkish grey hard
plastic, one has the clear parts, and the last one has the two rubber poly caps
that allow the propeller to spin. The pieces don't present any signs of flash,
and a quick test fit of the fuselage halves showed no signs of trouble.
Instructions are of the foldable style with 15 construction steps in black and white, each of them having enough information for a clear assembly of the aircraft, but without the clutter that comes in Trumpeter, Dragon or Hasegawa instructions.
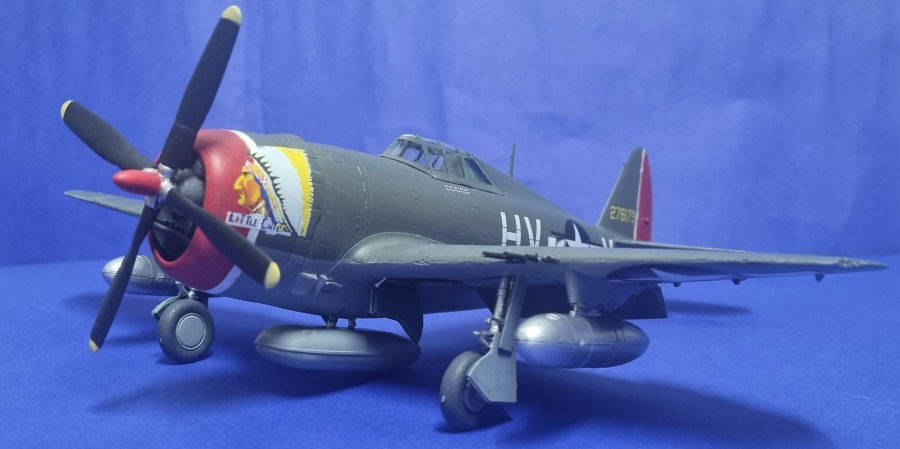
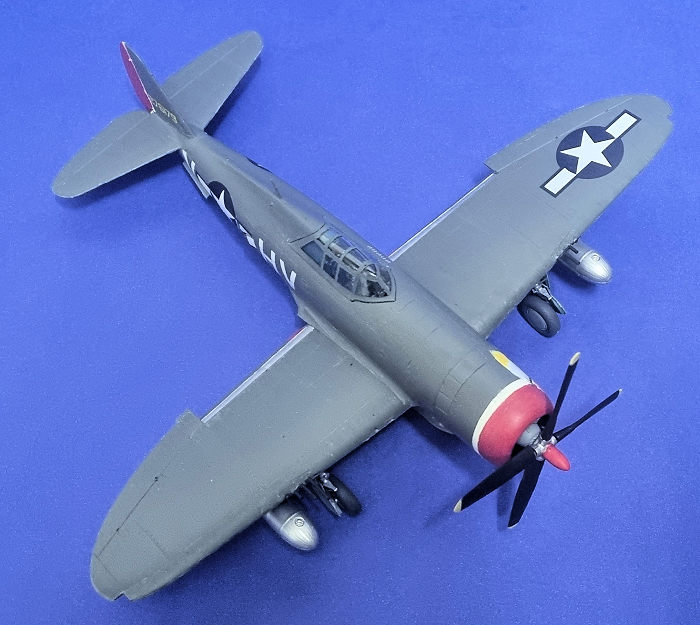
There're two decal options provided, HV-V "Little Chief" of Lieutenant Frank Klibbe and UN-M "Spirit of Atlantic City, NJ" of Captain Walker Mahurin. Both options are in Olive Drab upper surfaces with Neutral Grey lower surfaces. Klibbe's plane has a red nose and rudder, while Mahurin's option has white bands on the vertical and horizontal stabilizer. Decals are of the usual Tamiya style, thick but nicely printed. These will need the treatment of hot water plus my stronger than Microsol decal softener, Mr Mark Softer.
Options for the wing and fuselage stores are three fuel tanks (two paper and one flat one), two bazooka tubes, and two bombs.
| CONSTRUCTION |
I first investigated the instructions to check for subassemblies. These
were the propeller, wingspars, cockpit and engine. The cockpit parts were
painted Interior Green (Revell 48 Sea Green) with black details. The instrument
panel was also painted Interior Green with black instruments. Then the propeller
was painted matt black (Revell 08 Matt Black) with yellow tips (Revell 15 Matt
Yellow), a metallic centre (Revell 91 Steel), and a red hub (Revell 36 Matt
Red). I then turned my attention to the engine. This was painted stell with a
grey front (part B12). The engine was built up and glued inside the cowling,
taking care of previously install the air duct inside the co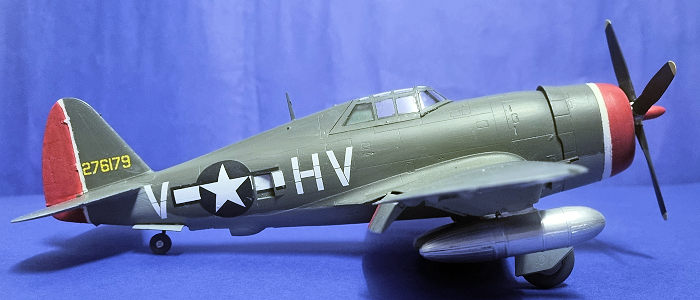 wling.
Two options of cowl flaps are provided, open or closed. I chose the open option.
With all these subassemblies done, I began gluing them into their correct
places. The cockpit was glued to the fuselage, the wingspars (which were a tight
fit) were slid into position, and then the fuselage halves were closed. I only
needed to scrap a bit the seams with my knife to eliminate them. Once the
fuselage halves were taped together, I glued the air outlets in the open
position.
wling.
Two options of cowl flaps are provided, open or closed. I chose the open option.
With all these subassemblies done, I began gluing them into their correct
places. The cockpit was glued to the fuselage, the wingspars (which were a tight
fit) were slid into position, and then the fuselage halves were closed. I only
needed to scrap a bit the seams with my knife to eliminate them. Once the
fuselage halves were taped together, I glued the air outlets in the open
position.
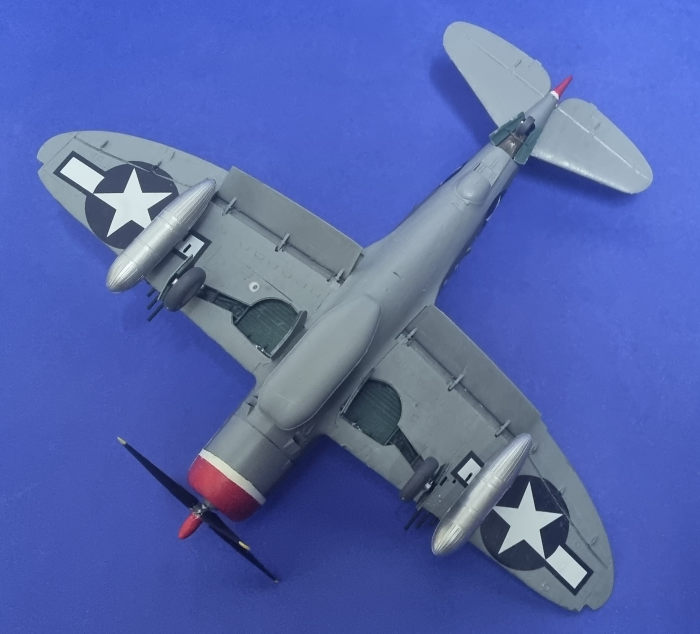
Wings were next. The modeller first needs to choose which store options he will be using, fuel tanks, bazookas or bombs. I chose to use the two underwing fuel tanks, so I opened the holes that are over the panel lines next to the machineguns ejector chutes. I then glued some covers on the lower wings. Tamiya engineered their P-47 so the wings would slide over the wingspars, using rails to align them. To obtain a more resistant assembly, I glued first the upper wings over the wingspars and fuselage wingroot, and then I glued the lower wing. These were taped and left to dry while I worked on the flaps in the extended position. Then the horizontal stabilizers were glued, together with the racks for the fuel tanks.
Before starting to paint the plane, I decided to paint the wheels, landing gear struts and fuel tanks. The wheels were painted Revell Tank Grey 78 with Neutral Grey (Revell 43 Neutral Grey) hubs. The landing gear struts were painted Revell 91 Steel. Regarding the fuel tanks, the paper ones were also painted Revell 91 Steel, with the fuselage flat fuel tank painted in Neutral Grey.
| COLORS & MARKINGS |
Not much to say about the colours. Both machines are painted in Olive
Drab uppers and Neutral Grey lower surfaces. However, Klibbe´s plane is the more
colourful option with red cowl and rudder, and this is the one I chose. I first
painted the nose and rudder in white (Revell 05 Matt White), being careful to
mask the white lines that go behind the red. The red parts were painted with
Revell 36 Carmin Red and masked. The fuselage and wings were painted Olive Drab
(Revell 66 Olive G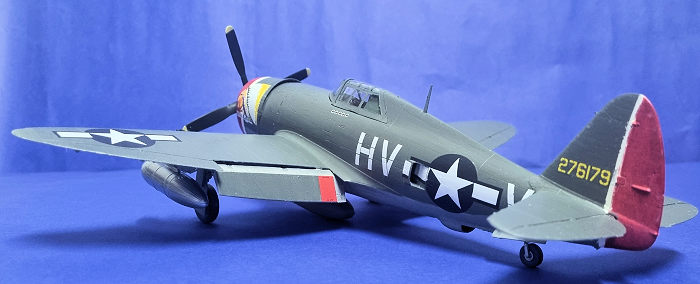 rey)
with Neutral Grey (Revell 43 Neutral Grey) undersides. The model was then
glossed in preparation for the decals (Revell 01 Gloss Varnish).
rey)
with Neutral Grey (Revell 43 Neutral Grey) undersides. The model was then
glossed in preparation for the decals (Revell 01 Gloss Varnish).
The model was decalled with almost no issues. I used Mr. Mark Softer to make these thick decals sink into the panel lines. Pay attention for any pooling of the softener and eliminate it, because it may damage the decal (and paint below). Once the decals were done, I matt varnished the model (Revell 02 Matt Varnish).
I glued the landing gear, gear doors, fuel tanks and added the propeller. The clear parts needed some sanding at the edges because otherwise they wouldn´t have fitted into the cockpit sill. The wing lights, as per my usual doing, weren't added, because I fear any sudded bump may break them away from the model.
| CONCLUSIONS |
This was a really nice kit, and I´m glad I chose it as my first P-47 kit ever. The fit was stellar, true to modern Tamiya's standard. Any modeller wishing to give a go at their first 1:48 WW2 fighter should choose this kit. Or the P-51D. Both are excellent.
Colours used (Revell Aqua and in no particular order of use): 66 Olive Grey (Olive Drab), 43 Neutral Grey, 48 Sea Green (Interior Green), 36 Matt Red, 15 Matt Yellow, 08 Matt Black, 91 Steel, 78 Tank Grey (tyres) and 05 Matt White.
Francisco Santoro
5 May 2023 Copyright ModelingMadness.com. All rights reserved. No
reproduction in part or in whole without express permission. If you would like your product reviewed fairly and
fairly quickly, please
contact
the editor
or see other details in the
Note to
Contributors.