| KIT #: | 02263 |
| PRICE: | £20-00 plus £16-50 shipping from Hong Kong. |
| DECALS: | Two options |
| REVIEWER: | Frank Reynolds |
| NOTES: | Techmod decals 32005A, price£9.99. Eduard JX070 canopy mask £4.99. HGW32053 US WW2 seat belts £6-40 |
| HISTORY |
 Statistics were much
beloved of kit manufacturers in the 1960s and the P-47 was frequently touted as:
“The largest and heaviest, single seat, single piston engined fighter of World
War 2”. A big airplane with big numbers. According to William Green, the
legendary researcher and writer, there were 546,000 combat sorties between March
1943 and August 1945 for an in-combat loss rate of 0.7%. 132,000 tons of bombs
dropped, 135 million rounds of ammunition, 1,934,000 flying hours and
204,504,000 gallons of fuel.
Statistics were much
beloved of kit manufacturers in the 1960s and the P-47 was frequently touted as:
“The largest and heaviest, single seat, single piston engined fighter of World
War 2”. A big airplane with big numbers. According to William Green, the
legendary researcher and writer, there were 546,000 combat sorties between March
1943 and August 1945 for an in-combat loss rate of 0.7%. 132,000 tons of bombs
dropped, 135 million rounds of ammunition, 1,934,000 flying hours and
204,504,000 gallons of fuel.
There is a story, no doubt apocryphal, that RAF pilots in the Burma theatre were used to jinking their Hurricanes out of trouble when confronted with nimble Japanese fighters. When replacement P-47s arrived the delivery pilots told them that in a Thunderbolt they had the option of unfastening the seat harness and dodging around the cockpit.
| THE KIT |
 The kit comes in a
luxurious box showing a copyright date of 2018, although the same kit was
reviewed by Tom Cleaver for MM in January 2009. The mass of neatly moulded grey
parts frames were securely bagged for safe shipping and a separate box contains
rubber tyres, etch parts for seat belts and cooler grilles and a large clear
plastic engine cowl.
The kit comes in a
luxurious box showing a copyright date of 2018, although the same kit was
reviewed by Tom Cleaver for MM in January 2009. The mass of neatly moulded grey
parts frames were securely bagged for safe shipping and a separate box contains
rubber tyres, etch parts for seat belts and cooler grilles and a large clear
plastic engine cowl.
Trumpeter’s A4 landscape style of instructions are printed in Black and White and set out 29 stages of assembly with colour notes, but there is no historical detail. There is an impressively generous provision of alternative parts, including four types of propeller and a wide range of armament and under wing stores, some of which is not applicable to an early type of P-47D. The parts were cleanly moulded with nicely restrained rivet detail and crystal clear transparent parts.
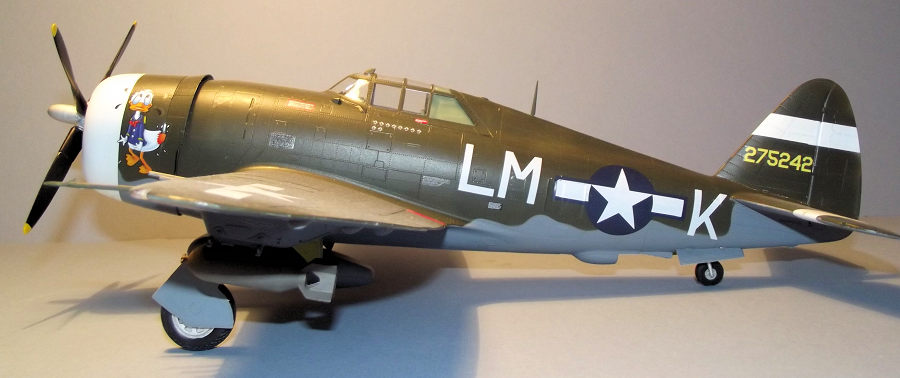
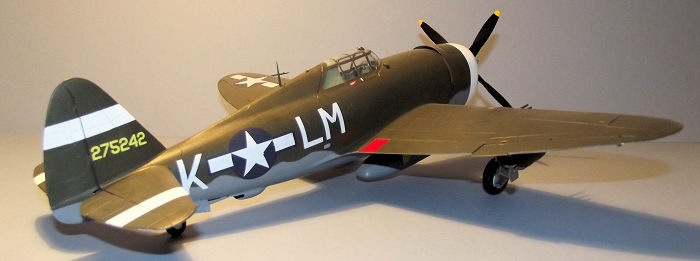
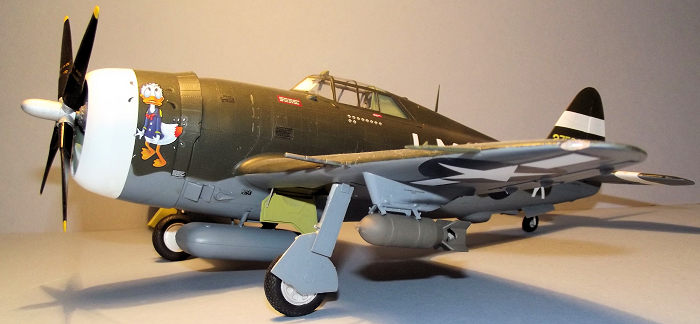
The decal sheet gives a choice of two finishes, one natural metal aircraft from the Southwest Pacific theatre and an Olive drab/Grey option for a UK- based P-47 of the 62nd Fighter Squadron, 56th fighter group flown by Capt. Michael Quirk from Halesworth in February 1944.
| CONSTRUCTION |
Since I was a school kid, the modelling motivation has always been the same. One completed subject demands another for comparison. I have a clutch of Me 109s on the shelf, they need an opponent so I build a P-51; that needs a companion, so I build a P-47. The one thing leading to another carries on until my grasshopper mind switches to another linked series of builds. I wanted an earlyish P-47 so I could finish it in camouflage and be spared the chore and the embarrassment of trying to do a natural metal finish. The Trumpeter P-47D razorback was well received when released early in the 21st century and the low price when shipped direct from China made it an attractive choice. Even with shipping costs I netted this jewel for less than £40-00 even if it did take a leisurely 30 days to get to me.
 The instructions make it
clear that this is a complex kit with extensive detailing inside the fuselage
and engine cowl. I like to keep my finished models simple and rarely do I depict
dropped flaps, open cockpits or deflected control surfaces. Accordingly, most of
the internal detail would not be seen on the finished article yet I could not be
sure how much might be seen through various apertures in the fuselage. I decided
that I would have to build the interior in its entirety, unpainted to ensure
maximum strength in the glued joints, then work out later how much would need to
be painted.
The instructions make it
clear that this is a complex kit with extensive detailing inside the fuselage
and engine cowl. I like to keep my finished models simple and rarely do I depict
dropped flaps, open cockpits or deflected control surfaces. Accordingly, most of
the internal detail would not be seen on the finished article yet I could not be
sure how much might be seen through various apertures in the fuselage. I decided
that I would have to build the interior in its entirety, unpainted to ensure
maximum strength in the glued joints, then work out later how much would need to
be painted.
Construction begins with building up the one-piece bucket seat that is fixed to a tubular support frame and the instrument panel that builds up as a sandwich structure with a section of printed film to represent the dials. The rudder pedals hang down from the panel and a choice of gun sights notch into the top edge. The seat and panel assembly were painted in Tamiya XF-71 Cockpit Green and while the airbrush was charged I took the opportunity to base coat the rest of the floor and wall panels that would build up the cockpit pod.
I fitted the excellent HGW seat belts. They are supplied pre-coloured and the fabric is laser-cut to shape with silver etch buckles and fasteners. I find it easier to leave the silver etch parts on the frame and to thread the fabric belts through them until I am satisfied that the buckles are in the correct position then secure them with a tiny dab of cyanoacrylate. The completed belts can then be snipped from the frame and tacked into place on the seat, again with cyano.
 The large cockpit is built
up from a one-piece floor with flat side walls locked into front and rear
bulkheads. I built up the floor, front and rear sections and one side, leaving
the assembly open on the fourth side so that I could brush paint the detail of
the radio gear, oxygen hoses and controls. When I was satisfied, the fourth side
was added to provide a solid box structure that was set aside while I pondered
the construction of the rest of the interior.
The large cockpit is built
up from a one-piece floor with flat side walls locked into front and rear
bulkheads. I built up the floor, front and rear sections and one side, leaving
the assembly open on the fourth side so that I could brush paint the detail of
the radio gear, oxygen hoses and controls. When I was satisfied, the fourth side
was added to provide a solid box structure that was set aside while I pondered
the construction of the rest of the interior.
The huge turbo-supercharged Pratt and Whitney R-2800 engine builds up from more than 50 parts and I was glad to be working with unpainted plastic to ensure well glued joints and I used Revell Contacta in a squeezy bottle with its useful needle-like metal applicator tube. The engine builds up with two rows of cylinders, each with a front and rear half. Trumpeter helpfully provides two different sets of rocker covers for the cylinder tops but unhelpfully does not mention why there should be a choice. I had already second-guessed the instructions with an unexplained choice of gun sights and this is a significant weakness in the kit’s presentation. There is a marvellous choice of alternative parts, but no way of establishing which are the correct ones without further research.
The engine was completed with the installation of the complex exhaust collector pipes that thread between the cylinders and a choice of gear box housings for the front of the engine. I spent some time trawling the web before making a choice of what to fit to the engine front. The engine was test fitted into the one-piece clear cowl before the glue hardened which enabled me to fettle some of the parts to ensure a snug fit. When dry the engine was sprayed with Tamiya XF-56 Metallic Grey and given a wash of dirty thinners to bring out the detail.
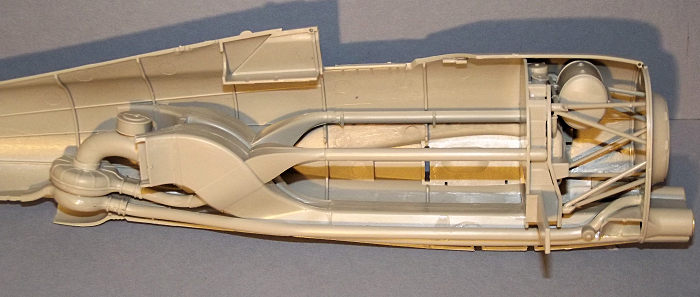 Attention now turned to the
large components that form the ducting between the lower rear fuselage and the
engine firewall. This also serves as a support for the cockpit assembly and stub
wing spars so there seems to be no option to omit anything without compromising
the alignment of the engine. The structures were built into one fuselage half to
ensure alignment of the assemblies, adding the two further stub wing spars. The
second fuselage half was test fitted a number of time, then it was time to say
goodbye to the detailed interior when the fuselage halves were joined, strapped
up with tape and left for a week to harden.
Attention now turned to the
large components that form the ducting between the lower rear fuselage and the
engine firewall. This also serves as a support for the cockpit assembly and stub
wing spars so there seems to be no option to omit anything without compromising
the alignment of the engine. The structures were built into one fuselage half to
ensure alignment of the assemblies, adding the two further stub wing spars. The
second fuselage half was test fitted a number of time, then it was time to say
goodbye to the detailed interior when the fuselage halves were joined, strapped
up with tape and left for a week to harden.
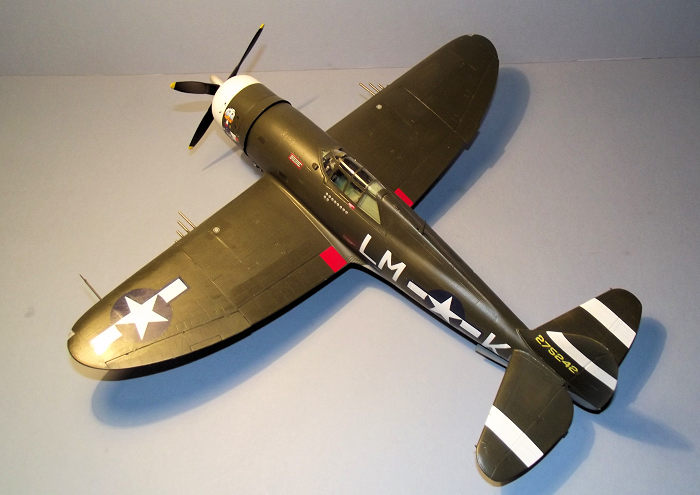
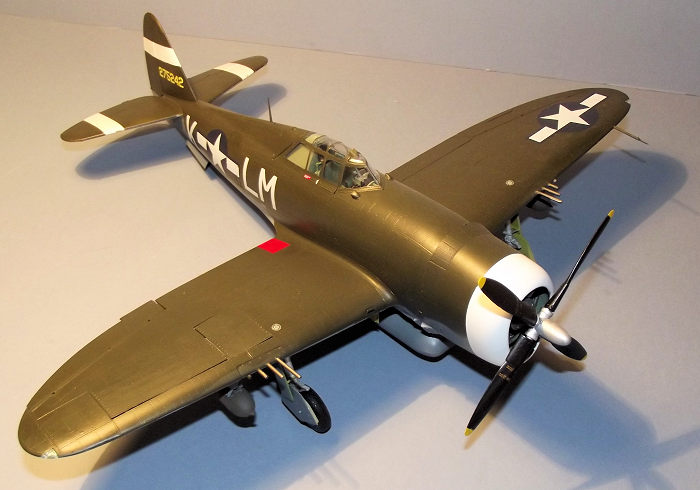
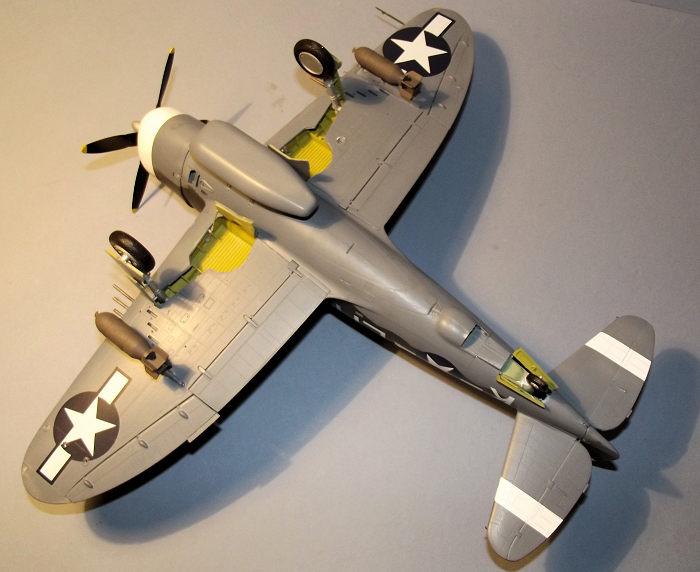
When it came to the wing build I immediately broke my self-imposed Keep-It-Simple rule and elected to have the gun bay open on the right wing so Interior Green was sprayed into the gun bays, landing gear bays and the inner faces of the gear doors. The weighty flaps and ailerons had optional hinges to allow displaced control surfaces and I elected for the fixed position. The guns have an unexplained option for two types of barrel and I chose the perforated version. The gun breaches have good detail and the quadruple ammunition feeds are formed from the same soft plastic as the landing gear tyres. The ammunition rounds were picked out with black and gold paint. The wing panels are in one piece, root to tip each side and before gluing them I dry fitted to check that they would slip on to the wing spars without interference. The wing structures were completed with two inset panels to the lower surfaces and a complex leading edge insert that slips over the staggered gun barrels, but this clicked into place on each wing half without fuss. The left and right side of the horizontal tail structures consist of upper and lower parts to the fixed horizontal surfaces and the elevators. They were glued into place and self-aligned easily. The rudder assembly was set aside to be installed after the painting stage.
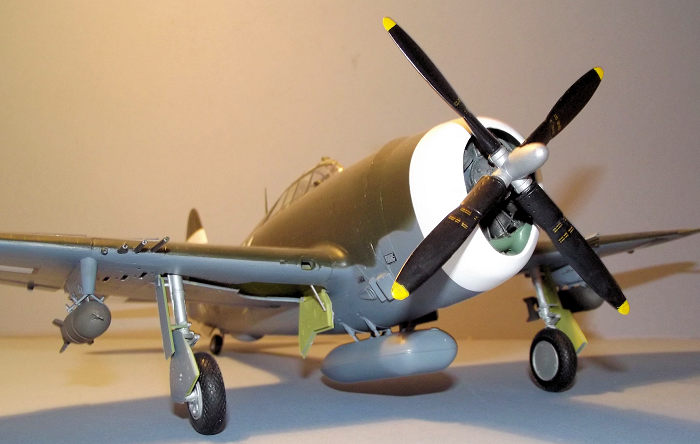
The one piece cowl was lined with the Interior Green and the internal intake glued to the lower lip. A separate collar is provided for the cowl gills, a choice of two different types – inevitably without explanation – and I chose the one that seemed to match the box art.
The basic airframe was now complete. Some minor rubbing down ensured smooth joints but no significant filler was required.
The canopy was glued in place and the crystal clear transparency proved to be a snug fit.
| COLORS & MARKINGS |
 The simple camouflage
scheme was based on Tamiya XF62 Olive Drab upper surfaces over XF53 Neutral Grey
undersides. The canopy was masked using the Eduard set and the whole airframe
primed Dark Grey with auto primer from a rattle can. Although the Techmod
instructions showed the cowl front and rudder to be Yellow, most references show
them to be White, so the relevant areas were oversprayed with Tamiya White
primer from a rattle can.
The simple camouflage
scheme was based on Tamiya XF62 Olive Drab upper surfaces over XF53 Neutral Grey
undersides. The canopy was masked using the Eduard set and the whole airframe
primed Dark Grey with auto primer from a rattle can. Although the Techmod
instructions showed the cowl front and rudder to be Yellow, most references show
them to be White, so the relevant areas were oversprayed with Tamiya White
primer from a rattle can.
Next the white stripes were masked out with Tamiya tape and the undersides and gear door exteriors sprayed in Neutral Grey.
After 24 hours drying the under sides were masked off with Tamiya tape while the demarcation line between upper and lower colours was achieved with rolled snakes of Blu Tak low tack putty. The covers to the gun bays were loosely tacked into place while the Olive Drab upper surface finish was sprayed on. All spraying was carried using my long term Iwata HP-C airbrush.
Tom Cleaver’s earlier review of this kit highlighted the fact that the Trumpeter decals are flawed in design. The wrong shades and wrong proportions make them of little use for serious modellers. I found that aftermarket decals for an Olive Drab 1/32 razorback offered a limited choice, and the Techmod decals, by coincidence, offered the same 62nd FS machine of Capt. Quirk so they were an obvious option. It would be a calculated risk since my success rate with Techmod decals is about 50:50 due to my experience of quality issues with that brand.
The airframe was brushed over with two coats of Future/Kleer floor polish to provide a gloss surface for the decals and I started off with the installation of the national insignia from the Techmod sheet. They cracked and broke on contact but a quick email to Hannants of Lowestoft brought a replacement set without quibble so I was able to complete the job with minimum delay.
 The airframe was finished
with a few misted coats of Xtracrylix Flat varnish and the canopy masking was
stripped away.
The airframe was finished
with a few misted coats of Xtracrylix Flat varnish and the canopy masking was
stripped away.
I selected a centre line drop tank and a pair of bombs from the stores inventory and installed one of the four props supplied. My choice was matched to photo references in my ancient reference library.
The gear legs and hubs were painted flat Aluminium and the rubber tyres slipped into place once the shallow mould lines around the circumference of the tyres had been trimmed away with a fresh scalpel blade. The main gear legs are sturdy with a positive fit, although the tail wheel leg is scale-like, slim and potentially fragile.
As if to remind me of why I normally build my aircraft subjects with all panels and surfaces buttoned up, I contrived to lose one of the hatches over the gun bay and had to make a new one from 15thou plastic card.
| CONCLUSIONS |
The P-47 is a big beast and an impressive model. Trumpeter’s offering is fiddly and somewhat over-engineered. It is typical of Trumpeter, ambitious in its design, well moulded, neatly detailed but let down by sketchy instructions and poor decals. The quantity of unused parts is truly impressive.
It was surprising how much work and planning was needed in order to “simplify” the build.
I find the soft tyres to be a mixed blessing , they relieve me of the chore of painting one piece wheels/tyres but I tend to forget that the rubbery tyres have more friction than painted plastic ones and I have twice snapped off the fragile tail wheel leg when sliding the completed model around on its display shelf.
All said, it was a satisfying build and the completed Jug looks fine on the display shelf.
| REFERENCES |
Republic Thunderbolt by Roger A. Freeman. Ducimus Books Ltd., 1973.
Famous Fighters of the Second World War by William Green. MacDonald & Co., 1957.
Warplanes of the Second World War, Fighters Volume Four by William Green, MacDonald and Co.,1961
30 November 2020
Copyright ModelingMadness.com
If you would like your product reviewed fairly and fairly quickly, please contact the editor or see other details in the Note to Contributors.
Back to the Main Page Back to the Review Index Page Back to the Previews Index Page