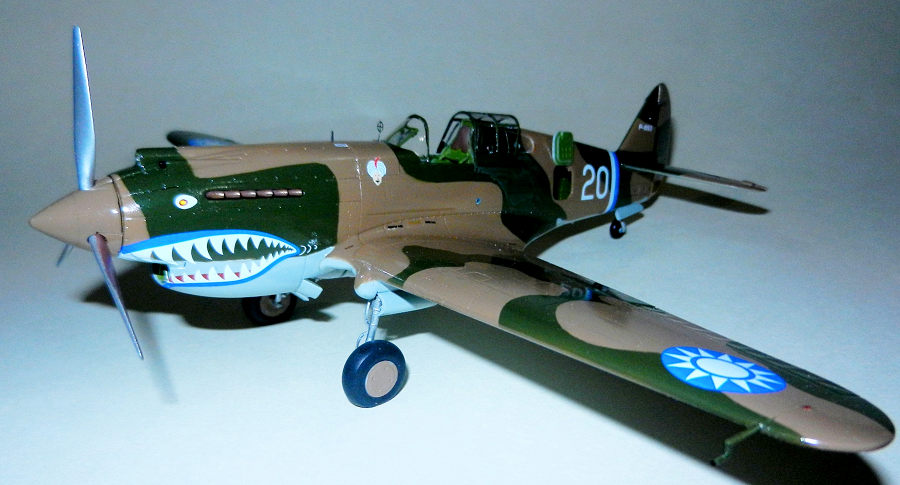
Airfix 1/48 P-40B Warhawk
| KIT #: | A05130 |
| PRICE: | CAD$30.00 |
| DECALS: | One option |
| REVIEWER: | Pablo Calcaterra |
| NOTES: | Cutting Edge 48182 and Kit World 148058 decals |
| HISTORY |
To talk about Eric Shilling there’s no one more authoritative than Tom Cleaver. So I refer you to his articles about the same plane where he tells you Shilling’s story better than what I can ever do. I want to focus on my research on the history of the recco ship. I cannot definitively prove that I am 100% right but I am pretty convinced I am making sense.
P-8153 arrived in Rangoon in June 1941. It was initially allocated to the 1st Squadron and received the white ID band along with a fuselage number around September. Between October and November it was transferred to the 2nd squadron and received the light blue ID band without losing the white one.
After the “discovery” of the shark mouths of the RAF (or was it the Me-110s? sources don’t agree but the most obvious answer is the cover of the magazine with the DAF P-40s who copied the design from the 110s) these were started to be painted on the AVG ships November 15th onwards.
P-8153 became the photo ship before December and at this point we can see the plane with the 2 ID bands, potentially the Swami and for sure a two digit fuselage number that ends with a “0”. More about this below.
On December 9 this plane flew the first recco mission. After the 3rd squadron returned to Kunming, China and was replaced with the 2nd squadron that flew to Burma this plane remained in Kunming and thus became part of the 3rd squadron. At this point it is clear to see that the fuselage numbers were overpainted in green. The patch can be seen as a round area coming forward from the area of the ID bands thus modifying the original cammo pattern. (RTSmith’s pictures)
 Around
mid-March the Disney decals started to arrive. The plane now can be seen with
the Swami, apparently 5 stars close to the Swami (recco missions?), the Disney
Tiger with the V, the left wing Chinese roundel overpainted and the first digit
now becoming apparently a “7” (makes sense as the high numbers belonged to the
3rd squadron and they repainted in red the ID bands of the planes they had
inherited...now question is: Did P-8153 get her white/blue bands overpainted in
red? There’s no photographic evidence but it is highly probable)
Around
mid-March the Disney decals started to arrive. The plane now can be seen with
the Swami, apparently 5 stars close to the Swami (recco missions?), the Disney
Tiger with the V, the left wing Chinese roundel overpainted and the first digit
now becoming apparently a “7” (makes sense as the high numbers belonged to the
3rd squadron and they repainted in red the ID bands of the planes they had
inherited...now question is: Did P-8153 get her white/blue bands overpainted in
red? There’s no photographic evidence but it is highly probable)
It is believed that the recco plane was converted to a standard fighter…but as late as July 3rd Charlie Bond tells the story of a scramble against a Japanese raid and him in a P-40 E (114) shaking off a “Zero” from the tail of another P-40. Then a third P-40 formed on him. It was Bob Raines flying the “old P-40 photo ship, which had no guns!”, and then…there this plane fades into history. I was not able to find anything more about it after July 4, 1942.
Now onto the mystery of the digits: The 1st Squadron had low numbers. When the plane was assigned to it “10” was Farrell’s (Pistole), “30” was Charlie Mott’s and “20” had no known serial number or pilot assigned. As we have seen in the picture in December when pilots gather around P-8153 with the 2 ID bands we can appreciate a “?0”. It is then my conclusion that the first digit is the “2” because it is the only number (20) on the 1st squadron that has no known pilot or serial number. And on the 2nd “50” is not assigned but again the plane received the number when it was flying with the 1st.
What about his time with the 3rd squadron? In this case we can see a “7?” in the picture taken around March. As a consequence they must have used the second digit of a previously lost plane and thus a number that was available (otherwise they would have had two planes with the same number). Going thru the options we have:
70 but it was 8118 and it does not have double ID bands, 71 was 8119 and had the area inside the mouth painted in Chinese blue (the recco’s was not painted inside), 72 is an option as it was lost in combat before March, 73 has the eye in the wrong position, 74 has black lips, 75 was 8186 but had brown tongue and inside mouth was painted light grey, 76 we have limited information (a possibility?), 77 was RT’s so totally discarded, 78 was damaged in combat on Feb 25 1942 and quite useless at that…because it was the recco ship according to Charlie Bond and finally 79 was 8135 and was flown by Hedman and Reed being lost in combat and also can be another option.
In short, the only options of available numbers are 72, 78 and 79 with French author Jean-Louis Couston firmly claiming it was 78 (Brad Smith).
Note that the 23FG website claims it was P-8147 “52” but the picture available in their website and elsewhere shows the plane with black lips and a single light (blue?) ID band. As a consequence 52 can’t be the recco ship. So as Scott says: “there you have it”. The recco ship was “20” and then most likely it became “78”
| THE KIT |
 Reviewed
by several over the years, the Airfix kit is a pleasure to build. Fit of the
parts is excellent, engineering is great, and the cockpit is almost a kit in
itself with just plastic parts that properly represent that part of the airplane
for the first time. Yes, there are some ejector marks in odd places but nothing
that you cannot fix with 30 seconds of sanding.
Reviewed
by several over the years, the Airfix kit is a pleasure to build. Fit of the
parts is excellent, engineering is great, and the cockpit is almost a kit in
itself with just plastic parts that properly represent that part of the airplane
for the first time. Yes, there are some ejector marks in odd places but nothing
that you cannot fix with 30 seconds of sanding.
Other areas where the kits falls short but are easy to fix: the actuator rod on top of the rudder is only present on the left side. The kit’s is incomplete and has the same “actuator” molded on the right side of the rudder. Finally the support and cable sticking out of the rudder below the horizontal surfaces on the right side are also missing.
My only criticism is the lack of some panel lines (including the prominent landing light under the wing) and the fact that the decals, though complete with lots of stencils and details, have an 11 point start (instead of 12) and that the Chinese blue is not accurate and seems to have a “violet” hue.
Issues with the nun-hat? The line of thrust is a little bit low? Nothing that will detract from a great replica. I mean…no matter how perfect the kit is…it will still have a fatal flaw: it won’t be able to fly. So it won’t be 100% accurate anyways…For my standards it is great.
| CONSTRUCTION |
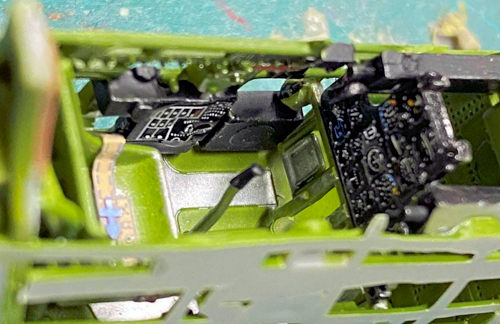 As I said
the cockpit is great. The only missing part is the light for the reflector
gunsight on the floor ahead of the control stick. I also added some photo etched
belts.
As I said
the cockpit is great. The only missing part is the light for the reflector
gunsight on the floor ahead of the control stick. I also added some photo etched
belts.
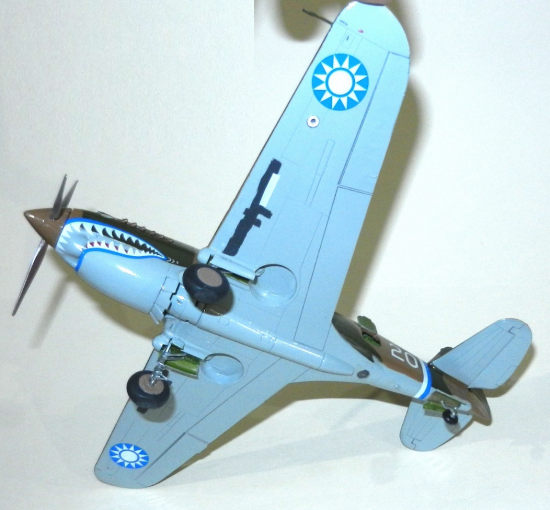
Following Cleaver’s notes I drilled a hole under the fuselage behind the wings and then attached a round clear window from the spares matching the size of the hole. As the access door was going to be left open to see the camera I had to paint the interior of the floor and fuselage in zinc chromate.
After some unsuccessful research about the correct position of the camera I decided to take the one from the kit, adjust the legs and glue it inside the fuselage on top of the clear window (previously painted the camera in black and the arms in zinc chromate).
 The
assembly of wings and fuselage are as easy as they can get. Maybe the curved
panels covering the union of fuselage to wings are a little bit tricky to attach
and if you don’t positon them perfectly then a gap in the union to the wings
might show up…I know it because I really struggled attaching this part. The wing
machine guns were not used and the holes for them on the wings covered with
putty.
The
assembly of wings and fuselage are as easy as they can get. Maybe the curved
panels covering the union of fuselage to wings are a little bit tricky to attach
and if you don’t positon them perfectly then a gap in the union to the wings
might show up…I know it because I really struggled attaching this part. The wing
machine guns were not used and the holes for them on the wings covered with
putty.
Another issue that I found with this kit is that the propeller hub leaves a gap around the propeller blades. I filled these with putty and carefully sanded them. I had to support the fuselage gun covers with some plastic card from inside. Rudder was left aside and the tail horizontal surfaces were glued on a slightly drooped position.
I decided to open the holes in the exhausts. Using a pin to mark the center of each exhaust I then placed the drill bit carefully on that pin hole. Then with low speed I made a hole on each exhaust. I left them aside for the final part of the construction. Once the kit was put together (minus the landing gear) it was time to paint it.
| COLORS & MARKINGS |
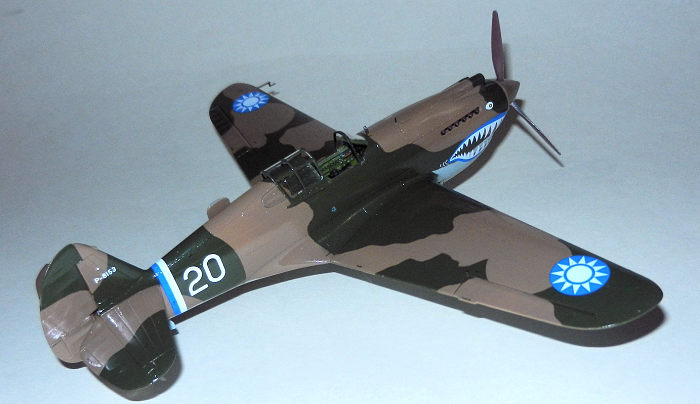
I used scale plans from Tullis’ book to make a template of the cammo pattern. A coat of white ModelMaster Primer was used to check for any imperfections.
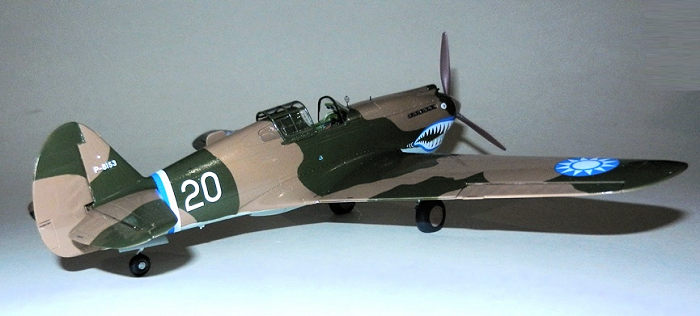 The
undersides were painted with ModelMaster Acryl 4693 which is an excellent match
of the original colour. Then this was masked and I painted the light brown (ModelMaster
Acryl 4709) including the wheel hubs. Then it was time to mask the brown using
the template mentioned above cut in Tamiya tape. The green (ModelMaster Acryl
4726) was applied.
The
undersides were painted with ModelMaster Acryl 4693 which is an excellent match
of the original colour. Then this was masked and I painted the light brown (ModelMaster
Acryl 4709) including the wheel hubs. Then it was time to mask the brown using
the template mentioned above cut in Tamiya tape. The green (ModelMaster Acryl
4726) was applied.
Following Tom Cleaver’s build the front of the propeller is aluminum and the back is maroon. I used a thin black pencil to highlight the moveable surfaces and my typical sanded black pastels to give them a little bit of dirt.
All formation lights were first given a drop silver (the excellent Vallejo paints) and then a drop of Future with a touch of blue (fuselage) or clear red or blue for the wings. White was used for the ones on the tail. A large drop of Vallejo silver was spread in circular motion to create the landing light under the wing.
The caps behind the pilot were painted in red and aluminum. Another tricky part was to simulate the dirty pattern created by the overflowing fuel below these caps. For this I used water with a drop of white and then put a tiny amount of this mixture on the fuselage blowing it downwards. It was repeated several times until it looked dirty enough with a help of a damped Q tip. Exhausts were painted using Rust colour and the openings black. The kit was given a coat of Future and was ready for the decals.
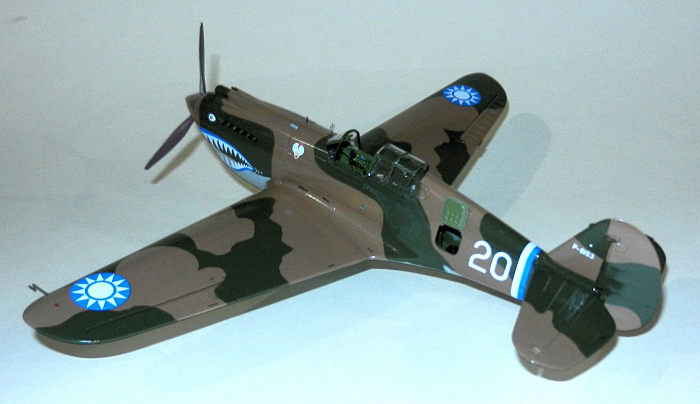
I created my own decals using Powerpoint and clear decal paper (No step, Fuel). On white paper I made the “Prestone” one. Tail numbers (serial), ID bands, shark mouth and eye and Chinese stars (roundels) are from Cutting Edge. For the fuselage number I used the numbers for Kits World. The “0” is correct but the “2” is not the type seen in the AVG numbers. I sacrificed the “2”, “3” and “5” to create the correct shape for the “2”. Because I tried to depict a brand new plane I used dark blue roundels for the top and bottom of the wings.
 The Swami
had some sort of feather that is clearly visible on Chevers book. I made this
printing it on decal paper. And the shape of the moustache and mouth on the
Cutting Edge decals are wrong so I retouched these using my own printed
moustache and mouth. It is clear to see that the machine gun panels under the
wings were covered with grey and maybe white dope. I made these printing them in
decal paper. All decals reacted perfectly to Set and Sol solutions. Decals were
sealed with Future as this plane was waxed to increase the speed.
The Swami
had some sort of feather that is clearly visible on Chevers book. I made this
printing it on decal paper. And the shape of the moustache and mouth on the
Cutting Edge decals are wrong so I retouched these using my own printed
moustache and mouth. It is clear to see that the machine gun panels under the
wings were covered with grey and maybe white dope. I made these printing them in
decal paper. All decals reacted perfectly to Set and Sol solutions. Decals were
sealed with Future as this plane was waxed to increase the speed.
With a kit as complete as this one the final details were few. These include attaching the rudder slightly offset, gluing the fuselage access door, photoetched gunsight, the brake lines running down the landing gear (very thin wire painted in aluminum), the horn on the tail (for the rudder), pitot and a little actuator under the right side of the tail.
The on-the-field designed reflector gunsight was made up with clear plastic cut to shape following the pictures found in Larry Pistole’s book. I attached it to the armoured glass (though being the weighted down recco plane there are big chances she did not have this gunsight…and maybe even did not have the internal armoured windshield!), glued the windshield and the two windows behind the cockpit and finally sat the hood in place.
| CONCLUSIONS |
Tom Cleaver’s recco ships were my inspiration. As I said before I love Airfix’s P-40s. Not everyone is happy. For me it is superior to the other offers in the market.
Now I have on my shelf 6 x P-40 Bs and 1 x P-40 E from the AVG. As I believe it was Mr. Ford who told me…I have more AVG P-40s than Chennault had at times available to fight the Japanese! And I still have another Airfix in the stash (to make “94” or “72”) and hope to get another E (with the simplified shark mouth) to then call my AVG collection complete.
| REFERENCES |
Terryl Clements “Colors of the AVG”,
Dan Ford’s Flying Tigers
Larry Pistole’s Flying Tigers
Tigers over China by Tullis
A Flying Tiger’s Diary by Charlie Bond
Flying Tigers by Chivers
And my exchanges with Mr Ford, Brad Smith (RT’s son) and Mr Clements
6 October 2023 Copyright ModelingMadness.com. All
rights reserved. No reproduction in part or in whole without express permission.
If you would like your product reviewed fairly and fairly quickly, please
contact
the editor or see other details in the
Note to
Contributors.