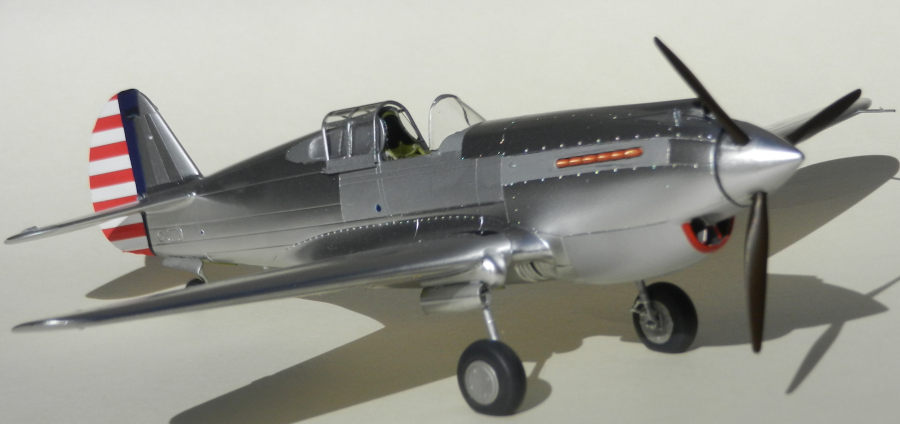
Airfix 1/48 P-40 Warhawk
| KIT #: | A05130? |
| PRICE: | CAD$45.00 |
| DECALS: | Two options |
| REVIEWER: | Pablo Calcaterra |
| NOTES: | Depicts second production aircraft |

| HISTORY |
 The P-40 was
the product of Curtiss’ proposal to the request issued by the USAAC on January
25, 1939 for a new Pursuit plane. Product of this competition were also the
P-39, P-38 and the P-43. Not being supercharged hurt the performance of the 39
and 40 but with the advantage of having a solid experience with their P-36 to
which an inline Allison engine was attached, the P-40 became the winner. Another
factor was that planes would be delivered one year earlier than any other
competitor in a time when the clouds of war were gathering. As a consequence,
the largest ever contract for a Pursuit plane was issued to Curtiss: 524 planes
were ordered.
Without going into the details of the development of the plane suffice to say that the first P-40 without self-sealing tanks, no armored windscreen nor pilot protection was delivered on April 4, 1940. Original armament for the full production series airplanes was to be a couple of .5 guns on the nose and a single .3 on each wing.
The first 3 planes (39-156, 157 and 158) were delivered for testing of the type without cammo though images of the supposedly 5th production plane show it also in natural metal. In the case of the 2nd plane which is the model I have built images show no guns at all and no antiglare panel painted. P-40s started service in the 33rd, 34th, 35th Pursuit Squadrons in June 1940.
| THE KIT |
 The Airfix
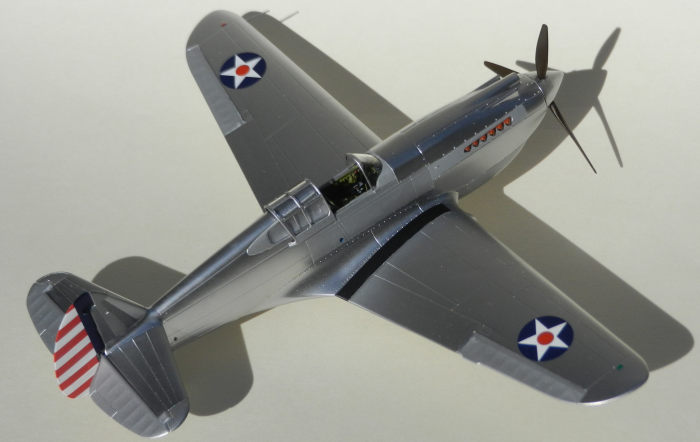
kit is a pleasure to build. Fit of the parts is excellent, engineering is great,
and the cockpit is almost a kit in itself with just plastic parts that properly
represent that part of the airplane for the first time. Yes, there are some
ejector marks in odd places but nothing that you cannot fix with 30 seconds of
sanding.
Other areas where the kit falls short but are easy to fix: the actuator rod on top of the rudder is only present on the left side. The kit’s is incomplete and has the same “actuator” molded on the right side of the rudder. Finally, the support and cable sticking out of the rudder below the horizontal surfaces on the right side are also missing.
My only criticism is the lack of some panel lines and the fact that the decals, though complete with lots of stencils and details, have an 11-point start (instead of 12) and that the Chinese blue is not accurate and seems to have a “violet” hue. For my standards it is great kit and would love to build many more.
| CONSTRUCTION |
 As I said
the cockpit is great. I also added some photo etched lap belts. I did not add
the butt of the .5 guns because this being the 2nd production plane these were
not present. I sanded off the pin where these go on the structure of the
cockpit.
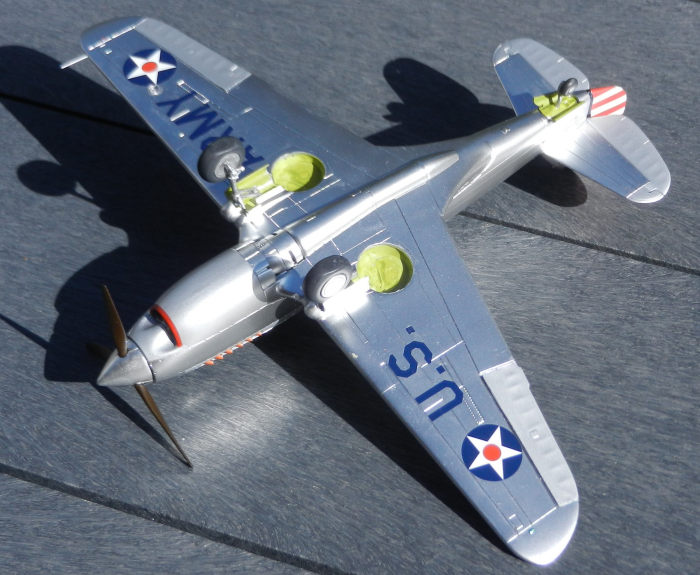
The cockpit and all wheel wells were painted in a mix of Interior Green and Yellow (2:3 proportion approx.) The oil cooler/radiator grills were painted black and drybrushed with aluminum.
The assembly of wings and fuselage are as easy as they can get. Maybe the curved panels covering the union of fuselage to wings are a little bit tricky to attach. I had a bit of glue popping out but that was my mistake and not the kit’s fault.
Another issue that I found with this kit is that the propeller hub leaves a gap around the propeller blades. I filled these with putty and carefully sanded them rescribing these lines with an Xcto knife. I cut out the long .50 cal muzzles and covered the holes for the machine guns on the wings and the chutes under the wings along with the panel lines linked to those 4 wing guns. Rudder and tail horizontal surfaces were left aside to be glued at the end. I attached the main legs of the landing gear and to support the tail I put a blob of blue tac with a piece of plastic sprue inside the tail wheel opening.
One thing that I discovered in this kit (after having assembled 2 before and fighting with this “problem”) is that the wheel hub is a very tight fight but that it has a proper side to be inserted into the wheels. If one side of the hub does not fit turn the hub around and it will fit like a glove inside the wheel.
| COLORS & MARKINGS |
I realized I had to find something better to paint the very shinny panels of this plane. Model Air Chorme from Vallejo would not cut it. Alclad is out of the question because of the smell/fumes plus the very fragile to the touch nature of this paint. (Your editor can only assume this is the original Alclad which was fragile. Alclad II dries rock hard and does not come off from handling). I found the new metallic line of Vallejo something that had good critics on line. I bought the Chrome one but when reading the instructions I realized it has to be applied over a Gloss Black Premier. I had already given the model a coat of Light Grey Vallejo Primer but it would not be enough. I asked my local hobby shop to get me a bottle of the Gloss primer and while I was waiting for it to arrive, I moved on to my next project (Eduard’s P-39 Nip’s Nemesis).
Once the Primer had arrived and the P-39 was done I started to work again on the P-40. I masked the ailerons to protect the light grey primer to further enhance the difference with the black primed areas. Cockpit masked with a piece of foam, wheel wells with a combination of masking tape and blue tac. Air intake and back of the chin were protected with wet tissue paper.
 The gloss
black primer was applied gently. Some areas developed a bit of shallow
craters/divots but that was my mistake. Nevertheless, and knowing that most of
the times trying to fix something it actually makes it worse, I left those areas
as is. Furthermore, if you look at the images of the actual plane the panels
were not smooth and flat but had bumps here and there.
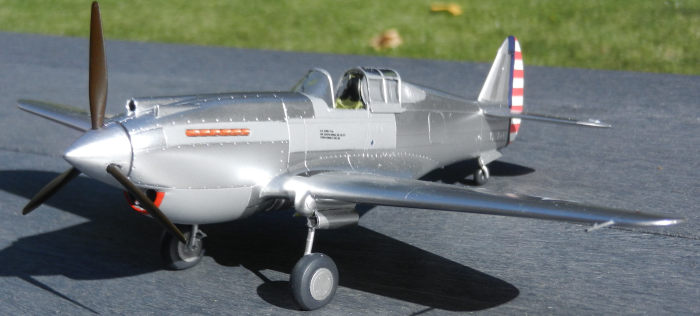
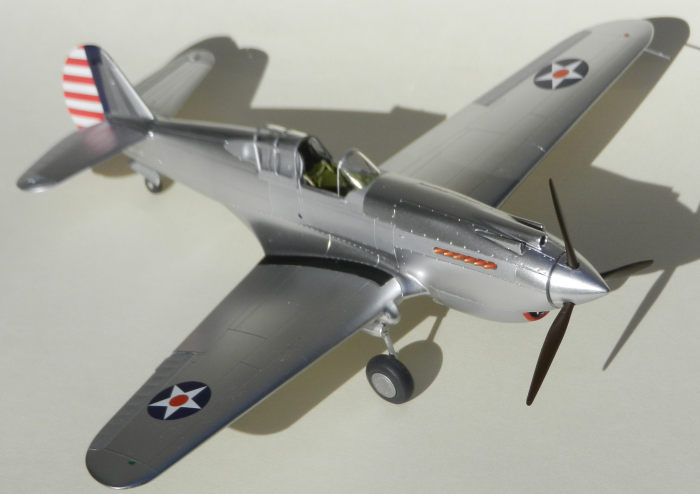
The entire plane was painted with several very light coats (probably 5 to 6) of Vallejo Metallic Chrome. It works really well, unless you move your hand too slow or the airbrush is too close to the model there will be some excess of paint which then turns into a slightly lighter (kind of smoked) chrome colour (there are 2 or 3 areas where this happened, more gentle applications mostly covered these “operator error” areas).
This excellent paint dries very fast. I left it to cure overnight and the following day I started to mask out the different areas to be painted with different aluminum shades. This step took me a couple of nights to allow the previous aluminum shade to dry as many times these were contiguous panels (i.e. tail, side of fuselage). Elevators were painted in aluminum. Rudder in gloss white.
Looking carefully at the pictures of this plane the propeller blades are not black but most likely maroon. These I then painted with maroon over the gloss black. With all the aluminum panels painted (and there was no bleed thru!) it was now time to apply the decals. I buffed the model with one of those very soft fabric cloths that they give you when you but glasses. I really did not see any difference in shine. I made my own decal for the P-40 serial number, covered it with Microset Decal solution, applied a bit of Set on the area under the cockpit and applied the decal no problem with no silvering and no need for Sol.
All the other decals came from the kit and they conformed to the panels very well. Just a bit of Set was needed. No use of Sol at all. Just a bit of pressure with a damp Q tip. There was absolutely no silvering anywhere.
The last one (and most complicated probably due to the small difference in shape/dimensions of the donor kit) was the one for the rudder stripes. It took a lot of Sol to get these to wrap around the edge and follow the ribs of the rudder. But the decal was too short in the hinge area. I had also misplaced the 2 halves a bit too high and this left the bottom of the rudder without decal…the following day and when everything had dried out I used a new Xcto blade to remove the excess of decal around the top edge, and painted the missing areas with Vallejo red (great match) and a mix of Black and Insignia Blue (Vallejo).
I almost forgot to paint the lip of the big air intake under the nose. I masked the area carefully and gentle coats of Vallejo red were applied with none of the dread bleed thru.
| FINAL CONSTRUCTION |
The formation lights on the side of the fuselage (that actually might not have been present in this plane) were painted with a drop of blue in Future. The other navigation lights were painted carefully with Clear Red and Green (Model Master), and white for those on the tail.
 I attached
the rest of the landing gear structure, the tail wheel doors and the wheel, the
doors for the main landing gear, the propeller. Windshield and scalloped windows
were glued with Microset White glue. The elevators were attached in a slightly
dropped position, the rudder a little bit turned to one side. The pitot tube was
added next.
Then, when the kit was “finished” and while doing some research about the history of this particular plane for this write up, I found in another website’s forum a message from Dana Bell with a clear picture showing that the first P-40s did not have the oil and gas caps under the left scalloped window but on the fuselage (below and behind that window).
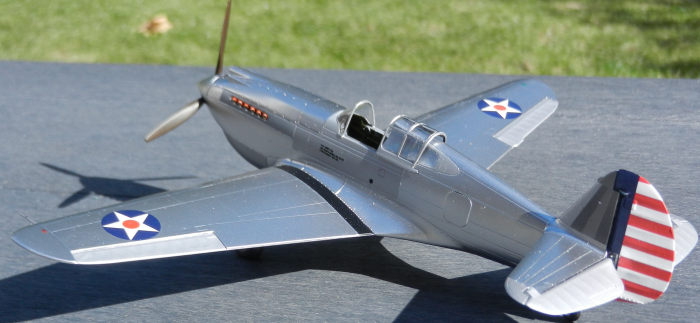
So out comes that window which I used as a template (with tape) to create a new one without the access holes. For this a small piece of Squadron clear sheet for vacuum canopies was used. Once I was satisfied with the result, I had to use a very small piece of coarse sandpaper and remove the two caps under the scallop window. This removed part of the paint in the area. I sanded the entire area with finer sandpaper and then I had to mask all the plane leaving the area under that window exposed. A light coat of light grey primer followed by Vallejo aluminum fixed the problem. For the new access doors I used Tamiya metered masking tape (aprox 2 x 2 mm in size), attached it where they doors were, and with an Xcto knife “drew” them on the paint. Not fancy, not perfect, but better than nothing. The new scallop window was glued in place followed by the opened hood and the shiny P-40 was finished.
| CONCLUSIONS |
A great kit. And a beautiful looking P-40 with all the different shades of aluminum and chrome. Vallejo Metallic Chrome could be not as shiny as Alclad but is so tough that it was not damaged at all during the rough handling of the model when I was redoing the oil and gas caps (which is something I have experienced with Alclad by just grabbing the model to move it around.). Another first for me with this plane was that many of my pictures were taken under the bright fall morning sunlight and we can see the blue sky reflected on the shiny Vallejo surface.
Yes, the P-40B (no the E onwards with their big chin air intakes) is my favourite plane…and a new close 2nd is the Airacobra (after building my first one which is the subject of my next article). Hurricanes and Spitfires used to be my favourites. But nothing beats a shiny P-40 (and potentially a similarly non-painted early P-39… with their rudders with stripes and their aluminum surface.
| REFERENCES |
Curtiss P-40 Warhawk: World War 2 Album (Merrian Press 2015)
P-40 Warhawk.com
Classicwarbirds.co.uk
5 November 2024
Copyright ModelingMadness.com. All rights reserved. No reproduction in part or in whole without express permission.
If you would like your product reviewed fairly and fairly quickly, please contact the editor or see other details in the Note to Contributors.