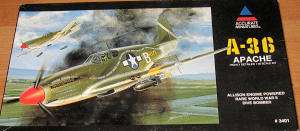
Accurate Miniatures 1/48 A-36A Apache
| KIT #: | 8203 |
| PRICE: | $ Currently out of production |
| DECALS: | One option |
| REVIEWER: | Dan Lee |
| NOTES: | Used True Details Cockpit and Squadron Vaccuform Canopy |
| HISTORY |
The A-36 Apache (or Invader as it was known in the 27th
Fighter Bomb Group because they were always invading places) was a dive bomber
version of the P-51 Mustang that was originally designed for the RAF. When the
P-51 was introduced, the USAAF found that all the funds for fighters were used
up till the next Fiscal Year so the USAAF decided to get around that budgetary
 restriction
and order a ground attack version which became the A-36A.
restriction
and order a ground attack version which became the A-36A.
The major airframe difference was the dive brakes added to the top/bottom of the wings. These enabled the A-36 to dive near vertical if not always straight (the Apache tended to roll to one side unless the pilot was able to correct it.) The Apache s armament was beefed up as it carried six .50 caliber machine guns (four in the wings and two in the fuselage) and had two underwing bomb racks that could handle up to a 1000lb bomb.
A-36 Apaches served in the CBI (China/Burma/India) Theater and in the Med with the 27th FBG and some 177 were lost of which many fell to small arms fire hitting the engine oil cooler that was located underneath the wings (foreshadowing Mustang losses in Western Europe and later Korea.) Due to the poor high altitude performance of the Allison engine, the Apaches did not fare so well in the CBI theater because of the altitude. Apaches served till 1944 when they were replaced by P-47s and P-40s.
Info from Wikipedia.
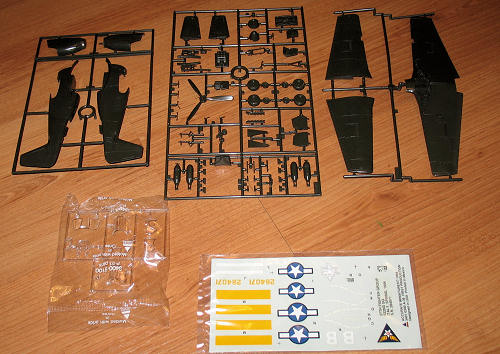
| THE KIT |
 The
layout of the A-36 should be familiar to everyone who has built an AM Mustang.
The fuselage consists of four parts, etc. The only major differences between
this kit and the other AM Mustangs is the wing (with dive flaps), openings for
the fuselage guns and bombs.
The
layout of the A-36 should be familiar to everyone who has built an AM Mustang.
The fuselage consists of four parts, etc. The only major differences between
this kit and the other AM Mustangs is the wing (with dive flaps), openings for
the fuselage guns and bombs.
My version of the kit looks like it was an original issue (box has a 1994 copyright) so the parts are lacking flash except for the mold marks. The detail looks also good. Only issues of note on the parts would be the rather thick canopy bits and the lack of an open canopy.
Decals have held up despite their age.
Only major gripe is the instructions which are brief and not so detailed.
| CONSTRUCTION |
After the parts were washed, I followed the sanest way of assembling the multipart fuselage as halves--gluing the pieces for each fuselage half together to keep everything aligned.
Once done, I sprayed the interior of the model with Tamiya
XF-5 Flat Green. There has been some discussion on whether or not the early
Mustangs should be interior green (as the USAF s Museum s A-36A Apace/Invader)
or zinc chromate green or da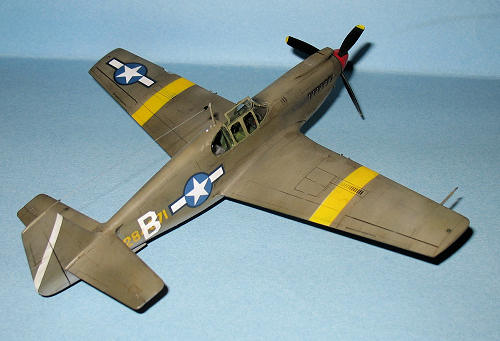 rk
gull green. I flipped a mental coin and went with the dark gull green because I
had built my P-51A the same way (and I don t claim it is accurate.)
rk
gull green. I flipped a mental coin and went with the dark gull green because I
had built my P-51A the same way (and I don t claim it is accurate.)
I then removed the True Details resin cockpit bits from the pour stubs using a razor saw and then wet sanded away the excess. The resin dust was washed away and the parts cleaned before the various bits were painted black, sliver, white, tan and Flat Green. The curved cockpit floor had some excess resin, but I decided not to go thru the trouble of sanding it away because I didn t think it was going to be a pain (Heh.)
The floor of the resin radio compartment was broken so the radio was carefully cut and the remaining floor was sanded away. It was painted black and dry brushed with silver. A piece of 20 thou plastic card was cut into shape, sprayed flat green and the resin radio was super glued in place. If I was thinking I would have used a piece of plastic card to seal up the interior, but I did not.
Unlike some of my more recent builds with aftermarket resin cockpits, this one went together reasonably well with the exception of the seat assembly which was a pain because I thought a very tiny bead super glue would keep it in place. It didn t so I pulled out the seat till the plane was fully assembled.
Turns out I was very wrong about the excess resin on the floor
of the cockpit. I had a very large step (1mm) on the bottom of the fuselage and
the wings to deal with. It seems that whenever I try to save time on one step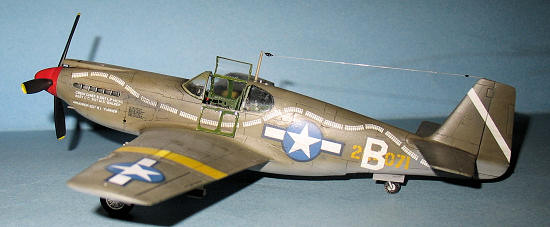 ends up haunting me the next. I taped over the high portion of the port wing
step to protect the plastic from the sanding and CA glue filler first. I then
ran thin beads of CA glue over the wings and let it air dry for about 10
minutes. Next I used a flat tooth pick like a trowel to smooth/blend the now
tacky glue in with the plastic. I waited another 20 minutes before I sanded it
down, sprayed with various colors to see what needed fixing. It took several
times to fill and wet sand everything smooth to my satisfaction. This was
repeated for the starboard wing and underside. Easier to type than to actually
do. The fuselage seams were easier to do. There is a gap on top of the engine
that isn t easy to sand and fill so I covered it with a cut piece of 5 thou
plastic card.
ends up haunting me the next. I taped over the high portion of the port wing
step to protect the plastic from the sanding and CA glue filler first. I then
ran thin beads of CA glue over the wings and let it air dry for about 10
minutes. Next I used a flat tooth pick like a trowel to smooth/blend the now
tacky glue in with the plastic. I waited another 20 minutes before I sanded it
down, sprayed with various colors to see what needed fixing. It took several
times to fill and wet sand everything smooth to my satisfaction. This was
repeated for the starboard wing and underside. Easier to type than to actually
do. The fuselage seams were easier to do. There is a gap on top of the engine
that isn t easy to sand and fill so I covered it with a cut piece of 5 thou
plastic card.
Once everything was done, I rescribed the detail the best I could and I was done with the basic construction.
| COLORS & MARKINGS |
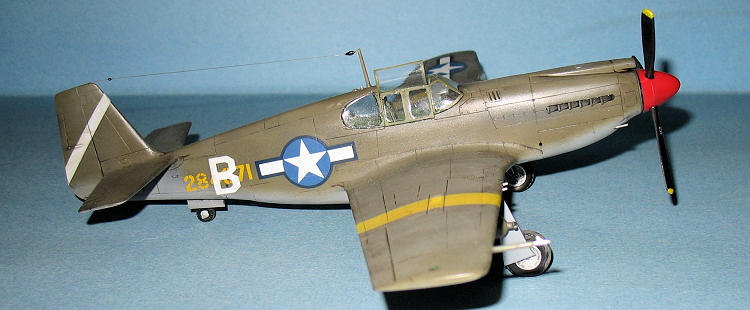
I opted to use the kit markings for this model which belong to the 27th Fighter Bomber Group.
First item painted with the prop spinner was sprayed flat white and when dry, it was sprayed with gloss red while the separate part for the prop blades was sprayed flat black.
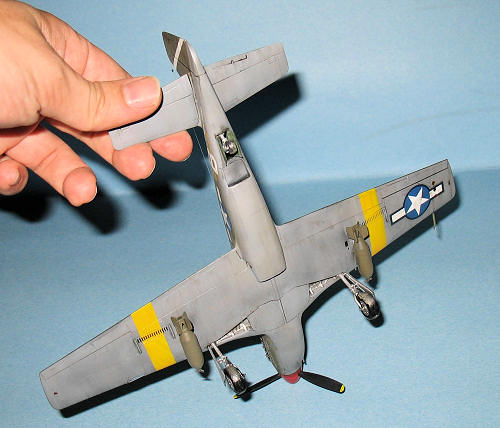
Next the landing gear wells (as well as the various parts of the landing gear) were sprayed with a spray can of Tamiya AS-12 aircraft aluminum. I hand painted the back of the gear wells with Tamiya XF-4 flat yellow which is a close approximation of zinc chromate yellow.
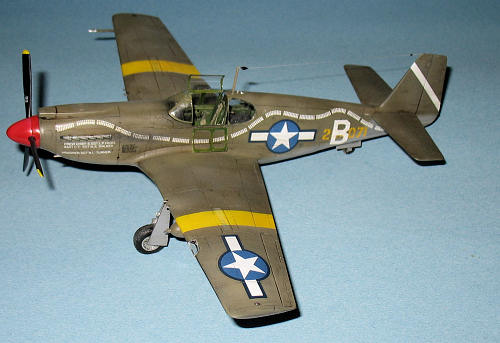
 Once
that was all dry, I stuffed the various openings with wet tissue paper and pre
shaded the plane flat black. I then used Gunze H53 Neutral grey for the
undersides. It took a while as I was careful to apply it in thin coats for the
paint to get that faded look without looking over done. I was painting several
planes at the time, so I let sit for a while till I got around to doing the
olive drab portion of the camo. I used 3M painters tape to cover up the
underside of the tailplanes and free hand sprayed the OD in the same manner as
the neutral grey.
Once
that was all dry, I stuffed the various openings with wet tissue paper and pre
shaded the plane flat black. I then used Gunze H53 Neutral grey for the
undersides. It took a while as I was careful to apply it in thin coats for the
paint to get that faded look without looking over done. I was painting several
planes at the time, so I let sit for a while till I got around to doing the
olive drab portion of the camo. I used 3M painters tape to cover up the
underside of the tailplanes and free hand sprayed the OD in the same manner as
the neutral grey.
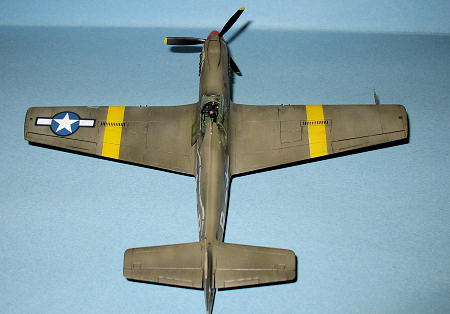
It only took a half hour for the paint to dry so I could mask off the wings and tailplane for the ID markings. Accurate Miniatures supplies decals for these, but I have had a lot of headaches with decal stripes so I now prefer to paint them instead (hey sometimes being lazy isn t a virtue.) One thing to watch out for is to make sure that the top and bottom align (if you were wondering, I did check) before painting. Flat white was sprayed on the areas marked by the tape on both sides of the wing and tail then Gunze Chrome yellow was sprayed on the affected areas of the wings
Once the paint was dry, a gloss coat of Future (or whatever the marketing guys at Johnson call it) was applied via air brush and let dry for a couple of days.
The decals in my kit were 14 years old, but they held up fine. These were really good decals as they went on with a little bit of Micro Set. The only decals that you have to watch out for are the mission markers that went up and down the fuselage, but as long as you carefully follow the decal guide you should be okay.
The plane was wiped down with a wet rag and then a light watercolor wash was used to highlight various panel lines and dirty the plane up a bit. Once the excess was was removed, a mixture of Tamiya Flat Base and Future sealed everything up. I then used some really thinned flat black for some exhaust stains.
| FINAL CONSTRUCTION |
In my copy of the kit, the door actuators were bent out of shape, but that didn t matter. The early Allison Mustangs well doors did not hang down like the later Merlin engined versions so I just cut away the attachment points and glued the doors in place.
The landing gear itself was simple to do (wheels, wheel
covers, etc.) I added some 30 gauge wire for the brake lines which was attached
using CA glue. Once the landing gear well covers were attached to the gear, then
they were glued in place with standard
 cement. I
adjusted the gear so they leaned forward and not straight down then left the
A-36 on it s back for the night for the cement to harden.
cement. I
adjusted the gear so they leaned forward and not straight down then left the
A-36 on it s back for the night for the cement to harden.
I bought a vacuformed canopy for the A-36 when I purchased the TD resin pit. I did not want to do major surgery to the model so I only used the center piece so I could pose it open and left the windscreen/back windows alone. No problems masking, painting or attaching (with Krystal Kleer) the canopy bits including the gunsight. The one thing I did modify was the port wing landing lights. I added a strip of sheet styrene, painted it OD then put two dots of silver (using a silver pen) coated with some Krystal Kleer (I would have used MV lenses, but the LHS didn t have any in that small of a size.)
The bombs were a bit fiddly, but not a major issue.
Finally, the antenna was attached with CA glue and then I used invisible thread for the radio wire (one of my better antennas.) The kinks were removed by running a just extinguished match run under the thread.
| CONCLUSIONS |
If you build this kit without a resin cockpit then assembly will be a breeze. With a resin cockpit, not so much. I m sure that folks would like to have more detail for the port wing, a plug to seal up the interior so you don t see thru the model and some way to pose the dive brakes which are molded in. I m sure that there is a way to do these with PE, but I m happy the way the model is.
I do recommend that if you want to open up the canopy then you probably should get a vacuformed canopy.
One last note, this kit has been discontinued by AM so the only way to purchase them is via E-Paid aka E-Bay (which is where I purchased it.) I find it a bit disappointing as I really do like the AM early Mustangs and find them fun to build.
Kit courtesy of my wallet.
February 2009
If you would like your product reviewed fairly and quickly, please contact me or see other details in the Note to Contributors.