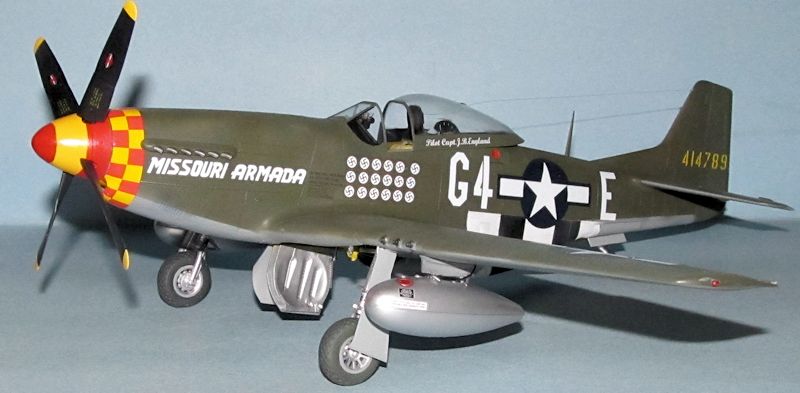
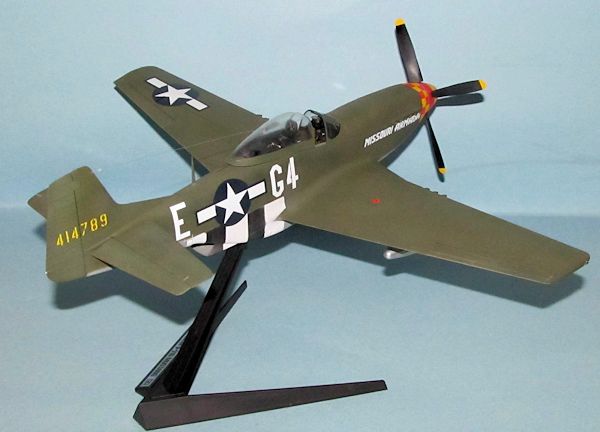
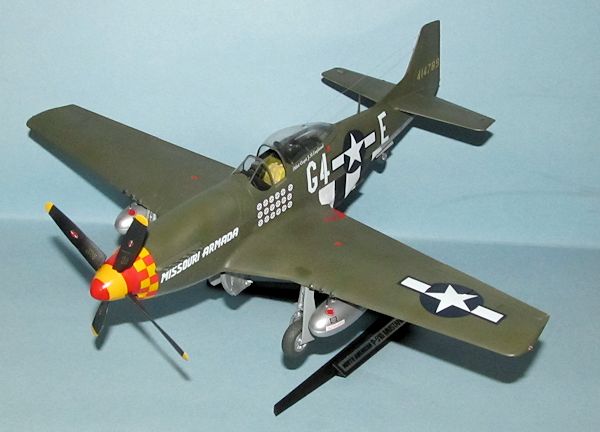
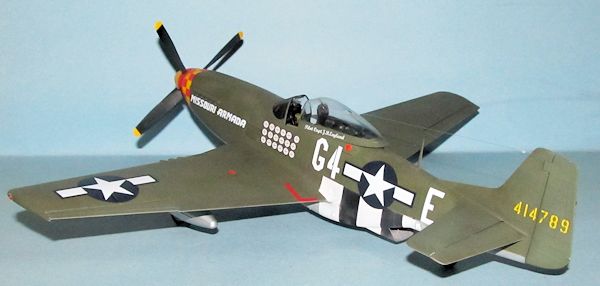
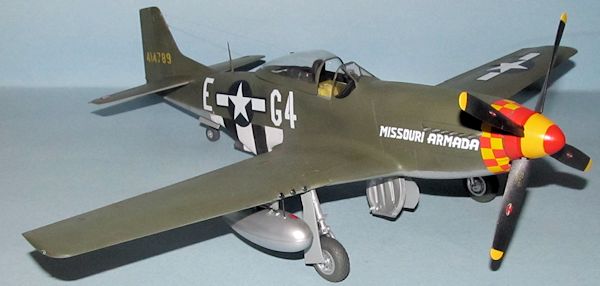
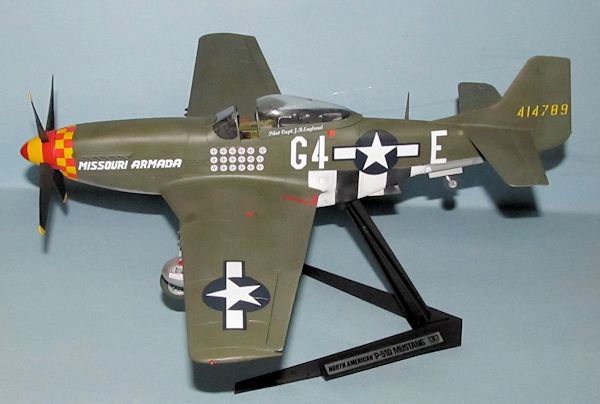
Tamiya 1/32 P-51D Mustang
| KIT #: | 60322 |
| PRICE: |
$183.00 SRP |
| DECALS: | Three options |
| REVIEWER: | Dan Lee |
| NOTES: |
Kit comes with PE, used EagleCals 32101 Yoxford Boys Part 1 Decal Sheet and Barracuda Studio Resin Wheels . |
| HISTORY |
The P-51D Mustang was one of the most influential
aircraft of WW2 as the premier escort fighter of the USAAF.
It enabled the USAAF to gain air superiority over the
skies of Europe.
The D model incorporated the Merlin engine and a bubble top
canopy to improve overall pilot visibility as well as 50% more firepower than
B/C models (six .50 caliber machine guns vs four.)
The Mustang fought in the Korean War as a fighter
bomber, but ended its service with the USAF soon after, but it flew on with
smaller air forces till the 1970s.
 The
Unit
The
Unit
The 357th FG (aka The Yoxford Boys) is one of the
most famous fighter groups of WW2 as it produced the most aces (42) of any unit
in 8th/9th AF with the exception of the 354th FG (42 aces.)
It’s distinct red and yellow checkerboard noses make it
a favorite of many a modeler.
The 357th was formed at Hamilton Field in
California on Dec 1, 1942 as part of the 4th AF but most of the training took
place in Tonopah Nevada with weary P-39s.
In late 1943, the 357th was sent to England and assigned
to the 9th AF as a Mustang Fighter Group.
However, the dire need for Mustang fighter groups to
escort bombers found the 357th traded to the 8th AF Fighter Command for a P-47
Fighter Group.
It’s first escort mission was the mission where James Howard won
the CMH for protecting several damaged bombers against many Luftwaffe fighters.
Soon after, the 357th participated in the Big Week which
broke the Luftwaffe fighter command.
It ended the war as one of the top scoring fighter
groups in Europe and was deactivated in 1946 with its history and lineage
assigned to the 121st Fighter Group of the Ohio National Guard.
The 121st FG eventually became the 121st Air Refueling
Wing.
 The Pilot
John England enlisted in the US Army as a private
in April of 1942 and soon became an aviation cadet.
He graduated as a pilot and commissioned as a lieutenant
in March of 1943 and assigned to the 357th FG.
John would shoot down his first plane on March 8, 1944.
In Aug of 1944, he became the CO of the 362FS till
relieved in April of 1945.
By the end of the war, John England was the 2nd highest
ranking Ace of the 357th with 17.5 kills.
John would remain in the USAF and served in Korea
shooting down one Mig.
He became commander of the 389th FBS after Korea.
He died in a Sabre crash in France in 1954 while trying
to avoid crashing into a building during a deadstick landing.
Alexandria AFB in Louisiana was renamed to England AFB
in his honor.
| THE KIT |
See Tom Cleaver’s
review of the kit to see what’s in the box.
| CONSTRUCTION |
Various parts were painted on the sprues including
the exhausts.
 I pretty
much followed the build order with one exception and paint suggestions for the
cockpit.
I selected version A which is close to the plane I wanted to model.
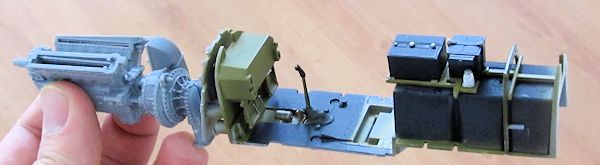
I added the engine parts that were required to provide
interior strength for the panels, but I omitted pretty much everything else.
I also didn’t add most of the PE plates and magnets
because I wasn’t going to open up the interior.
However, I did add the various metal rods and PE
actuators for the flaps, ailerons and rudder.
I pretty
much followed the build order with one exception and paint suggestions for the
cockpit.
I selected version A which is close to the plane I wanted to model.
I added the engine parts that were required to provide
interior strength for the panels, but I omitted pretty much everything else.
I also didn’t add most of the PE plates and magnets
because I wasn’t going to open up the interior.
However, I did add the various metal rods and PE
actuators for the flaps, ailerons and rudder.
The model sat in the box for a couple of weeks to
allow the glue to cure and remove the chance of phantom seams although I didn’t
deal with the intake seams. Tamiya did a very good job of limiting the seams
needed to be sanded and filled.
The one seam they couldn’t avoid was where the wing met
the fuselage.
I had to remove some of the surface rivet detail there, but
replaced it later.
Once the seams were done to my satisfaction, the
thin engine compartment panels were glued on.
It wasn’t a perfect fit as a I had a rather large seam
on the port side, but I used Vallejo plastic putty to fill it in.
 One
mistake I did was not adding the part of the canopy that slides in the fuselage
after I glued on the top of the fuselage section between the tail and the
cockpit.
I added this after thinking it wouldn’t be a problem.
I ended up cutting part of the piece so it could fit in.
One
mistake I did was not adding the part of the canopy that slides in the fuselage
after I glued on the top of the fuselage section between the tail and the
cockpit.
I added this after thinking it wouldn’t be a problem.
I ended up cutting part of the piece so it could fit in.
There are three different canopies supplied with
the kit.
I selected the one that went with the Missouri Armada and then
sanded/polished the seam line.
I took my time and gently polished the canopy to avoid
breaking the delicate pieces as forewarned by Len Roberto’s review.
I added the armored plate glass and windscreen to the
fuselage at the time then I cut out the masks and added them (as well as masked
of the sliding portion of the canopy.)
The landing gear was assembled and sat in the box for three weeks before being sanded/filled to hopefully eliminate phantom seams because they were to be sprayed TS-30 Old Leaf Silver.
| COLORS & MARKINGS |
I picked John England’s P-51D “Missouri Armada”
from EagleCal Decal Sheet 101 because I was lazy and didn’t want to build a NMF
P-51D in the winter time.
The wheel wells of the Mustang were masked off using the
wheels up landing doors.
First the Mustang was preshaded using German Grey and
flat black.
Next, the underside color of Medium Sea Grey was sprayed on.
When it was dry, I masked off the demarcation lines and
sprayed on RAF Dark Green for the top.
I cleaned out my airbrush and then sprayed on a coat of
Tamiya gloss for the decals.
 The prop
blades tips were painted flat white then RLM04.
When the paint was dry they were then masked off and the
rest of the prop was painted flat black.
I had some leak through and had to do some touch up.
Next was the prop hub which was a pain.
Each of the bands (red and RLM04) needed some touch up
as I had some bleed through (I think it was because the paint was too thin.)
I eventually got it to look okay (not perfect though.)
The prop
blades tips were painted flat white then RLM04.
When the paint was dry they were then masked off and the
rest of the prop was painted flat black.
I had some leak through and had to do some touch up.
Next was the prop hub which was a pain.
Each of the bands (red and RLM04) needed some touch up
as I had some bleed through (I think it was because the paint was too thin.)
I eventually got it to look okay (not perfect though.)
Next I painted the Barracuda Resin wheels RLM66
while the hubs were sprayed TS-30 Old Silver Leaf.
Later the landing gear bits and fuel tanks were sprayed
Old Leaf Silver too.
Once everything was dry, I masked off the rear
underside of the fuselage for the invasion stripes and sprayed it flat white.
Next, the flat white sections were masked off and the
remaining area was sprayed flat
 black.
It wasn’t perfect from an aesthetic view, but my
understanding was that the invasion stripes were hastily done so it was “perfect”
from a historical accuracy view.
black.
It wasn’t perfect from an aesthetic view, but my
understanding was that the invasion stripes were hastily done so it was “perfect”
from a historical accuracy view.
Decals
I used EagleCals Yoxford Boys decal sheet number
32101.
Most of the stencils were left off with the exception of the fuel caps.
The red and yellow checkerboards around the nose were a
little easier than I expected.
I only used a little bit of Microsol for the decals.
Weathering and Final Coat
No weathering was done aside from some preshading
of the underside.
The model was sprayed with two thin coats of Vallejo
Flat Varnish for the final coat.
| FINAL CONSTRUCTION |
The landing gear, landing gear details, wheels and
wing edges were screwed and glued in place.
I drilled out where the fuel lines in the fuel
tanks went and then used CA glue to attach 30 gauge wire that was painted black
for the fuel lines.
I drilled out the hole in the wing where the fuel line
is supposed to go.
It took a bit of conc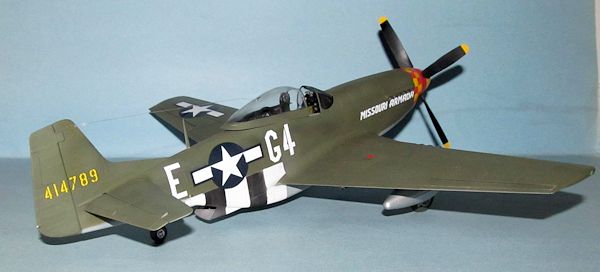 entration
to get the fuel tank holes and fuel lines lined up.
entration
to get the fuel tank holes and fuel lines lined up.
I added the canopy, but I had some issues
(mentioned earlier in the review) as I should have added the canopy sliding
piece before adding the top portion of the rear fuselage.
I ended up trimming part of the sliding piece so that I
could sneak it in without tearing the model apart.
I then drilled out a hole in the rear canopy and slid
through some clear repair thread for the radio aerial.
I drilled a hole in the tail using a number 72 drill
bit, inserted one end of the thread with CA glue at the tip into the tail hole
and the other end attached to the headrest of the seat.
I then tightened the thread using the heat from an
extinguished match.
The stand was assembled according to the
instructions and the Mustang was screwed to it.
| CONCLUSIONS |
This kit deserves all the accolades it has
received.
Worth its MRSP although you can get it for cheaper.
My only wish is that Tamiya would make a version that
didn’t have all the engine parts as most of us won’t open it up.
Otherwise it is the best Mustang that I’ve built.
I wouldn’t recommend this for a beginner due to the PE
and number of parts (and the NMF paint schemes) but anyone with some modeling
experience can build this
model without too many issues.
If you would like your product reviewed fairly and fairly quickly, please contact the editor or see other details in the Note to Contributors.