Revell 1/48 P-39 Airacobra
| KIT #: | 85-5255 |
| PRICE: | $14.95 MSRP |
| DECALS: | Three options |
| REVIEWER: | Ralph Koziarski |
| NOTES: | Reissue of Monogram kit |

| HISTORY |
The P-39
Aircobra was designed in response to the
Beginning
in 1941 Aircobras were supplied to
The
| THE KIT |
 This kit
is a great classic. Originally released by Monogram, in the late 1960s, it was
top of the line. A goodly amount of cockpit, and wheel-well detail, a basic, but
sufficient gun bay, and a partially exposed engine must have made many a young
boy exited back then. The kit was updated and rereleased under the Promodeler
brand in the mid 1990s. Finally, Revell cleaned up the molds and released the
kit once again in late 2008. Surface detail consists of petite raised panel
lines, and recessed control surfaces. The wheel wells are boxed in, and include
some basic plumbing. The engine, cockpit, and gun bay are moderately well
detailed, and provide a nice canvas for the super-detailers wishing to spruce
things up.
This most
recent reincarnation of the model comes in a standard gray plastic, which is
almost flash free, and contains few sink marks and other imperfections. The kit
retains the classic options to model the gun-bay, engine bay, and one of the
cockpit “car-doors” open; and includes both a seated and standing pilot, as well
as a mechanic figure kneeling on an oild-drum. The modeler also has the option
of two kinds of exhaust pipes, bomb or drop-tank and several different
cannon/machine –gun layouts. The kit includes three markings options
Not being
a rivet-counter, I can not comment on how well the kit scales out. But it
looks to me like a P-39. The only area which to my eye seems to be lacking is
the forward edge of the wing. The air-scoops and filters in at the front of the
lower wing, look a bit flat to me, but again I am no expert on the type.
| CONSTRUCTION |
It has
been some months since I have completed construction, so I can not provide a
blow-by-blow account of how things went. I will instead focus on the areas of
construction which I found especially memorable and or problematic. In an
nutshell though, fit of the parts was good, and many of the problems I ran into
with the kit were a result of my building it with the wheels up.
 I began
the model by assembling and painting the cockpit and gun bay. I was initially
planning on detailing both, but lost interest when I could not come up with an
adequate way to pack enough weight into the nose to keep the plane from tail
sitting. At this point I sealed up the gun bay, and finished the cockpit OOB. I
installed the figure provided in the kit, which I painted in a light khaki
uniform, to make him look like a South Pacific airman.
The
fuselage was sewn up, and all relevant panels and parts attached. I do not
recall any problems with fit up to this point. I attached the main wing by first
gluing the upper wings to the fuselage, and then attaching the lower wing to the
completed assembly. I find this method to be a surefire way
in avoiding poor wing-root fit, particularly in older models. It is a lot
easier to sand and fill the leading and trailing edges if they don’t fit, than
it is to monkey around with a wing root. On this model, the method proved
useful, and the only filling I recall doing, was at the back end of the lower
wing, on the belly of the plane. A little bit of super glue made quick work of
the gap. The fit of the horizontal stabilizers was a bit more dodgy and required
a bit of filler at the roots. The kit I was building had underwing gun-pods,
which I added at this point. These required just a little bit of filler to
conform to the curve of the wing.
The
landing gear covers provided in the kit work like a dream when posed open, but
as is often the case, they were too small when closed up. After some fuss, I
decided to simply fashion closed gear doors from card stock and attach them to
wheel wells filled with epoxy putty. This gave the model some added heft, which
feels kind of nice when its picked up.
I masked up the canopy parts and glued them onto the fuselage in preparation for painting. Maybe it was just me, but do take care with the car-door windows. On my model, both of them ended up being pushed inside of the canopy, and so I simply replaced them with Krystal Klear once the kit was completed.
| COLORS & MARKINGS |
As
mentioned above, Revell provides the builder with three marking options in this
kit. The first is an olive drab over neutral gray machine used in North Africa.
This has some attractive yellow numbers, and red outlined US insignia. The
second option, is a flamboyant Cactus Airforce version in dark green and brown
camouflage with a shark-mouth and fighting rooster “nose-art”. The final option,
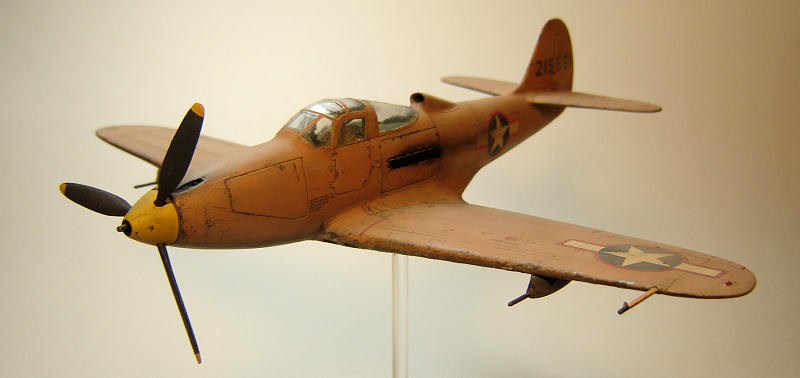
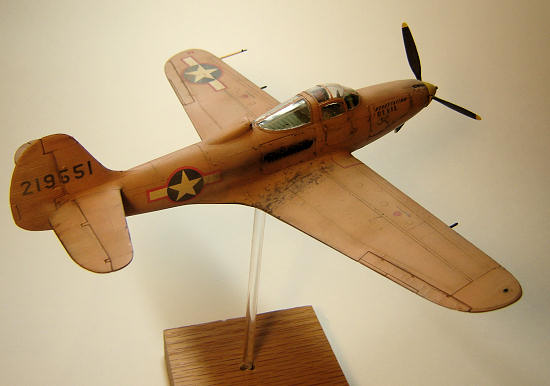
which I chose is “Devastating Devil” in coral pink temporary camouflage, when
the aircraft was stationed at the coral a toll of Canton Island. The decals for
this option are possibly incorrect, in that the US insignia have a blue outline,
when in fact they may need to be red; although that is debatable. Similarly,
“Devastating Devil is in black, when it may have been red on the real aircraft.
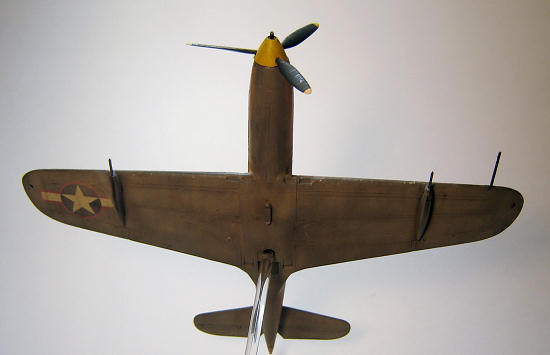
I painted
the model’s underside with Tamiya neutral gray. I then added some white to the
gray, and randomly misted on fine coats to break up the monotony of the color.
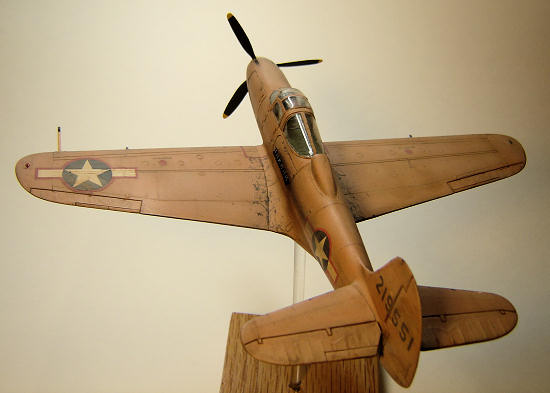
The topside was then painted with olive drab, followed by several mist coats of
a home mixed coral pink. I think I mixed Vallejo red and flesh highlight, and
maybe added a touch of yellow. Vallejo paints are somewhat fragile, and once I
finished painting the topside, I scrubbed portions with a toothbrush to simulate
the finish being sand-blasted by flying bits of loose Canton Island coral picked
up and blown about by prop wash.
I ended
up replacing the US insignia for the fuselage with red outlined stars from my
spares box, but used the codes and “nose art”. I also used the red outline stars
from the North African bird on the wings. The Revell decals are sharply printed,
and went onto the model without a hitch. I used Microset solution to assist in
setting the decals down over a coat of Future.
The
decals were oversprayed with Model Master Acrylic flat coat, and before it had a
chance to fully cure, I rubbed in some pastel dusts to further weather the
aircraft. A final mist coat of MM Acrylic flat-coat sealed everything in.
| FINAL CONSTRUCTION |
Final
construction included the painting of small details like exhausts, a pitot tube,
and the prop. I painted the spinner yellow, but have since heard that perhaps it
should be OD or black. I hollowed out the 37 mm cannon, and drilled a small hole
in the bottom to accept a length of acrylic rod. The other end of the rod was
glued into a small block of free flooring sample, and that was it.
| CONCLUSIONS |
I simply love old models, and it makes me very glad when Revell, Airfix, and the other classic manufacturers rerelease their oldies with new smart new decals. This kit is inexpensive and easy to find in most hobby shops and even craft stores like Michaels and Hobby Lobby. It is a nice alternative to the far more expensive Eduard kit, and even with minimal TLC builds into a beautiful kit of one of the funkier looking fighters of WW II. I would recommend without hesitation to both beginners and advanced modelers alike.
January 2011
Thanks to me and my fondness for anything different from the norm for this one.
If you would like your product reviewed fairly and quickly, please contact me or see other details in the Note to Contributors.