| KIT #: | 2681 |
| PRICE: | $17.00 on sale |
| DECALS: | Five options |
| REVIEWER: | Spiros Pendedekas |
| NOTES: | Reboxed Academy kit |
| HISTORY |
Italian pilots started to face P-38s from late
1942 and these fighters, with their long range, high speed and powerful
weaponry, were quickly established as a more dangerous foe than the previously
met Supermarine Spitfire. The few P-38s that fell into the hands of Germans and
Italians were tested and used in combat, providing vital results.
After the war, Italy received 100 to 120 dismantled ex-USAAF P-38s. Seven of
these airframes were not rebuilt but were reserved for use as spares. The
remaining, after a one-month refurbishment by AERFER manufacturing company
(which later merged with Salmoiraghi and the aviation division of Fiat to create
Aeritalia), were first assigned to the 3rd Stormo in Bari and Lecce in Apulia.
They were a mix of P-38L fighters and PR conversions, including F-5E, G and H
models. Six machines were modified as dual-control trainers.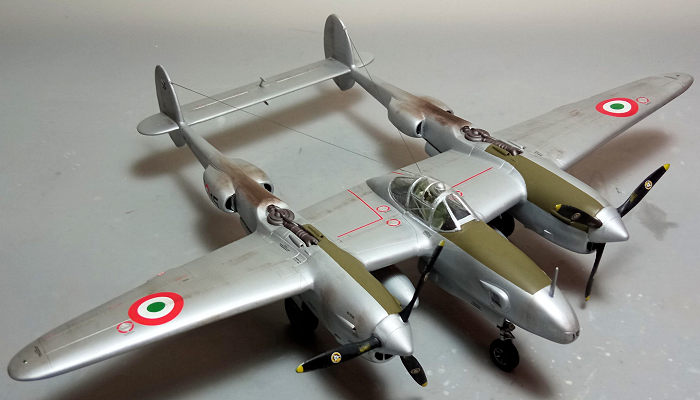
In service with the Aeronautica Militare, the type flew reconnaissance missions
over the Balkans, as well as ground attack, naval cooperation and air
superiority missions, making their operational debut on 9 September 1948, when a
single F-5 took photographs of objectives in the Balkans. Albeit a very high
number of those planes were lost in accidents (due to a number of reasons), with
at least thirty of those crashes claiming a number of victims, the P-38 was
generally liked by the Italian pilots, who appreciated, among others, its
excellent visibility on the ground and its stability at takeoff. It was
ultimately phased-out in 1956.
As for the unconventional and charismatic P-38 itself, little can be said that
hasn’t been said: a fine twin engine machine, combining very good performance,
advanced armament and firepower, excellent range and endurance and operational
flexibility and versatility, making it a valuable asset in the allied inventory.
| THE KIT |
Italeri came with this 1/48 P-38 in 2009, which was a rebox of the well known
1994 Academy/Minicraft mold. While not among the latest and greatest, it is
still a good, solid kit of the iconic P-38, with correct general shapes of
parts, nice recessed panel lines and adequate overall detail.
The specific kit was bought sealed in 2025 at a killer price of only $17 and for
an in-depth look at its contents you may read its preview,
found in the ever growing MM archives.
| CONSTRUCTION |
I started by assembling the reasonably detailed 10-piece cockpit and trapped it
between the lower and upper fuselage halves, which contain a portion of the
lower wing half and the full upper wing half respectively. Basic cockpit color
was a home brewed shade of green zinc chromate, while the inner front anti glare
area, side consoles, yoke, head cushion and rear radio equipment were painted
black. I used the good looking kit decal for the instrument panel, picking up
some “switches” (also on the side console faces) by “pinning” red, yellow and
white paint. The seat had some holes drilled at its backrest to look less plain
and received seat belts from masking tape. All raised instrumentation was dry
brushed with silver.
 Next the booms were assembled, trapping the main wheel wells between them. After
having the front engine faces and radiator lips attached, the booms were glued
to the main model, followed by the external lower wing halves, the elevator and
the external sections of the horizontal stabilizer. I performed the above
operation with the glue still uncured, allowing me to twerk the assembled
structure and come up with a reasonably aligned basic model.
Next the booms were assembled, trapping the main wheel wells between them. After
having the front engine faces and radiator lips attached, the booms were glued
to the main model, followed by the external lower wing halves, the elevator and
the external sections of the horizontal stabilizer. I performed the above
operation with the glue still uncured, allowing me to twerk the assembled
structure and come up with a reasonably aligned basic model.
The 2-piece nose was next assembled and attached in position. Since every P-38
model is a prime candidate for tail sitting, I stuffed in as many fishing
weights as I could, which was well in excess of the already whoppy 40 grams the
instructions suggest. Of course, the bottom line would be that the weights would
be visible through the camera windows: painting them black being the only thing
I could figure out.
The supercharger intercooler ducts were next assembled and attached, while the
wing tanks were assembled but were left off, to facilitate painting. In order to
add some realism, I drilled out the various small air inlets located mainly
around the engines.
This concluded basic assembly which was a relatively pleasant experience. Fit,
while definitely not Tamiya, was not too bad either, requiring moderate filling
and sanding at the “usual” areas, with some extra attention to the wing-to-boom
and nose-to-fuselage joints. After a final 1000 grit sanding, the charming bird
headed to the paint shop!
| COLORS & MARKINGS |
 I gave the complete model, including the wing tanks and doors, a coat of my
trusty Hu11 silver (while stocks last…), which I lightly buffed afterwards to
add some shine depth. The external anti glare areas were masked and painted
Hu155 Olive Drab), with a coat of Future (mostly for protection of the sensitive
silver - it was already “gloss”) preparing the bird for decals.
I gave the complete model, including the wing tanks and doors, a coat of my
trusty Hu11 silver (while stocks last…), which I lightly buffed afterwards to
add some shine depth. The external anti glare areas were masked and painted
Hu155 Olive Drab), with a coat of Future (mostly for protection of the sensitive
silver - it was already “gloss”) preparing the bird for decals.
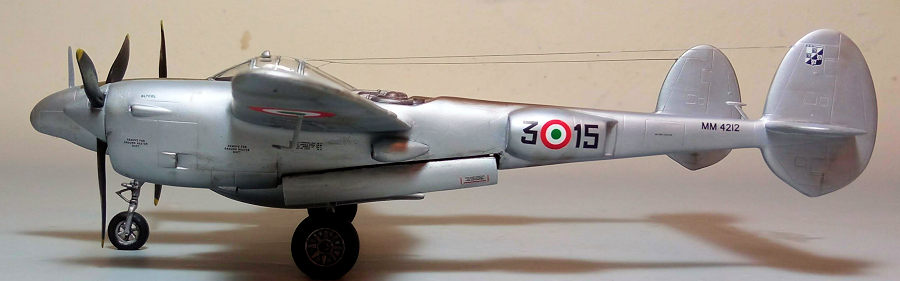
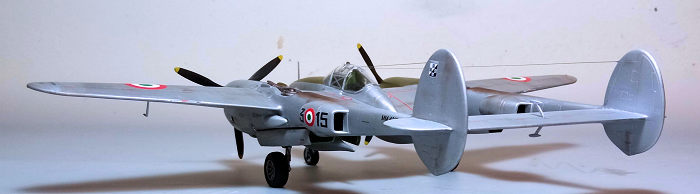
I used the kit decals, to represent the MM 4212 machine, belonging to 132 Gruppo,
3 Stormo, as it stood in Bari Palese Macchie in 1947. The decals were perfectly
printed and, despite their age and relative thickness, behaved well, but needing
strong softening solution to conform to the underlying engraved panel lines and
curves, with another coat of Future sealing them in.
As a note, Italeri provides the OD anti glare areas as decals, but I didn’t dare
using them, as I feared their thickness would not allow them to conform to the
complex curves.
| FINAL CONSTRUCTION |
 The good looking landing gear was assembled and attached in position, followed
by the wheels and doors. To my relief, the model did not tail sit. Fit of the
gear struts was positive, but the same cannot be said for all five doors, which
practically had to be trimmed and butt fitted on a trial and error basis.
Nothing too serious, just needing some extra attention. The wheels were filed to
look weighted, while simplistic brake lines and a steering harness from
stretched sprue were added to the main and nose legs respectively. All landing
gear bits, including wheel rims, were painted silver. Tires, brake lines and
nose leg harness were painted black, while the wheel wells and door innards were
painted a home brewed green zinc chromate.
The good looking landing gear was assembled and attached in position, followed
by the wheels and doors. To my relief, the model did not tail sit. Fit of the
gear struts was positive, but the same cannot be said for all five doors, which
practically had to be trimmed and butt fitted on a trial and error basis.
Nothing too serious, just needing some extra attention. The wheels were filed to
look weighted, while simplistic brake lines and a steering harness from
stretched sprue were added to the main and nose legs respectively. All landing
gear bits, including wheel rims, were painted silver. Tires, brake lines and
nose leg harness were painted black, while the wheel wells and door innards were
painted a home brewed green zinc chromate.
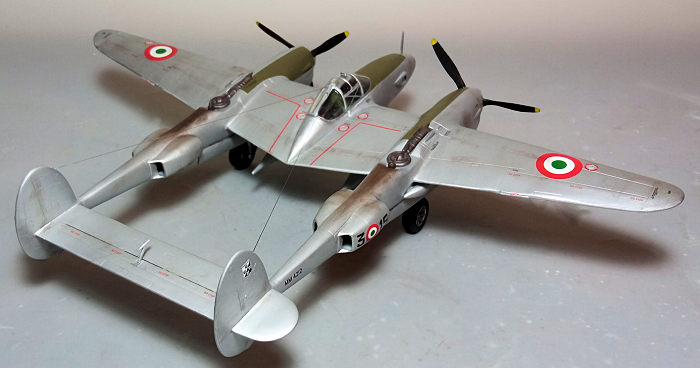
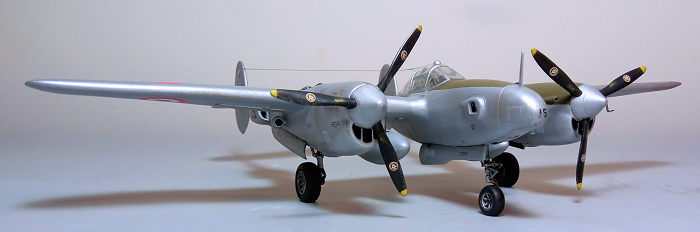
Next the distinctive supercharger exhausts were painted Mr Hobby Burned metal
and attached in position, followed by the wing tanks, the elevator mass balances
and the port underwing located pitot tube (the latter had its body painted
silver and its tip gunmetal).
Time for some weathering! Sure enough, AERFER manufacturing company refurbished
those planes thoroughly, but this did not stop me from first adding a black wash
allover to accentuate al engraved detailing (heftier on the landing gear area,
to add a used, oily look), followed by application of dark brown and black dry
pastels at all places where dirt and grime would reside. Of course, the
distinctive exhaust soot above each boom was also represented by dry pastels as
well (and I assumed the Regia Aeronautica piloti used rich mixtures to preserve
the engines, so my soot representation was on the heavy side). A satin coat gave
the bird its final hue.
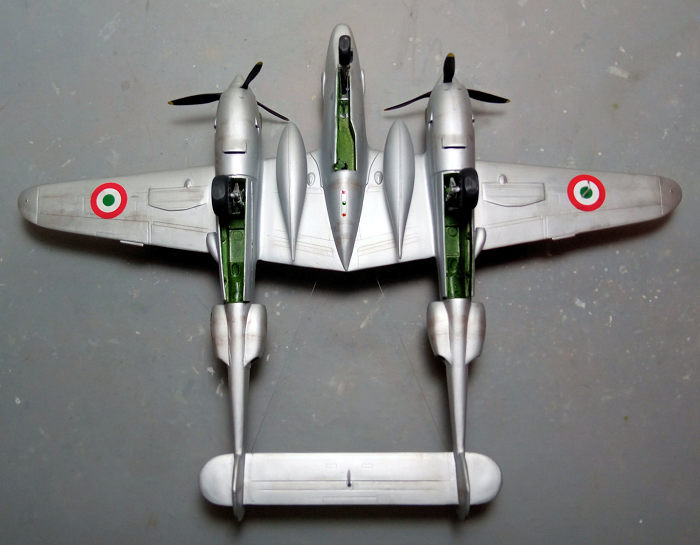
 The camera glasses were replicated by liquid crystal glue. The five piece canopy
was assembled and, after having its well defined framing hand painted, was
attached in position. This was an operation easier said than done, as I
struggled putting together the five pieces and coming up with a reasonably
aligned result. White glue was generously used to even the gaps. On second
thought, it might have been way easier to go for an open canopy, but some folks
(Yours Truly being definitely among them), find it too hard changing the habits
of a lifetime…
The camera glasses were replicated by liquid crystal glue. The five piece canopy
was assembled and, after having its well defined framing hand painted, was
attached in position. This was an operation easier said than done, as I
struggled putting together the five pieces and coming up with a reasonably
aligned result. White glue was generously used to even the gaps. On second
thought, it might have been way easier to go for an open canopy, but some folks
(Yours Truly being definitely among them), find it too hard changing the habits
of a lifetime…
The keyed props were assembled and attached. They had silver spinners, black
blades and yellow tips. Their nicely printed stencil decals were attached and
some silver dry brushing was applied to the outer area of their leading edges,
to represent abrasive wear.
The radio antenna mast was attached on the top of the nose (actually the mast
was molded-on with the one nose half, shaved off during sanding, but thankfully,
a spare was provided by the kit, to cater for the versions that had the mast
ventrally located). The aerial wires were represented by thin stretched sprue
pieces run from the fins to the top of the canopy. Finally, the wingtip and
ventrally located formation lights were represented by mini blobs of red, green
and orange clear paint, before calling the classy American-Italian lady done!
| CONCLUSIONS |
While not among the latest and greatest, this 1994 mold is a good, solid kit of
the iconic P-38: general shape looks correct, molding, while not perfect, is
acceptable, panel lines are finely recessed, overall detail is adequate,
transparencies are clear, instructions are nice and decals, though thick, were
nicely printed and behaved well.
Out of the box a fine representation of the iconic P-38 can emerge. The somewhat
complex construction requires a builder who has a few kits under his belt, with
the main areas of concern being the alignment of the booms and some fit issues
at the “usual” areas of the wings to booms and fuselage joint). Fit issues are
not an uncommon issue to all P-38 kits, except for the magnificent Tamiya P-38
(which comes at a price, though).
If you are not a beginner and fancying building a quarter scale P-38, the
Italeri/Academy mold is a good candidate, especially if found at a discount
price.
Happy Modeling!
Spiros Pendedekas
18 April 2025
Copyright ModelingMadness.com. All rights reserved. No
reproduction in part or in whole without express permission.
If you would like your product reviewed fairly and
fairly quickly, please
contact
the editor
or see other details in the
Note to
Contributors.