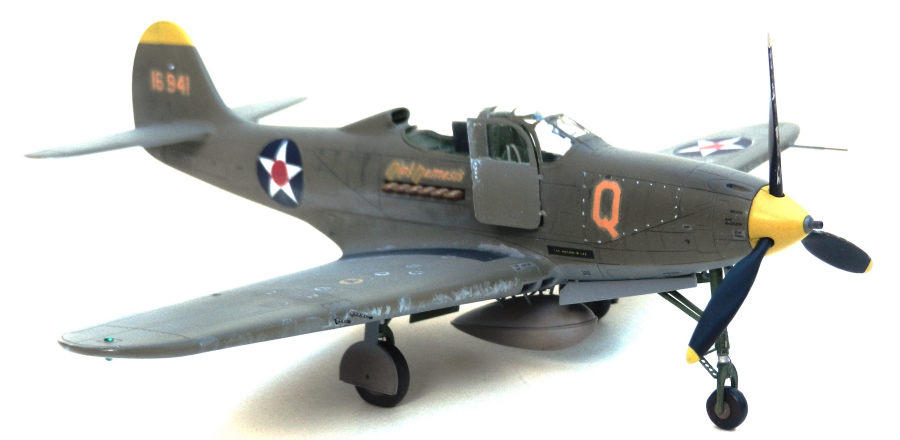
Eduard 1/48 P-39D Airacobra
| KIT #: | 8065 |
| PRICE: | CAD$25.00 'used' |
| DECALS: | Four options |
| REVIEWER: | Pablo Calcaterra |
| NOTES: | Profipack 2001 release |

| HISTORY |
The P-39 was the product of Bell’s proposal to the request issued by the USAAC on January 25, 1939 for a new Pursuit plane. Product of this competition were also the P-40, P-38 and the P-43. Though originally supercharged NACA tests showed that the plane was so draggy that only the Buffalo and biplanes were worse than it! Thus in order to make the plane more streamlined the supercharger was deleted, the plane’s performance at height was destroyed and the reputation of the Airacobra was born…
As the RAAF P-40s were bleeding to death in their fight against the Japanese over Port Moresby and when they were about to be wiped out after 44 days of combat, the P-39s of the 35th PS, 8th Group made their entry into the scenario on April 5 1942 led by Buzz Wagner. Flown by mostly inexperienced pilots and flying the wrong tactics in an unforgiving environment the P-39s suffered accordingly in the following days.
 The first
victory of the 36th PS took place on May 1. Two chutai of Tainan Kokutai Zeros
strafed Port Moresby’s airfields early in the morning. After their attack and
when on their way back to Lae they found a patrol of the 36th PS that was
returning to their base. During a very short combat 2nd Lt Don McGee shot down
FPO2c Arita. Even though he was low in fuel the pursuit pilot worked his
gunsight in front of the Zero and fired with 40 degrees deflection. The tracers
showed him that his aim was to the right. McGee corrected and the tracers flew
under the Zero. Correcting again (and with the luck that no other Zero was on
his tail) he aimed further ahead of his enemy and fired again, this time with a
15-degree deflection. Now the Zero was showered in the tracers. Having
apparently hit Arita (no smoke or fire came out of the stricken Japanese
fighter) the Zero rolled slowly to the left. Initially McGee thought about
chasing the Zero into the Split S he assumed the Japanese had started only to
realize that they were only 150 ft above the ground. The Zero smashed in the
jungle while the Airacobra brushed the top of the trees! Now catching up with
the victor other Zeroes chased McGee out to sea, hitting the P-39 in the wings
and tail. The Plexiglas was also hit and that same bullet removed McGee’s
sunglasses. He was flying Airacobra 41-6941 “Nip’s Nemesis” which is the subject
of this build. The P-39 was so severely damaged that it was used as a source of
spares.
The following day during an engagement over Port Moresby McGee shot down Sea1c Haruo Kawanishi. This Zero coded V-104 was seen to crash in mountain 40 miles away from Port Moresby. The plane was located 3 months later. Doug McGee was the only Airacobra ever to achieve two confirmed Zero kills in successive days! He went on to claim two more Zeros on May 29th (one Zero was actually confirmed shot down, another one crash landed back in Lae but it is not clear if it had been damaged in combat) and became an ace flying P-38s with the 80 FS in 1943. To the 3 confirmed and 2 probables flying P-39s we have to add 2 confirmed with P-38s and finally a Me-109 in 1945 flying with the 375th FG.
| THE KIT |
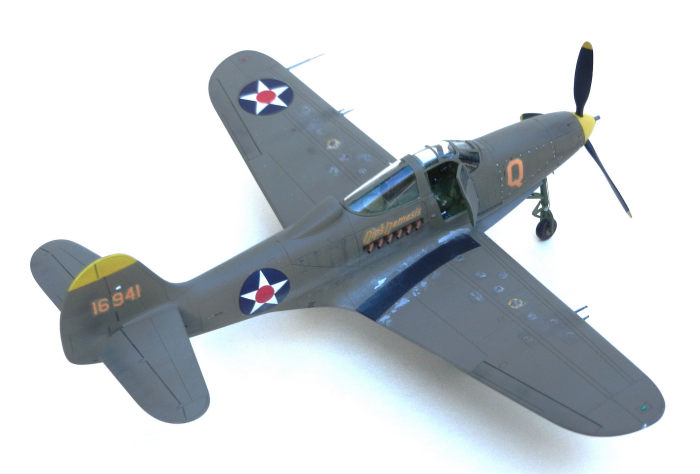 Moulded in
their typical olive drab plastic, Eduard’s kit all the parts you need to make an
Airacobra from the very first model to the last.
Level of detail is very good with very fine panel lines. It becomes excellent with the PE parts of the Profipack edition. It also has masks for the wheel hubs and clear parts (but probably due to the age these left some of the glue on the paper…and some on the clear parts after painting!!)
As well known, the trailing edge of the wings is a bit too thick but sanding can take care of this. Another contention point is the fact that the canopy is not as narrow as the fuselage. In my opinion this is a misconception. For these parts to be aligned properly you need to make sure that the deck behind the pilot is glued to the internal sides of the fuselage. This pushed the wall inward…and makes it align to the canopy. But more about this later.
Decals are excellent like always…but most of them I did not use (only the stencils as my kit was the one with French, Soviet, US, and Italian decals)
| CONSTRUCTION |
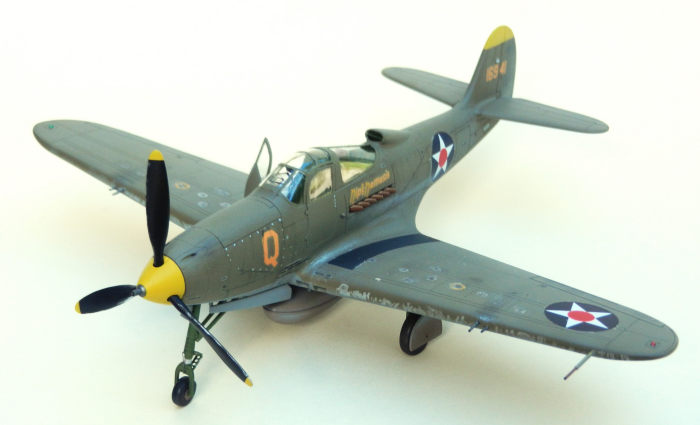 The cockpit
is great and the details that are added with the PE parts is outstanding. Some
of the wiring is hard to glue in place but otherwise there is more detail there
than probably needed. This means that at least you have to build the plane with
the right door open (left was seldom used because of the throttle levers were in
the way).
The nose weight that comes with the kit needs a bit of sanding as the edges are rough and don’t allow the fuselage sides to close completely.Following the instructions step by step ensures a very easy build.
As I only glued one side of the deck behind the pilot seat I did not “compress” the walls of the fuselage enough and this left a bit a of a step with the canopy and the top of the left door is not fully “closed”. But that was my fault.
To the windshield I added a PE ring gunsight, the armoured glass and the reflector gunsight following Eduard’s instructions for a D model. These details are not in the instructions of my kit as it was a Q model. I did not need any filler almost anywhere. Fit is almost perfect.
| COLORS & MARKINGS |
Once the kit had been assembled and masked, I sprayed a coat of light grey Vallejo primer, followed by yellow for the tip of the tail and the propeller hub. White was used in the position where the stars would be (then the white was masked with circles cut on Tamiya masking paper). Having masked the yellow portions I sprayed Neutral Gray on the undersides and Olive Drab for the top/sides. All paints are Vallejo.
Chipping was achieved with a mix of drybrushing and very careful application of aluminum with a very thin toothpick. As the environment was not very healthy for the planes (and pilots) I drubrushed sanded brown pastels in the places where mud would most likely build. With very diluted black paint in water, I simulated dirt, grime and oil stains on the fuselage.
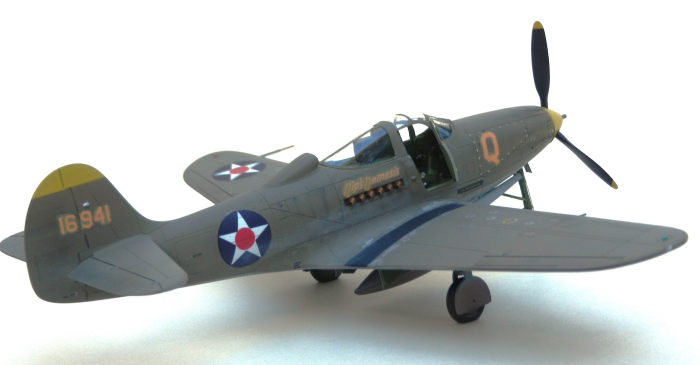 The model was
covered with several very light layers of Quick Shine which I believe is more
forgiving than Future (seems to be less runny) and less demanding than Vallejo’s
clear varnish (that requires very high pressure to spray this very thick
product…and still is not totally shiny)
I worked hard designing and printing the decals using the drawings available on line. I printed my own USAAC stars on clear decal paper. On white decal paper and after finding the most approximate Olive Drab colour that I could print I then designed the Q, Nip Nemesis and the tail serial number. Once these were in place I merged the edge of the decals onto the paint underneath using the same Vallejo Olive Drab being careful not to paint over the yellow ink! The US ARMY decals came from an Airfix P-40 as I had built it as one of my AVG planes.
On clear decal paper I designed and printed the name of the pilot as seen in many of the Moresby’s P-39s. They were in a black rectangle with yellow (?) fonts and placed before the right door and almost in line with the border of attack of the wings. I put a little rectangular white decal paper underneath the clear one. Most of the stencils on top of inspection doors were drybrushed with aluminum.
Everything was sealed under a coat of Model Master Clear flat varnish. Some of the decals were dirtied with another mix of black diluted with water. With very light air pressure and a very white diluted paint I added the exhaust streaks on the sides of the fuselage.
| FINAL CONSTRUCTION |
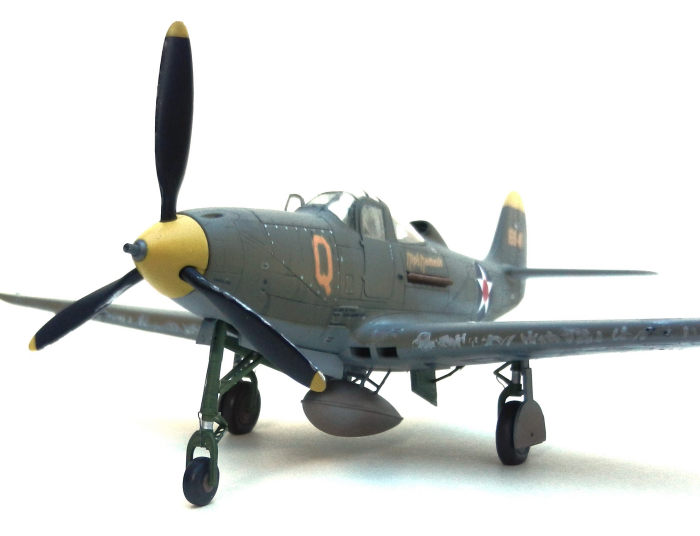 Walking from
the middle out I started to add the last details under the plane: drop tank
(pretty challenging to set up I must say), the landing gear doors and wheels.
Flipping the plane on her legs I removed the masking from the canopy and found
that some of the glue had stuck to the clear parts and was impossible to remove.
I had to sand the glue as much as I could and then use Future to restore the
lost shininess. I attached the opened right door, the machine guns one the wings
and using of those Tamiya rubber parts that I had left from another kit I
attached the propeller in place with the 37 mm gun.
Exhausts were painted rust and drybrushed with bronze. The opening of these was painted black. Pitot tube was hand brushed olive drab with the tip painted in rust and a dot of black for the opening. Navigation lights were painted using my usual technique of silver base and clear red/green Model Master paints while white was used for those on the tail.
| CONCLUSIONS |
The Eduard Airacobra is a great kit. It really does not need the PE parts but these take it to a higher level with all the handles, brake lines, wires, etc. I am looking forward building a couple more as the P-39 is gaining a place in my heart with her streamlined design and tricycle landing gear.
| REFERENCES |
P-39/P-400 Airacobra vs A6M3/3 Zero-Sen by M. Claringbould (Osprey)
P-39 Aces by J Stanaway and G Mellinger (Osprey)
Scalemates (for the instructions for the windshield of a D model)
Pablo
Calcaterra 22 November 2024 Copyright ModelingMadness.com. All rights reserved. No
reproduction in part or in whole without express permssion from the editor. If you would like your product reviewed fairly and fairly quickly, please
contact
the editor or see other details in the
Note to
Contributors.