AMC 1/72 Curtiss XP-40Q-2 Warhawk
| KIT #: | 7205 |
| PRICE: | $21.00 |
| DECALS: | one option |
| REVIEWER: | Peter Burstow |
| NOTES: | Resin kit |
| HISTORY |
As a last gasp of the P-40 series, the XP-40Q was another attempt by Curtiss to get something into production. After the failures of the XP-42, XP-46, XP-53, XP-55, XP-60 and XP-62, Curtiss were desperate to get a modern fighter going, and not just build other companies designs.
 Three
XP-40Qs were built, all based on the P-40K, and all different in detail. The
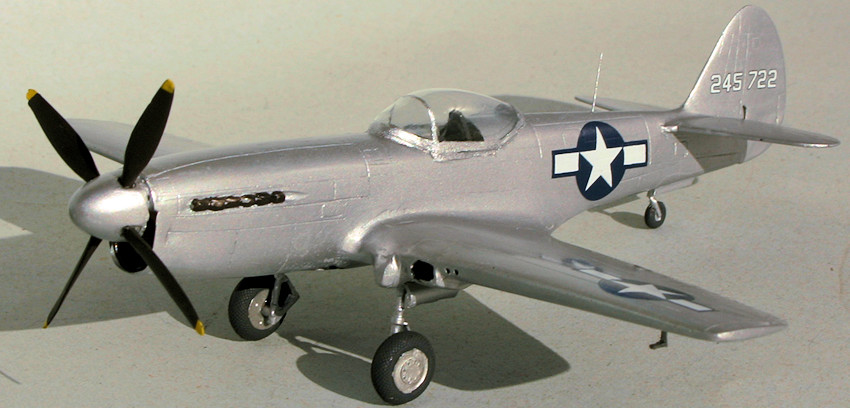
XP-40Q-2-CU, which the kit models, was a re-build of the first P-40K-1. The tail
had the 20 inch “long tail” modification fitted, and the nose was extended by
around two feet. An Allison V1710-121 engine was installed, with a two-stage,
two-speed supercharger. The wing was modified with the centre section thickened
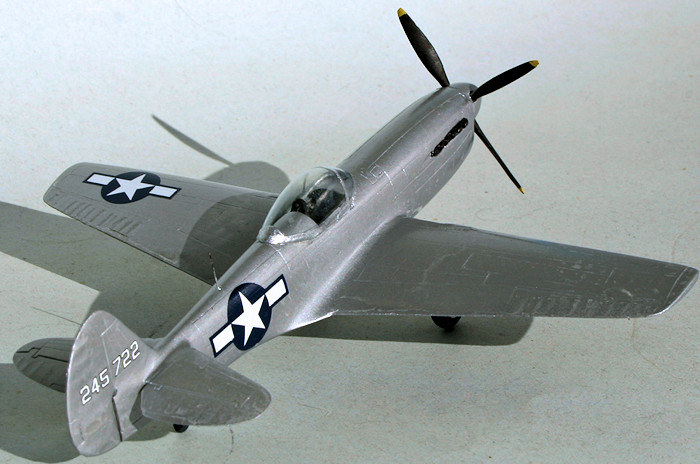
to house the radiators, and later the tips were squared off. The rear fuselage
was cut down and a bubble canopy fitted. Provision was made for four .50 calibre
machine guns in the wings.
Three
XP-40Qs were built, all based on the P-40K, and all different in detail. The
XP-40Q-2-CU, which the kit models, was a re-build of the first P-40K-1. The tail
had the 20 inch “long tail” modification fitted, and the nose was extended by
around two feet. An Allison V1710-121 engine was installed, with a two-stage,
two-speed supercharger. The wing was modified with the centre section thickened
to house the radiators, and later the tips were squared off. The rear fuselage
was cut down and a bubble canopy fitted. Provision was made for four .50 calibre
machine guns in the wings.
The Q-1 and Q-3 didn't last long, both being written off in 1944. The Q-2 was the fastest of the P-40 series at 422 m.p.h., but still was outperformed by the P-47 and P-51, and was not awarded a production contract. The XP-40Q-2 survived the war and was bought by racing pilot Joe Ziegler. It crashed after engine failure during the 1947 Thompson Trophy race.
| THE KIT |
Coming in a tiny box,
nearly falling apart, were 20 odd resin parts, two white metal undercarriage
legs and a vacform canopy. The resin parts are mostly well cast, with restrained
engraved panel lines and sharp
 details.
There are a number of bubbles and glitches, but nothing too bad.
details.
There are a number of bubbles and glitches, but nothing too bad.
There is not much in the way of cockpit details, a bit of structure on the fuselage sides, a seat, stick and instrument panel. The propeller blades are separate, as beloved by many modellers. The small decal sheet had four 'stars and bars' in an odd shade of blue, two serials for the second Q, and the obligatory shark mouth.
The instruction sheet has a
cartoon like exploded diagram and a side view profile. It showed a part which I
couldn't identify or find, more about this later.
| CONSTRUCTION |
The first step on any resin kit is the parts clean-up, the only difficulty was the fuselage halves, the pouring block extended well into the part, and needed careful carving. After a sand to tidy the edges, all the parts were washed in warm water with laundry soap and a stiff brush, then left on a paper towel to dry.
As on the real aircraft, the cockpit sits on the wing centre section, but there was only a tiny indent to indicate the position of the control stick. The control stick was put there, and the seat positioned a little behind it. I then added the tail wheel well, joined the fuselage halves and positioned the instrument panel and rear bulkhead from underneath.
I then tried to fit the
fuselage onto the wing, the wing moulding had two ridges matching up with a
cut-out in the fuselage halves, a rather odd way of doing things. The main
problem was that the ridges were about 3mm too far apart to suit the fuselage,
or the fuselage was far to narrow. I couldn't think of an easy way to
 widen the
fuselage, so it was the ridges that needed to go, but that would leave a huge
hole in the fuselage sides.
widen the
fuselage, so it was the ridges that needed to go, but that would leave a huge
hole in the fuselage sides.
I found that I could just match up the parts with the fuselage just balanced on the inner edge of the ridges. Out with the riffle files, and a lot of elbow grease later the ridges were wafer thin. This was a really tedious job, with a break every few minutes to test fit. Eventually it was close enough and after a wash up of the wing, I joined the fuselage. There still was a step and gaps, but it didn't take long to file the last of the protruding ridges away and then to sand the area smooth. I filled the resulting gap with super-glue and called it a night. Next day a couple of layers of Mr Surfacer and a bit more sanding tidied up the area. This was really bad engineering, as even if it had all fitted, there still was a seam in a prominent area on the fuselage sides.
After all the trials of the
wing to fuselage joint the rest of the assembly was relatively plain sailing.
The tail surfaces were added and the joints cleaned up, no problems with the fit
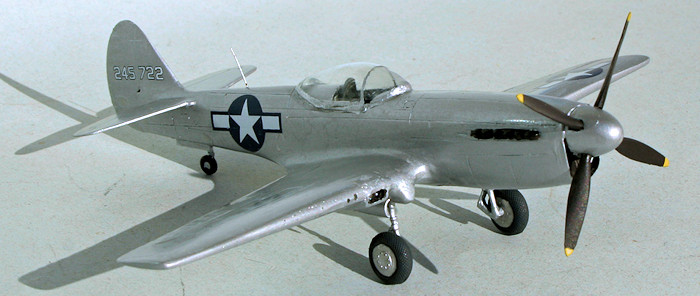
in this area. Next I test fit the spinner, and this is were the mysterious
missing part made it's absence felt. It was an intake lip, under the spinner,
similar but not the same as the familiar intakes on other P-40s. Similar enough,
I thought, so I raided the bin of doom, home of many scrapped kits, including a
couple of P-40s. There was no way an old Revell or Airfix intake was going to
fit, so try something else. Using a bit of plastic card strip, I
 attached
it at one end, the slowly bent it around the opening, applying a dab of
super-glue every couple of millimetres. Soon I was all the way around and was
able to cut it to exact size and glue it. I went over the joint with more
super-glue, and left it to cure. A bit of careful thinning of the inner surface
and the intake lip was done, and I then fitted the spinner.
attached
it at one end, the slowly bent it around the opening, applying a dab of
super-glue every couple of millimetres. Soon I was all the way around and was
able to cut it to exact size and glue it. I went over the joint with more
super-glue, and left it to cure. A bit of careful thinning of the inner surface
and the intake lip was done, and I then fitted the spinner.
Now came the familiar work
common to most kits, filling the seams and bubbles, sanding, filling again and
sanding again. The main difference between a resin kit and an ordinary plastic
kit was the use of super-glue, of the thick variety, for filling larger gaps. I
then gave it a prime, which highlighted more areas needing attention. For me
super-glue's big disadvantage is it's relative invisibility, so it's hard to see
what you have done. The few remaining areas were small, and I used Mr Surfacer
500 then 1000 to deal with them. More sanding, with 800 and 1000 grit paper, a
thorough wash and it was ready to paint.
| COLORS & MARKINGS |
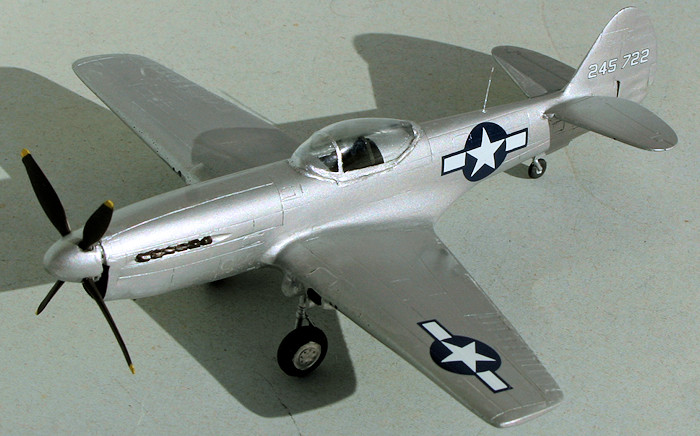
I chose an all metal scheme and thought, everything else should be the same colour, so I added the white metal undercarriage legs, the tail wheel and the doors. I used a Tamiya rattle can, TS 76 Mica Silver. Two or three coats gave a good glossy finish ready for the decals.
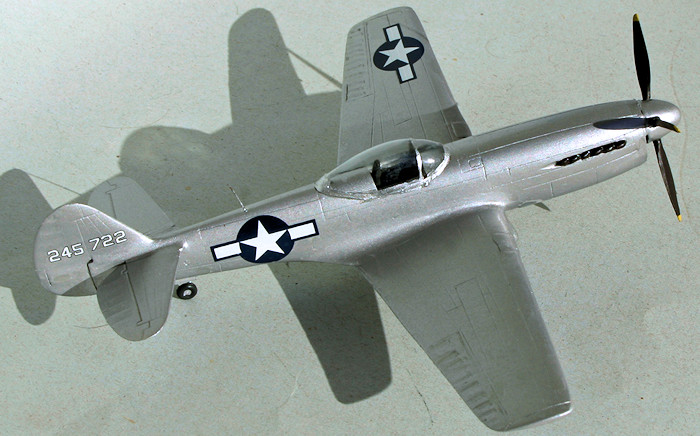 The
supplied decals worked well, very thin, conformed well and no silvering. I
didn't use the shark's mouth, none of the several photos I found of the Qs
showed it. I gave the model an overall spray of Long Life floor polish to seal
the decals. Some detailing of the cockpit, exhausts, inlets and gun-ports
finished the painting.
The
supplied decals worked well, very thin, conformed well and no silvering. I
didn't use the shark's mouth, none of the several photos I found of the Qs
showed it. I gave the model an overall spray of Long Life floor polish to seal
the decals. Some detailing of the cockpit, exhausts, inlets and gun-ports
finished the painting.
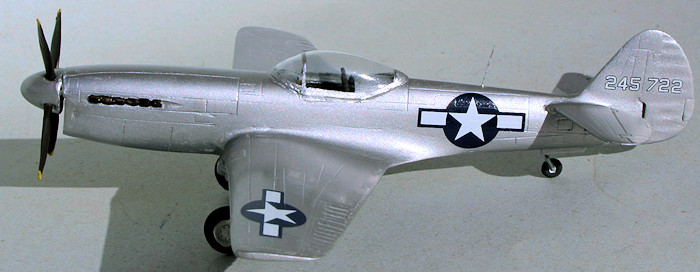
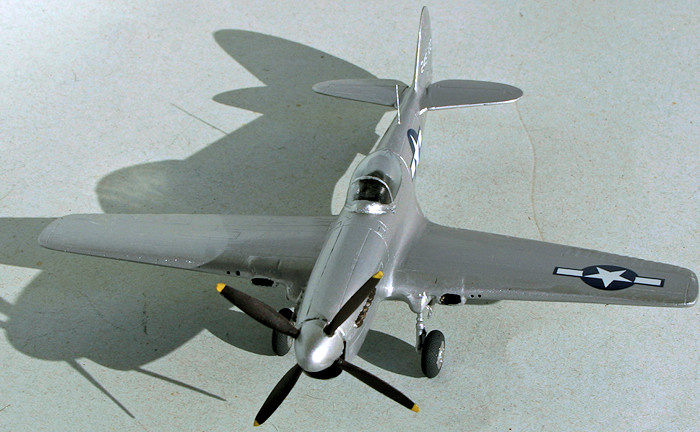
Just a few bits to go, but
mostly difficult. First the vacfomed canopy, after trimming I attached it with
white glue, and hand painted the framing with Tamiya XF-16 'flat aluminium',
didn't look the best. I then added the wheels and a whip antenna made from
fishing line. Last of all the propeller blades, always a tricky assembly, I
found slow super-glue the best way as it gives you plenty of fiddle time.
| CONCLUSIONS |
 One of
the more difficult kits of a single engined WW2 fighter I have attempted. It
turned out OK in the end but was tedious and a lot of work. Now I have a
different and unusual P-40 in the display case.
One of
the more difficult kits of a single engined WW2 fighter I have attempted. It
turned out OK in the end but was tedious and a lot of work. Now I have a
different and unusual P-40 in the display case.
Not recommended, mainly
because of the difficulty fitting the wing to the fuselage. If you must have a
XP-40Q in your collection the only alternative I know of is a Pegasus kit from
1995, also of the Q-2.
| REFERENCES |
Richard S. Dann, P-40 Warhawk, In Action 205, Squadron Signal, Carrolltown, 2007
Peter Burstow
January 2016
Copyright ModelingMadness.com
If you would like your product reviewed fairly and fairly quickly, please contact the editor or see other details in the Note to Contributors.