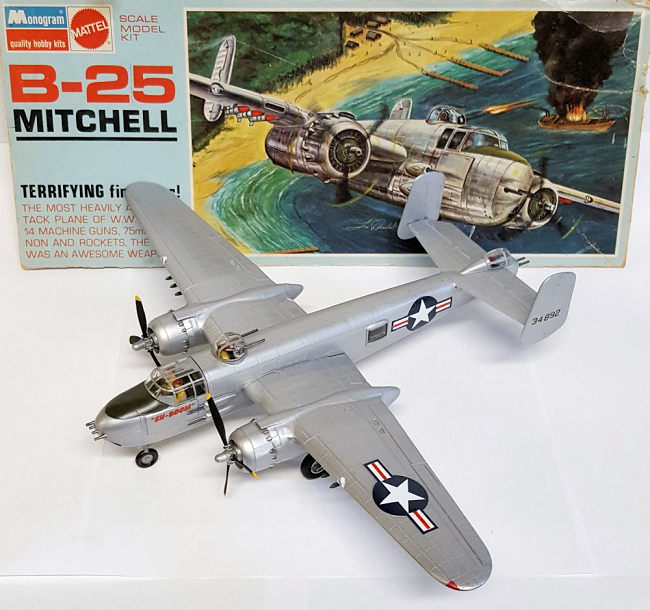
Monogram 1/68 B-25H Mitchell
| KIT #: | 6819 |
| PRICE: | $ |
| DECALS: | One option |
| REVIEWER: | Chris Mikesh |
| NOTES: |
| HISTORY |
(From instruction sheet, edited.) The immortal B-25 Mitchell was the best all-around medium bomber of World War II. Regarded by pilots as sweet handling, and highly adaptable in roles varying from carrier launched bomber to tactical photo Recon, the B-25 distinguished itself in all theatres. The B-25 with 14, 50 caliber machine guns, 75 mm cannon, rockets and a 3200 lb. bombload, was the most potent attack plane of the war.
| THE KIT |
This is a kit that goes back to
1955, early in the Monogram era of all plastic kits. This particular kit that I
built was produced in 1967. Many of you remember this kit as something you could
cut your “model building teeth” on. It is older than most of us remaining who
built models.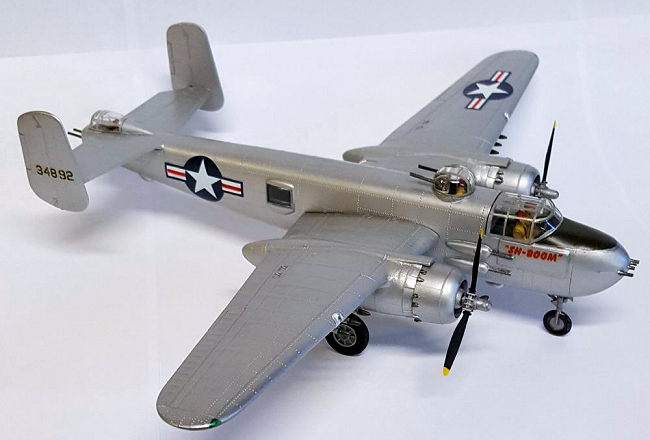
This kit was a sweet build when I was 12, and it did not let me down in 2022 either. Although it is a very rudimentary kit, it is a model many of us compared all other B-25's to. The surface details are highly exaggerated and includes raised lines for the decal markings. All rivets are gigantic in the scale of the model as well as the raised panel lines. So, by today's standards, this is not competitive compared to more modern B-25's. There is no interior except for the crew, and even a couple of those guys are cut in half and skewered in the side on a post. There is no wheel well to speak of, and the landing gear doors are molded into the open position. I added a nose gear door from scrap plastic sheeting.
But on the plus side, this is made from that good swirly silver hard plastic that all of us enjoyed as beginner modelers. You could drop the model down the stairwell, and it would cartwheel landing upside down, with no broken parts (that were not already broken off). Back then tube glue made everything as hard as a rock. Plastic back in the good old days did not have a vinyl texture we see today. I miss the good old days!
The instructions are pretty well laid out in picture format with a little bit of painting and assembly directions. There are not too many parts, or complex structures to pre build. The plastic is pretty thick in all respects.
| CONSTRUCTION |
Any novice can pick up this kit and
dive in. But an experienced modeler would probably cause more problems for
himself by making a simple kit complex. I started out with cleaning up the touch
points where I will be gluing. There was not a lot of flash, but seams are very
evident. Secondly, I added 12 BBs inside the nose cone with super glue. The
instructions indicate to install the crew onto their posts (ouch!) before gluing
the two fuselage halves together. I set the crew a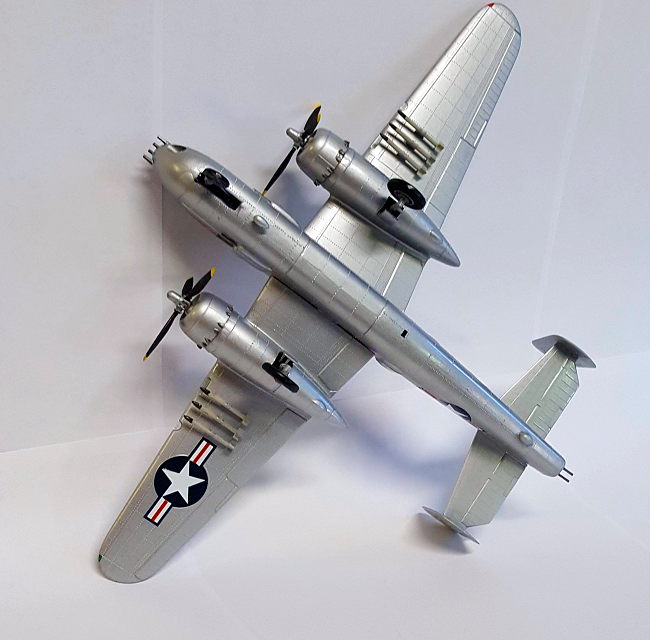 side
to be painted shortly, (there is room to install them later) added the waist gun
windows and glued the two fuselage halves together. Next were the two wing
halves, and they fit together perfectly. The engine nacelle halves were also
assembled but set aside to cure and added later. The next day, I tackled the
seam lines. Even for a 55-year-old kit there was not too much sanding and
correcting to do. However, in the process of sanding the seams, the builder will
be removing rivets and details. I added masking tape over the rivets to protect
them while sanding. But I still needed to replace some rivets by pressing the
point of a #11 Xacto knife where the rivets should have been and pry up the
plastic gently. For the most part this appeared to work. Once that was completed
and polished, I added the one-piece elevator. This also requires seam
corrections, as the gap is a scaled down Grand Canyon. I filled that with
stretched sprue, and sheet stock, using liquid cement so it would be more
pliable.
side
to be painted shortly, (there is room to install them later) added the waist gun
windows and glued the two fuselage halves together. Next were the two wing
halves, and they fit together perfectly. The engine nacelle halves were also
assembled but set aside to cure and added later. The next day, I tackled the
seam lines. Even for a 55-year-old kit there was not too much sanding and
correcting to do. However, in the process of sanding the seams, the builder will
be removing rivets and details. I added masking tape over the rivets to protect
them while sanding. But I still needed to replace some rivets by pressing the
point of a #11 Xacto knife where the rivets should have been and pry up the
plastic gently. For the most part this appeared to work. Once that was completed
and polished, I added the one-piece elevator. This also requires seam
corrections, as the gap is a scaled down Grand Canyon. I filled that with
stretched sprue, and sheet stock, using liquid cement so it would be more
pliable.
Then I discovered that the nose weight was still not enough. This is a very tail-heavy model and added another 16 BBs into the fuselage nose in front of the pilots. (That should be enough!) After cleanup on the wings, they were dry fit to the fuselage, and it was nearly perfect.
Next, came the rudders, and they attached perfectly as well. The propellers were not added yet but used white glue to temporarily attach the engine cowling before painting. Then the waist gun windows were masked. With all the primary components on the model, I started to look at paint.
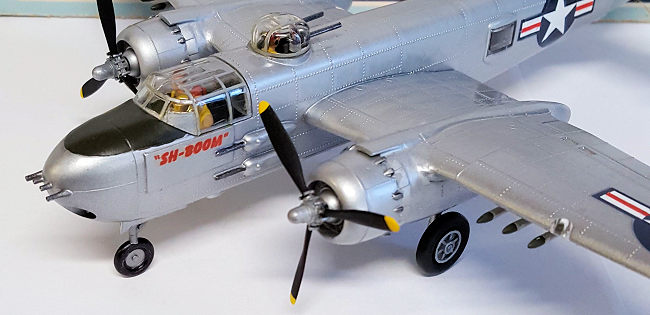
| COLORS AND MARKINGS |
 I didn't
have to go very far to find a can of Tamiya gloss aluminum (TS-17). Tamiya has
always given a very satisfying result using their spray cans. Overall, the spray
paint is very acceptable for a model such as this. The wheels and propeller
blades are flat black, and the guns are Tamiya metallic gray. The five-inch
rockets are painted neutral gray with an olive warhead. The same olive is used
on the anti-glare panel. The red and green navigation lenses were produced by a
Sharpie. The silver Sharpie is the same silver as the Tamiya aerosol and comes
in handy for touch ups.
I didn't
have to go very far to find a can of Tamiya gloss aluminum (TS-17). Tamiya has
always given a very satisfying result using their spray cans. Overall, the spray
paint is very acceptable for a model such as this. The wheels and propeller
blades are flat black, and the guns are Tamiya metallic gray. The five-inch
rockets are painted neutral gray with an olive warhead. The same olive is used
on the anti-glare panel. The red and green navigation lenses were produced by a
Sharpie. The silver Sharpie is the same silver as the Tamiya aerosol and comes
in handy for touch ups.
For the most part, the decals were useless. It is evident that the kit was stored in an attic or garage and the decals pulled from the paper. Extra Decal produces very good decals in various sizes, and these settled onto the ridges easily using Microsol, and Microset. These replaced the kit decals, and almost fit perfectly. The tail code and nose art (“SH-BOOM”) were the only things that were salvageable from that decal sheet.
| FINAL BITS |
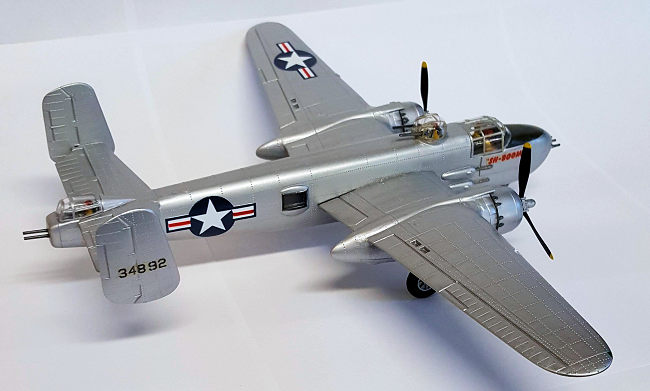
 The canopy,
tail gunner, and turret framing were completed by using silver painted masking
tape. Aizu tape is very thin and comes in very small sizes. The framing is 1
millimeter tape painted silver and delivers a very sharp line. Once all the
framing is completed, the clear parts were dunked in future floor finish to seal
everything permanently. The crew was then skewered onto their posts. A quick
airbrushed coat of Future over all to cover the decals and seal the paint, gave
it a more natural look, and covered many of my mistakes.
The canopy,
tail gunner, and turret framing were completed by using silver painted masking
tape. Aizu tape is very thin and comes in very small sizes. The framing is 1
millimeter tape painted silver and delivers a very sharp line. Once all the
framing is completed, the clear parts were dunked in future floor finish to seal
everything permanently. The crew was then skewered onto their posts. A quick
airbrushed coat of Future over all to cover the decals and seal the paint, gave
it a more natural look, and covered many of my mistakes.
But the model is still barely on three wheels. The engine cowlings were removed, to add the propellers, hubs, and 5 more BBs in each cowling then glued back into place. The wheels and rockets were permanently added. All clear parts were glued into place using Elmer’s glue (dries mostly clear).
This kit was purchased over the Internet at an extraordinary price! (I'm embarrassed to tell you how much I paid for it! LOL!) But I really wanted it!
Chris Mikesh
11 October 2022
Copyright ModelingMadness.com. All rights reserved. No reproduction in part or in whole without express permission.
If you would like your product reviewed fairly and fairly quickly, please contact the editor or see other details in the Note to Contributors.