| KIT #: | H-216 |
| PRICE: | ~$21.00 |
| DECALS: | Two options |
| REVIEWER: | Chris Mikesh |
| NOTES: | Both decak options from original Revell Kits |
| HISTORY |
From instruction sheet on original Revell Kit. The Japanese were advancing steadily across the Pacific. Guam, Wake, Hong Kong, and Singapore had fallen. In the Philippines, General Wainwright and the remnants of his force were making a brave, but hopeless stand on Corregidor.
 On April 18,
1942, 800 miles from Tokyo, Brigadier General James H. Doolittle shepherded 16
B-25s from the aircraft carrier Hornet to the heart of the Japanese mainland.
The mission required a plane that had the range to bomb Tokyo and the ability to
take off from a short-range carrier deck just 800 feet long. Only the B-25 could
make this short run take off and fly the range. Every spare ounce of weight was
stripped from the plane to make room for fuel tanks. Even the lower turret was
removed. To discourage enemy attack, fake guns made of wooden broomsticks were
installed in the tail. The decoy worked. Daringly flying in a tree top level,
the Raiders bombed Tokyo and other targets without a single loss to enemy fire.
Tremendously boosting American morale, the Doolittle Raid became one of the most
famous actions of the Second World War. He exposed Japan’s vulnerability to air
attack and forced the Japanese to keep at home many of its fighter planes.
On April 18,
1942, 800 miles from Tokyo, Brigadier General James H. Doolittle shepherded 16
B-25s from the aircraft carrier Hornet to the heart of the Japanese mainland.
The mission required a plane that had the range to bomb Tokyo and the ability to
take off from a short-range carrier deck just 800 feet long. Only the B-25 could
make this short run take off and fly the range. Every spare ounce of weight was
stripped from the plane to make room for fuel tanks. Even the lower turret was
removed. To discourage enemy attack, fake guns made of wooden broomsticks were
installed in the tail. The decoy worked. Daringly flying in a tree top level,
the Raiders bombed Tokyo and other targets without a single loss to enemy fire.
Tremendously boosting American morale, the Doolittle Raid became one of the most
famous actions of the Second World War. He exposed Japan’s vulnerability to air
attack and forced the Japanese to keep at home many of its fighter planes.
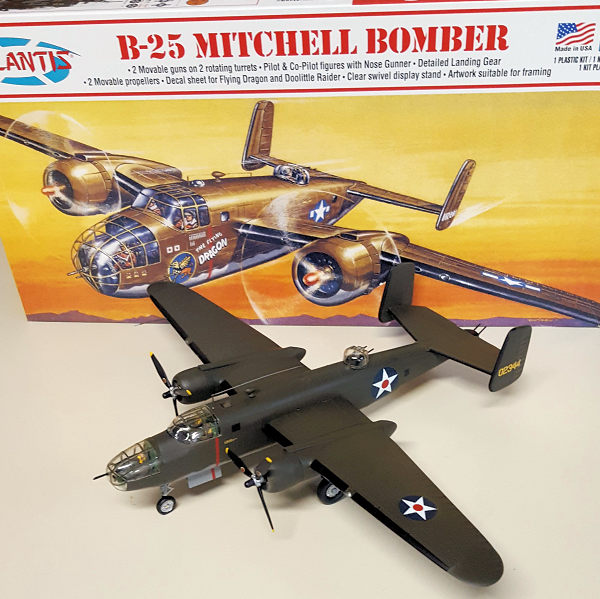
| THE KIT |
 The molds
date back to 1955 (Scalemates.com) and this issue is from 2019. This version
includes decals for Doolittle’s “Pacific Raiders” version as well as the earlier
“Flying Dragon”.
The molds
date back to 1955 (Scalemates.com) and this issue is from 2019. This version
includes decals for Doolittle’s “Pacific Raiders” version as well as the earlier
“Flying Dragon”.
As a young boy, I first built this kit in 1965, and fell in love with the B-25. Every B-25 I looked at was judged against that model. Well, ya gotta start somewhere! To date, I’ve built 8 of these kits (and still didn’t get it right!).
Your expectations go back to the Revell kit, and it is fulfilled as you see the traditional Olive brown plastic in an oversized box. There are 2 fuselage halves, an undersized cockpit, wings, engine nacelles and sadly shaped engine cowls. But then your eyes search out the single piece elevator and 2 rudders. Like a kid, you push the rudders onto the elevator and smile. (Where’s my glue??) For all of its flaws, it is still a model you grew up with right beside your GI Joe. (Today it’s R. Lee Ermey.)
| CONSTRUCTION |
Let’s get started! Paint the Flight Deck Zinc Chromate, including the seats of the pilots, fuselage walls, and bombardier nose. Pilots and Bombardier are painted brown except for flesh in the right places. The control column is black, and the instrument panel is black. Dry brush white to make details stand out. Glue pilots in place after everything is painted.
DO NOT put the blisters on the turrets, and DO NOT attach the bombardier nose on yet (you’ll thank me later). Glue the fuselage halves together with the turret base, nose gear, and Cockpit. DRY FIT…DRY FIT…DRY FIT! You may find that the locator pins on the fuselage to be too big and will force a gap. In fact, I just took them all off.
 Wing and
nacelle assembly is very straight forward. But you may want to wait to glue on
the cowling until later. If you do put them on, use white glue, and put the
cowls on temporarily. You will discover the cone in the back of the nacelle is a
poor fit and will require attention. You will also find a huge gap between the
wing tips and the wings that will need filler.
Wing and
nacelle assembly is very straight forward. But you may want to wait to glue on
the cowling until later. If you do put them on, use white glue, and put the
cowls on temporarily. You will discover the cone in the back of the nacelle is a
poor fit and will require attention. You will also find a huge gap between the
wing tips and the wings that will need filler.
Back to the fuselage: Those seams are going to need some help. It’s up to you how you want to deal with it. Since you removed the locator pins most of the seams may line up ok now. But a 1955 kit is not a 2016 Hasegawa kit and will need to be filled. Where does the nose weight go? Under the flight deck and in the engine cowlings. I used a whole 1-inch car wheel weight in the nose, AND 4 BBs in the cowlings. IT STILL tends to be a tail sitter after all is assembled because the tail is near solid. Looking at the 48 scale models (Accurate Miniatures) there is a wall and crawl space behind the bombardiers station in the nose. I glued some card stock behind the Bombardier and cut the crawlway in and then added the bombardier nose. This covers up the nose weights and adds accuracy. (You’re welcome.) Looking at photos of the real B-25s on the Hornet, the additional nose gun was omitted and taped over on Doolittle’s plane.
Dry fit the wings, and tail assembly – DO NOT GLUE yet. Once you have the fit where you want it, get your paints ready. But a note on the tail assembly: it is a poor fit in modern standards. Clip off the fore and aft guides of the elevator. These generate the poor fit. Don’t glue the rudders on yet either. You may want to remove the former brand tab on the bottom of the elevator also.
| COLORS & MARKINGS |
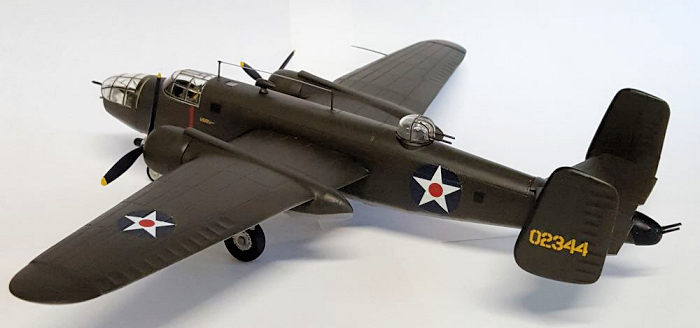
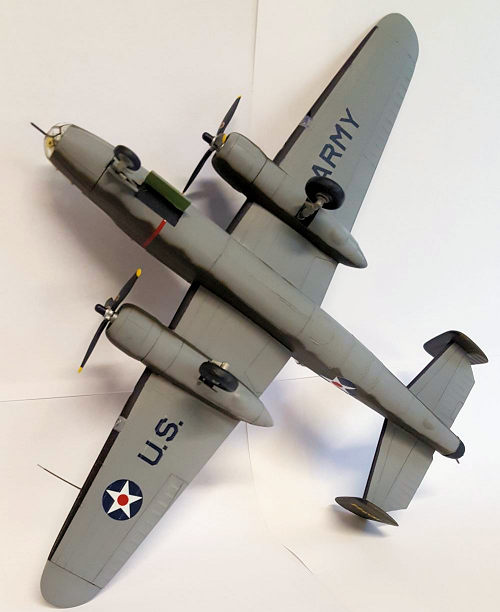 So, now
you have your major components laid out. Paint the fuselage and bottom parts
gray. I used Tamiya AS-7 Spray. EXCELLENT! Recommended. Mask off the areas
you want gray, and dry brush the Olive as recommended. I used Tamiya XF-62
Olive Drab (it’s more brown than green). Next mask the edges where you want
black leading edges and paint or use a Sharpie for the black. (Yes, a
Sharpie. It doesn’t run like paint and is not thick.)
So, now
you have your major components laid out. Paint the fuselage and bottom parts
gray. I used Tamiya AS-7 Spray. EXCELLENT! Recommended. Mask off the areas
you want gray, and dry brush the Olive as recommended. I used Tamiya XF-62
Olive Drab (it’s more brown than green). Next mask the edges where you want
black leading edges and paint or use a Sharpie for the black. (Yes, a
Sharpie. It doesn’t run like paint and is not thick.)
Now assemble your primary components. It’s already pre-painted in the hard-to-reach areas. The main landing gear is too short. Before glued in, DRY FIT! Don’t insert the main gear into the sockets all the way, so the plane sits level. Mine is nose high. Oops!
Atlantis did a great job or reproducing the Revell decals with some upgrades like propeller labels, and some yellow stencils. My decals were rather thick and took a long time to free from the paper. I needed a double coating of MicroSol and MicroSet, and they still silvered. Be on the lookout for decals lifting and get a coat of Future or another clear coat on them as soon as possible because of the decals breaking like mine.
| FINAL BITS |
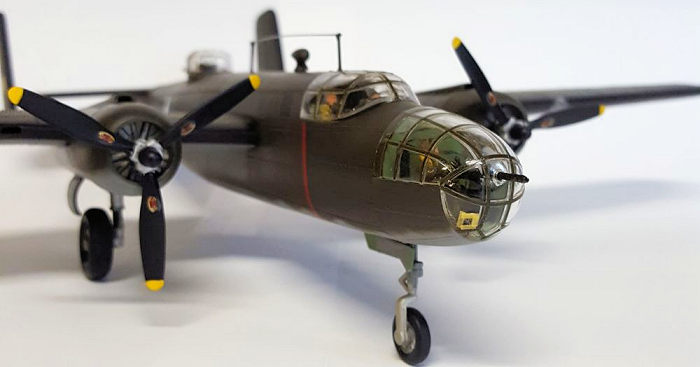
The Atlantis kit (and probably the Revell kit) has a clear sprue that is perfect for the wing landing lights. Simply use a rounded file to put a groove into the wing and glue a piece of the clear sprue and shape it to the wing.
All pictures I’ve seen of a B-25B has a flat pane of glass instead of the kit provided observation dome. I squared it off to 6mm square and painted it black along with all other fuselage windows.
 Tail Cone:
The kit has a solid tail cone. Real B-25Bs had a clear tail cone and two guns.
If you can make a clear tail cone, go for it. I painted it semi-gloss black and
added the guns from the lower turret (Doolittle). You can’t fake clear too
easily.
Tail Cone:
The kit has a solid tail cone. Real B-25Bs had a clear tail cone and two guns.
If you can make a clear tail cone, go for it. I painted it semi-gloss black and
added the guns from the lower turret (Doolittle). You can’t fake clear too
easily.
The fuselage radio masts were made of sprue as was the wing pitot tube. Silver stretched sprue is the radio antenna.
There is no exhaust port for the engines. You may want to fashion some when you build the kit.
Clear parts are a problem on this kit. The ridges of the frames are on the inside, not outside. Easy fix: Aizu makes several sizes of Micron Masking Tape. Most of the framing is actually painted 0.7mm or 2mm masking tape and placed appropriately. Since there is no ridge, it lays down perfectly. More tedious is the patch over the extra nose gun hole. Dip in Future Floor finish to lock everything in place.
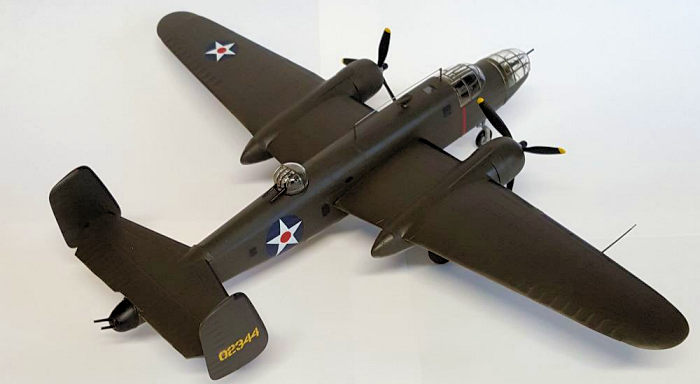
| CONCLUSIONS |
Thank you Atlantis for bringing back these ‘Box-Scaled’ kits. This completes my “Pacific Raiders” Series. This model is not contest capable (unless ‘build the same kit’ competition). But no matter what – it will bring a smile to your face. Thanks for the Memories.
3 May 2022
Copyright ModelingMadness.com. All rights reserved. No reproduction in part or in whole without express permission.
Thanks to me for picking this one up when it was on sale.
If you would like your product reviewed fairly and quickly, please contact the editor or see other details in the Note to Contributors.