| KIT #: | 72518 |
| PRICE: | $25.00 on sale |
| DECALS: | Three options |
| REVIEWER: | Ryan Grosswiler |
| NOTES: | All injected. Also boxed by Italerei and Revell. |
| HISTORY |
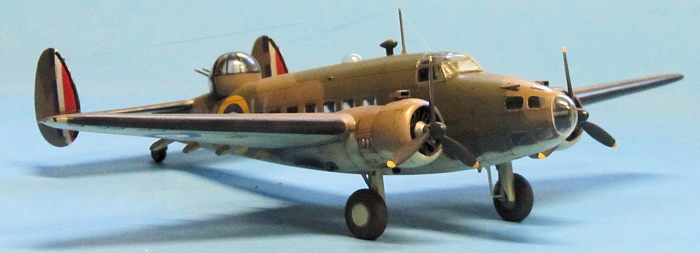
Despite its porky appearance, this
airliner-turned-bomber was the firstborn of the most successful family of Allied
patrol and attack aircraft of the entire Second World War, starting with the
Hudson and ending up with the bigger and slower but longer-legged and much more
devastating PV-2 Harpoon.
A direct
development of the Model 14 regional airliner, itself a ground-breaker in
straight line performance and history-maker in that it carried UK PM Neville
Chamberlain to and from his infamous "Peace for our Time" dope-deal with Hitler
("Hey! Let's throw the Czechs under the bus and stick our heads back in the sand
for a while longer!"). The British Purchasing Commission, much more connected to impending re back then--produced a detailed plywood mockup of
the proposed configuration in 24 hours. Sir Arthur Harris, the man pulling the
strings behind the purchasing commission's decisions and one to gain greater
fame as the head of the RAF's bomber offensive against Germany much later, was
sold.
back then--produced a detailed plywood mockup of
the proposed configuration in 24 hours. Sir Arthur Harris, the man pulling the
strings behind the purchasing commission's decisions and one to gain greater
fame as the head of the RAF's bomber offensive against Germany much later, was
sold.
An impulse purchase by an air force desperate for combat aircraft from any source, it proved fortuitous. Not only would the airplane turn out to be an effective patrol and ASW aircraft, but was surprisingly maneuverable as well, a difficult target when intercepted. Seeing service not only in Europe but in the Pacific as well, in Australian hands, the Hudson went into action side-by-side with the US Navy's further-developed PV-1 Ventura all the way to the end of the war in 1945 and beyond.
The Mk. I and II differed primarily in the -II incorporated flush riveting over the whole airframe to improve performance.
| THE KIT |
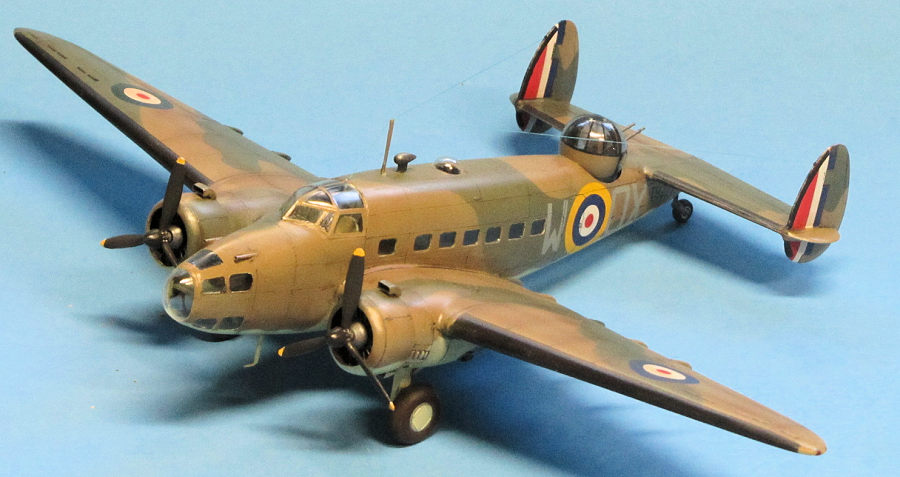
I've always been fascinated by the plowshares-into-swords story of the Hudson, and that that beach-ball of a turret--stuck on like an afterthought!
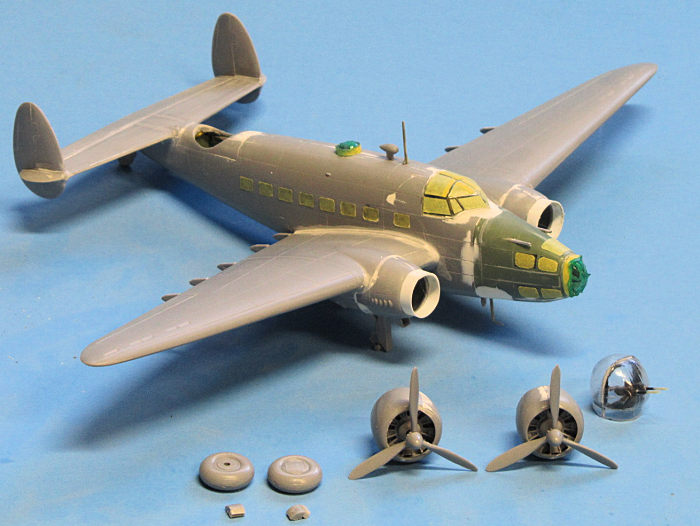
 Five gray sprues, one clear, all displaying MPM's trademark fine recessed panel
lines. Lots of unused parts to accommodate different versions and boxings,
including a set of P&W Twin Wasp engines, though not their cowls. No locating
pins, except a few on the wings. Aviaprint decals for three RAF aircraft, all
early-war Dark Green/Dark Earth, with an option for black undersides on one
instead of Sky. The de-icing boots for the vertical stabilizers are provided as
decals; a nice touch. Parts for a fairly complete interior from nose to turret,
with the option to cut open the main crew entry and pose a separately provided
door open, complete with its integral life raft stowage box. Clear parts are all
injected.
Five gray sprues, one clear, all displaying MPM's trademark fine recessed panel
lines. Lots of unused parts to accommodate different versions and boxings,
including a set of P&W Twin Wasp engines, though not their cowls. No locating
pins, except a few on the wings. Aviaprint decals for three RAF aircraft, all
early-war Dark Green/Dark Earth, with an option for black undersides on one
instead of Sky. The de-icing boots for the vertical stabilizers are provided as
decals; a nice touch. Parts for a fairly complete interior from nose to turret,
with the option to cut open the main crew entry and pose a separately provided
door open, complete with its integral life raft stowage box. Clear parts are all
injected.
My sample suffered from a short-shot right fuselage half, manifesting as a hole
aft of the cockpit and some roughness/flow lines on the nearby canopy joints,
all easily repaired with bits of styrene and a little putty.
| CONSTRUCTION |
As I happened to have the Falcon canopies on hand from Set # 30 "US Aircraft in
Foreign Service", I started this project by fitting these transparencies to the
main fuselage parts. Though meant for the Airfix kit, the Falcon parts are
adaptable to this one with about the same amount of work. They share MPM's
engineering in providing the whole forward fuselage almost to the cockpit in
clear, but the two disagree in length and you have to cut the MPM fuselage back
about 3/8" further aft to accommodate the Falcon parts. Fully four modelling
sessions were devoted to getting all this worked out among the five components
 (nose halves, clear nose dome, and main fuselage halves, plus flanges where vac
met injected parts for a strong joint). This labor rewards you with a more
accurate nose profile (both the Airfix and MPM kits are too 'needle-nosed') and
better window shape/size in addition to the superior optical qualities that vac
parts provide.
(nose halves, clear nose dome, and main fuselage halves, plus flanges where vac
met injected parts for a strong joint). This labor rewards you with a more
accurate nose profile (both the Airfix and MPM kits are too 'needle-nosed') and
better window shape/size in addition to the superior optical qualities that vac
parts provide.
If you haven't picked up what I'm throwing down, however, it's a really dicey operation, as to avoid joints running through centerline window panes the Falcon nose halves are not split symmetrically. If you dislike vac canopies or getting more than three transparent components playing nice together all at once, simply build the nose as the kit provides it; it'll look just fine to the casual viewer. My reward? (Martini in hand) "Hey, everyone! Look at my new model of an obscure airplane--I put another five hours of work into it to get a slightly more accurate nose profile!"
I also widened the aft turret mount (Part # G1) to accommodate Falcon's more lovingly-depicted Boulton-Paul C-type dorsal turret in all its bulbousness.
These self-imposed detours done, construction proper could begin. I started by
adding floors and bulkheads to one fuselage half. The interior is remarkably
complete; I just added stairs to the nose compartment, seatbelts, and the odd
fine detail here and there, before spraying UK Interior Green overall. It's
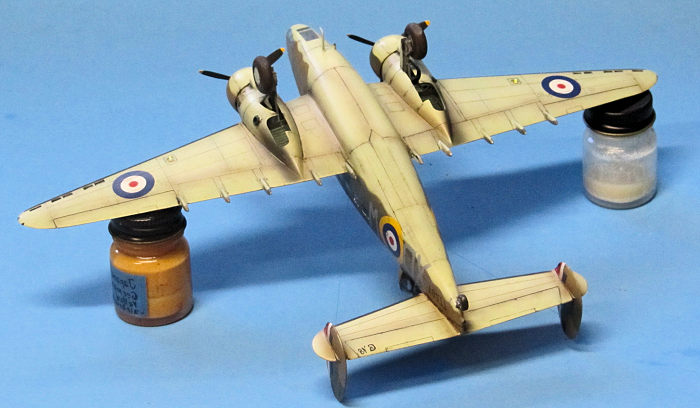
important to note that those rows of airliner windows running up either side
make the entire main cabin interior faintly visible, even in normal lighting, so
take the time to add the spar and bunk parts and paint it all up. A dark
wash followed, small details were picked out, and the kit's fuselage windows
were added. Some of these required enlarging of their corresponding holes with a
few knife scrapes. I prefer adding clear parts and masking them all off before
wings and other protrusions start getting in the way.
 The control surfaces share the same scribing depth and width as the other panel
lines. I went over those for the ailerons, elevator, and rudders for more depth
and contour, making them stand out a little more. Note that the elevator was a
single piece across the whole span; a little wedge-fairing in the aft fuselage
moved with it.
The control surfaces share the same scribing depth and width as the other panel
lines. I went over those for the ailerons, elevator, and rudders for more depth
and contour, making them stand out a little more. Note that the elevator was a
single piece across the whole span; a little wedge-fairing in the aft fuselage
moved with it.
All that work behind me, general assembly thereafter is straightforward, but this kit is very much a product of a company trying to make the jump from short-run to mainstream: there's quite a bit of tweaking involved, plus filling and sanding over most of the joints. Nothing too intense; just enough work to keep your fitting skills honed! My only other deviation was in leaving the main gear parts off until main construction was complete, but this required some tricky threading to get them into their slots. Wheel well interiors are provided, but they're too shallow. Simply separate the aft segments (the ribbed portions) and mount them to the top wing parts for better accuracy.
Also, to accommodate in a single mold the variety of exhaust outlets carried by all the different production batches of the Hudson, MPM has molded the Mk. I's louvered venting on a separate plate which is supposed to be scabbed on to the nacelle. A dry for showed that this didn't look right at all, so I resorted to slicing the louvers off the plate and cementing them on individually. Finally, the engine cowls sit too far aft: two 3/16" wide rings of styrene glued to the forward ends of the nacelles served as necessary spacers. See the in-progress pic.
 Four of the engine accessory orifices are molded annoyingly solid. Dissatisfied
with this, I attempted to drill out both the exhausts (part C13) and carburetor
intakes (part E12), and even using my smallest Dremel bit managed to totally
mangle all four pieces. The recovery: I salvaged the carburetor parts by slicing
off their Ryan-destroyed fronts and replacing them with rectangles cut from a
leftover Hasegawa Ki-61 radiator intake, achieving the desired effect nicely.
The exhausts were replaced by angled segments of 1/8" K&S aluminum tubing. The
final touches were holes drilled to accept MV lenses for the landing lights
under the wing.
Four of the engine accessory orifices are molded annoyingly solid. Dissatisfied
with this, I attempted to drill out both the exhausts (part C13) and carburetor
intakes (part E12), and even using my smallest Dremel bit managed to totally
mangle all four pieces. The recovery: I salvaged the carburetor parts by slicing
off their Ryan-destroyed fronts and replacing them with rectangles cut from a
leftover Hasegawa Ki-61 radiator intake, achieving the desired effect nicely.
The exhausts were replaced by angled segments of 1/8" K&S aluminum tubing. The
final touches were holes drilled to accept MV lenses for the landing lights
under the wing.
One last item: that previously-mentioned Boulton-Paul "C"-type turret is very much a proud entity unto itself back there, hanging out with its buddies the tail group. MPM did a well-molded and thoughtfully-engineered depiction of it, but it's a little undersize. I felt it worthwhile to build up Falcon's vac-form replacement for a better representation, doing so in parallel with the rest of the model's construction. Cutting out and fitting the halves together, scratchbuilding the chassis and interior, and getting it all masked probably took all of five modeling sessions, but it was worth it.
| COLORS & MARKINGS |
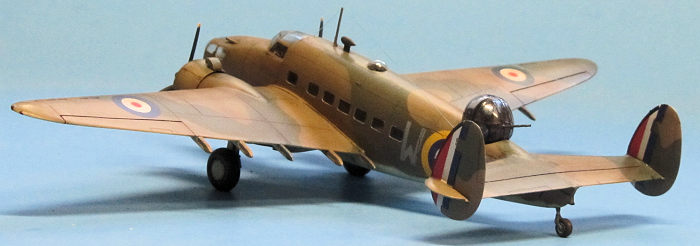 The instructions
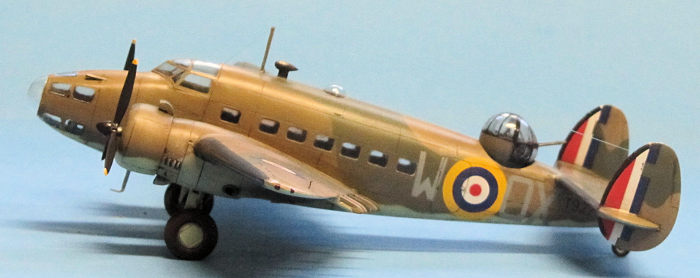
quote the Warpaint title as QX-W having silver undersurfaces. I found a photo of
the actual aircraft on the internet and could't tell if it was indeed silver or
simply Sky and went with the latter. Paints were a mix of Testor's and Xtracolor
(thankfully available once again here in the 'States), lightened 30% as
usual. Decals are by Aviprint, and are excellent, except the red is a little
intense. I ended up masking off and airbrushing over
these parts to tone them down.
The instructions
quote the Warpaint title as QX-W having silver undersurfaces. I found a photo of
the actual aircraft on the internet and could't tell if it was indeed silver or
simply Sky and went with the latter. Paints were a mix of Testor's and Xtracolor
(thankfully available once again here in the 'States), lightened 30% as
usual. Decals are by Aviprint, and are excellent, except the red is a little
intense. I ended up masking off and airbrushing over
these parts to tone them down.
One unique difficulty: I wanted to depict the version with the UK tail flashes covering the entire fin, as on the box art (the other options just have the small rectangular ones). This means the applied markings will have to be accurate to cover the fin, retain proportion, and be in alignment with each other. Because the black deicer boots are integral with the red-white-and-blue of the rest of the markings the problem is even more complex.
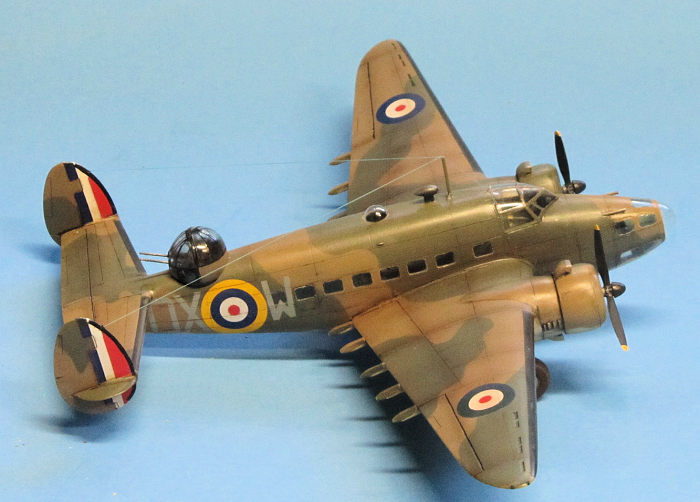 Learn from my mistake: while they're wet and moveable, prioritize that these
flashes all line up 1) with each other, and 2) with the rudders' hinge lines.
Trust me, leave any other problems to be sorted out after the decals cure.
I instead became obsessed with fixing it all at once, and as a result one of the
flashes intruded back on to the rudder. This doesn't sound so bad, but painting
that part over meant that the equal proportions of the three color stripes was
thrown off, and I spent quality time rebuilding the marking as it should look
using bits cut from the spare flashes on the sheet. Separate black deicer boots
are also supplied for the other options, and I used these last of all to get all
the deicer boots in agreement with each other.
Learn from my mistake: while they're wet and moveable, prioritize that these
flashes all line up 1) with each other, and 2) with the rudders' hinge lines.
Trust me, leave any other problems to be sorted out after the decals cure.
I instead became obsessed with fixing it all at once, and as a result one of the
flashes intruded back on to the rudder. This doesn't sound so bad, but painting
that part over meant that the equal proportions of the three color stripes was
thrown off, and I spent quality time rebuilding the marking as it should look
using bits cut from the spare flashes on the sheet. Separate black deicer boots
are also supplied for the other options, and I used these last of all to get all
the deicer boots in agreement with each other.
The wheel axles are molded much too short. Simply glue the wheel on to what little is there and the landing gear strut as well, the resulting assembly will be plenty strong. I got a little carried away with my first try at post-shading using a mix of Tamiya Clear Red and Green. A set of aerials from the EZ-Line range was my last experiment, these are nice and durable while being properly petite.
| CONCLUSIONS |
| REFERENCES |
3 December 2018
Copyright ModelingMadness.com
If you would like your product reviewed fairly and
fairly quickly, please
contact
the editor or see other details in the
Note to
Contributors. Back to the Main Page
Back to the Review
Index Page
Back to the Previews Index Page