Atlantis 1/120 B-29 Superfortress
| KIT #: | H-208 |
| PRICE: | $24.95 MSRP |
| DECALS: | One option |
| REVIEWER: | Ed Bailey |
| NOTES: | Reissue of Revell kit |
| HISTORY |
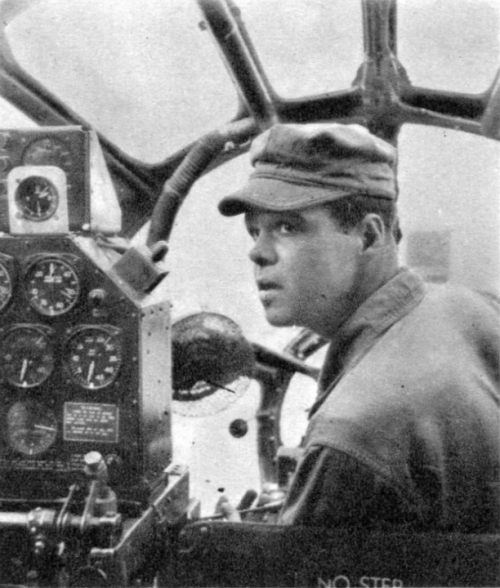
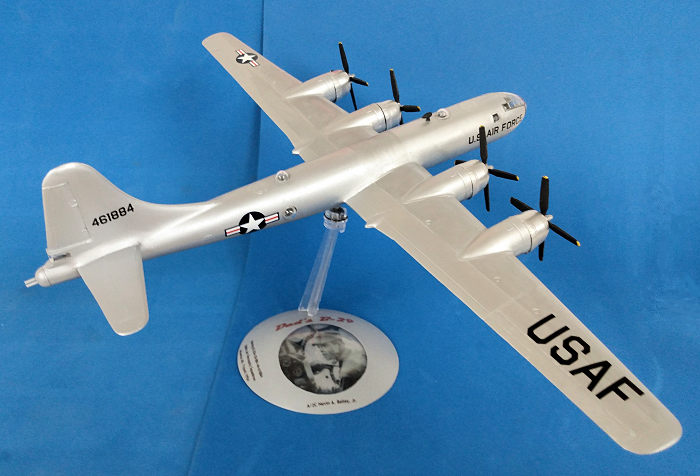
After service in two wars as a bomber, plus such varied duties as aerial refuelling (KB-29) and search and rescue (SB-29 Super Dumbo), the B-29 was on its way out of USAF service during 1954-55. At that time, my dad was stationed at Wheelus AB in Tripoli with the 580th Air Resupply Group, where he was assigned to the ground crew of B-29A-50-BN 44-61884.
He had no idea what the B-29s were up to at the time, just that they flew north across the Mediterranean and would return hours later, sometimes on all four engines. In the '90s he found out, when their mission was finally declassified. They were dropping supplies to anti-communist forces in Yugoslavia. This stopped abruptly when Tito assured Eisenhower that he wouldn't join the Warsaw Pact.
 My dad was
an instrument technician, a job that required patient troubleshooting, a quality
he had in spades. Not every graduate of USAF tech training shared this trait,
however. One of his recollections was of an erratic flap angle indicator in a
B-29. Ground crewmen were divided on whether the fault was mechanical or
electrical in nature, according to which field was NOT their responsibility. He
got in there and looked (not easily, because he was a big man) and found that
the potentiometer on the torque tube of the flap had broken loose from its
mount.
My dad was
an instrument technician, a job that required patient troubleshooting, a quality
he had in spades. Not every graduate of USAF tech training shared this trait,
however. One of his recollections was of an erratic flap angle indicator in a
B-29. Ground crewmen were divided on whether the fault was mechanical or
electrical in nature, according to which field was NOT their responsibility. He
got in there and looked (not easily, because he was a big man) and found that
the potentiometer on the torque tube of the flap had broken loose from its
mount.
Another of his B-29 recollections was of traveling on the creeper through the bomb bay tunnel (which he didn't repeat, being as I said a big man, and the tunnel a mere 18 inches in diameter). I dont' think the creeper was original equipment in B-29s, but was added because crawling between the two pressurized sections was a real chore. He recalled vividly imagining what would happen to a crewman in that tunnel at altitude if either section were to suddenly depressurize: sudden death as a human cannonball.
Some of his other recollections of Wheelus AB were that there wasn't much reason for going off base, except in groups to tour local attractions like the Roman ruins of Leptis Magna. The local population mostly lived in extreme poverty. A side effect of that poverty was that trash pickup at Wheelus consisted of dumping refuse outside the gates, where it would quickly disappear. Scrap metal was in very high demand.
While my dad was at Wheelus, the 5th Tow Target Squadron was also there, which may not be of any great significance, but he did collect one of their cool Disney-designed squadron patches, which I have to this day. This squadron also operated a lone B-29, in the tow target role. He probably worked on it as well, since he worked on the other B-29s of his squadron.
| THE KIT |
 I remember
the Revell kit, in the markings of Robert Morgan's "Dauntless Dotty" hanging
from our bedroom ceiling some 55 years ago. My brother and I were prolific model
airplane builders, and our dad would build a model only once in a while, but I
think my dad was the one who built this kit.
I remember
the Revell kit, in the markings of Robert Morgan's "Dauntless Dotty" hanging
from our bedroom ceiling some 55 years ago. My brother and I were prolific model
airplane builders, and our dad would build a model only once in a while, but I
think my dad was the one who built this kit.
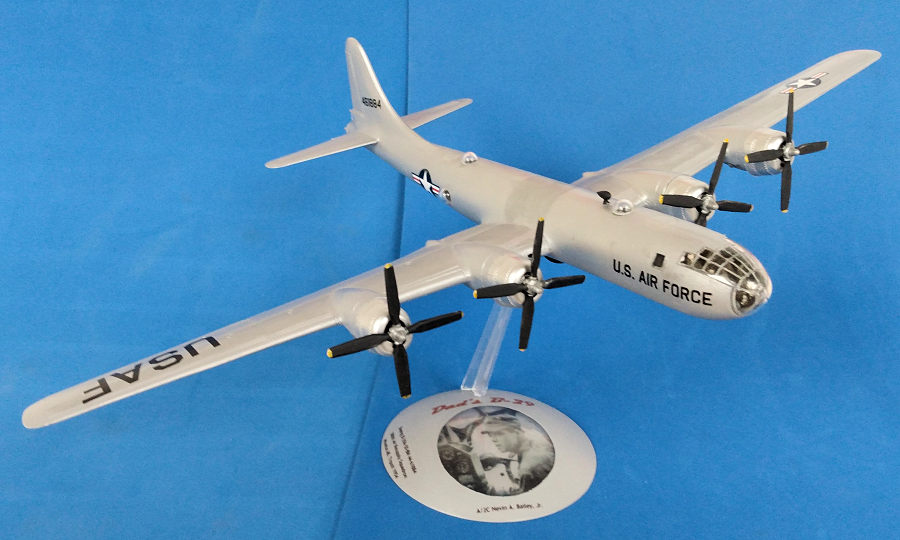
Atlantis Models reissued this kit a few years ago with a larger, more substantial clear base and nicely printed decals that I didn't use. Someone at Atlantis must have noticed that it's actually 1/120 scale, as opposed to the 1/133 scale listed on Scalemates for the Revell kit. Where that scale comes from, I don't know, because I doubt that Revell ever stated the scale on the box. Anyhow, the real thing is 99 feet long with a 141 foot wingspan (the B-29 is the only aircraft whose dimensions I have memorized), so it was easy for me to verify the scale of 1/120.
| CONSTRUCTION |
This February, my local IPMS chapter (Delaware Valley Scale Modelers) had a random swap of Atlantis kits, with the requirements that we complete the kits we received in time for the April meeting, and stick to an Out-of-the-Box build. But the instant I got the B-29 kit, the idea popped into my head fully formed of building my dad's B-29, so the build was not going to be quite OOB. The plan still had to be simple, so it was limited to removal of turrets, adding a radome, and decals to represent my dad's B-29.
The turrets needed removal, so it was a simple matter of grinding off the base of the front top turret and filling in the other three with Milliput. While I was at it, I sanded off the ridiculous baseball-sized rivets and sanded and filled the equally absurd rib-and-fabric contours on the control surfaces, since the B-29 was flush-riveted and had all-metal control surfaces.
The main assembly consists of upper and lower halves
of the wings coming together through the fuselage halves. The Revell kit
designers had the idea of lengthening one tab on each side, so that the upper
tab from one wing and lower tab from the other would overlap, making a strong
joint similar to the wing box in the real thing, where the wing spars carry
right through the fuselage and support it on the wing. That was the idea anyway.
The problem is tha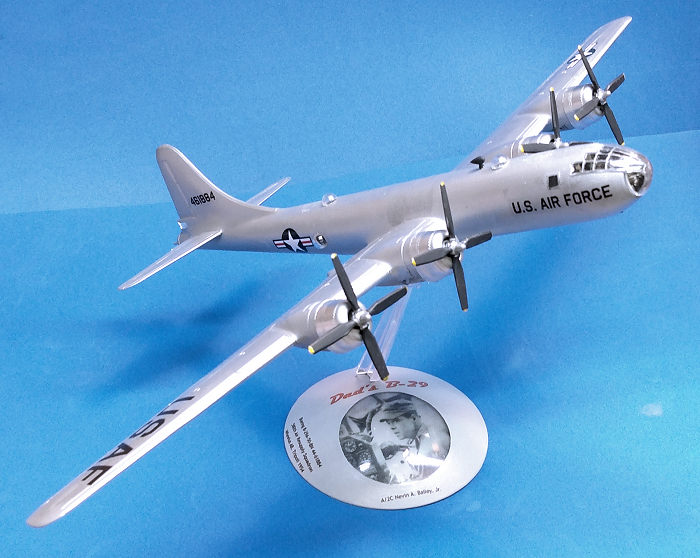 t
when the tabs are inside the fuselage, how do you clamp them together? In
practice, it's like trying to make a sandwich inside a box that you can't get
your hands into.
t
when the tabs are inside the fuselage, how do you clamp them together? In
practice, it's like trying to make a sandwich inside a box that you can't get
your hands into.
One detail that I think was eventually added to most B-29s, including 44-61884, but missing on this kit, is a one-piece non-retractable radome covering the APQ-13 radar mounted between the two bomb bays. I measured the kit's fuselage diameter and took measurements from photos, and after about 20 minutes had a 3D drawing. Being very small, it took about half an hour to print it out on my resin printer. If I could do it this fast on a regular basis, I'd have my own business making 3D printed detail parts, but alas, this was the exception to the rule. I glued this in place and painted it and the props with Vallejo Model Color German Grey, because I never paint black things black, except when I make an exception.
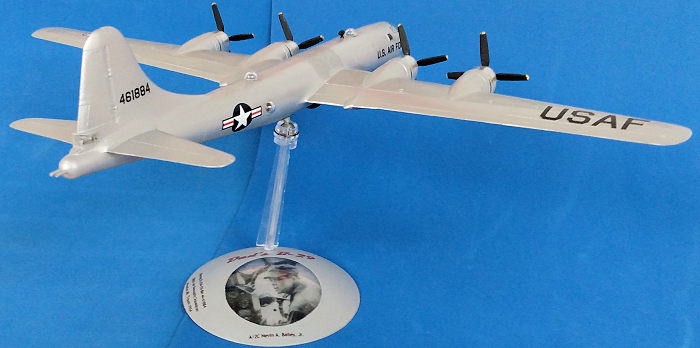
Thankfully, the kit is strictly an in-flight presentation, the way my dad thought all aircraft models should be, so no messing with landing gear. It took a bit of putty to smooth out the wing and tail joints, and to smooth out the rear fuselage/vertical stablizer joint near the tail gunner's position. There is relief here that looks like a mold seam, but I think it's just where two machining operations met and no one bothered to smooth it out.
I didn't care if the propellers spun, so I glued them in.
Along the way, I lost one of the gunners' blisters, and found an undersized replacement in my spares for the left side. The photos are all from the right side, because my philosophy of model photography is to accentuate the positive (you know the song – thanks to digital photography, there's a bonus joke in there).
The kit comes with two bases, the original and Atlantis' clear base with a ball and socket joint. Both fit the slot in the bottom of the fuselage, but the clear base is more substantial as well as posable. I sanded out the raised globe detail on the inside of the base and polished the inner surface smooth and glossy. I scanned a photo of my dad sitting in a B-29 cockpit from the Wheelus AB yearbook and laser printed it on clear decal film, then applied the decal to a disc cut from a sheet of clear styrene. This I cemented to the inside of the base. I masked off this circular area on the outside of the base and airbrushed it with a metallic grey I mixed up, then applied the other decals I printed identifying the base, unit, aircraft, and airman.
| COLORS & MARKINGS |
 I applied
spray Metallizer Buffing Aluminum (yes, I still had some) over the primer coat
of Mr. Surfacer. It did mean the buffing effect was not possible. However, the
cowlings were unprimed, so they polished up to a nice shine. Some areas of the
natural metal finish were done with AK paint markers in Aluminum and Dark
Aluminum, and various other paints that came to hand. The canopy framing is on
the inside, so I used an AK marker and just scraped away the excess with a
toothpick.
I applied
spray Metallizer Buffing Aluminum (yes, I still had some) over the primer coat
of Mr. Surfacer. It did mean the buffing effect was not possible. However, the
cowlings were unprimed, so they polished up to a nice shine. Some areas of the
natural metal finish were done with AK paint markers in Aluminum and Dark
Aluminum, and various other paints that came to hand. The canopy framing is on
the inside, so I used an AK marker and just scraped away the excess with a
toothpick.
I looked at some Kodachrome slides my dad had taken of B-29s at Wheelus, and tried to find the relevant T.O. 1 1 4 to get the correct size and placement of markings. Next best thing, on Cybermodeler.com I found the page for the B-50. This enabled me to print my own decals for the lettering and the red nose gear door. Painted in white on each nose gear door are the last three digits of the aircraft's serial number (clear enough) and the letter "A" or "B" depending on whether it's the right or left door. (If anyone has any idea what the A and B designate, I'd be interested in finding out. It's not as if anyone was inadvertantly going to get the doors switched.) Anyway, I simply drew the shape of the nose gear doors in Autocad, filled in red, with the lettering on the nose gear door left clear, then painted the doors white and applied the decal over the white paint. For national insignia, I used 30" Stars & Bars from a Techmod 1/72 sheet, which neatly matches the size of the 50" stars needed for 1/120 scale. (Do the math. It works perfectly.)
| CONCLUSIONS |
Atlantis repops old kits like this one in large part because we aging modelers are in the market for a nostalgia build. As is common with nostalgia builds, building this kit should suffice to undo the nostalgia.
The object here was just to honor my dad, not to do some kind of fantastic build, so I tried to keep it simple. I'm sure my dad would have liked it.
| REFERENCES |
Wheelus Field: a Pictorial Record of a Modern U.S.A.F. Base, edited by Lt. Worth R. Johnson, printed in Italy by Apollon, Via Tiburtina 1292, Rome, 1955.
Kodachrome slides taken in Libya by Nevin A. Bailey, Jr., 1954-5.
B-50 Superfortress USAF T.O.1-1-4 Color Profile and Paint Guide.
26 January 2026
Copyright ModelingMadness.com. All rights
reserved. No reproduction in part or in whole without express permission from
the editor.
Review kit courtesy of my wallet If you would like your product reviewed fairly and fairly quickly, please contact the editor
or see other details in the
Note to
Contributors. Back to the Main Page
Back to the Review
Index Page
Back to the Previews Index Page