Rareplanes 1/72 P-43 Lancer
| KIT #: | ? |
| PRICE: | $4.00 way back when |
| DECALS: | None |
| REVIEWER: | Carmel J. Attard |
| NOTES: | Vacuformed Plastic |
| HISTORY |
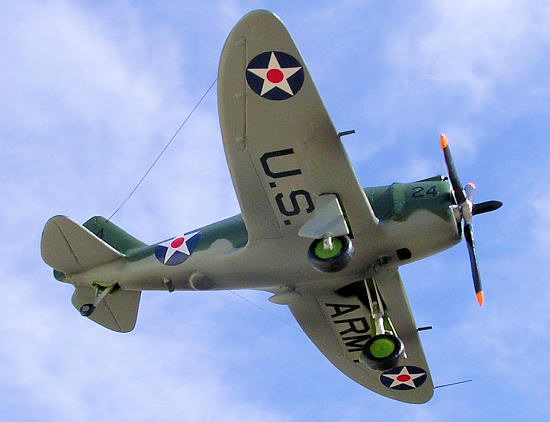
A lot has been said about the background history of the P-43 and the literature is accessible by going through the list of past reviews on the front page of MM and simply picks the kit subject. In brief the P-43 Lancer entered service with the USAAC during 1941 and in spite of its short service life the type carried a variety of colour schemes which makes it an attractive subject to aircraft modellers.
| THE KIT |
The Rareplanes P-43 comes as a single sheet of white
styrene plastic which contains all the components which are vac formed and which
carry appreciable amount of surface detail. There is also a vac form canopy in
clear acetate. This is a small but impress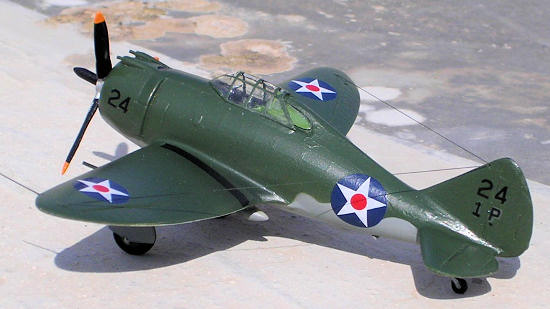 ive
kit by Rareplanes and I was always was impressed with the quality of detailed
instruction sheet that always accompany Rareplane models. There is an exploded
view of the components that makes up the kit while other scrap views show
details that should go with the undercarriage and propeller and another part of
the instructions make suggestions on colour and markings suited for the P-43. No
decals come with the kit but these can be obtained from mainstream supplies like
Superscale etc. A quick look indicates that this is the sort of vac form kit
that is well within the capability of the average modeller and suited for those
who never tried their hands on this type of kit. The only difference from the
conventional kit being that the parts have to be cut and then their surface
rubbed down to fit together. Smaller items are found in spares box or made from
scrap plastic.
Having arrived to this stage the kit assembles just
like any other, ideally using liquid cement.
ive
kit by Rareplanes and I was always was impressed with the quality of detailed
instruction sheet that always accompany Rareplane models. There is an exploded
view of the components that makes up the kit while other scrap views show
details that should go with the undercarriage and propeller and another part of
the instructions make suggestions on colour and markings suited for the P-43. No
decals come with the kit but these can be obtained from mainstream supplies like
Superscale etc. A quick look indicates that this is the sort of vac form kit
that is well within the capability of the average modeller and suited for those
who never tried their hands on this type of kit. The only difference from the
conventional kit being that the parts have to be cut and then their surface
rubbed down to fit together. Smaller items are found in spares box or made from
scrap plastic.
Having arrived to this stage the kit assembles just
like any other, ideally using liquid cement.
| CONSTRUCTION |
The procedure
followed is the standard one adapted to any vac form kit preparation and
assembly. Each vac formed part is first trimmed from the backing sheet with a
sharp craft knife or simply score around with a blade and breaking away excess
plastic 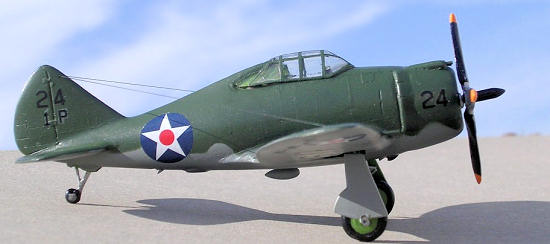 with
fingers. The cut edges of all components are then rubbed on a flat sheet of wet
and dry sand paper, removing enough plastic (around 1/32”) to ensure that
centreline joints are perfect. For smooth abrasive action water can be added.
This can be messy and I much prefer to do the procedure using dry smooth
sanding. The leading and trailing edges are then scraped from the inside using a
modelling knife. All the details are retained on the outside surface. At this
stage I made sure that a sufficiently slim airfoil is obtained on the flying
surface before attempting to cement parts together.
with
fingers. The cut edges of all components are then rubbed on a flat sheet of wet
and dry sand paper, removing enough plastic (around 1/32”) to ensure that
centreline joints are perfect. For smooth abrasive action water can be added.
This can be messy and I much prefer to do the procedure using dry smooth
sanding. The leading and trailing edges are then scraped from the inside using a
modelling knife. All the details are retained on the outside surface. At this
stage I made sure that a sufficiently slim airfoil is obtained on the flying
surface before attempting to cement parts together.
The clear canopy and side ports may be the tricky stage. These were cut with a razor blade and trimmed a little at a time until the best fit is obtained. The front cowling opening was then sanded to shape with a rolled wet and dry paper. The cockpit area also required opening using a simple exacto saw blade and avoiding cutting through the cockpit side walls. If this happens nothing is so grave as a little drop of poly liquid cement will restore any over cut. The interior of wheel wells was then dealt with. Instrument panel, floor, seat, which are all provided were carefully painted using a fine brush and also added details to side walls. I have found that ‘Modelaid’ printed sidewalls very handy for this purpose and selected ones in cockpit green colour. A control stick was added shaped from sprue.
 I then
added a Pratt and Whitney A1830 radial engine from spares as I had to replace
the rather crude one supplied among the vac form parts. The cockpit assembly and
engine firewall were then glued in place and the fuselage halves mated together.
Incidentally the two halves had intermittent short stabs added at the inner
edge/periphery to help self align the parts. The wing parts which are now also
assembled in two separate pieces required more attention at the root. This was
to ensure the correct dihedral is obtained. And once liquid cement was applied
these were held firmly so that the desired shape is retained. The same was
repeated to the tail planes.
I then
added a Pratt and Whitney A1830 radial engine from spares as I had to replace
the rather crude one supplied among the vac form parts. The cockpit assembly and
engine firewall were then glued in place and the fuselage halves mated together.
Incidentally the two halves had intermittent short stabs added at the inner
edge/periphery to help self align the parts. The wing parts which are now also
assembled in two separate pieces required more attention at the root. This was
to ensure the correct dihedral is obtained. And once liquid cement was applied
these were held firmly so that the desired shape is retained. The same was
repeated to the tail planes.
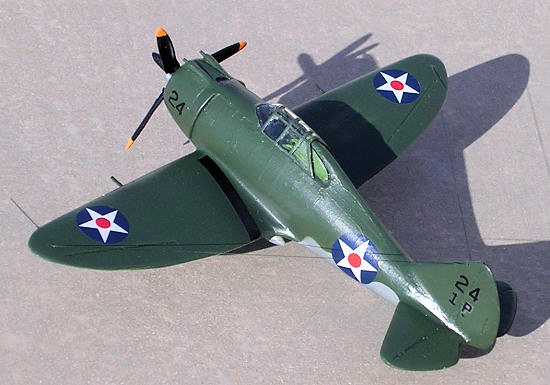
The joint lines were now cleaned and all the surface details close to these were masked with tape.. Seams were then filled with a little Plasto filler and sanded smooth when dry. The undercarriage was then fitted in place finally the canopy was closed using white glue. One extra detail added to the kit was the four machine guns added to wing and upper cowling blisters which were cut from hollow metal needles. A black and yellow prop was fitted on. A wing tip pitot tube added and wireless aerial added from fine invisible thread.
| COLORS & MARKINGS |
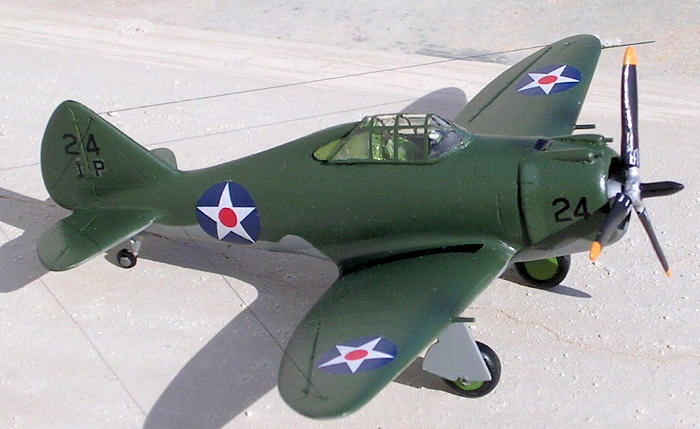
 The
P-43A was finished to represent one selected from the Rareplanes sheet. This one
served with 1st Pursuit Group, used for fighter patrol duties in
The
P-43A was finished to represent one selected from the Rareplanes sheet. This one
served with 1st Pursuit Group, used for fighter patrol duties in
| CONCLUSIONS |
This was a step by step build and accomplished at a reasonably slow pace which in the end resulted into a pleasing model to go next to the Pavla P-43 of same scale.
October 2008
If you would like your product reviewed fairly and quickly , please contact me or see other details in the Note to Contributors.