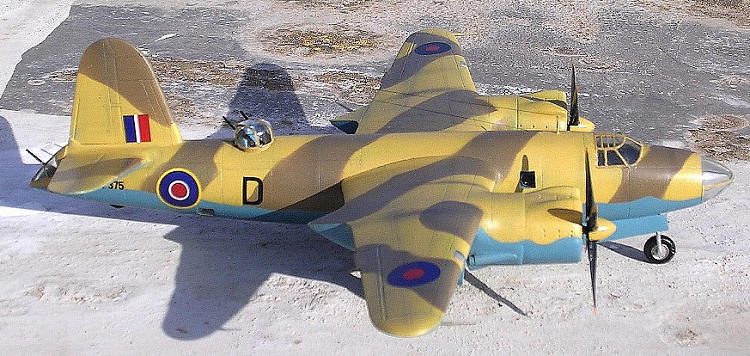
Valom 1/72 B-26A Marauder I
| KIT #: | 72028 |
| PRICE: | £31.00 |
| DECALS: | One option |
| REVIEWER: | Carmel J. Attard |
| NOTES: | Short run kit with resin and photo etch parts. |

| HISTORY |
Designed to meet a demanding USAAC specification of
1939 for a high speed medium bomber, the Martin
Model 179 proposed was considered
to be so far in advance of competing submissions that in September 1939 the
company was awarded an ‘off the drawing board’ contract for 201 of these
aircraft. The action unprecedented in USAAC history, required no prototype or
production aircraft, and the first production B-26 as the type was then
designated, was flown initially on 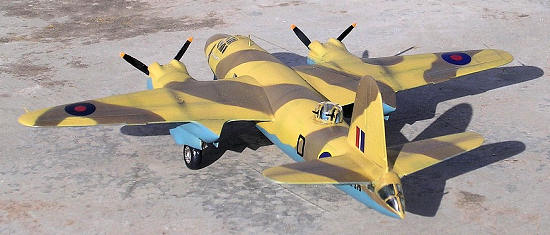 Subsequently
named Marauder, the aircraft was a cantilever shoulder-wing monoplane with a
fuselage of circular cross-section accommodating a crew of five (later seven as
operational conditions demanded), and with retractable tricycle landing gear.
The
Curtiss four-bladed propellers were adjustable and electrically controlled. The
USAAF eventually ordered 1131 B-26. The B-26A had rather short wings and smaller
tail areas because of their high speed. This resulted in higher wing loading and
long take-off with higher landing speed. The B-26A was powered by two P&W
R2800-5 or R-2800-39 (B-26A-1) rated at 1380 KW (1850HP) each. The armament
consisted of 4x12.7mm machine guns and carried a bomb load of 4,800 lbs. or a
torpedo 559mm (22 inch) of 2,000lb weight. The Marauder had a maximum speed of
313 mph and had a range of 2,600 miles or 1,000 miles with the bomb load.
The Marauder is regarded as of a beautiful design in view of its elegant aerodynamic shape but was found to be dangerous for inexperienced pilots and there were many accidents with fatal results on the early, short-winged aircraft. The aircraft gained many uncomplimentary names such as “Widow Maker”. Subsequent B-26s with longer wings had one of the lowest loss rates of any aircraft of the war.
| THE KIT |
There have
been several issues of the Marauder principally by Airfix, Frog and Revell to
the common scale of 1/72 but apparently
 this is
the first time that the early version with short wing span and pointed rear end
was issued on the market. (Yes and no as Monogram did a
nice 1/72 Snap-Tite B-26B-2
many years back. Ed.)The kit comes in the standard Valom box with a
picturesque view of the Marauder in desert camouflage flying in formation with
another during a routine mission. It is moulded in grey plastic with gracefully
engraved panel lines that one should expect from Valom kits. The kit contains
extra transparencies, an indication that there are future plans so that
different styles of rear end could be built. The transparencies which are
injected are very clear and the delicate embossed framing makes masking and
painting an easy task. The 16 page A5 size instruction booklet depicts 18 easy
to follow stages of construction. These include a colour 4-view drawing for
quick reference during painting while the last page is devoted to five colour
code equivalent that includes FS, Humbrol, and Gunze Sangyo.
(
| CONSTRUCTION |
 complete
with a seat and side armour plates and harness.
Before closing the fuselage I placed enough weight to the forward fuselage to make the kit balance on the nose wheel utilising every hidden space and also made use of the navigator compartment. I inserted a flat round lead weight which I stuck to the deviding bulkhead and placed so that it was not visible from any of the side windows. I anchored the weight with cross plastic sprue pieces. The fuselage was then closed firmly which also made a good matching joint requiring a little amount of filler and allowed to set for 5 hours. The rear tail gunner cone and Perspex complete with gun mount were then added to the fuselage. It was time to assemble the wings.
The cowlings were first assembled in one piece since the upper half of each was resin. Inside the cowls are fitted the detailed resin radial engines which were mounted on back plates before these were inserted. The landing lights Perspex at the leading edges in spite of them fitting so exactly, these lacked the search lights inside and I therefore preferred to insert a solid Perspex which I have drilled at the rear of it to make what looks like the search light lamp when polished. At this stage all the Perspex pieces were fitted on the fuselage. Finally I added the undercarriage. Smaller details like the antenna and wing aerials which I replaced with metal pins and also the side exhaust pipes which I bored the inside using a drill. These were all fitted in their respective places.
| COLORS & MARKINGS |
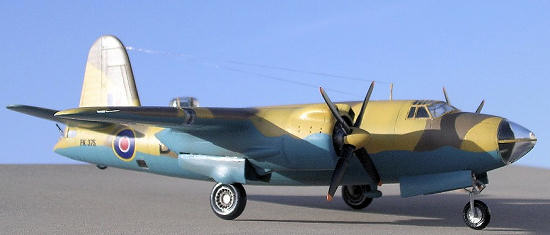
Martin Marauder Mk1A FK375 that is represented in the kit decal was one of 19
Marauders (FK362-FK380) which were delivered to the RAF. FK372 and FK380 crashed
in the 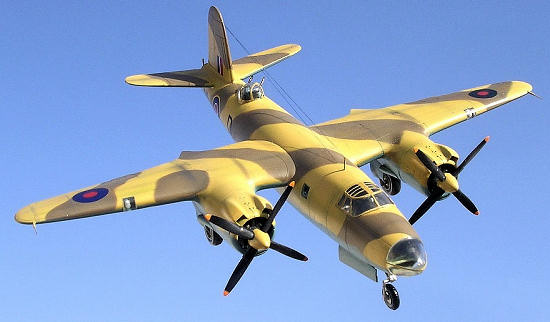 the
desert. These were withdrawn in the late summer 1942 and the squadron returned
to operations in the spring of 1943 with Marauders Mk1A bombers. These were also
fitted for torpedo carrying and used for anti shipping attacks and
reconnaissance. They moved from Tripolatania to Bleda on the Algerian coast just
before the fall of the last Axis forces in
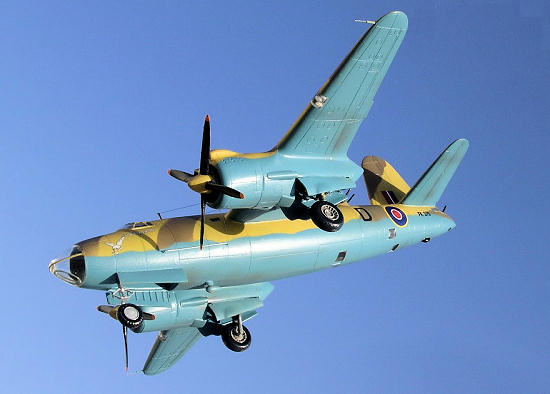
The instructions give a clear indication of the colour that the components should be down to the minute details. The instrument levers were black with red knobs. The undercarriage legs were silver and I added oil wash using oil colour oak diluted with turpentine. The wheel wells interior and well doors were also azure on the inside. The radial engines were engine grey with silver touches. Straps were azure blue with metal buckle. The bulkhead and cockpit floor were interior green. The upper surface of the aircraft was sand camouflaged in disruptive dark earth (Humbrol 29) and Mid Stone (Revell brand) enamel paint. All the lower surfaces were azure blue Lifecolor acrylic. This camouflage scheme resulted in very contrasting colours which was common in the Mediterranean areas.
| CONCLUSIONS |
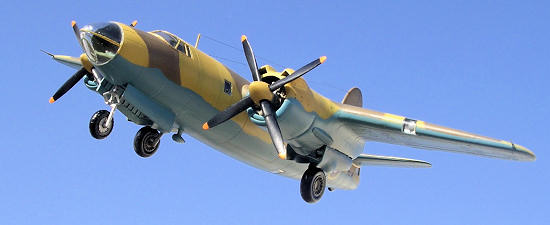 Once
again this Valom kit proved to be a nice – fitting one with no difficulty at all
encountered during construction. Perhaps worth mentioning is that the fitting of
the clear cockpit parts was a step forward when compared to previous kits I have
built from the same range. This is an opportunity for adding the early version
of the Marauder to your collection and the unique sand scheme makes it stands
out when placed next to the Marauders of the European theatre.
| REFERENCES |
An excellent reference on 14 Sq Marauders is Allied Wings #2: Marauder I. Ed
March 2009
Copyright ModelingMadness.com If you would like your product reviewed fairly and fairly quickly, please
contact
the editor or see other details in the
Note to
Contributors.