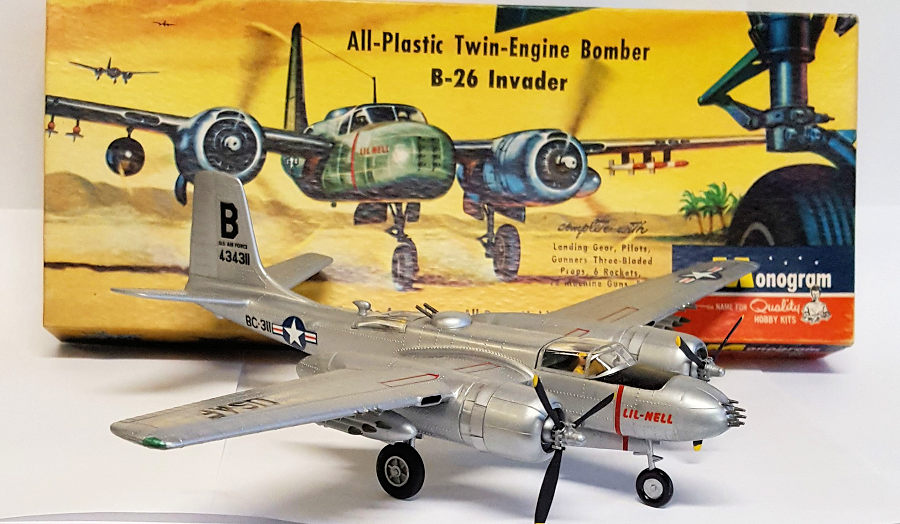
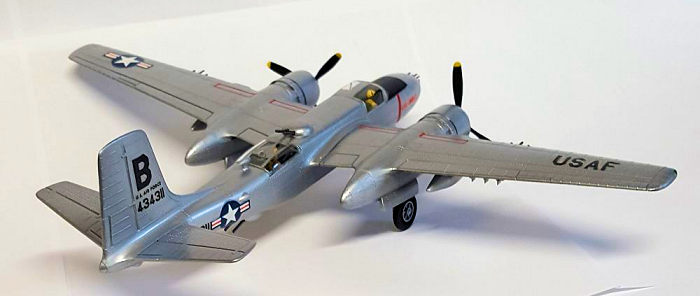
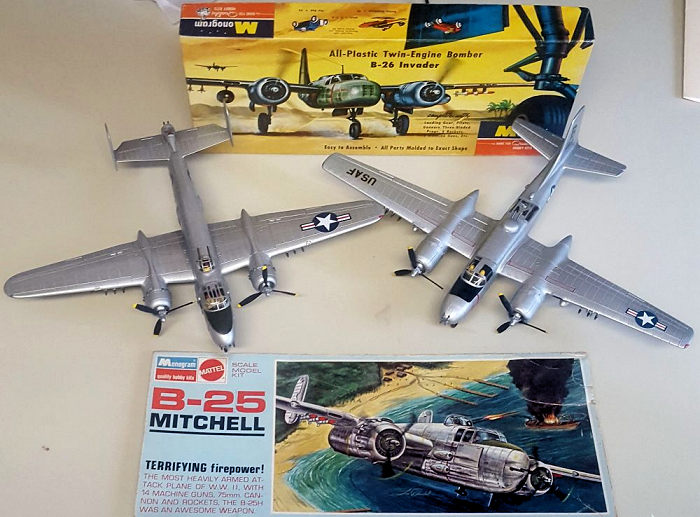
Monogram 1/67 B-26B Invader
| KIT #: | PA-6 |
| PRICE: | $ |
| DECALS: | One option |
| REVIEWER: | Chris Mikesh |
| NOTES: | Vector Conversion Set ($26.00) |
| HISTORY |
 (From
instruction sheet, edited.) During World War Two the B-26, (formerly A-26),
was developed by Douglas Aircraft Company to fill the need of a modern
attack plane. It was named the “Invader” and was the fastest attack bomber
of its day. Combining speed, heavy firepower, and bomb capability, it serves
well as a strategic bomber, night fighter, skip bomber or as a strafing and
attack plane.
(From
instruction sheet, edited.) During World War Two the B-26, (formerly A-26),
was developed by Douglas Aircraft Company to fill the need of a modern
attack plane. It was named the “Invader” and was the fastest attack bomber
of its day. Combining speed, heavy firepower, and bomb capability, it serves
well as a strategic bomber, night fighter, skip bomber or as a strafing and
attack plane.
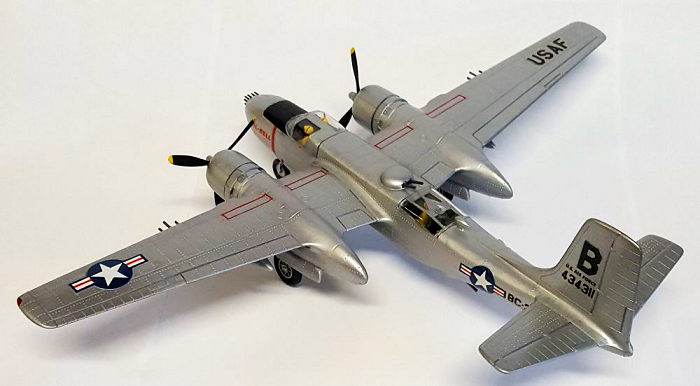
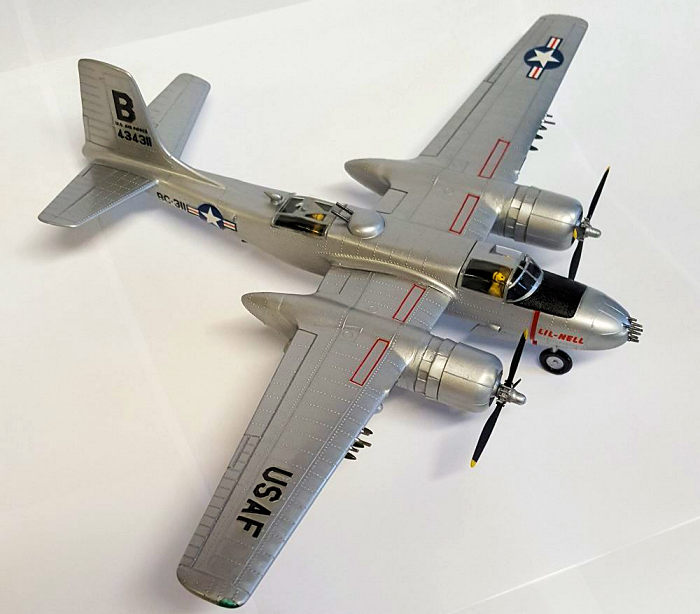
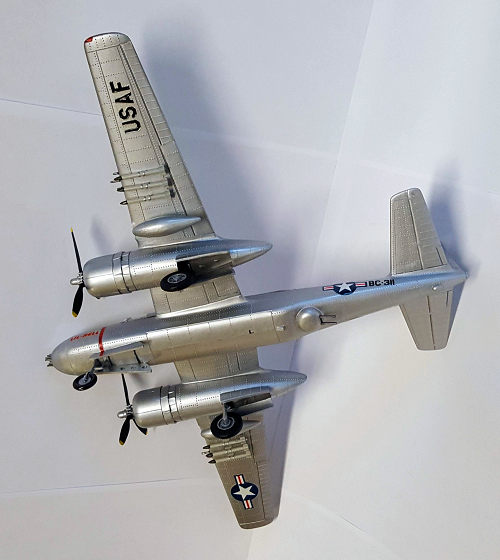
This model of the B-26 carries 18 50 caliber machine guns, six rockets and two napalm tanks in addition to the regular bombload within the fuselage. The gun turrets in the fuselage are remotely controlled and are aimed by a gunner using a periscope-like sighting mechanism (also found on the B-29).
| THE KIT |
 This is a
kit that goes back to 1955, early in the Monogram era of all-plastic kits.
I’ve had this kit sitting around in the “To-Do” pile for decades. It is the
same issue of my very first kit I ever built. My father flew B-26s in his
early career, Korea and again after I was born. So, when he wanted to build
a model with me (I was 6) it was the natural choice.
This is a
kit that goes back to 1955, early in the Monogram era of all-plastic kits.
I’ve had this kit sitting around in the “To-Do” pile for decades. It is the
same issue of my very first kit I ever built. My father flew B-26s in his
early career, Korea and again after I was born. So, when he wanted to build
a model with me (I was 6) it was the natural choice.
This kit was a familiar build, and it was like walking down Memory Lane again. Although it is a very rudimentary kit, it is a model many of us compared all other B-26's to. The surface details are highly exaggerated and includes raised lines for the decal markings. All rivets are gigantic in the scale of the model as well as the raised panel lines. So, by today's standards, this is not competitive compared to more modern B-25's. There is no interior except for the crew, and even a couple of those guys are cut in half and skewered in the side on a post. There is no wheel well to speak of, and the landing gear doors are molded into the open position. (So, if you want to fly in around the room, you’ll have to stay in the landing pattern.)
But on the plus side, this is made from that good swirly silver hard plastic that all of us enjoyed as beginner modelers. The plastic is so hard, that many of us still have it in our toy boxes and junk piles. It never goes away.
The instructions are pretty well laid out in picture format with a little bit of painting and assembly directions. There are not too many parts, or complex structures to pre build. The plastic is very thick in all respects.
| CONSTRUCTION |
Any experienced modeler can ruin this kit. But a novice will probably build it right. I started out with cleaning up the touch points where I will be gluing. There was not a lot of flash, but seams are very evident. Secondly, I added 10 BBs inside the nose cone with super glue. Then the instructions indicate to install the crew onto their posts (ouch!) before gluing the two fuselage halves together. I set the crew aside to be painted shortly, (there is room to install them later) and glued the two fuselage halves together. Next were the two wing halves, and they fit together perfectly. The engine nacelle halves were also assembled but set aside to cure and added later.
 The next
day, I tackled the seam lines. Even for a 65-year-old kit there was not too
much sanding and correcting to do. However, in the process of sanding the
seams, the builder will be removing rivets and details. I added masking tape
over the rivets to protect them while sanding. But I still needed to replace
some rivets by pressing the point of a #11 Xacto knife where the rivets
should have been and pry up the plastic gently. For the most part this
appeared to work. Once that was completed and polished, I proceeded to major
element assembly – and a few problems.
The next
day, I tackled the seam lines. Even for a 65-year-old kit there was not too
much sanding and correcting to do. However, in the process of sanding the
seams, the builder will be removing rivets and details. I added masking tape
over the rivets to protect them while sanding. But I still needed to replace
some rivets by pressing the point of a #11 Xacto knife where the rivets
should have been and pry up the plastic gently. For the most part this
appeared to work. Once that was completed and polished, I proceeded to major
element assembly – and a few problems.
Wings: Although the wings fit well, I discovered they did not naturally adjust to the correct dihedral with the left wing at a very steep high angle. Yup, the fuselage is twisted (probably due to age, heat, poor molding, etc.) that I did not see earlier. This caused a huge gap at the top of the ill-fitting wings, and was filled with stretched sprue, super glue, and filler, but was still visible.
Then I discovered that the nose weight was still not enough. This is a very tail-heavy model and added another 16 BBs into the fuselage nose in front of the pilots. (That should be enough!)
Next, came the elevators, and they attached perfectly as well. The propellers were not added yet but I used white glue to temporarily attach the engine cowling before painting. With all the primary components on the model, I started to look at paint.
| COLORS & MARKINGS |
I had leftover Tamiya aerosol gloss aluminum (TS-17) from a Monogram B-25 recently finished. Tamiya has always given a very satisfying result using their spray cans. Overall, the spray paint is very acceptable for a model such as this. The wheels, Anti-Glare Panel and propeller blades are flat black. The guns are Tamiya metallic gray. The five-inch rockets are painted neutral gray with an olive warhead. The red and green navigation lenses were produced by a Sharpie. The silver Sharpie is the same silver as the Tamiya aerosol and comes in handy for touch ups.
 I knew
these were going to be a problem, so I covered them with a decal saver to
prevent these old decals from shattering. If you build this model Out of the
Box (OTB), recall that all the markings are raised areas on the model, and
the decals will need a lot of attention to make them sit properly on the
plane. MicroSol, and MicroSet are a must! There will be a lot of bubbles to
contend with.
I knew
these were going to be a problem, so I covered them with a decal saver to
prevent these old decals from shattering. If you build this model Out of the
Box (OTB), recall that all the markings are raised areas on the model, and
the decals will need a lot of attention to make them sit properly on the
plane. MicroSol, and MicroSet are a must! There will be a lot of bubbles to
contend with.
The canopy and gunner framing was completed by using silver painted masking tape. Aizu Tape is very thin and comes in very small sizes. The framing is .7, 1, & 2 millimeter tape painted silver and delivers a very sharp line. Once all the framing is completed, the clear parts were dunked in future floor finish to seal everything permanently and set aside to dry. A quick airbrushed coat of Future over all to cover the decals and seal the paint, gave it a more natural look, and covered many of my mistakes.
But the model is still barely on three wheels. The engine cowlings were removed, to add the propellers, hubs, and 5 more BBs in each cowling then glued back into place. The crew was then skewered onto their posts (Ouch!). The wheels and rockets were permanently added. All clear parts were glued into place using Elmer’s glue (dries mostly clear).
| CONCLUSIONS |
 Generally,
a good kit. Odd scale, but close to 1/72. One thing I’d recommend for a
builder is sand off all the rivets and raised lines. Second, pay more
attention to the wing roots. Back in 1955, this was not an issue (which
is probably why it is not produced today). Third, add more nose weight
than you think you will use. It is a very heavy kit. Forth, if you are
good at it, finish the wheel wells, and cockpit. Finally, buy a
different kit unless you are flying down Memory Lane like me. Even the
old Airfix kit fits better and is more detailed.
Generally,
a good kit. Odd scale, but close to 1/72. One thing I’d recommend for a
builder is sand off all the rivets and raised lines. Second, pay more
attention to the wing roots. Back in 1955, this was not an issue (which
is probably why it is not produced today). Third, add more nose weight
than you think you will use. It is a very heavy kit. Forth, if you are
good at it, finish the wheel wells, and cockpit. Finally, buy a
different kit unless you are flying down Memory Lane like me. Even the
old Airfix kit fits better and is more detailed.
Oh! The tactical nuke is in the Bomb Bay – You just can’t see it!
24 October 2022
Copyright ModelingMadness.com. All rights reserved. No reproduction in part or in whole without express permission.
If you would like your product reviewed fairly and fairly quickly, please contact the editor or see other details in the Note to Contributors.