| KIT #: | AA-2044 |
| PRICE: | $58.00 |
| DECALS: | Two options |
| REVIEWER: | Mark Joyce |
| NOTES: | Short run resin kit with resin clear parts |
| HISTORY |
 The Beech Model 28/XA-38
‘Grizzly’ began in 1942 as a ‘bomber-destroyer’ aeroplane, but later became an
attack type in the effort to find a replacement for the Douglas A-20. It had a
two-man crew consisting of a pilot and an observer/gunner in a rear cabin, a
forward-firing 75mm cannon to penetrate hardened targets, and two 0.50 in
(12.7mm) machine guns in the nose along with twin 0.50 in machine guns in a top
and bottom turret for defense.
The Beech Model 28/XA-38
‘Grizzly’ began in 1942 as a ‘bomber-destroyer’ aeroplane, but later became an
attack type in the effort to find a replacement for the Douglas A-20. It had a
two-man crew consisting of a pilot and an observer/gunner in a rear cabin, a
forward-firing 75mm cannon to penetrate hardened targets, and two 0.50 in
(12.7mm) machine guns in the nose along with twin 0.50 in machine guns in a top
and bottom turret for defense.
The first prototype flew on 7 May 1944. It was one of those rare airplanes in which performance including top speed actually exceeded expectations. However, the main reason for its exception performance also largely resulted in its downfall: the two Wright R-3350 engines that powered it were needed for the higher priority B-29 Superfortress. As a result, only two prototypes were completed at which time the project was cancelled.
| THE KIT |
 Typical of
most Anigrand kits, this one consists of beige resin with heavy engraving and
thick, somewhat opaque clear parts contained in a sturdy cardboard box. The
resin parts in my kit were nicely molded, with no really noticeable air bubbles
or pin holes, nor any obviously short-shot parts. Dry fitting the major parts
indicated a decent fit. Also typical of Anigrand kits, the instructions consist
of one page, with an exploded view of where each part goes on one side and a
painting and decal guide on the other. Mine had two decal sheets, one of which
appears to have been taken from some other kit, since not only are the national
insignia provided but also some mysterious serial numbers. A second, smaller
decal sheet contains the correct serial number for one of the two Grizzlies
built.
Typical of
most Anigrand kits, this one consists of beige resin with heavy engraving and
thick, somewhat opaque clear parts contained in a sturdy cardboard box. The
resin parts in my kit were nicely molded, with no really noticeable air bubbles
or pin holes, nor any obviously short-shot parts. Dry fitting the major parts
indicated a decent fit. Also typical of Anigrand kits, the instructions consist
of one page, with an exploded view of where each part goes on one side and a
painting and decal guide on the other. Mine had two decal sheets, one of which
appears to have been taken from some other kit, since not only are the national
insignia provided but also some mysterious serial numbers. A second, smaller
decal sheet contains the correct serial number for one of the two Grizzlies
built.
| CONSTRUCTION |
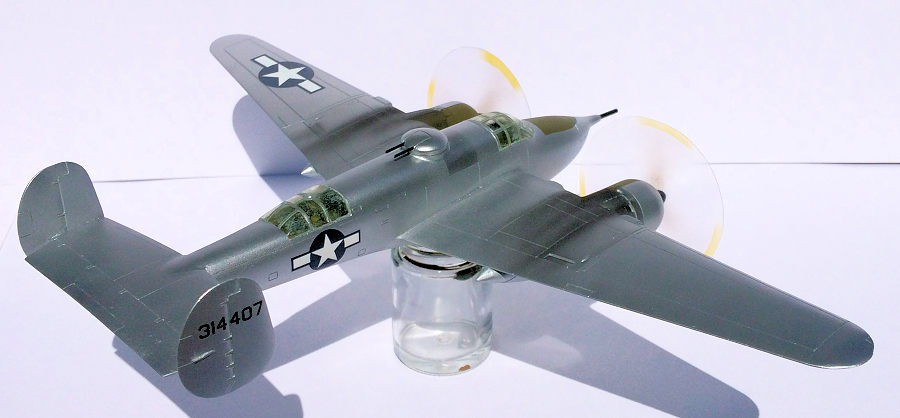
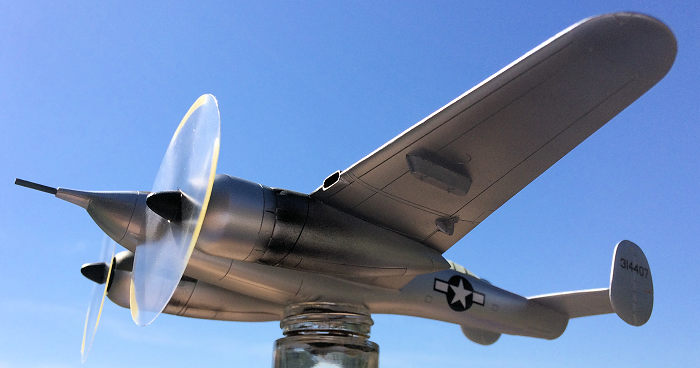
To me, photographs of the Grizzly in flight bring to mind either some huge prehistoric insect or a futuristic predatory machine. It seems to radiate raw power. However, on the ground sitting on its undercarriage in a nose high attitude gives it an awkward, ungainly appearance. As a result, I decided early on that I would construct my Grizzly in an in-flight display, something I’ve not done before.
With one exception, which will be mentioned later, gap-filling superglue was used throughout the construction, both to attach the parts together and also to rid the parts of the resultant seams. I prefer superglue over putty or other fillers for the latter process, for at least in my case in seems more durable and provides a smoother surface for painting, especially natural metal finishes. Now on to the build itself….
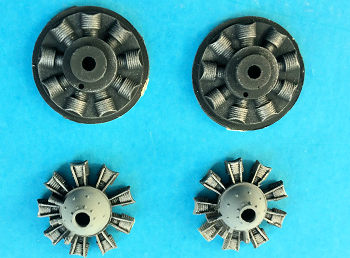 I started
by painting the two engines, which are somewhat generic representations of the
front of the R-3350s that powered this beast. These have to be installed in the
nacelles prior to gluing the nacelle halves together. It’s important to ensure
that the proper halves are glued together, otherwise they won’t fit when
installed to the wings. I then installed the gear doors, which fit surprising
well in the closed position and required only a little sanding. At this point I
test-fit each nacelle to the underside of the respective wing, which has lightly
engraved guide lines to help in determining placement. Some sanding was required
to get a decent fit, and I concentrated my efforts in obtaining the best fit on
the outboard side since it’s more visible. An application of Mr. Surfacer 500
helped fill the minor gap between the nacelles and wings. Wing construction was
finished by attaching the two bomb racks under each wing.
I started
by painting the two engines, which are somewhat generic representations of the
front of the R-3350s that powered this beast. These have to be installed in the
nacelles prior to gluing the nacelle halves together. It’s important to ensure
that the proper halves are glued together, otherwise they won’t fit when
installed to the wings. I then installed the gear doors, which fit surprising
well in the closed position and required only a little sanding. At this point I
test-fit each nacelle to the underside of the respective wing, which has lightly
engraved guide lines to help in determining placement. Some sanding was required
to get a decent fit, and I concentrated my efforts in obtaining the best fit on
the outboard side since it’s more visible. An application of Mr. Surfacer 500
helped fill the minor gap between the nacelles and wings. Wing construction was
finished by attaching the two bomb racks under each wing.
With the
wings out of the way, I turned my attention to the fuselage. I always struggle
in gluing resin fuselage halves together, since the method I used in styrene
kits of working bit-by-bit with Tamiya extra thin cement doesn’t work. In this
case, I was able to apply superglue to the entire upper half of one fuselage and
used a combination to tape, clamps, and
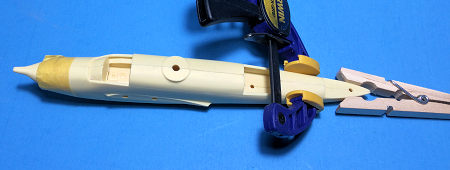 clothespins to hold the halves together
until the glue set. I then turned my attention to the lower section, where I put
a bit of superglue on the tip of knife blade, which I inserted between the
halves in hopes of getting at least a little glue between them.
clothespins to hold the halves together
until the glue set. I then turned my attention to the lower section, where I put
a bit of superglue on the tip of knife blade, which I inserted between the
halves in hopes of getting at least a little glue between them.
Now it was time to attach the wings to the fuselage. This is one area that I don’t use superglue, at least on larger resin kits such as this one, since I’ve discovered the hard way that it doesn’t provide a durable connection. Instead, I opt for 5-minute epoxy. A little sanding occurred to get as good a fit as I could, again concentrating on a better fit for the more visible top side. An application of Mr. Surfacer 500 helped fill what little gap occurred. Once the wings were finished I attached the horizontal tail, which only at this point I noticed had a slight downward warp. I chose to ignore the warp and moved on to attaching the two vertical stabilizers.
 With
the fuselage together I tackled the very basic interior consistent with most
Anigrand kits, which in this case consists of a pilot’s seat, a yolk, a seat for
the gunner in back, and what I assume is the telescopic sight for the upper and
lower remote controlled turrets. I painted everything here with Model Master
Interior Green with the exception of the instrument panel and its cover, which
were painted flat black. I found a 72nd
instrument panel decal from my spare’s stash, along with a pilot to use since
this is an in-flight display.
With
the fuselage together I tackled the very basic interior consistent with most
Anigrand kits, which in this case consists of a pilot’s seat, a yolk, a seat for
the gunner in back, and what I assume is the telescopic sight for the upper and
lower remote controlled turrets. I painted everything here with Model Master
Interior Green with the exception of the instrument panel and its cover, which
were painted flat black. I found a 72nd
instrument panel decal from my spare’s stash, along with a pilot to use since
this is an in-flight display.
Now I came to my main snag in this build: those clear parts. Masking with Tamiya tape was easy due to the pronounced framing, but when I test fit them I found both canopies were slightly wider than the fuselage. I attached both with superglue, using clamps to try and hold them flush with the fuselage with limited success, so ended up using more superglue followed by Mr. Surfacer 500 to try and smooth things out, again with limited success.
| COLORS & MARKINGS |
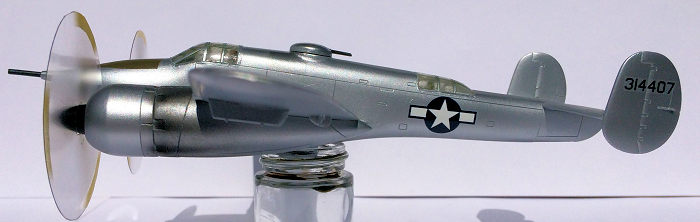
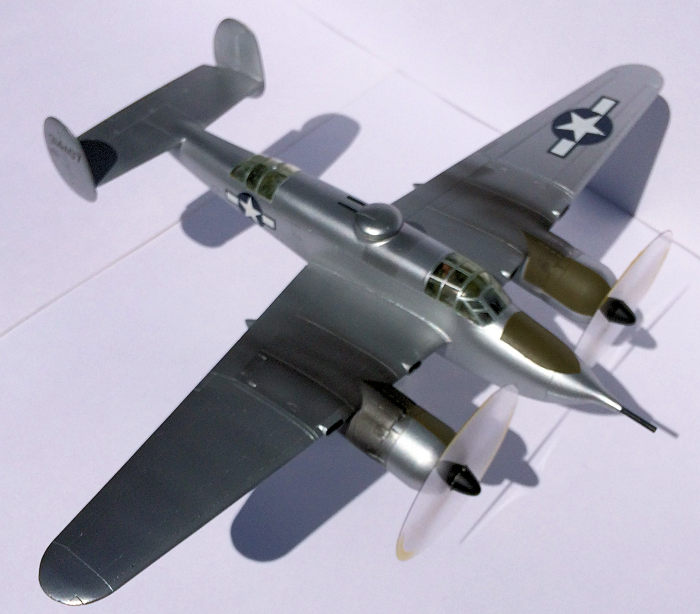
After a coat of Alclad II Grey Primer/Microfiller, I painted the whole airframe Alclad II Aluminum. The photos I’ve seen don’t show much tonal variation on the airframe, so I simply masked and highlight a few panels using Dark Aluminum to break up the monotony a little. I masked off the black wing walkway (the instructions indicate walkways on both wings but photographs indicate the port side only) and finally the olive drab anti-glare panels on the nose and nacelles.
 The
problems with the clear parts bit me again when I removed the masks. This has
been an on-again, off-again project for some time. I thought I had dipped the
canopies in future, but based on the fogging from the superglue this probably
wasn’t the case. Apparently superglue fogs resin canopies as well as styrene
ones. Not that there was much interior detail to see anyway.
The
problems with the clear parts bit me again when I removed the masks. This has
been an on-again, off-again project for some time. I thought I had dipped the
canopies in future, but based on the fogging from the superglue this probably
wasn’t the case. Apparently superglue fogs resin canopies as well as styrene
ones. Not that there was much interior detail to see anyway.
The few decals went on with little fuss and settled nicely on the Alclad.
| FINAL CONSTRUCTION |
Those R-3350s were apparently big time oil burners, as indicated by the exhaust staining seen in photographs, so I replicated these stains by airbrushing thinned Tamiya smoke. This was the extent of my ‘weathering.’
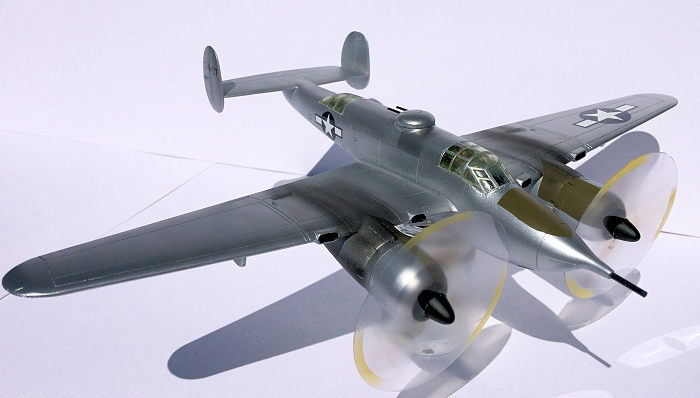
This being an in-flight display, I pondered how best to replicate the spinning props. Some people can probably use Photoshop or some similar program, but that’s beyond my ability. Also, I didn’t want to expend money on anything aftermarket. Ultimately, I decided on a rather cheesy representation. I ended up cutting appropriate sized circles out of some clear styrene sheets, cutting an opening in the center to fit them on the spinners, and airbrushing highly thinned black and yellow on the circles for a blurred appearance. Same issues came into play for a cheesy stand to hold up the model, so I simply placed it on a paint jar for the photographs. Cheesy props and stand but, hey, that’s me!
| CONCLUSIONS |
This Anigrand resin kit is a nice representation of the Beech XA-38 Grizzly. I’m not saying it’s 100% accurate but it looks the part. The build itself is a rather straightforward process, with no real construction issues beyond the fit of the clear canopies. I can recommend the kit for someone who has a resin kit or two under their belt, and especially has an interest in a rather unknown, “what might have been” airplane.
| REFERENCES |
Buttler, Tony, and Alan Griffith. American Secret Projects: Fighters, Bombers, and Attack Aircraft 1937-1945. Manchester: Crecy Publishing Ltd., 2015.
National Museum of the US Air Force website
Wikipedia
24 June 2019
Copyright ModelingMadness.com
If you would like your product reviewed fairly and fairly quickly, please contact the editor or see other details in the Note to Contributors.
Back to the Main Page Back to the Review Index Page Back to the Previews Index Page