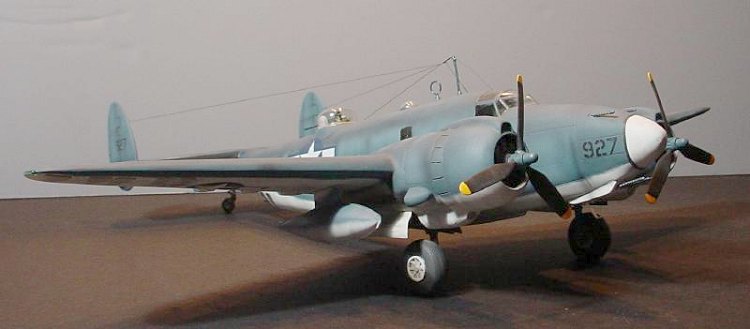
Confronting Vacuphobia.
Vacuformed kits seem to be the pinnacle of trepidation for most modelers. The gulf between today’s modern “Tamiyagawa” shake-the-box well-engineered kits and the limited-run injection molded kits of ten years ago is small by comparison. A lot of modelers I know, very good builders often well-versed in scratchbuilding parts on their own are loathe to tackle vacuformed kits. They’ll build resin kits without a second thought, but are afraid to start a vacuformed kit.
In part I think it’s the same sort of phobia which keeps us from trying different foods, like squid. It just doesn’t look right. Well, just like squid when it’s cut into bits and deep-fried as calamari, a vacuformed kit can be approached as a sum of its parts. If you take the plunge, you’ll find a vacuformed kit can often be less work than a resin or limited-run styrene kit.
|
HISTORY |
The Ventura.
 Lockheed Aircraft
Company was well-known by the time the Ventura began its service life.
Its subsidiary, Vega, had long established itself as a premier passenger
aircraft design and manufacturing company. The Hudson (Vega Model 14)
was a corporate transport, mail carrier and general transport aircraft.
Its militarization was simple, with a convenient belly hold for luggage
easily transformed into a bomb bay. The Hudson enjoyed reasonable speed,
spacious cabin and cockpit, and fairly good range. The British purchased
the Hudson for coastal patrol, arming it with a defensive Boulton-Paul
turret and other military items.
The shortcomings of the Hudson were obvious. It was too small and too slow for prolonged military use. Lockheed had already addressed the problem with their Model 18 “Lodestar” transport. Though the aircraft obviously share a lineage, the Model 18 was not a revised Model 14. The Model 18 “Ventura” was larger, faster, and stronger than its predecessor.
Military demands led the British to specify Pratt & Whitney Model 2800 engines. These Double Wasps were standard on military fighters and bombers, but were not originally specified for the Ventura. This led to a unique design feature of the Ventura, which would serve it well throughout its career. As Lockheed would not re-tool its Vega factory to increase the wing length or move the engines farther out along the wing, another solution to the increased propeller size was needed.
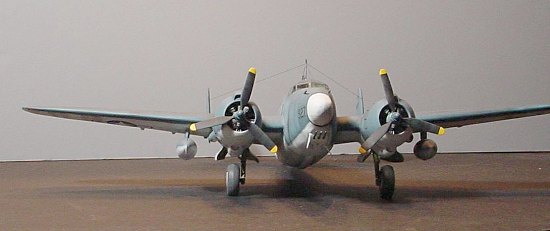 A wide-chord
“paddle bladed” propeller was developed. These paddle-blades produced a
distinctive sound, especially considering their proximity to the
fuselage. The close nacelle location also made the Ventura a compact,
powerful design with outstanding low-to-mid altitude performance. In the
parlance of the day, it was a “hot ship.”
This came as a surprise to the British, who were disappointed when they first used their new aircraft. The Ventural was ill-suited as a low-level attacker against hardened targets. Despite the 2500lb payload, and high speed and good maneuverability the plane was not an attack aircraft partially due to its high wing loading. The British re-assigned their Venturas to the reconnaissance role. The US Army showed interest in the design, and designated it the B-37, up-arming it with U.S. Standard .50 caliber machine guns and the familiar Martin turret. The USAAF never quite figured out what to do with the plane, though. It was a bit too big for a trainer, it wasn’t a heavy bomber, and it wasn’t an attacker like the A-20. When the US Navy requested a transfer of Venturas, the AAF was happy to oblige.
The Navy was desperate for a land-based partner to the Catalina. PBY losses were unacceptable in high-threat areas, where fighters made short work of the elegant but slow aircraft. USN Hudsons proved themselves capable, and the Ventura seemed to be an answer to the Navy’s prayers.
The Navy made its own changes to the Ventura. The bomb bay was fitted to carry a single Mk. 13 aircraft torpedo, and could also carry Tiny Tim rockets – though no records of their use exists. The bomb bay could also carry two fuel tanks, 200 and 280 gallons in non-self-sealing tanks. Wing hardpoints provided space for auxiliary fuel tanks, soon to be a standard feature on Venturas.
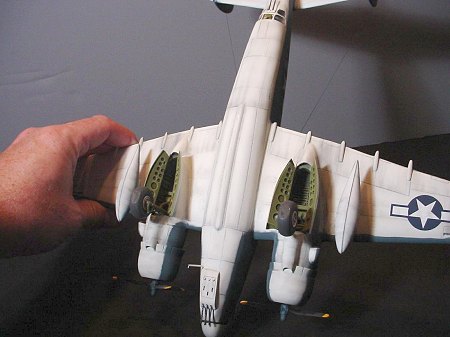 The Ventura, with
its 5-man crew, soon proved itself in combat. In the Aleutians,
considered low-level conflict, the Ventura outclassed their Japanese
fighter opponents. They provided long-range convoy escort duty, and
actually flew as long-ranged fighters while escorting C-47s. The twin
bow guns, combined with the outstanding Martin turret and dorsal
“stinger” guns made the 312mph Ventura one big fighter. The PV-1 could
outrun Japanese Zekes and Hamps, and a Tony could only outrun the Ventura
when using dangerously high power. This gave the Ventura a well-needed
envelope in which to operate.
All of this came at a price, well-known to all aircraft aficionados. High wing loading means high landing speeds, but well-designed controls including Fowler flaps and sturdy landing gear mitigated this risk. Navy pilots soon became very fond of their aircraft, and enthusiastic about the role they played in the war. PV-1s were used in the South Pacific and North Atlantic supporting convoy patrols, and anti-shipping missions. Eventually an improved version deleted all nose windows in favor of a 3-gun pack. This 5 forward facing .50 caliber onslaught could saw small ships in half.
You will notice a wide variety of ordinance, configuration and electronics on Venturas. Directional antennae, whip antennae, wires and sensors could be placed in various positions – so don’t assume you know what looks “right” unless you have a specific picture!
More than 1600 Venturas were used in WWII. It’s one of the most overlooked aircraft in the war, considering its success in a very important role. When one reads the crew’s respect and affection for the aircraft, it’s hard to understand why more people don’t know about the plane. I’ve learned a lot during the project, becoming an enthusiast for a plane I knew primarily as very attractive.
|
THE KIT |
 Koster Aero
Enterprises offers a wide variety of 1/48 scale multimedia kits. These
are, from what I’ve seen, well-engineered. The styrene is fairly thick,
though the detail is a bit soft. Resin and metal parts are provided for
sharper detail, and very well-formed clear parts complete the kit.
Beautiful decals from Microscale provide options for 7 planes, one of
which is British. You get a lot of choices, including glazed-nose
versions, a Boulton-Paul turret, an option for the Spartan fuselage hold,
and the chin gun pack.
Instructions are terse but adequate, though you will definitely want to use references to help with optional placements like antennae.
|
CONSTRUCTION |
First things first. This was my first vacuformed kit, so I asked friends for advice. Armed with my newfound confidence, I plunged into the venture with both feet. I outlined all the parts with a marker, this was to provide a demarcation for sanding later. Using a hobby knife or a scribe where appropriate, I cut all the major parts from the styrene backing as per instructions. After doing this, the model looks very much like any styrene kit.
 Wet Sanding took
some time. I sanded down to the marker layer, which was a bit too far
for the fuselage as I’d learn later. At this point I should interrupt –
I’ve learned a valuable lesson. What I should have done was cut out the
clear cockpit windscreen and stinger windscreen. I should have taped the
fuselage together and tested the fit of these clear bits. I did not do
so, and sanded the fuselage too far – making it a bit too narrow for the
clear parts. This would cause me a lot of work later. Lesson learned.
A bit of advice for the initiate – the butt joint of vacuformed parts can be small. This means it can be weak. Strengthening this joint, providing extra surface area for cement, as well as helping with alignment, is simple if you cement strips of spare styrene along the edges. They don’t need to be huge, about 3-5mm is sufficient. The instructions give a good description of the process.
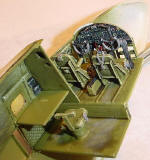 Cockpit
construction is straightforward. The deck is suspended between two
bulkheads, and detail is pretty good. I added a number of throttle
quadrant levers and instrument panel lights. I was undecided whether to
open a couple of windows, and wanted to detail the interior
sufficiently.
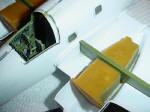 A very smart
feature of this kit – and several others I’ve seen from Koster, is the
integrated wing spar/bulkhead. This aligns the wings perfectly. I was
highly impressed, as these also pass through the landing gear bay to
positively lock these in place and provide even more strength. The kit
does not rely on a simple butt joint for the wings, when this spar is in
place. It really is very strong. This bulkhead forms the aft of the
navigator’s compartment – which includes radios, the navigator’s table,
and the nifty little swivel chair.
I initially
put a glob of Miliput epoxy putty in the nose. This was meant to
provide an anchor for the machine guns. However, after the fuselage was
assembled, these popped loose and now rattle around in the nose – and
have caused little flakes of white gunk to adhere to my clear bits
(expletives deleted). There’s another lesson. I don’t use Milliput
anymore, I’ve switched to Aves. I’ve also decided that merely cementing
a few layers of styrene in a spot like this would have been a
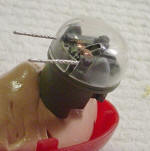 better
solution.
The stinger location must also be addressed at this point, and the tail wheel mounting point. If you want to detail the stinger position, you need to do it now. Also, if you want to detail the fuselage hold, which can be seen through the optional open door, now’s your chance. I also placed a lip around the cockpit and stinger openings with thin styrene, giving them a more solid purchase.
Gluing the fuselage
together presented a slight problem. For some reason or another, if I
aligned the panel lines, the nose wasn’t quite right. I figured a bit of
epoxy putty on the nose was easier than panel lines, and the least of my
worries. Overall, the fit was good, but did require a little putty
work. Not a major problem. I
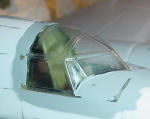 sanded the nose to shape, and called it
finished.
My attention next turned to the wings. I placed the landing gear bays into the nacelles, but did not glue them in place yet, as per the instructions. The reason is simple, the wing spar will set the placement – it passes right through the bay just as in the actual plane. Once the bottom wing was glued to the fuselage, and the spar glued to the wing, then the gear bay can be expoxied in place. When mating the upper wing surfaces to the lower, I noted my second example of over-sanding. The halves didn’t meet at the fuselage – more Aves Apoxie Sculpt to the rescue!
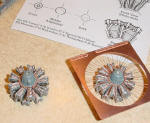 I replaced the
kit’s engines with ones from Verlinden.
The tail surfaces are simple by comparison, but here you do want to sand well, as they’re fairly thin on the real aircraft. Careful alignment will result in a great-looking twin “Lockheed” tail.
Next, I began to
work on the model’s surface. The panel lines are quite soft, so I used a
file to sharpen them a bit. Apparently this kit is produced via a
positive master, not like Sierra or Dynavector kits. This wasn’t a big
issue to me, I merely smoothed the lines a bit with a file. Liberal use
of Gunze-Sangyo’s Mr.
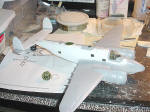 Surfacer and Aves Apoxie resulted in a pretty good
surface.
At this point, for some reason or another which I don’t remember, I put the model in a bin. I worked on many other things while the Ventura stared at me from its massive container. Occasionally I’d look at it and say “I really should finish this thing” and replace it. More than two years later, I finally lived up to that promise. In the meantime, I’d learned quite a few tricks.
 Refreshed by a
challenge from a friend, I began anew on the kit. I arranged
sub-assemblies, devised mounting techniques for the various bits and
pieces, and finished preparing the surface. It was then I noticed the
windscreen and tail stinger screens were too wide. I epoxied them in
place, and used epoxy putty to build up the surrounding area a bit.
Combined with sanding and the use of more Mr. Surfacer, the results were
passable. I installed the navigator’s dome from inside the fuselage,
by going through the open rear turret hole. I
didn’t think I’d get satisfactory results by placing it atop, so I
thinned the hole from the inside and used a bit of wire with Blue Tack
(adhesive putty) to glue it in place. A bit of epoxy cement did the job,
the slight gap was filled with Mr. Surfacer.
|
COLORS & MARKINGS |
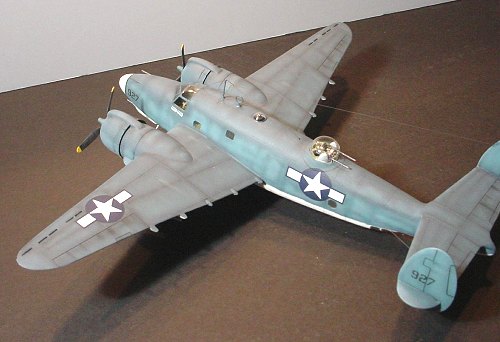 Priming with the
expensive but astounding Mr. Surfacer 1000 in a spray can allowed me to
smooth the surfaces. Once satisfied, I proceeded with painting the
aircraft as normal. Well, almost normal, as I had decided to use pre-
and post-shading techniques more extensively than I’d ever done. Here’s
the order I came up with for this.
1. Base color (underside a slightly grayed white, Intermediate blue and Navy blue for side and upper surfaces, respectively.
2. A darkened base color along panel lines.
3. A lightened base color in the middle of the panels.
4. Base color again to blend and add directional fading techniques.
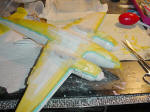 For the base color
I used my Omni 3000, but for all the effect steps I used my Sotar 20/20.
Paints were mostly Gunze Sangyo, though a jar of Tamiya was used, too.
This would turn out to be a mistake, as I used flat – and it turned out
to be too gritty. I should have sanded it off. Lesson learned – again.
Generally I prefer to use gloss paints, and the Gunze semi-gloss paints
are sufficient. The flat paints are just too flat.
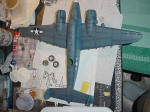 When I first
painted the model, the side intermediate blue was too dark, and there
wasn’t sufficient contrast with the upper surfaces. Combined with a poor
panel wash – partly due to the soft, wide panel lines and partly due to
fairly gritty paint, I was highly dissatisfied. It went back to the
paint booth for another complete blue paint job. There’s a lot of paint
on the model. This second painting also disrupted what was a pretty good
soft demarcation between blue and white. The wash turned out to be
pretty effective, once painted over – a trick I’ll use again.
Windscreen masking, just Tamiya tape, was a bit dodgy when removed – so much paint had been applied in areas I needed to repair here and there.
|
FINAL CONSTRUCTION |
After painting all the little details were added – antennae, props, landing gear etc. Compared with the rest of the ordeal, these were no effort at all. I made sure to drill small holes for the 4-lb test monofilament line antenna wires. The insulator off the main mast is merely built-up superglue. The nylon monofilament line is painted with PolyScale Grimy Black, as are the tires.
|
CONCLUSIONS |
I’m happy with the results. Is it perfect? No. Does it look good? Yeah. At the time, it was the only game in town for a 1/48 Ventura, and it does build up very well – particularly if you know what you’re doing at the start. Considering it’s my first attempt at a Vacuformed kit, I’m very happy. It will look great at contests when I’ve painted the Eduard PSP base. I haven’t seen any previews of the upcoming FM Ventura kit, so I can’t draw any conclusions.
If you’ve got experience with limited-run kits, you’ve probably got no excuses for avoiding vacuformed kits. Take the plunge and build one if you’ve found a subject you like.
August 2004
|
REFERENCES |
PV-1 Ventura In Action By Scrivner and Scarborough, Squadron/Signal publications No. 48,1981
Copyright ModelingMadness.com. All rights reserved. No reproduction in part or in whole without express permission from the editor.