|
KIT: |
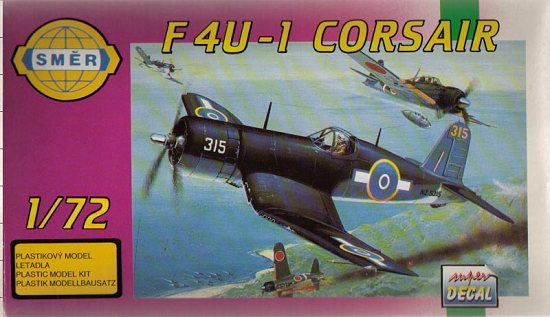
SMER 1/72 F4U-1 Corsair |
|
KIT # |
155 |
|
PRICE: |
$6.998 |
|
DECALS: |
Two aircraft |
|
REVIEW & |
Steve Mesner |
|
NOTES: |
Heller molds` |
|
THE KIT |
I don’t know when Heller’s F4U-1A first appeared, but I do know that it was
reboxed and sold under the Aurora name in the mid-1970s, so it’s been around at
least that long. More recently it has been sold by SMER of Czechoslovakia. Kit
numbers and prices therefore will vary. Current retail on the SMER boxing is
$6.98, but Squadron regularly discounts that to $5.46 and often has it on sale
for even less. Depending on boxing, you might even be able to beat that at a
swap meet.
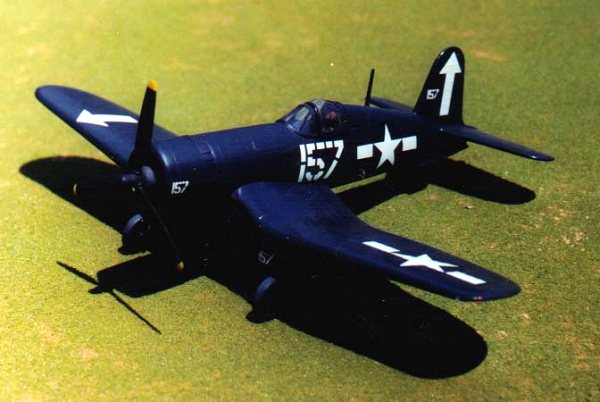
Let’s cut right to the chase here: Does the finished model look like a Corsair?
Yes, in fact, it does, as you can see even in the rather dark accompanying
photo. In accuracy of outline and overall look, it’s not the best 1/72 Corsair
available, but it’s far from the worst. It’s behind the Tamiya and Hasegawa, but
clearly ahead of the Airfix, Revell, or Hawk/Testor. (I’ve never seen the
Academy or Frog built, so can’t comment on those.) Its closest competition might
come from the long-defunct JoHan Corsair. The JoHan has overdone engraved panel
lines; the Heller has fine raised ones. The Heller is more detailed, but the
JoHan is slightly more accurate in shape and LOTS easier to assemble.
While the JoHan kit almost falls together, Heller’s Corsair will give you fits
in the wing
assembly. The outer panels are molded separately, perhaps to encourage you to
build it with folded wings (no such instructions or wingfold detail is given,
but at least the cut is made for you), but the outer-to-inner wings joints are
quite nebulous; you can glue the outer panels in any number of positions, most
all of them wrong. Dihedral is important in the overall “right look” of any
airplane, and especially so in the case of the Corsair--get either too much or
too little and your model looks like a cheap toy.
To get the wing assembled on mine, I flooded the outer and inner panel joints of
one wing with Testor liquid cement, then mated the two, comparing the wing with
good head-on drawings of the Corsair and noodling with the angle for quite a
long time while the cement dried. Then I repeated the operation on the other
side the next evening, after the first was solidly cured. This was a huge pain
in the rump, and is what I most remember about building this kit today, some six
or seven years later! If I were to build another one (and in fact, I very well
might!), I’d use good 1/72 drawings to construct a simple styrene or cardboard
template of the upper surface of the Corsair wing, tip-to-tip, and use that to
get
everything in proper alignment. I would strongly advise not mating the wing
center section
to the fuselage until you have the outer panels on, just to make getting
everything straight
that much easier.
I don’t recall any other particular problems with the assembly of this kit
besides the wing.
There’s a cockpit of sorts, and a generic-looking engine. The propeller, wheels,
and
landing gear are all reasonably convincing, though not of course up to the
standards of
newer kits. The cowling is molded in two halves, a minor annoyance. Panel lines
and
surface detailing are handled by very fine raised lines that don’t detract
greatly from the
appearance of the finished kit. Fabric areas of the flying surfaces are
represented by very
delicately engraved crosshatching, which in scale would represent something
between
chicken wire and fishnet. (Attention, model manufacturers: Please stop trying to
represent
fabric on model airplanes! Real airplane fabric is filled with so much dope that
NO weave
pattern of any kind is ever seen even in 1:1 scale! Just give us the ribbed
effect where
appropriate! Thank you!) This crosshatching gets filled in for the most part by
a couple
heavy coats of paint, and doesn’t detract much from the appearance of the
finished model.
Being a fan of overall Glossy Sea Blue Corsairs (if the truth were known, I just
don’t like
painting the tri-color camo scheme!), I converted my Heller F4U-1A to a -1D by
the
simple expedient of sanding and polishing off the two pieces of overhead
framework in the
canopy to make the later style. (I ignored the -1D’s wing center section pylons
and rocket
mounting stubs; perhaps I shall add these someday.) After giving the whole thing
a good
squirt of Model Master Glossy Sea Blue FS15042, I masked off the forward
fuselage
antiglare panel and shot that in Testor Dullcote. This is how at least some of
the real
F4U-1Ds got their antiglares, too--a clear flat coat over the base paint! For
markings I
chose the distinctive arrows of VF-84 on the Bunker Hill from an old Micro Scale
sheet.
(Yes, I have photos of VF-84 Corsairs without the yellow noses!) Note that while
I
painted my landing gear and wheels in GSB with the rest of the airframe, these
should
have been in a natural silver color at this particular time. (GSB wheels and
gear would
come on the -1 Corsairs at repaint time, not from the factory).
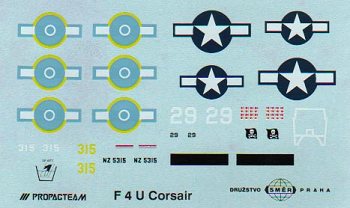 The SMER rebox of this kit that I bought just a couple years ago (box art and
decals
illustrated here) has Propagteam decals for two aircraft, Ira Kepford’s #29 of
VF-17 and a
RNZAF Corsair in tricolor camo. I’ve lost the box for the kit I actually built
(I think it was
an Aurora rebox) and can’t tell you what decals came with that one.
Is this a kit worth having and building? Well, if it were the only -1 Corsair
available in
1/72, we could get by with it, as it’s just barely good enough to justify
aftermarket
The SMER rebox of this kit that I bought just a couple years ago (box art and
decals
illustrated here) has Propagteam decals for two aircraft, Ira Kepford’s #29 of
VF-17 and a
RNZAF Corsair in tricolor camo. I’ve lost the box for the kit I actually built
(I think it was
an Aurora rebox) and can’t tell you what decals came with that one.
Is this a kit worth having and building? Well, if it were the only -1 Corsair
available in
1/72, we could get by with it, as it’s just barely good enough to justify
aftermarket
detailing, rescribing, and so forth. If you want a really good Corsair model
today, you’re
better off starting with either the Tamiya or the Hasegawa kit. But if you have
one of the
Hellers in the back of the closet, or run across one or its Aurora or SMER
reboxings
somewhere at a really good price, give a thought to knocking one together
out-of-the-box
as a simple, fun project--I’ll bet you’ve got extra Corsair decals laying around
looking for
a good home! I wouldn’t recommend this kit for a youngster or beginner, though,
unless
they had at least some experience--and some help from you getting the wing
together
straight. Model on!
If you would like your product reviewed fairly and quickly by a site that averages thousands of visits a day, please contact me or see other details in the Note to Contributors.