Academy 1/72 TBF Avenger
|
KIT # |
1651 |
|
PRICE: |
£4.25 MSRP |
|
DECALS: |
one option |
|
REVIEWER: |
|
|
NOTES: |
OOB |
|
HISTORY |
The
Avenger had a distinguished wartime record from its disastrous debut at
Midway, to bombing raids over Tokyo – covered
 in various books.
The main differences between the different versions modellers are likely to encounter is thus:
TBF-1/TBM-1, made by both Grumman and General Motors, has 2 upper engine gills and 1 lower, giving the impression of a Y shape from the front when opened. Only 1 carburettor intake in the upper cowling lip. Early TBFs had a 0.30 machine gun firing through a trough - recessed in front of the pilot, and which cut through the starboard gill.
TBM/TBF-1C, same engine configuration, but the 0.30 is deleted and replaced with a 0.50 in each wing.
TBM-3, I’ve never seen a reference to a TBF-3 so assume these are all General Motors. Wright R2600-20 engine of 1800hp. Full ring of cooling gills, with inlets in upper and lower cowing lips. Same 0.50s in each wing. Some late versions had external arrestor hook.
|
THE KIT |
The Academy TBF kit has been with us a long time. My first has instructions copyright 1987, which is about when I bought and built it. My most recent is actually older. This kit was assembled at the same time as another Airfix TBM-3 (but not the FAA version I reviewed earlier in 2003), so expect some direct comparisons.
 I’ve
been told that the Academy kit is a reworking of the ancient Frog Avenger
– which was actually a Royal Navy Tarpon, and would explain the bulged
side windows.
I’ve
been told that the Academy kit is a reworking of the ancient Frog Avenger
– which was actually a Royal Navy Tarpon, and would explain the bulged
side windows.
Moulded in hard grey plastic, with finely engraved surface detail, it consists of 51 parts including 7 clears and a two-part stand. As I remember my first Avenger, assembly was straightforward with no difficulties – the turret even rotates! This kit has no moveable control surfaces, and their associated gaps. As far as I described so far this kit is a definite improvement over the Airfix equivalent. Academy scores the first point!
The kit has a three tone US Navy sea camo for White 301 of VT-84 USS Bunker Hill 1945. Perusing a copy of Avenger at War I, found a photo of this aircraft on page 87 – with considerable combat damage. It also had a full ring of engine gills – making it a TBM-3! Own goal by Academy for poor research!
A really interesting feature is the instruction illustration, which shows something more like a Douglas Dauntless with a turret - it’s even got the dive brakes open!
 Originally I painted my first Avenger as White 301 – but revisiting it I
was pretty disappointed. Around the time I acquired the new Avenger, I
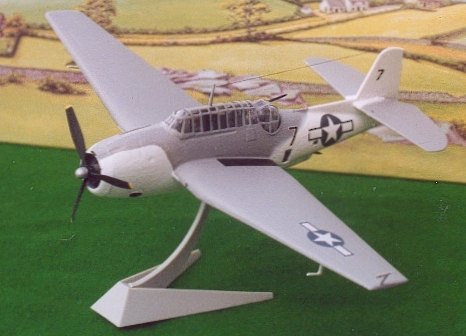
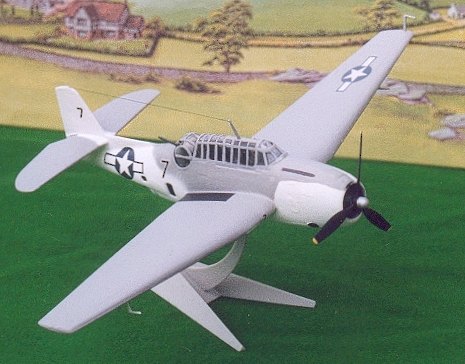
repainted the original in the Atlantic ASW No 2 scheme as Black 7 as
illustrated on the cover of Barrett Tillman’s Osprey Air Combat book. As
I didn’t relish the idea of cutting the trough in the upper fuselage, I
represented the 0.30 with a dark grey decal.
Originally I painted my first Avenger as White 301 – but revisiting it I
was pretty disappointed. Around the time I acquired the new Avenger, I
repainted the original in the Atlantic ASW No 2 scheme as Black 7 as
illustrated on the cover of Barrett Tillman’s Osprey Air Combat book. As
I didn’t relish the idea of cutting the trough in the upper fuselage, I
represented the 0.30 with a dark grey decal.
Expect some repetition from my Airfix review – as some of the construction and painting will be similar.
|
CONSTRUCTION |
Construction starts with the interior, which consists of a two miniature cockpits – each with seats and bulkheads. Then there’s a similar seat for the gunner. I painted the whole lot, and the fuselage interior, wing wheel wells, and all undercarriage components with Inscribe Avacado acrylic. Seats were painted light brown and treated to a harness set made from thinly sliced Tamiya masking tape. No need to hide anything with a pilot figure on this kit.
At this point I realised that in terms of parts, surface detail, and interior - this kit is an order of magnitude improved over its Airfix equivalent! I’ll check shape and size later. Academy pulls ahead again!
Next stage is fuselage assembly, including the turret. All went together perfectly, without gaps – and the turret even rotates. As usual I omitted the porthole transparencies – planning to use Humbrol Clearfix after painting. This kit has no arrestor, but I waited until painting was finished before installing the lower glazing and gun.
Next is the wings and horizontal tail. These were completed as instruction, fitting onto the fuselage sides. The fit was less that perfect – so a bit of filling, sanding and smoothing was necessary. The engine front was also attached at this point, modifying the prop-spindle so that it could be removed for transit. The breakdown provides a perfect colour demarcation for the yellow nose of the included scheme – but I’d decided to finish this model as a REAL Blue/Grey/White TBF-1, from photo evidence.
The fuselage was finished off by fitting the canopy – and no gaps to speak of, so Academy move further ahead.
|
CAMOUFLAGE & MARKINGS |
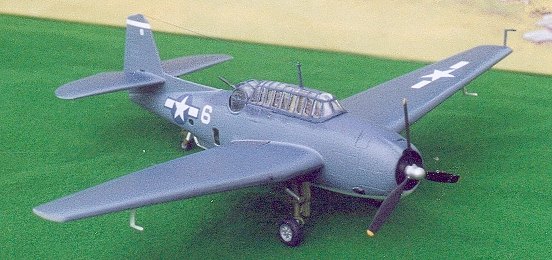
I hand painted the canopy framing and the rest of the upper surfaces with Humbrol 104 Oxford Blue. Then I aerosolled the lower surfaces with Poundland white primer. Next I masked the glazing and airbrushed the fuselage sides and wing leading edges freehand with Humbrol 144 Intermediate Blue.
My Atlantic Avenger is Halfords Appliance White underneath, and Humbrol 64 upper.
 I did
try the kit insignia elsewhere and found them easy to use - unfortunately
I thought they were too dark and too small, so I used stars from my
previous Airfix Avenger. My method of applying decals is to apply it
over a blob of wet Klear and press it down. This expels any air, which
is the cause of silvering, and quickly bonds decal to the model surface.
After setting overnight, I give the model another coat of Klear, then
treat with a matt finish.
I did
try the kit insignia elsewhere and found them easy to use - unfortunately
I thought they were too dark and too small, so I used stars from my
previous Airfix Avenger. My method of applying decals is to apply it
over a blob of wet Klear and press it down. This expels any air, which
is the cause of silvering, and quickly bonds decal to the model surface.
After setting overnight, I give the model another coat of Klear, then
treat with a matt finish.
A perusal of “Avenger At War” – whilst leafing through my decal spares, led me to TBF-1C White 6 of VT-15 USS Essex, photographed on page 101. This plane has no graffiti, number 6 on the fuselage, 6 and a horizontal white stripe around the tail – all of which I could find.
Further perusal of Avenger reference books indicated that all of them had wing footboards adjacent to the cockpit, these were either decaled or painted onto my Avengers.
|
FINAL CONSTRUCTION |
Nearly there, I fitted the main undercarriage, lower gun, remaining pitots and aerials. All my references indicate that the legs are the same interior green as the wheel wells, so Avacado it is! Oleos on my aircraft are the brightest silver I have to hand. The undercarriage is more sturdy than Airfix, and a little more awkward to fit, but no surgery is necessary. Wheels are Aluminium with Aeromaster Tire Grey tyres. Wheels are a definite improvement over Airfix, and have a tread pattern. The lower gun is much more sturdy (dubious accuracy) that Airfix, and quite difficult to fit.
After
completion of detail - I remasked the canopy and turret, and coated the
whole airframe with Humbrol Matt Cote to dull it down.
The only remaining tasks, after a day’s drying time, are the cockpit mast and aerial, propeller, arrestor, and any detail painting such as exhaust and air intakes. I have to say that the exhausts on this kit are dreadful – just a moulded blob. I did consider drilling it out and inserting a piece of tube at the correct angle. The prop is a definite improvement over Airfix, being a little more delicate and refined. Finally I sealed the fuselage portholes with Humbrol Clearfix, and drilled small holes in the wing leading edge for the 0.50s. My Avenger fleet has now grow to a strength of 4, representing all but the early 2 tone grey scheme.
Accuracy
For the purposes of review completeness, I measure models to establish their accuracy, multiplying my measurements by 72 and comparing with the quoted dimensions.
This method is difficult for taildraggers, so I’m tolerant to minor errors.
In this case I have 72nd scale schematics in an Osprey book by Barrett Tillman – so was able to lay kit parts on top and see acceptable accuracy.
 Span
230mm x72= 16.560M Quoted 16.51M Difference 50mm
Span
230mm x72= 16.560M Quoted 16.51M Difference 50mm
Length 169mm x72= 12.168M Quoted 12.19M Difference 22mm
Height Ignored as difficult to measure, and conflicting quoted dimensions.
So spot on in size!
Other points: Oversize lower gun, no concession to fixed forward or underwing armament. No tail-hook. Forward port-hole has rivet detail for FAA bulged window. Painting instructions (the Early version) show different scheme to box-art, with Blue/Grey only – and black undercarriage.
Rear fuselage does have the change in taper – giving slight hump, so more accurate shape than Airfix. Neither kit gives the pilot his huge single panel side window, and neither offers this in open position – which it always seems to be in photos. Neither kit shows accurate paint guides for lower gun position.
|
CONCLUSIONS |
Overall, a definite improvement on Airfix in terms of quality, detail and accuracy – let down only by the research and paperwork. I can’t say I enjoyed this kit – as I damaged the cockpit and had to repair it during building. After that the project became a chore – which is my fault not the kit’s. I did enjoy converting my Atlantic Avenger though, and the modelling juices started flowing again when I saw the airbrushed grey on the sides of this TBF, – I am pleased with result of both!
September 2003
Copyright ModelingMadness.com. All rights reserved. No reproduction in any form without express permission from the editor.
If you would like your product reviewed fairly and fairly quickly, please contact the editor or see other details in the Note to Contributors.