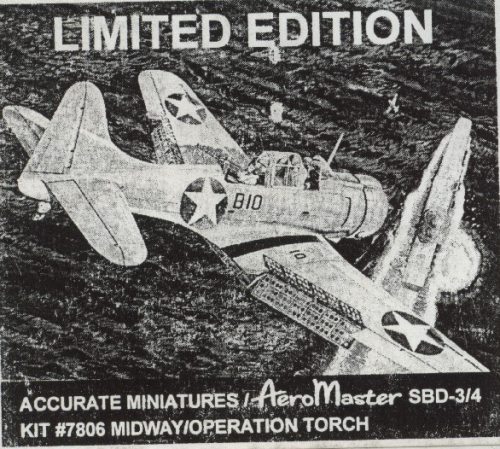
Accurate Miniatures 1/48 SBD-4
|
KIT # |
7806 |
|
PRICE: |
$49.95 CDN |
|
DECALS: |
two aircaft |
|
REVIEWER: |
Olivier Lacombe |
|
NOTES: |
|
HISTORY |
The Douglas SBD Dauntless is the aircraft that achieved the most rewarding strike in military History. On the 4th of June 1942, Commander Clarence W. McClusky led 61 aircraft, including 37 SBDs from the Enterprise to seek and destroy Nagumo’s carriers. The Hornet launched a similar contingent. While the torpedo bombers made their way on the deck towards the flattops, Zeros descended upon them and slaughtered all but 6 aircrafts. Without any fighters to oppose them, the Dauntlesses swooped down from 17 000’, the Hornet’s targeting the Kaga, while Commander McClusky spited his dive-bombers in two formations, going for Soryu and Akagi. A fourth carrier, Hiryu, farther to the North, was dealt with later this evening, with four SBDs from Enterprise hitting the mark.
The Japanese Navy had suffered its first defeat in 300 years and the tide of the war was reversed in the Pacific.
I suggest that you read Tom Cleaver’s excellent reviews for more in-depth information on this plane, right here on Modeling Madness.
|
THE KIT |
 In a big sturdy white box, Accurate
Miniatures provides you with their superb SBD-3 kit, moulded in light grey
styrene. There are no sink marks (at least, none that I could see), but a few
ejector pin marks will have to be cleaned up.
In a big sturdy white box, Accurate
Miniatures provides you with their superb SBD-3 kit, moulded in light grey
styrene. There are no sink marks (at least, none that I could see), but a few
ejector pin marks will have to be cleaned up.
What makes this boxing special is that you get two fuselages, that’s right, two. One is for a SBD-3 and the other is for a –4. You also get two propellers, one with counterweights and a hydromatic one. Other options include single or twin gun mounts and different rear cockpit bulkheads.
The decals are from Aeromaster and include two sheets, one for a Midway SBD-3 and the other one for an Operation Torch SBD-4 from USS Ranger. This particular sheet gives you the option of 8 or 6 inches insignia. The 8 inches one overlap on top of the fuselage.
The instructions are really good, being a small book, and they comprise lots of text that is highly necessary to achieve a good model, and since it’s a special boxing, you also get an extra sheet of instruction to build the SBD-4.
|
CONSTRUCTION |
I followed the kit’s instructions to the letter, and painted the interior Model Master Green Zinc Chromate (I know it’s not the right colour, I’m just finishing the jar and I’ll get the right one). Various details were picked up with Flat Black, and the cockpit was assembled fairly easily, saved for the pilot rudder pedals, which are a dog to construct. Take more time than I and you’ll do just fine.
 Assembly continued following the
instructions and I painted the cowl guns and the engine Gun Metal with a Neutral
Grey crankcase. I installed the oil cooler, but didn’t bother to paint it, it’s
barely visible once all the cowls are in place. I glued the various cowlings in
subassembly before fitting them. Some gaps prevailed and were dealt with a
little putty. I guess I became overzealous because I puttied away the
antenna-locating hole. The wings and the stabilisers necessitated some sanding
for a smooth joint, but the configuration of the SBD makes them easy to reach.
Assembly continued following the
instructions and I painted the cowl guns and the engine Gun Metal with a Neutral
Grey crankcase. I installed the oil cooler, but didn’t bother to paint it, it’s
barely visible once all the cowls are in place. I glued the various cowlings in
subassembly before fitting them. Some gaps prevailed and were dealt with a
little putty. I guess I became overzealous because I puttied away the
antenna-locating hole. The wings and the stabilisers necessitated some sanding
for a smooth joint, but the configuration of the SBD makes them easy to reach.
With the Dauntless getting close to the painting stage, I gave the wheel wells a shot of Model Master Green Zinc Chromate and glued the bomb fairing in place along with the tail hook. I opted to display my model with opened canopies, and I used Tamiya masking tape to hide the glass from the approaching paint.
|
PAINT & DECALS |
Painting
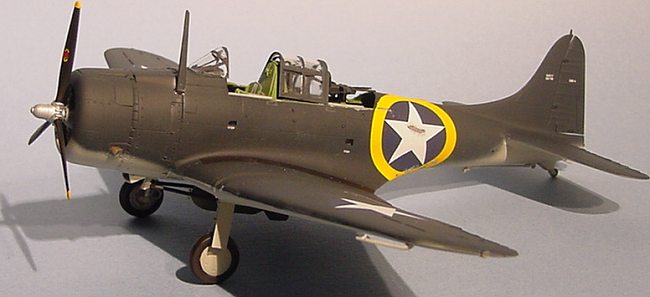
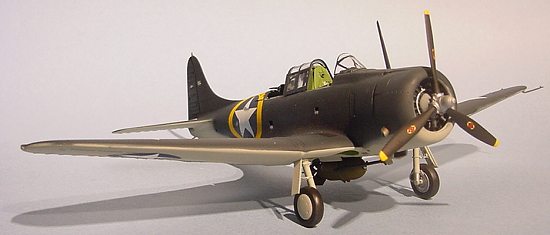
I shot the belly with Model Master Flat Gull Gray (FS 36440) and the upper surfaces with Model Master Non-Specular Sea Blue (FS 34042). The camouflage edges are soft, as pointed out by the fine folks on the forum. The results are good, but I think that my blue is much too dark for the period I’m modeling. The reason I chose this colour is because the other blues looked too pale to my taste. Oh well, but beauty is in the eye of the beholder, or so they say.
 When it was time to paint the flaps, I
had the brilliant idea of leaving them on the sprue so to have a handle during
painting. When I tried, and I really mean tried, to cut them from the sprue,
they sheared away and warped at will. Fortunately, I had another set of flaps
in my box, so I separated them before painting and the paint was applied with a
brush.
When it was time to paint the flaps, I
had the brilliant idea of leaving them on the sprue so to have a handle during
painting. When I tried, and I really mean tried, to cut them from the sprue,
they sheared away and warped at will. Fortunately, I had another set of flaps
in my box, so I separated them before painting and the paint was applied with a
brush.
Construction continues
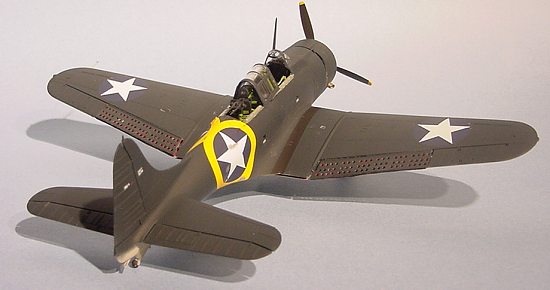
The masks were removed and I completed the interior, painted the propeller and glued the landing gear in place. The latter gave me some problems, but I managed to have my SBD sit level, which suits me fine. Still undecided about if I would pose the flaps up, down or in the diving position, I surfed the review section and upon seeing most aircrafts with the flaps down, I made a hard turn to the right and opted for a clean configuration. It may just be me, but the demons gave me lots of troubles, but they reacted very well to super glue. Large gaps prevailed at the trailing edges, but a quick pass with Flat Black toned them down to an acceptable level.
The bomb was painted Olive Drab and the trapeze Gun Metal. The whole assembly was then glued under the aircraft.
Decals
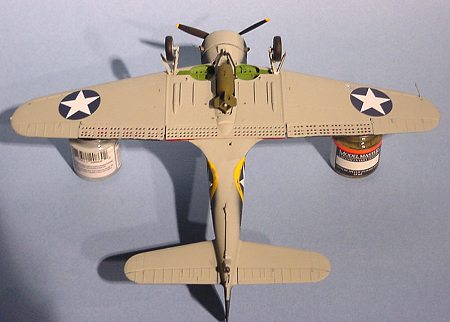 I opted for the large 8 inch national
insignia on the Operation Torch sheet and I applied them after the model had
received a coat of Future. The decals reacted very well to Micro Sol and Micro
Set, however the fuselage insignias gave me some trouble since they have to be
glued on a compound curve. I applied numerous coats of Micro Sol over it, then
took a brand new X-Acto blade, removed the wrinkles and painted the scratches
Model Master Chrome Silver. The results are not bad, although I would have
preferred intact insignias.
I opted for the large 8 inch national
insignia on the Operation Torch sheet and I applied them after the model had
received a coat of Future. The decals reacted very well to Micro Sol and Micro
Set, however the fuselage insignias gave me some trouble since they have to be
glued on a compound curve. I applied numerous coats of Micro Sol over it, then
took a brand new X-Acto blade, removed the wrinkles and painted the scratches
Model Master Chrome Silver. The results are not bad, although I would have
preferred intact insignias.
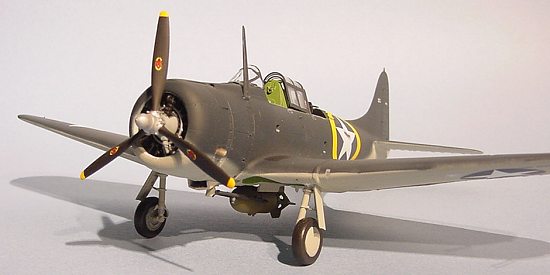
I glued the antenna mast in place and the pitot tube, gave the kit a coat of Model Master Dull Coat and installed the canopy in the opened position. The reason why there is no telescopic sight on my example can be attributed to my heavy hand with an X-Acto,
which promptly destroyed the first windshield in the box. The landing light was glued to its place after the inside received some Model Master Chrome Silver, after which the bomb aiming window was glued with white glue and the light for the leading edge was promptly lost and replaced by white glue.
|
CONCLUSIONS |
This kit was, to me, lots of work, more than short run kits. I attribute it to the amount of detail found in it, but don’t get me wrong, the results impress me a lot. While I wouldn’t recommend this kit to a debutant, due to the small interior parts, any modeller with a few kits under their belts will have no troubles cranking out a fine SBD, if they take their time and closely follow the instructions.
July 2002
Copyright ModelingMadness.com
Kit provided by my bank account.
If you would like your product reviewed fairly and fairly quickly, please contact the editor or see other details in the Note to Contributors.
Back to Reviews Page 2017