 Kit Number: 9570
Pro Modeler 1/48 B-24D Liberator
Kit Number: 9570
Price: $35
Media: Injection-molded styrene with photo-etched brass
Decals: ScaleMaster sheet for two aircraft involved with the Ploesti raids, August 1943
"Teggie Ann": 376th Bomb Group -- Sand/Neutral Gray
"Suzy Q": 67th Bomb Group -- Olive Drab/Neutral Gray
Accuracy: Generally good. The rear turret is wrong for the D model
Overall: A very nice model of an important aircraft
Review by: Lee Kolosna
Another photo at the bottom of the page
 The Consolidated B-24 has always played second fiddle to the more glamorous
Boeing B-17. Yet more B-24s were built and they participated in every theater
of operation during the war. Their high-aspect ratio wing, faster cruise
speed, longer range, and ability to carry more bomb payload made them
particularly successful in the Pacific. I've always been attracted to the
general ugliness of the airplane, especially in the D version with its enormous
greenhouse nose (a Consolidated trademark), oval engine nacelles, and the
beached-whale appearance it had while on the ground. In later H and J models,
the nose was made even less sleek with the addition of the a turret, further
adding to its quest for the title of "ugliest bomber".
The Consolidated B-24 has always played second fiddle to the more glamorous
Boeing B-17. Yet more B-24s were built and they participated in every theater
of operation during the war. Their high-aspect ratio wing, faster cruise
speed, longer range, and ability to carry more bomb payload made them
particularly successful in the Pacific. I've always been attracted to the
general ugliness of the airplane, especially in the D version with its enormous
greenhouse nose (a Consolidated trademark), oval engine nacelles, and the
beached-whale appearance it had while on the ground. In later H and J models,
the nose was made even less sleek with the addition of the a turret, further
adding to its quest for the title of "ugliest bomber".
The ProModeler version of this more-than-a-decade-old kit adds some nice
features: flattened tires, quality decals (although my sheet was printed
slightly out of register), figures of the air and ground crew figures, a
simplistic replica of a bomb loading tractor, a nice Bert Kinzey instruction
booklet, and a photo-etched brass sheet of belt buckles, instrument panel,
bomb fuses, ammunition belts, gun sights, and engine wiring harnesses. Mine
also came with a free bottle of ProModeler Olive Drab acrylic paint. I tried
using it when I painted the bombs. It sprayed nicely, but it never dried,
and I finally had to strip it off and start over again with Polly Scale paint.
Revell-Monogram acknowledged that a bad batch of their paint was distributed
to the general public, and gave apologies and replacements when anyone contacted
them about it. Other modelers who have purchased and used the paint since
then have reported excellent results. The kit is molded in light gray plastic
with raised panel lines with all sprue trees bagged. The clear parts are
good, although a slight mold seam was present right down the middle of the
nose greenhouse. I sanded this off
 with a tri-grit file (found in the nail
care section of any fine drug store) and then polished with toothpaste. The
rear turret is incorrect for a D model and this is apparent when compared
to the helpful Detail and Scale photographs in the instruction booklet. Koster
makes a vacuformed replacement. I went ahead and used the kit turret anyway
(waiting for the Koster piece to arrive), and ran into the problem of a terrible
join line of the two halves right over the top of the clear part of the turret.
The right way to fix this is to make a new top by constructing the turret,
filling the seam, sanding it smooth, and making a new clear part by vacuforming
or using the "heat and smash" method with Squadron's Thermaform. Or you can
just order the Koster replacement. In the interim, I glued a thin piece of
aluminum foil over the seam and painted it to match the camouflage, hoping
to fool the casual observer into thinking it is a frame member. If you're
going to have an inaccurate turret, you might as well go all the way....
with a tri-grit file (found in the nail
care section of any fine drug store) and then polished with toothpaste. The
rear turret is incorrect for a D model and this is apparent when compared
to the helpful Detail and Scale photographs in the instruction booklet. Koster
makes a vacuformed replacement. I went ahead and used the kit turret anyway
(waiting for the Koster piece to arrive), and ran into the problem of a terrible
join line of the two halves right over the top of the clear part of the turret.
The right way to fix this is to make a new top by constructing the turret,
filling the seam, sanding it smooth, and making a new clear part by vacuforming
or using the "heat and smash" method with Squadron's Thermaform. Or you can
just order the Koster replacement. In the interim, I glued a thin piece of
aluminum foil over the seam and painted it to match the camouflage, hoping
to fool the casual observer into thinking it is a frame member. If you're
going to have an inaccurate turret, you might as well go all the way....
Like the other Monogram bomber kits, the interior is quite nice. Super detailing can be done, but will be difficult to see when the fuselage is closed up and the clear parts are applied. An instrument panel decal is provided to place behind the brass front panel. Drybrush the highlights around the instruments and it will look properly busy. Making your own seat belts with the provided buckle hardware is an exercise in patience and tedium. I managed to use regular paper (painted very light gray) to thread through the buckles. It took a couple of hours to do, and I lost a few of the tiny photo-etched pieces. Definitely don't do this over a shag carpet! I find that after-market photo-etched brass replicas of the entire belt and hardware are much easier to use, if somewhat less accurate.
Eight bombs are provided, as are stencil decals and photo-etched fuses. I
used thin strips of yellow decal to simulate the stripes on live bombs. The
bomb fins are on the thick side and could use some thinning to look right
for the scale. The option of having the bomb bay doors open or closed is
given to the modeler through two complete sets of bomb bay doors. The attachment
points of the individual bombs to the bomb racks are not very positive in
feel. I slopped quite a bit of CA glue around trying to get them to stay
in place. If I were to do it over, I would glue the bombs unpainted to the
racks with styrene cement, then do the painting and
 decaling. Other detailed
interior areas are the bombardier's station and the waist gunners' station.
With all the recent research on interior colors, I elected to paint my interior
Polly Scale's version of FS34092 (labeled as RAAF Foliage Green), lightened
with a little white. I dry-brushed the interior framing ribs with light gray
to give some contrast.
decaling. Other detailed
interior areas are the bombardier's station and the waist gunners' station.
With all the recent research on interior colors, I elected to paint my interior
Polly Scale's version of FS34092 (labeled as RAAF Foliage Green), lightened
with a little white. I dry-brushed the interior framing ribs with light gray
to give some contrast.
Construction is straightforward with a few surprises. There are some areas that will need filling. There is a large gap between the front of the horizontal stabilizer and the fuselage. I filled this with plastic sheet and sealed it with CA glue. It took a lot of work to make the seam disappear. The sides of each engine nacelle have very prominent seams that need filling and elbow grease to rectify. The profile of each front engine cowling is larger than the nacelle that it attaches to and needs to be sanded down. Also, the seam between the two needs to be filled and rescribed to make it less pronounced. My biggest problem was with the insert plate in the area of where the belly turret goes in the J model. This did not match the lines of the underside of the fuselage at all, and serious amounts of filing and sanding were needed to bring this back in line. The wings fit into the sockets in the fuselage very well, so I was able to leave them off through the painting and decal stages. The exhaust vents on the bottom of the wings at the back of each nacelle are molded closed. I drilled and filed the openings out.
One confusing situation that I encountered involved what appears to be small pitot-type tubes that are provided for placement on top of the middle of each wing. The kit instructions make no mention of gluing them on, but the holes are there and the box art and finished model pictures include them. I pored over every picture that I could find of B-24s, and only on a few pictures of B-24Js could I see them clearly. I decided to leave them off, filling the holes.
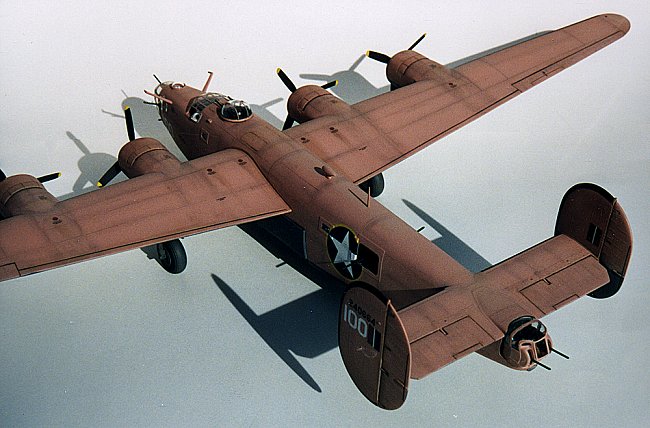
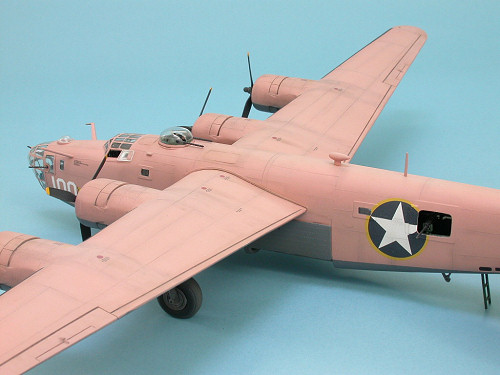
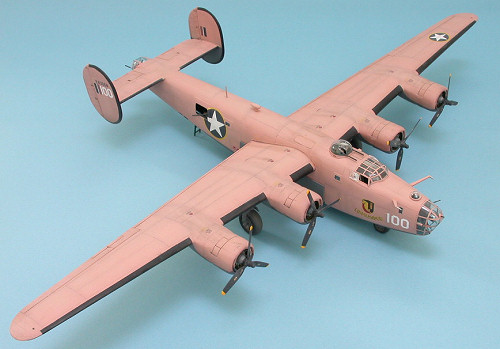
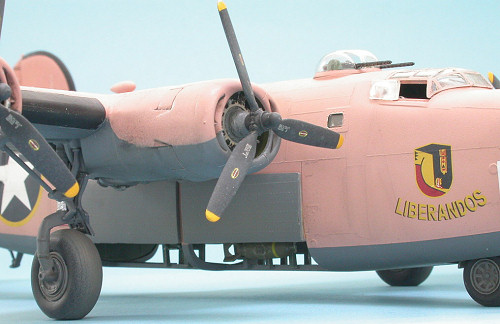
I primed the plastic using Krylon sandable primer out of a spray can. I polished the primer with 0000 steel wool and it makes a nice smooth base for the final camouflage. I haven't decided whether I will continue this practice though, as any additional paint makes the fine details that much less articulated. On a raised panel kit like this, it isn't much of a problem. I was ready for the decision about how to replicate "desert pink". In Dana Bell's Air Force Colors Volume II, he states that Sand A/NA 616 had an apricot tint to it when new, and then faded quickly to a very pronounced shade of pink. Starting with a whole bottle of Polly Scale Sand A/NA 616, I added almost half a bottle of white to lighten it up, then twenty or so drops of red to bring out the pink. I was pleased with the result. Even my family remarked on the color when the kit emerged from the spray painting area. It is truly revolting! This was done over neutral gray undersides. This is also a controversy, as several B-24 crew members who were based in North Africa remember sky blue or azure blue as the proper color. Dana Bell acknowledges this, and states that most were probably neutral gray. I opted for this scheme to match the desert pink B-24D in the US Air Force Museum.
On the twin tail sections, outlines of the black de-icer boots are not molded in the plastic. Therefore, I had to paint the de-icer boot with a very steady hand. I first drew the outline with a pencil to gauge uniformity, then followed up with paint on a very small brush. It looks okay, but it would have been much easier with some sort of physical guide on the tail like the one present on all the other de-icer boots on the wings and horizontal stabilizer. Adventurous modelers with access to French curves and frisket paper could probably set up a spray mask, but I don't count myself among this exalted group.
 Decals were a slight problem. Mine were slightly out of register (the yellow
surrounds to the national insignia and the red of the RAF fin flashes), so
I ordered a new set from Revell-Monogram's customer service line. They came
within two weeks, and I have to say that I am impressed that this company
cares enough to make the customer happy. "Teggie Ann" was assigned to the
376th Bomb Group and based in Libya in 1943. The decals are very thin and
go down nicely with Super Set and Super Sol. The large insignia on the fuselage
sides need to span the wind deflectors in front of the waist gunner stations,
so I slit the decal and used lots of Super Sol. After it dried, I applied
tiny strips of decal cut from a spare national insignia to cover the gaps.
Some stencils are also provided for the top of the wing. I put them on, but
further research leads me to believe that they were overpainted at the North
African supply deport when the originally OD and gray airplanes were painted
with A/NA 616 Sand.
Decals were a slight problem. Mine were slightly out of register (the yellow
surrounds to the national insignia and the red of the RAF fin flashes), so
I ordered a new set from Revell-Monogram's customer service line. They came
within two weeks, and I have to say that I am impressed that this company
cares enough to make the customer happy. "Teggie Ann" was assigned to the
376th Bomb Group and based in Libya in 1943. The decals are very thin and
go down nicely with Super Set and Super Sol. The large insignia on the fuselage
sides need to span the wind deflectors in front of the waist gunner stations,
so I slit the decal and used lots of Super Sol. After it dried, I applied
tiny strips of decal cut from a spare national insignia to cover the gaps.
Some stencils are also provided for the top of the wing. I put them on, but
further research leads me to believe that they were overpainted at the North
African supply deport when the originally OD and gray airplanes were painted
with A/NA 616 Sand.
Weathering was done with a relatively light hand, mostly confined to bleaching out of the pink (Polly Scale Dust was used) and highlighting some panel lines for variation. I used chalk pastels, followed by a wash of artist's oils (Payne's Gray and Burnt Umber) mixed with Turpenoid to highlight the control surfaces. Looking again at the photographs, the Pratt and Whitney R-1830 Twin Wasp engines of the B-24 didn't seem to leak and belch with the same messy intensity of the B-17's Wright Cyclones. In the Libyan desert, I imagine that dust and searing sun were the biggest influencing factors in the look of the aircraft.
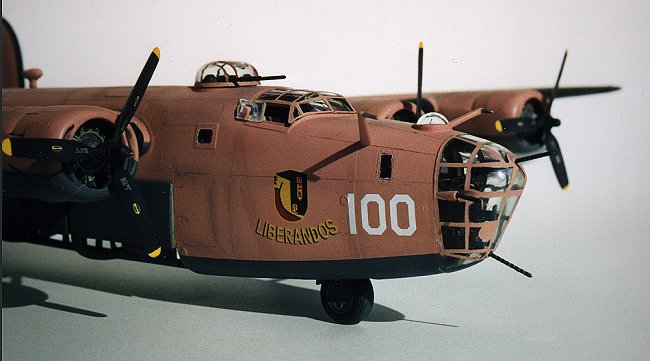
The B-24D is right up there in the Greenhouse Hall of Fame, along with the Heinkel 111 and the TBF Avenger. Plan on taking a lot of time masking the turrets, the canopy, the nose, and the fuselage windows. I used Scotch magic tape after giving up on Parafilm M. This wonder material was not sticky enough to stay in all the tiny panes as it was being trimmed. Be sure to remember to paint the interior color first, then the camouflage color, followed by the final flat coat (I used Future floor polish as a decal base, then Testors Dullcote). When attached to the fuselage, the gaps left by the canopy and the nose greenhouse are large enough to warrant attention. I used white glue to fill the gap, then carefully hand-painted more pink and neutral gray where appropriate, followed by a final shot of Dullcote. Be very careful when positioning the machine guns in the nose. The lowest gun interferes with the bomb sight, making it impossible to attach the nose glass. I had to pull the gun out (breaking it, of course), and reposition it at an angle that allows it to avoid the bomb sight. I noticed that in the two finished models on the box top, the lower gun was omitted. The pictures of the US Air Force Museum's B-24D show the gun in place.
The landing gear are very solidly attached. Revell-Monogram provides a crew access ladder in the rear of the airplane to use as a way of keeping the model from sitting on its tail. If you don't use this clever contrivance, be prepared to put a ton of weight in the nose. This is a very tail-heavy model.
I enjoyed working on this kit and would recommend it to anyone interested in the B-24. After about 70 hours of work, I had produced an out-of-the-box model that looks like a fine replica of a very important aircraft. With some work, the ProModeler B-24D Liberator kit will present a fun and interesting subject for the experienced modeler.