
Tamiya 1/48 P-51B Mustang
|
KIT # |
61042 |
|
PRICE: |
$24.00 |
|
DECALS: |
See Review |
|
REVIEW : |
Tyler Gates |
|
NOTES: |
Malcolm Hood included with kit |
|
HISTORY |
The P-51 was originally designed by North American Aviation to
be used by the British as a part of lend lease from America. The initial
Mustangs had a standard Allison engine, but the plans were in the works to
convert it into a Merlin powered aircraft, such as the Hurricane and the
Spitfire. Packard Motor Company ended up manufacturing the Merlin engine, and
this engine was mated with the first P-51B. The new "B" radiator scoop
increased the Mustang’s altitude ceiling to 10,000ft and increased the top
speed by 50mph. The first P-51B’s were used by the 354th fighter
group and by the end of the war, a grand total of 3738 P-51B’s were produced.
|
THE KIT |
Tamiya’s P-51B kit is arguably the best of the type in the 48th scale, and by all means the best fitting. Upon opening the box, I was very happy to see some of the finest molding I have ever come across. This kit lives up to the Tamiya name very well. There are 3 sprues and 3 decal options printed on Tamiya’s Invisiclear sheet. There is also ordinance in the way of drop tanks and bombs, a very nice touch. There are 2 types of exhaust and an option for a Malcolm hood or even a very nice molded open "B" canopy.
|
CONSTRUCTION |
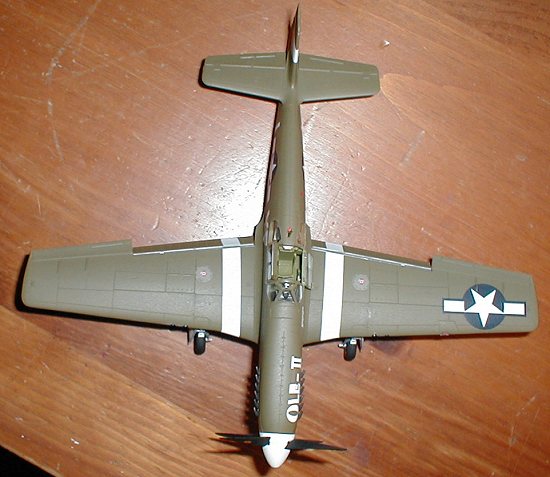
The first thing I did as far as construction was to airbrush the cockpit interior and the wheel wells interior green from the Model Master range. I then hand painted and dry-brushed the detail inside and on the instrument panel. I assembled the cockpit pieces to their platform and was not surprised (having built quite a few Tamiya kits) that the fit on all of the pieces was perfect. The next step was to assemble the fuselage halves. The fit was also excellent in this area and only two little bits of putty were required along with some sanding to get a seam free model. Next I put the frontal fuselage piece on (note: The instructions tell you to put in the exhausts now, but I advise you to wait until after painting so no masking is needed in this area). I then inserted the wings and the tail planes and only a bit of putty was needed on the lower wing join to get a realistic look. Since my flaps were to be dropped, I did not insert them at this time, but rather airbrushed them separately. Paint time!
|
PAINT & DECALS |
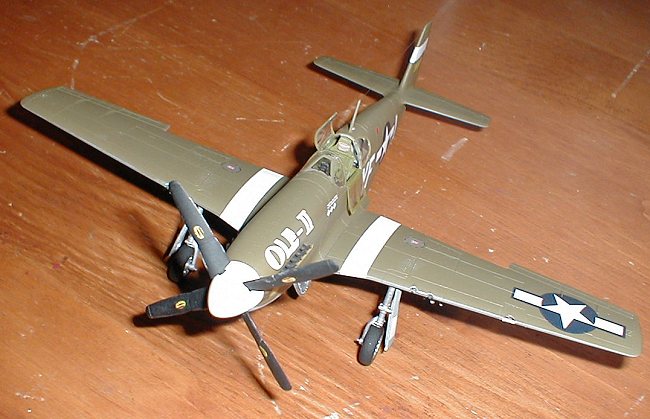
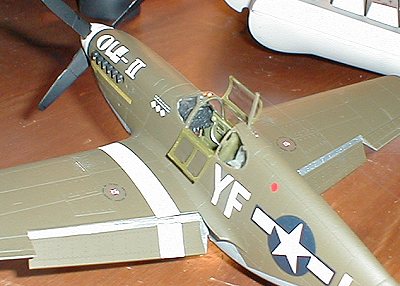 I decided to use the kit decals. All of the 3 schemes were very nice, but I
elected to do the one from the 355th Fighter Group, 358th
Fighter Squadron. This plane had the standard Olive Drab (fs34087) and Neutral
Gray (fs36270) two-tone paint scheme. I used an Aztek double action airbrush to
finish the model and all paints were from the Model Master range. I used the
wheel well covers and blu-tak to mask the wheel wells and masked the to-be-open
canopy (already sprayed interior green for interior framing) with masking tape.
I used Testors aluminum plate metalizer for the inside of the wheel well covers.
I then gave a coat of Model Master spray gloss and let it dry. Next I began
decaling using Micro-set and Micro-sol. I was a bit upset to see minor silvering
of one or two decals (especially the wing gas caps) after a second gloss cote. A
Model Master flat cote was then applied and the little parts such as the wheels
and covers were applied afterward. I also added an aerial wire using very thin
nylon thread and superglue, which yielded good results.
I decided to use the kit decals. All of the 3 schemes were very nice, but I
elected to do the one from the 355th Fighter Group, 358th
Fighter Squadron. This plane had the standard Olive Drab (fs34087) and Neutral
Gray (fs36270) two-tone paint scheme. I used an Aztek double action airbrush to
finish the model and all paints were from the Model Master range. I used the
wheel well covers and blu-tak to mask the wheel wells and masked the to-be-open
canopy (already sprayed interior green for interior framing) with masking tape.
I used Testors aluminum plate metalizer for the inside of the wheel well covers.
I then gave a coat of Model Master spray gloss and let it dry. Next I began
decaling using Micro-set and Micro-sol. I was a bit upset to see minor silvering
of one or two decals (especially the wing gas caps) after a second gloss cote. A
Model Master flat cote was then applied and the little parts such as the wheels
and covers were applied afterward. I also added an aerial wire using very thin
nylon thread and superglue, which yielded good results.
|
CONCLUSIONS |
This kit was a true joy to build and I would recommend it to all moderately skilled modelers. With many after market decals available for the P-51B, I will surely add one or two more to my collection. Despite the minor decal silvering and a so-so flat cote, I am very pleased with my results.
|
REFERENCES |
None for this project, just the instruction manual.
Copyright ModelingMadness.com. All rights reserved. No reproduction in part or in whole without express permission from the editor.
If you would like your product reviewed fairly and quickly, please contact the editor or see other details in the Note to Contributors.
Back to Reviews Page 2024