Accurate Miniatures 1/48 SBD-5 (A-24B)
|
KIT # |
3412 |
|
PRICE: |
$29.95 MSRP when new |
|
DECALS: |
See review |
|
REVIEWER: |
|
|
NOTES: |
MSAP SBD-5 Decals |
"The American Stuka"
|
HISTORY |
While the story of the Douglas Dauntless as the great shipboard divebomber of the Second World War, the airplane that sank more Japanese naval tonnage than any other, the airplane whose pilots single-handedly changed the outcome of the Pacific War, is well-known, the story of its adoption as a land-based dive bomber in a role similar to that played by the equally well-known Junkers Ju-87 Stuka, is less so.
In 1940, Army
planners saw the shape of the war to come in the form of the German blitzkrieg
defeat of the western Allies and destruction of France in a six-week campaign.
The use of the Stuka as "flying forward artillery" for the armored formations
was not lost on George C. Marshall and his staff. How close
 American participation in the
war was no one knew; whatever it was, it was not sufficient time to develop a
distinct dive-bomber of their own. The Navy was now taking delivery of the new
Douglas dive bomber, and it appeared to easily meet the known specifications for
such an airplane. Accordingly, the Army Air Corps obtained a Dauntless and
tested it, with the result being an order for 500 de-navalized Dauntlesses, to
be known as the A-24A "Banshee."
American participation in the
war was no one knew; whatever it was, it was not sufficient time to develop a
distinct dive-bomber of their own. The Navy was now taking delivery of the new
Douglas dive bomber, and it appeared to easily meet the known specifications for
such an airplane. Accordingly, the Army Air Corps obtained a Dauntless and
tested it, with the result being an order for 500 de-navalized Dauntlesses, to
be known as the A-24A "Banshee."
While several bomb groups were equipped with the A-24 in the next two years, and the subsequent SBD-5 Dauntless was also ordered as the A-24B, the only known combat use of the A-24 occurred in the spring of 1942, when the 3rd Bomb Group arrived in Australia and was thrown into the battle to slow down the Japanese advance through the Dutch East Indies and New Guinea. Unfortunately, the Army fliers had never learned to use the aircraft correctly; the kind of strike they flew was more glide than dive-bombing, little different than what might have been achieved had they been flying P-40s. They were certainly incapable of the kind of close air support of ground troops Marine Corps Dauntless pilots routinely performed. Additionally, the A-24 - like almost all dive-bombers -required a modicum of local air superiority in the form of escorting fighters. By the time the Dauntless became immortal at Midway, its combat career with the Army was over.
There was the problem of what to do with all these dive-bombers coming out of the Douglas factory. They ended up as squadron hacks and target tugs at training fields around the country. This was still underutilization of a combat airplane.
Following the
invasion of North Africa and the surrender of the Vichy French forces there, it
was decided to re-equip the French Air Force for participation in the coming
invasions. As anyone can tell looking at photographs of the American types
provided the French prior to the arrival of the P-47 in the fall of 1944, the
P-39s and P-40s that equipped French fighter groups was not exactly first-rate -
it was a good way to get rid of airplanes that had been supplanted by better
designs in the USAAF. The same was true for the Groupes Bombardement, many of
which were equipped with the A-24B Banshee. For
 more than a year after
receiving these airplanes, the French crews were able to devote themselves to
training - unlike the American Army Air Forces, the French learned to use the
little dive bomber correctly, in vertical dives that insured accuracy.
more than a year after
receiving these airplanes, the French crews were able to devote themselves to
training - unlike the American Army Air Forces, the French learned to use the
little dive bomber correctly, in vertical dives that insured accuracy.
Following the invasion of Southern France in August 1944, the French Air Force returned to metropolitan France. While the Allies drove north up the Rhone Valley to connect up with the forces that broken out of Normandy and go on to confront the main German enemy, the French were left with the responsibility of driving the rest of the Germans out of France. This struggle - fought between September 1944 and the end of the war in May 1945, is little-known outside of France. The Germans were not pushovers and the French armed forces were not that well-equipped and supported. Hitler ordered the German forces holding the Atlantic ports that had been used as U-boat bases to hold their positions and turn them into fortress cities. These ports held out to the final surrender in May.
Among the French Air Force units supporting this struggle was Armee de l'Air d'Liberation Groupe de Chasse-Bombardement 1/18 "Vendee," equipped with 16 A-24Bs. The group provided effective close air support to the Maquis in the plateau region of southwestern France, and undertook bombing missions against the Germans at Bordeaux.
Eventually, in early 1945, the Groupes de Chasse-Bombardement were re-equipped with the P-47D Thunderbolt, capable of carrying a heavier load of bombs and guns than three A-24s combined. The surviving A-24s ended their days at places like Meknes, in Algeria, performing target towing and other utility missions.
|
THE KIT |
 It's doubtful there is a modeler who in the past five years managed to miss
seeing the series of Dauntless kits released by Accurate Miniatures. The kit is
arguably the best one of the 2 best plastic model kits ever produced (the
other contender being the Accurate Miniatures Avenger series). Other than some
aftermarket decal sheets, I have never seen any other aftermarket sets - such as
corrected engines, cockpits, etc. - created for this kit. That's because
they're unnecessary! One can take this kit, and - assuming you can read the
instructions (a necessary thing with A-M kits) - produce a show-stopper.
It's doubtful there is a modeler who in the past five years managed to miss
seeing the series of Dauntless kits released by Accurate Miniatures. The kit is
arguably the best one of the 2 best plastic model kits ever produced (the
other contender being the Accurate Miniatures Avenger series). Other than some
aftermarket decal sheets, I have never seen any other aftermarket sets - such as
corrected engines, cockpits, etc. - created for this kit. That's because
they're unnecessary! One can take this kit, and - assuming you can read the
instructions (a necessary thing with A-M kits) - produce a show-stopper.
In my case, I had this SBD-5 kit sitting in the pile, while I looked for something interesting markings-wise. When I ran across the now out-of-production SBD-5 decal sheet from Ministry of Small Aircraft Production, with its markings for this Free French A-24B, I knew I had found the project.
|
CONSTRUCTION |
The Dauntless starts
with the cockpit. Everything gets painted Interior Green, the various detail
parts are pre-painted according to the instructions, and one begins the
assembly. As stated above, read the instructions! There is a particular
order that the parts can be assembled in (which is detailed in the instructions)
which is easier than other alternatives. The cockpit is fiddly and it is easy
to misplace things if you don't follow this order. While I realize the truly
radical nature of a 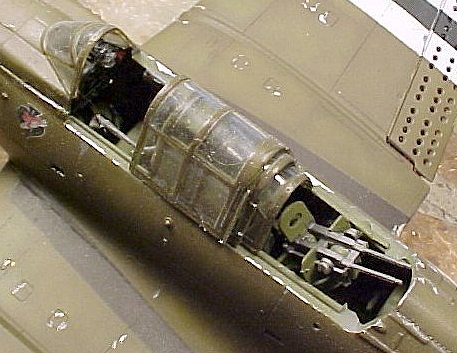 suggestion
that one actually follow the instructions, these were written by people who had
actually built the model, and therefore know of what they speak.
suggestion
that one actually follow the instructions, these were written by people who had
actually built the model, and therefore know of what they speak.
Once the cockpit interior was assembled, I glued the sidewall parts in position on the fuselage halves and then assembled the fuselage halves. I then inserted the cockpit, which fits precisely and makes a little "click" when it's where it should be.
Next, I assembled the wings. Attach the lower wing to the fuselage with glue at the fore and positions where it attaches to the fuselage. DO NOT glue the lower wing to the spar!! Then glue the upper wings in position. If you do this carefully, you will not need any putty. I also assembled the horizontal stabilizers and positioned them.
Having painted the R-1830 engine per the instructions, I assembled the forward fuselage parts per the kit instructions.
Do remember not to attach the tail hook, though the hinge assembly on the fuselage remains in position. I also cut off the small carrier tail wheel and replaced it with a left-over large tail wheel from a Hasegawa Bf-109G-2 kit, since the land-based Dauntless uses the larger tail wheel.
|
PAINT & DECALS |
 Painting:
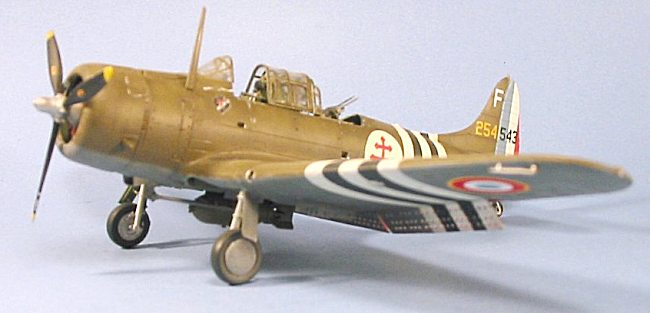
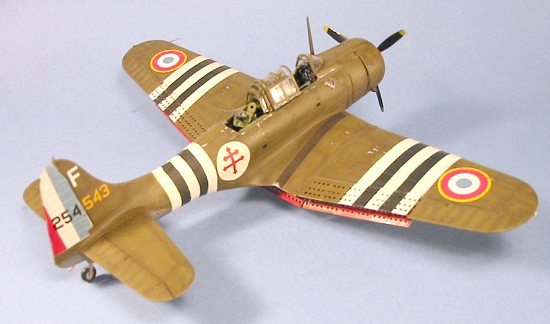
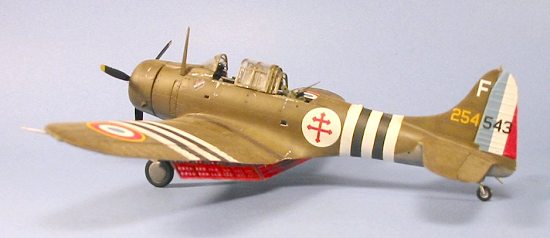
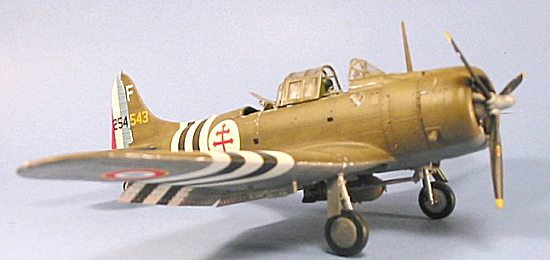
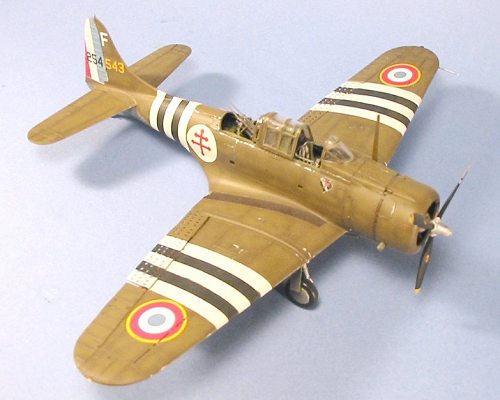
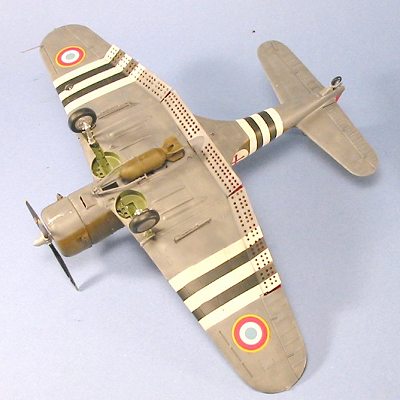
After pre-shading the model with flat black along all panel lines, I painted the "Invasion Stripes," which in this case are 12 inches wide for the wings and 9 inches wide for the fuselage; the black and white stripes were used on the A-24 throughout its European combat career to protect it from Allied fighter pilots who were unfamiliar with the type. Once these were done and masked over, I painted the rest of the model in Gunze Sanyo Olive Drab (1), and Tamiya Neutral Grey, fading the paints with various applications of white and yellow to the Olive Drab, and some white to the Neutral Grey. When all was dry, I Futured the model.
Decals:
One problem with MSAP decals has always been they have not been thin enough to go over contrasting colors on a model, this being particularly the case with any white areas. Therefore, the first thing I did was cut out white decal sheet the size of the roundels and the shape of the rudder, and apply them. I replaced the rudder serial numbers with yellow number decals from an old Micro-Scale sheet in the decal dungeon. I then applied the MSAP national insignias and squadron insignia. I used the maintenance stencils provided in the kit decals.
|
FINAL CONSTRUCTION |
 After another coat of
Future, the various areas of the airframe subject to people walking on the
surface, opening things up, etc., were suitably "dinged." I then applied
several coats of thinned Dullcote, and finished off with some Tamiya "Smoke" for
the exhaust stains.
After another coat of
Future, the various areas of the airframe subject to people walking on the
surface, opening things up, etc., were suitably "dinged." I then applied
several coats of thinned Dullcote, and finished off with some Tamiya "Smoke" for
the exhaust stains.
I then attached the rear gun turret and stacked the canopy sections. One thing you should do before you stack these is test them to see they actually fit right. You may want to sand down the lower edge of the sections that are the interior of the stack to get a proper fit.
|
CONCLUSIONS |
Hey, it's a Dauntless in D-Day stripes!!! Completely out-of-the-ordinary. I have had people who should know better compliment me on the "what-if" scheme of my SBD model, to their subsequent consternation. It looks great sitting there with the other Dauntless models on their shelf.
November 2002
Review kit courtesy of my wallet.
Editor's Note: for those wanting to do a French Dauntless in 1/72, Carpena does an Indochina scheme on sheet #72-07.
Copyright ModelingMadness.com
If you would like your product reviewed fairly and fairly quickly by a site that has well over 150,000 visitors a month, please contact the editor or see other details in the Note to Contributors.