Hasegawa 1/72 FM-1 Wildcat
|
KIT # |
AP 25 |
|
PRICE: |
$15.98 |
|
DECALS: |
See review |
|
REVIEW: |
|
|
NOTES: |
|
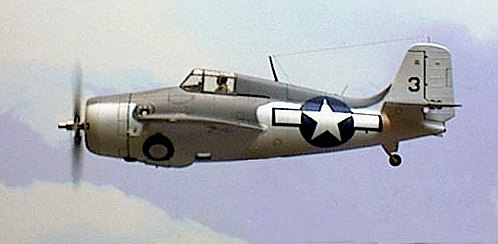
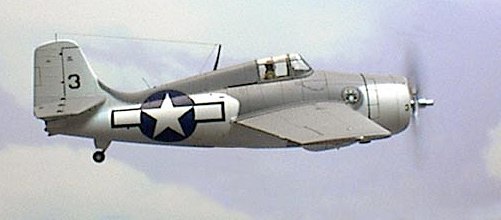
"ATLANTIC GUARDIAN"
EASTERN AIRCRAFT FM-1 "WILDCAT'
SQUADRON VC-12, USS CORE (CVE-18)
MID-ATLANTIC, WINTER 1943/44
|
HISTORY |
 With exception
of the two outermost machine guns in each wing, the FM-1 was identical to the
Grumman F4F-4. Eastern Aircraft Division of General Motors took over the
assembly of the "Wildcat" and the "Avenger", so that Grumman
could devote its attention to assembly of the F6F-3 "Hellcat", which
was sorely needed in the Pacific Theater.
With exception
of the two outermost machine guns in each wing, the FM-1 was identical to the
Grumman F4F-4. Eastern Aircraft Division of General Motors took over the
assembly of the "Wildcat" and the "Avenger", so that Grumman
could devote its attention to assembly of the F6F-3 "Hellcat", which
was sorely needed in the Pacific Theater.
At the same time Atlantic convoys of supplies and troops to England were suffering disturbing losses to German U-boats. The U.S. Navy had a large number of what were called escort carriers, these usually being converted from existing merchant ships or built over the hulls of smaller ships, and intended for the purpose of air transport to supply aircraft to fleet carriers in the Pacific.
With the destruction of the Japanese aircraft carrier fleet at Midway, these carriers were no longer required for their intended purpose, so the U. S. Navy, in cooperation with the British Navy, began to use the escort carrier aircraft as air cover to protect convoys bound for England. Since these carriers were quite small, it was necessary to operate a small fighter in order to be effective. The Wildcat fit the bill and in the course of six months the "Wildcat" operated by the U.S. Navy and the "Martlet" of the Fleet Air Arm, along with their TBF and TBM "Avenger" brothers, turned the war around for the German U-boats and won the "Battle of the Atlantic".
My model represents an Eastern Aircraft FM-1 that served aboard the escort carrier USS Core (CVE-13) during the winter of 1943/44 after the battle had been won. At this time U-boats were more of a nuisance than a threat and were more often destroyed when surfacing for air or to recharge their batteries.
|
CONSTRUCTION |
Interior:
 The interior
consisted of a cockpit bay, seat, control stick, and instrument panel placard. I
carefully cut away a portion of the cockpit bay, so that the pilot could see out
of the lower windows as on real FM-1s. I also cut away the molded on rudder
pedals as they were inaccurate and did not fit my pilot's feet. I added foot
channeling from U-shaped Plastistrut and new rudders from styrene strip.
The interior
consisted of a cockpit bay, seat, control stick, and instrument panel placard. I
carefully cut away a portion of the cockpit bay, so that the pilot could see out
of the lower windows as on real FM-1s. I also cut away the molded on rudder
pedals as they were inaccurate and did not fit my pilot's feet. I added foot
channeling from U-shaped Plastistrut and new rudders from styrene strip.
Sidewalls were added using styrene strip and various boxes were simulated with sheet styrene and attached to match photos in Detail & Scale's F4F Wildcat book. A small bulkhead was added to the cockpit bay behind the seat, this being constructed from sheet styrene.
The pilot came from an old Hasegawa P-47 kit. I painted him with Tamiya and Polly-S acrylics and gave him a dark brown wash one finished. Once cemented to the seat, two harnesses were attached to the pilot using small strips of masking tape and True Details buckles.
The gunsight from the kit was cut away and replaced with one constructed from a Waldron-punched disk and clear sheet styrene. Additional instruments for the instrument panel piece were cut from scrap decals to match photos in Detail & Scale.
The engine was assembled as per instructions with exception of adding a section of 3/32nd inch brass tubing for the propeller shaft holder. The propeller's short plastic shaft was replaced with a longer section of 1/16th inch brass tubing.
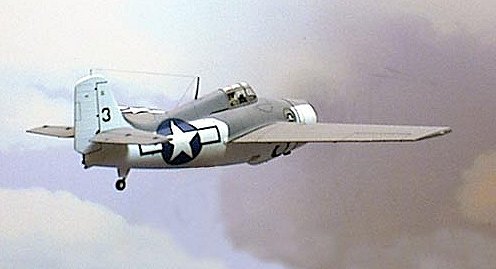
Exterior:
 This is a shake
and bake kit. As usual, Hasegawa's fit is second to none. I merely added some
wing guns from drilled out styrene rod as photos of these in flight showed the
outline of the barrels even when covered by protective tape.
This is a shake
and bake kit. As usual, Hasegawa's fit is second to none. I merely added some
wing guns from drilled out styrene rod as photos of these in flight showed the
outline of the barrels even when covered by protective tape.
Since I wanted my "Wildcat" in the in-flight position, it was necessary for me to retract the wheels. This kit was so well engineered that all I had to do was cut the lowest portion of each main landing gear strut (part number B3) and cement the two cut struts into the location pins for the extended gear. I used slow setting styrene cement to allow for the correct positioning of the wheels, then sturdied the struts with super glue once the styrene glue had set. I held off attachment of the wheels until final assembly to facilitate masking. The two gear doors needed a little sanding to fit the centerpiece composite from kit pieces B4 and B12, after I had cut the molded on gear struts away from these.
The cheek scoops for the oil coolers were thinned a little by sanding before attaching them to the cowling. I cut the antenna post from the rudder and replaced it with brass wire.
|
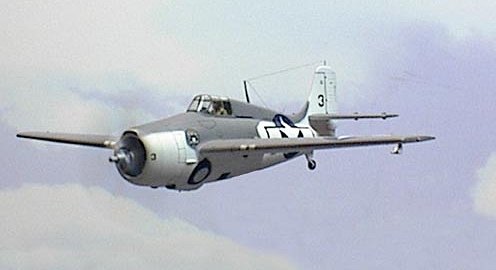
PAINT & DECALS |
The cockpit bay and fuselage interior in the cockpit area were painted Model Masters Green Zinc Chromate. Areas in the landing gear bay were painted Polly-S Flat White and given a gray wash, as was the engine bay. Various boxes in the cockpit were painted flat black.
The engine was painted Gunze Steel and given a black wash once dry. The pushrods were dry-brushed with bright aluminum, whereas the magnetos were painted semi-gloss black. The gear housing was painted aircraft gray.
After masking the canopy and lower windows with Bare-metal foil, I white-glued them to the airframe and painted the framing green zinc chromate. Once dried I cut masks for the cowling and wheel openings and painted the entire aircraft Polly-S Flat White mixed with Polly-S Clear Gloss. I had some photocopies of the kit's paint diagrams enlarged to 1/72nd scale and cut paper masks from these for the demarcations on the fuselage. The undersurfaces were masked using masking tape and the upper surface was now painted Gunze Dark Gull gray.
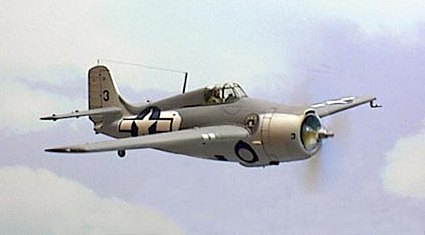
 After two days
the decals were applied using SuperScale sheet 72-013 for the national insignia
and the kit decals for the rest. Once the decals had dried I washed the model to
remove any residue and treated all control surfaces, cowl flaps, wing folds,
access panels, and life raft compartment to a black wash in their recesses.
After two days
the decals were applied using SuperScale sheet 72-013 for the national insignia
and the kit decals for the rest. Once the decals had dried I washed the model to
remove any residue and treated all control surfaces, cowl flaps, wing folds,
access panels, and life raft compartment to a black wash in their recesses.
All wing and navigation lights were replaced with tiny drops of epoxy applied over silver painted and painted either clear red, clear green, clear blue, or clear white as per reference.
April 2000
Copyright ModelingMadness.com. All rights reserved. No reproduction in part or in whole without express permission.
If you would like your product reviewed fairly and fairly quicklyy, please contact the editor or see other details in the Note to Contributors.