| KIT #: | 5302 |
| PRICE: | $4.00 from on line auctions |
| DECALS: | See review |
| REVIEWER: | Chris Baltrinic |
| NOTES: | Currently (2004) out of production |
| HISTORY |
What can I say about
the P-47? The Thunderbolt has always been one of my all time favorite
aircraft. I think we all know the history of this aircraft—it was the
heaviest, most durable and well armed allied fighter of WW2. It is unique
among other Allied fighters with its 8 x .50 caliber guns and loaded weight
of over 13,000 pounds. Yet, with all that weight, its massive water
injected R-2800 could propel it to speeds faster than even the P-51 at high
altitudes. It really only had two w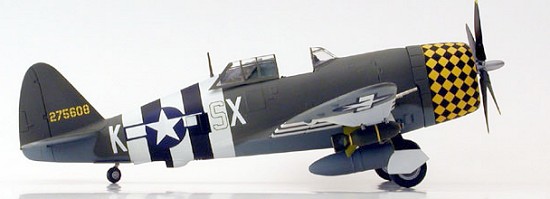 eak points: mediocre climb rate and
range. Climb rate was not a huge issue since the P-47 had plenty of time to
climb before engaging the Luftwaffe over the sky’s of Europe.
eak points: mediocre climb rate and
range. Climb rate was not a huge issue since the P-47 had plenty of time to
climb before engaging the Luftwaffe over the sky’s of Europe.
I think it was Francis Gabreski who said “The Mustang was a fine plane to get your picture taken in, but if you wanted to fly into combat and come back alive, you would take a Thunderbolt.” I could not find the exact quote, but I think that was pretty close.
| THE KIT |
Most people know about Monogram kit. Old, raised, yet nice panel lines, and can be built into quite a good and accurate replica with little hassle. It also has very good fit for a kit of its age. For those that don't know about the kit, please visit this preview.
| CONSTRUCTION |
I had this kit sitting
around for a while when all the sudden I needed a D-Day theme for a local
modelers meeting here in San Diego. I had an Aeromaster sheet with full
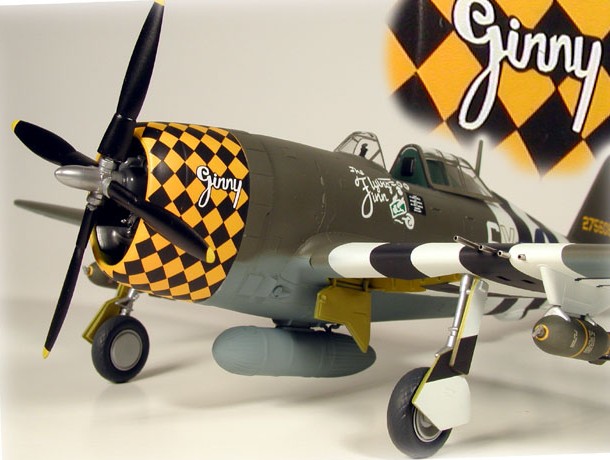
D-Day stripes for a 353rd FG Razorback. Since the cowl checkers
on the decal 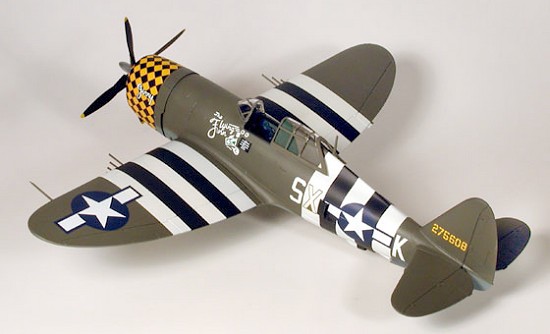 sheet were fitted for the Monogram kit, I had no excuse to
save them for a Tamiya or Hasegawa wunder kit. Also, I was pressed for time
and the Monogram kit could be thrown together muy pronto.
sheet were fitted for the Monogram kit, I had no excuse to
save them for a Tamiya or Hasegawa wunder kit. Also, I was pressed for time
and the Monogram kit could be thrown together muy pronto.
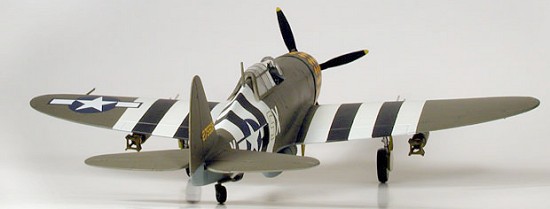
I made just a few modifications to the kit. I put a brass prop shaft into the propeller and drilled out the engine to insert a corresponding shaft to receive it. This insured against the dreaded drooped prop profile. Secondly, I replaced the kit guns with .042 inch stainless steel tubing. I recommend this as it goes a long way to making the finished product look more like a model and less like a toy. It also makes sanding down the leading edge of the wing much easier. I admit, however, I did not do a great job at this as I was determined to have this be a fun, quick, low stress build ( I even glued the wings on AFTER painting and decaling). I simply drilled holes in the leading edge of the wing with a drill press. Well, needless to say, it is difficult to drill accurate holes on a curved surface and I fell victim to drill bit travel. Having said that, the new guns are marked improvement over the plastic stubs that come with the kit.
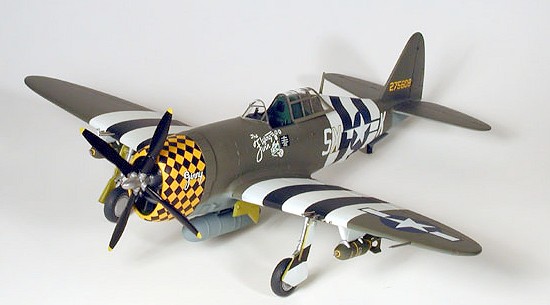
| COLORS & MARKINGS |
 While I have long since
converted to Acrylic paints, I did a retro paint job on my jug with Model
Master Enamels. The underside was painted Medium Grey and the upper
surfaces, if I remember correctly, were ANA OD Green. Invasion stripes were
compliments of Floquil Reefer White and a home brew of faded black. The
yellow cowling was painted Floquil Reefer Yellow ( I love Floquil Reefer
White and Yellow, they are airbrushable straight from the bottle and are
very very opaque).
While I have long since
converted to Acrylic paints, I did a retro paint job on my jug with Model
Master Enamels. The underside was painted Medium Grey and the upper
surfaces, if I remember correctly, were ANA OD Green. Invasion stripes were
compliments of Floquil Reefer White and a home brew of faded black. The
yellow cowling was painted Floquil Reefer Yellow ( I love Floquil Reefer
White and Yellow, they are airbrushable straight from the bottle and are
very very opaque).
A coat of Future and the Aeromaster Decals went on with no problems
| CONCLUSIONS |
 I was actually
quite impressed with the final result, considering my attitude while
building the kit. Maybe I should attack more projects with the “I don’t
care, I just wana have fun” attitude. I totally recommend this kit to salty
modelers looking to save a few bucks as well as those just cutting their
teeth in our little glue sniffing world. You can still find them all the
time on eBay and you won’t have to part with much green stuff to get one.
I was actually
quite impressed with the final result, considering my attitude while
building the kit. Maybe I should attack more projects with the “I don’t
care, I just wana have fun” attitude. I totally recommend this kit to salty
modelers looking to save a few bucks as well as those just cutting their
teeth in our little glue sniffing world. You can still find them all the
time on eBay and you won’t have to part with much green stuff to get one.
| REFERENCES |
Just the Decal Sheet Instructions Ma’am.
November 2004
If you would like your product reviewed fairly and fairly quickly, please contact the editor or see other details in the Note to Contributors.