Mirage 1/48 PZL.37B Los
| KIT #: | 48132 |
| PRICE: | €40 in 2005 |
| DECALS: | Three options |
| REVIEWER: | Spiros Pendedekas |
| NOTES: | I |
| HISTORY |
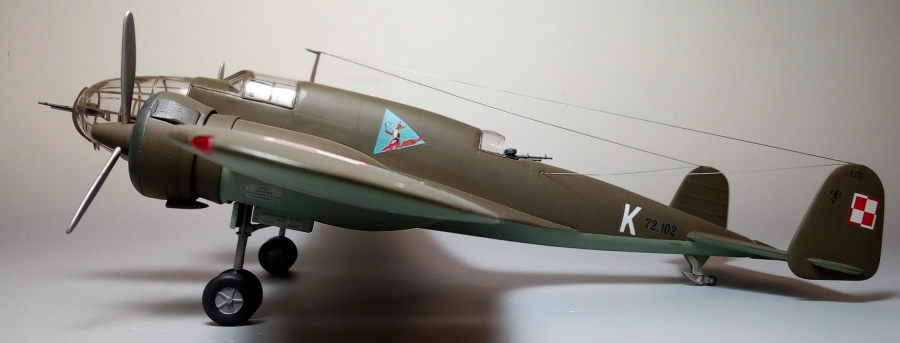
Introduced in 1938, the PZL.37 Łoś was a twin-engine all-metal monoplane
medium bomber, considered to be not only the most modern and effective
weapon then possessed by Poland, but also one of the most advanced bombers
then operational in the world.
It was relatively conventional in layout, with a low-set wings of effective
aerodynamic profile and (on the majority of aircraft) a twin tail. Being
quite small for its bomb load and range, its capacity was achieved in part
by a lift-generating, airfoil-shaped fuselage, which was another
then-unusual feature. The crew consisted of four: pilot,
commander-bombardier, radio operator and rear gunner. The bombardier was
accommodated in the glazed nose, with a forward machine gun. The radio
operator sat inside the fuselage, above the bomb bay, and he also operated
an underbelly rear machine gun.
 The Łoś featured retractable main undercarriage, which retracted into
purpose-built alcoves located within the engine nacelles. The undercarriage
was double-wheeled, complete with independent suspension for each wheel. It
was powered by a pair of Bristol Pegasus radial engines.
The Łoś featured retractable main undercarriage, which retracted into
purpose-built alcoves located within the engine nacelles. The undercarriage
was double-wheeled, complete with independent suspension for each wheel. It
was powered by a pair of Bristol Pegasus radial engines.
Offensive payload was interestingly spread across a two-section bomb bay set
within the fuselage (providing space for up to 4 bombs) and a total of 8
compact bomb bays located in the central section of the wings (which had
space for a maximum of 16 bombs). Understandably, this arrangement of bomb
bays imposed considerable restrictions on the types of bombs that could be
carried, especially in the wing bays, which were quite small, due to the
need to fit between the ribs of the wing.
The Łoś was extensively used in the defense of Poland during the rapid
invasion of Poland by Nazi Germany in September 1939. On 1 September 1939,
the Polish Air Force had roughly 86 PZL.37s in total, but less than a half
of those actually saw active combat use due to aircraft being used by
training units, being in maintenance, or having been held in reserve.
It suffered from a high attrition rate, due to lack of fighter protection,
with the final Polish combat missions performed on 19 September. During
October 1940, 26 or 27 aircrafts that had been evacuated from Poland were
seized by the Romanian government, with 23 of them subsequently used by the
Royal Romanian Air Force, including offensive missions against the Soviet
Union.
Over 120 were built with, sadly, none (but a replica) surviving today.
| THE KIT |
 The kit comes in a nice top opening box, featuring a dramatic boxart of a
P.37 with all bomb bay doors open. Inside you find 5 dark gray sprues. All
surfaces have pebbly texture, which will need some sanding to go away.
Hopefully the panel lines are recessed and well defined, so they will not
disappear after sanding. I have also noticed quite a few sink marks that
will have to be addressed during building. Two spinner options are provided,
depending on the version you build, with the prop blades separately molded.
Internal detail is good, but, of course, with those extended glazing, it
will never be enough!! Transparencies are clear, framing is well defined,
with the nose glazing provided in two halves, nicely joined through a frame
line.
The kit comes in a nice top opening box, featuring a dramatic boxart of a
P.37 with all bomb bay doors open. Inside you find 5 dark gray sprues. All
surfaces have pebbly texture, which will need some sanding to go away.
Hopefully the panel lines are recessed and well defined, so they will not
disappear after sanding. I have also noticed quite a few sink marks that
will have to be addressed during building. Two spinner options are provided,
depending on the version you build, with the prop blades separately molded.
Internal detail is good, but, of course, with those extended glazing, it
will never be enough!! Transparencies are clear, framing is well defined,
with the nose glazing provided in two halves, nicely joined through a frame
line.
Instructions are provided in a well printed 16-page booklet. They are
written only in Polish, which might be restraining to some, but, since color
callouts are provided in Humbrol codes, a moderate modeler can work things
out. Construction is spread in 21 steps, though I would not mind
having them spread even more, especially at the interior assembly. Three
identical schemes (khaki over light blue) are provided: two Polish Air Force
and a Nazi captured one. Decals are superbly printed by Techmod, but they
look very thin and should be handled with care.
| CONSTRUCTION |
I started by assembling the 5-piece floor and attaching it onto the
starboard fuselage half. I then assembled, painted and installed all
interior components (seats, controls, consoles and various boxes, guns, ammo
magazines, document bags etc). Having no knowledge on PZL-37s, I completely
trusted the instructions upon paint callouts. Basic cockpit color was
“aluminum” (I used Testors Steel), with black grey floors (Hu32), black
instrument panel, control yoke and consoles, leather seat cushions, khaki
bags, gunmetal guns and ammo boxes etc. With only seat belts (made from
green doped masking tape) added, the finished interior looked well
appointed. The two fuselage parts were then joined and left to cure.
 I then went on to assemble the wings. I first attached the three parting
bomb bay walls at each lower wing half, then assembled the wings and
attached them to the fuselage. The 2-piece left and right flaps were
attached “closed”, as well as the two conical engine bases, followed by the
cowlings, which had the 2-piece air inlets under them attached as well. The
2-piece clear navigation lights were also attached. Since I typically build
my models with bomb bays closed (which makes the current kit’s molded
“closed” fuselage bomb bay doors a plus for me), I went on and attached all
8 wing bomb bay doors in “closed” position. Basic construction was
accomplished by assembling and attaching the 8 piece dual-fin tail (a mini
model by itself) at the rear. General fit was good, with some mismatches
here and there.
I then went on to assemble the wings. I first attached the three parting
bomb bay walls at each lower wing half, then assembled the wings and
attached them to the fuselage. The 2-piece left and right flaps were
attached “closed”, as well as the two conical engine bases, followed by the
cowlings, which had the 2-piece air inlets under them attached as well. The
2-piece clear navigation lights were also attached. Since I typically build
my models with bomb bays closed (which makes the current kit’s molded
“closed” fuselage bomb bay doors a plus for me), I went on and attached all
8 wing bomb bay doors in “closed” position. Basic construction was
accomplished by assembling and attaching the 8 piece dual-fin tail (a mini
model by itself) at the rear. General fit was good, with some mismatches
here and there.
The nice 3-piece engines were assembled, painted black and heavily dry
brushed with silver. The prop base (sans the blades), is a 4-piece affair,
including the dome, very nicely executed: it was assembled and painted olive
drab (Hu155) and attached to the engine block. Be sure you have selected the
correct dome for the version you have chosen.
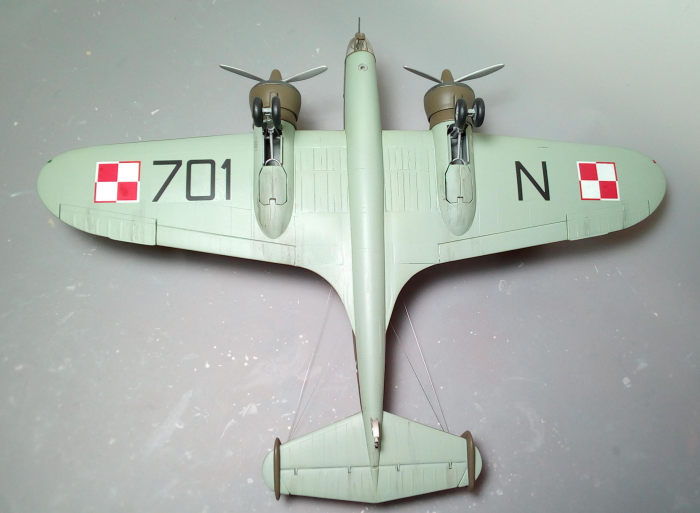
The 2-piece main wheels were assembled and had their tires painted black. No
info was provided regarding the color shades of the rims, cowling innards,
landing gear, wheel wells and door innards. By studying net available
pictorial evidence, they looked to be “aluminum”, as are the fuselage
innards, so I gave everything a coat of Testors Steel.
The whole model was then coarse sanded (which not only evened the joint
mismatches, but also eliminated the pebbly surface), then filled at various
places, smooth sanded, had its innards blanked by masking tape and headed to
the paint shop!
| COLORS & MARKINGS |
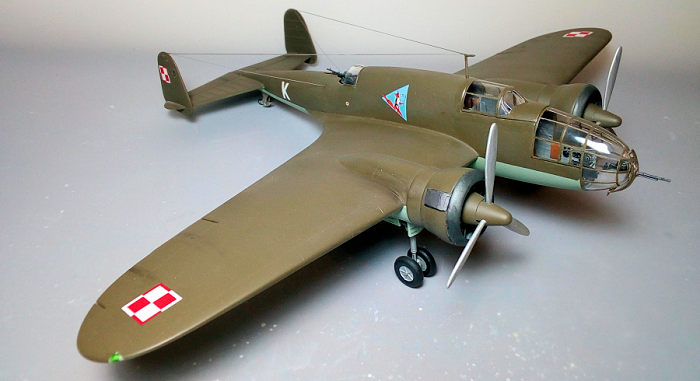
 With my trusty Revell Vario, I first gave all undersides (including gear doors
outer sides) a coat of Hu65 light blue, followed by a protective coat of Future,
then masked them off. Instructions call for Hu142 “field drab” upper color. I
decided to use Hu155 olive drab, which sprayed on nicely. Masking was removed
and the whole model was Future-d.
With my trusty Revell Vario, I first gave all undersides (including gear doors
outer sides) a coat of Hu65 light blue, followed by a protective coat of Future,
then masked them off. Instructions call for Hu142 “field drab” upper color. I
decided to use Hu155 olive drab, which sprayed on nicely. Masking was removed
and the whole model was Future-d.
I used the kit decals, in order to depict the box art plane. The decals were
cautiously thin, so I was extra careful upon applying them. They adhered well,
were relatively opaque, but I did experience some silvering which, of course,
may very well be my fault. A coat of future sealed them.
| FINAL CONSTRUCTION |
The landing gear was attached, followed by the four main wheels and the
three piece nose wheel assembly. They were aligned and left to cure. Then,
the engines were attached in position, followed by the cowling lips, which
were beforehand painted Testors burned metal. The blades were painted
Testors Steel and attached in position. Fit was nice and positive, with some
care needed as to attach them at the correct angles (do the radical act of
following the pictorial instructions here…). The characteristic oil coolers
were painted gunmetal and attached at the outer cowling sides, as well.
 It was then transparencies time: still attached on the sprue tree (for
easier handling), with my 10/0 Springer Pinsel, I brush painted the
bazillion of frames. I then carefully detached them from the tree, cleaned
and attached them onto the model Fit was not perfect, leaving some gaps and
contour mismatches. I did not want to take any risks by stressing the
already painted fuselage or the clear parts of unknown brittleness, so, all
I did was fairing the gaps with white glue and retouched.
It was then transparencies time: still attached on the sprue tree (for
easier handling), with my 10/0 Springer Pinsel, I brush painted the
bazillion of frames. I then carefully detached them from the tree, cleaned
and attached them onto the model Fit was not perfect, leaving some gaps and
contour mismatches. I did not want to take any risks by stressing the
already painted fuselage or the clear parts of unknown brittleness, so, all
I did was fairing the gaps with white glue and retouched.
Some extra care must be taken upon assembling the front gun, with the small
nose part trapped between, then attaching the mini assembly onto the “main”
nose clear part. Looking at the clear parts attached, it became absolutely
obvious that I should have installed them at earlier phases of construction
and blend them nicely to the fuselage….oh, well, next time, upon building
the single fin version!
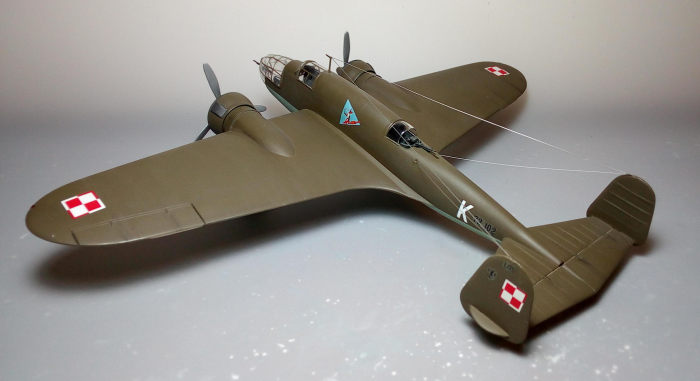
Net pics show the P-37s in more or less excellent condition, so, I only
applied some engine staining and minimal general dirtying, all performed
with dry pastels of appropriate dark colors. A satin towards matt coating
gave the P-37 its final shade.
I then attached the top front antenna mast, run four silver stretched sprue
pieces, in order to replicate the antenna wires, tightened with hot air from
my wife’s hair dryer, and called this beautiful plane done!
| CONCLUSIONS |
This is a nice kit of an important twin engine bomber. Overall shape, fit,
detailing, transparencies clarity and decals are satisfying. Leaning towards
limited run, issues like the pebbly surface and the transparencies mismatching
are totally understandable and can be easily addressed by an intermediate
modeler with a couple of “complicated” builds under his belt. The fact that the
instructions are completely in Polish is not a real disadvantage, as they are
pictorially clear and also color codes are provided. I am aware that newer
releases instructions are also in English (and are downloadable).
I had a great time putting this kit together, whereas I should have broken my
usual shortcut/laziness rule of attaching the transparencies at later stages.
Should I have installed them from the start, I would have been able to blend
them nicely to the fuselage. Ok, a lot of masking would have been ahead, but
nice aftermarket masking sets are widely available.
Out of the box (OOB), this kit is sufficiently detailed, but there are also nice
extra PE enhancements on the market that will definitely beef up the final looks
and produce a work of art. The kit has been reissued a couple of times and it’s
not that hard to find at reasonable prices.
Kind of “esoteric” subject, and the only game in town at this scale, it
nevertheless is a great kit of a beautiful and important plane, not very often
seen built. If you feel inclined to it, grab one and build it. You’ll definitely
have a head turner in your showcase!
Happy modeling!
7 February 2022
Back to the Previews Index Page
Back to the Previews Index Page