Janusz Makowski 1/72 Lublin R.XIII-D
| KIT #: | |
| DECALS: | One option |
| REVIEWER: | Chris Peachment |
| NOTES: |
Injection soft white plastic, no etched, little interior detail. |
| HISTORY |
I
can do not better than to quote from Scott Van Aken's review of a 1/48 version
of this aircraft on this website
The Lublin R-XIII was the Polish army-cooperation plane (observation and liaison
plane), designed in the early-1930s in the Plage i Laśkiewicz factory in Lublin.
It was the main army cooperation plane in the Invasion of Poland. Its variant
Lublin R-XIV was a military trainer aircraft.
In the early 1930s the R-XIII was quite a successful plane for its purpose. It
had a very short take-off (68 m for R-XIIIA) and landing, enabling it to operate
from fields and meadows. However, only some of R-XIIIs were equipped with a
radio and a camera, which lowered their usefulness. In 1932-1936 they were used
in three-aircraft liaison platoons, being a basic Polish army-cooperation plane.
In 1937 they were formed into army-cooperation escadres (eskadra
towarzysząca),
in 1939 reformed into observation escadres (eskadra
obse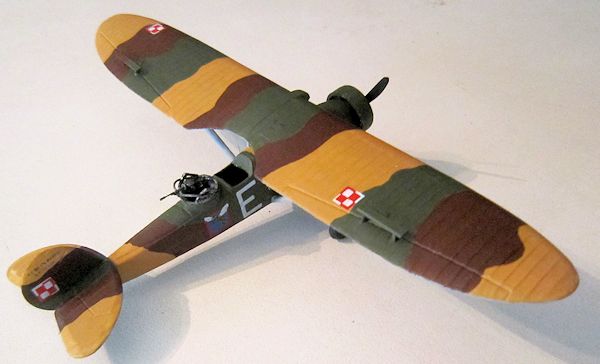 rwacyjna).
Only in 1939, part of R-XIII were replaced by the RWD-14b Czapla, which was not
much more modern. A planned replacement was a modern LWS-3 Mewa, but it was not
introduced due to war outbreak.
rwacyjna).
Only in 1939, part of R-XIII were replaced by the RWD-14b Czapla, which was not
much more modern. A planned replacement was a modern LWS-3 Mewa, but it was not
introduced due to war outbreak.
On the eve of the Invasion of Poland in 1939, the Polish Air Force had about 150
R-XIII. Of them, 49 were in combat units, 30 in reserve, about 30 in training
units and about 40 in repairs. In combat units, R-XIII were used in 7
observation escadres (out of 12): numbers 16, 26, 36, 43, 46, 56 and 66. Each
escadre had 7 aircraft. The 16th Escadre was in C-in-C reserve, while the others
were distributed among the field Armies. The R-XIII was no match for any of the
Luftwaffe fighters, bombers or even reconnaissance aircraft, being much slower,
and armed with only one machine gun, but they were actively used for close
reconnaissance and liaison tasks.
About 40 R-XIII from combat units were destroyed during the campaign, but only
part of those were shot down by the German aircraft or flak. During the
campaign, 9 aircraft were given to observation escadres as replenishment. Some
planes were also used in a wartime improvised units in air bases. About 10
combat aircraft and 7 from other units were withdrawn to Romania. A number of
aircraft were bombed by the Germans in air bases or burned by withdrawing Poles.
None have survived to today.
In the Naval Air Squadron, 11 R-XIIIter and R-XIIIG floatplanes were used in
1939. One of them made a night bombing raid on Danzig on September 7, searching
in vain for the
Schleswig-Holstein.
On September 8 all planes were bombed, while stationed on the sea near Hel on
the Hel Peninsula.
| THE KIT |
| CONSTRUCTION |
I found this kit under a table at a
recent gathering of the IPMS at RAF Museum Hendon in North London. I was dimly
aware of the Lublin and had never seen a kit of one. The box to the kit looked
like a c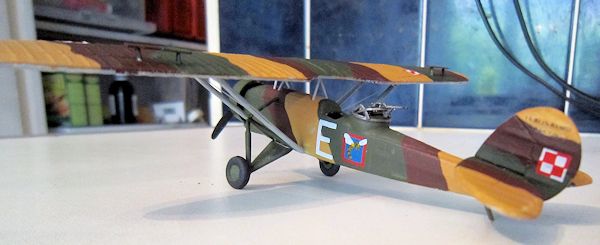 old war Soviet boxing of recycled wood chips, with the decadent western
luxury of a colour picture on the top of the model, in fetching shades of sludge
brown. It was priced at £6, so I asked the dealer if I could look inside the
box. I looked at the sprues, took a step back and managed not to scream. “All
right then,” said the dealer, “£5.” Overcome by his generosity, and feeling the
urge to conquer a new world, I agreed and also bought a Samolet Szkolny PWS-26
from him, which I had also not heard of. I will get down to that after
convalescing from the Lublin.
old war Soviet boxing of recycled wood chips, with the decadent western
luxury of a colour picture on the top of the model, in fetching shades of sludge
brown. It was priced at £6, so I asked the dealer if I could look inside the
box. I looked at the sprues, took a step back and managed not to scream. “All
right then,” said the dealer, “£5.” Overcome by his generosity, and feeling the
urge to conquer a new world, I agreed and also bought a Samolet Szkolny PWS-26
from him, which I had also not heard of. I will get down to that after
convalescing from the Lublin.
Anyone familiar with Amodel kits will know what to expect. Enough flash to be
worth storing for future scratch builds in scrap plastic. Two fuselage halves
that don't match up length-wise. A once piece wing, which isn't too badly
moulded, and a tailplane that has the leading edges of a plank. Some squares of
plastic that might be the interior, and struts with a bad case of rickets. A
decal sheet that was printed on old wrapping paper. And just to add a little
extra spice to the whole endeavour, there were no instructions. I felt this
could be the start of an interesting month of Sundays.
 There is minimal cockpit detail. The kit has one large oblong of flat plastic
which I thought might be the floor, but was too wide by about twice the
measurement. And so I did without. There were a couple of bulkheads and seat
shaped things with cushions on them. I painted the whole interior a medium
brown, with leather seats and threw in a joystick from scrap with a black grip.
Then glued the fuselage halves being careful to mate them up so the main centre
sections were even, though that left an overhang at either end on one side. Once
dry I attacked it with a nail file the equivalent of a metal rasp, and soon it
had matched all up.
There is minimal cockpit detail. The kit has one large oblong of flat plastic
which I thought might be the floor, but was too wide by about twice the
measurement. And so I did without. There were a couple of bulkheads and seat
shaped things with cushions on them. I painted the whole interior a medium
brown, with leather seats and threw in a joystick from scrap with a black grip.
Then glued the fuselage halves being careful to mate them up so the main centre
sections were even, though that left an overhang at either end on one side. Once
dry I attacked it with a nail file the equivalent of a metal rasp, and soon it
had matched all up.
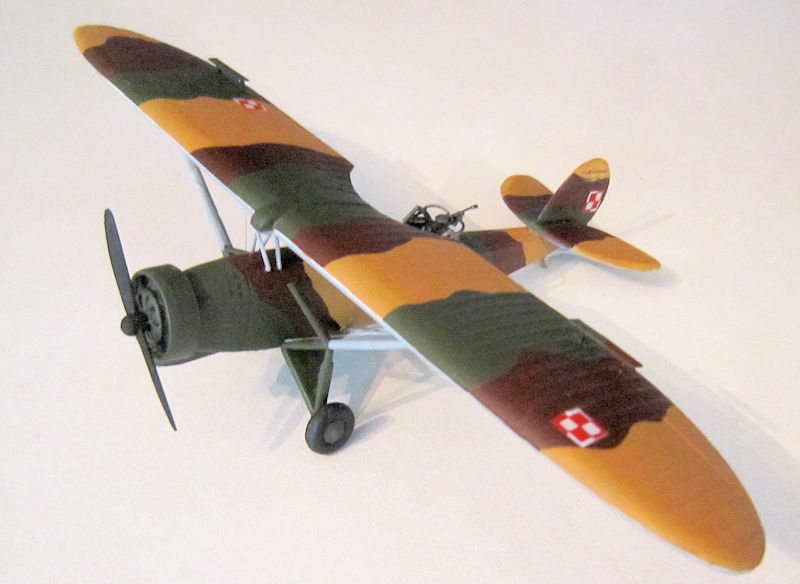
| COLORS & MARKINGS |
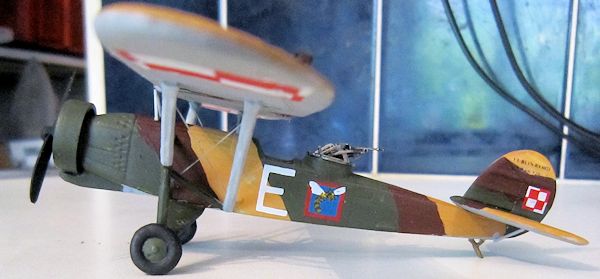 After sanding off a good few tenths of an inch all the way round the wing, and
filling all seams on the fuselage, I began painting with a Dark Gull Grey
underside to both. I tend to treat parasol monoplanes in the same fashion
as biplanes, and paint the wings and fuselage separately, early in the build.
After masking the nose of the fuselage, I then applied the camouflage for which
I used Lifecolor Middle Stone in the UK range, with Vallejo Hull Red for the
dark brown. For the green I used Vallejo Cam. Olive Green which is equivalent to
RLM80 Olive Green, and a very nice shade too.
After sanding off a good few tenths of an inch all the way round the wing, and
filling all seams on the fuselage, I began painting with a Dark Gull Grey
underside to both. I tend to treat parasol monoplanes in the same fashion
as biplanes, and paint the wings and fuselage separately, early in the build.
After masking the nose of the fuselage, I then applied the camouflage for which
I used Lifecolor Middle Stone in the UK range, with Vallejo Hull Red for the
dark brown. For the green I used Vallejo Cam. Olive Green which is equivalent to
RLM80 Olive Green, and a very nice shade too.
| FINAL CONSTRUCTION |
Whilst all that was drying I turned attention to the struts. For some reason
there seemed to be twice the number required. It was only then that I noticed
that they had all been split lengthwise into two parts. I have never seen
anything like that before on a kit, and so with a happy laugh, I started glueing
them all together until I had what resembled bones from an arthritic dinosaur.
Several hours of scraping and sanding and bending convinced me that I should
have made them from scratch. But I am loathe to lose time already spent.
 The cabane struts were beyond the pale, and so I cut some from plastic rod,
leaving the front pair until after I had the wing in place. Since the
cabanes come to a point at the top, then you can't mount the top wing on them
without making a jig. If I were grown up I would have a wooden adjustable jig
with wingnuts mounted on a polished mahogany base at the ready.
The cabane struts were beyond the pale, and so I cut some from plastic rod,
leaving the front pair until after I had the wing in place. Since the
cabanes come to a point at the top, then you can't mount the top wing on them
without making a jig. If I were grown up I would have a wooden adjustable jig
with wingnuts mounted on a polished mahogany base at the ready.
Instead I did my normal jury-rigged thing with some tins of paint and a book or
two. Laying the inverted wing down first, then gingerly offering the fuselage,
with supports on either side from a couple of paperbacks. Once lined up, and
setting, the main wing struts can be glued in place. It was only while they were
setting that I consulted a picture or two and realised I had them the
wrong way round. Much wailing and gnashing of teeth.
After re-aligning them, I left the whole thing to set overnight and fell into a
tortured sleep.
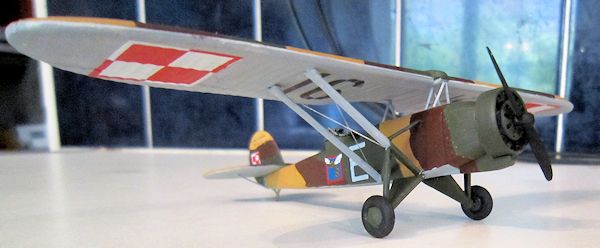
The tailplane was sanded down for about an hour so that the leading and trailing
edges were at least rounded rather than square, the top of the rear fuselage
scraped down a lot to accept the horizontal tailplanes. The fin is best painted
separately.
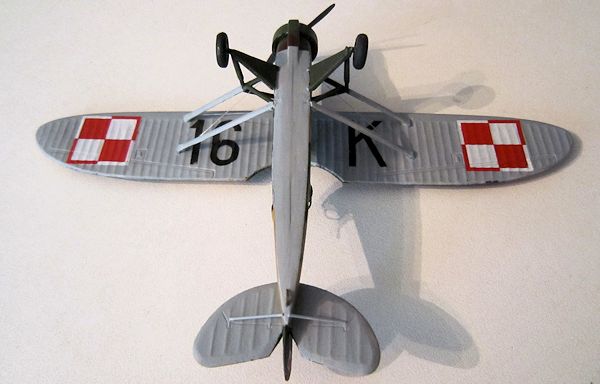
Then came the decals. Expecting the worst I left them in a
saucer of water for half an hour but they showed no signs of budging. After
dowsing them with setting solution they reluctantly started to slide around a
bit. The main underwing chequers were so thick that I had to prise them off the
backing sheet with a scalpel blade. A few pieces went missing. The underwing
numbers only settled own after repeated drownings in setting solution. I tried
the new Humbrol Decal fix, and was slightly disappointed in that it is very
glue-ey, and sticky, and leaves a nasty shiny residue. Perhaps it was unfair to
try it on decals like these. The upper wing chequers were much easier, being
smaller, and they are set in an asymmetric pattern, familiar from Polish
aircraft. The only reason I can think of for this arrangement is to deceive
enemy gunners into shooting between the two markings, thus missing the pilot.
Although the mid point between them w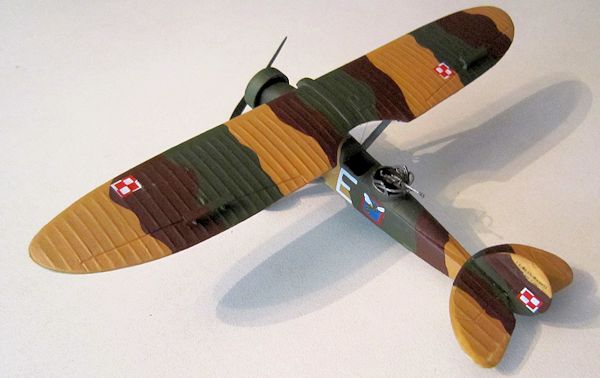 ould result in holes in the wings.
The engine and cowling comes moulded all in one piece, which isn't too bad once
you have filled in around the cylinders with matt black and painted the front
streamlining green The long intake under the cowling, which I take to be an oil
cooling intake, was too think by about an eighth of an inch and need sanding, if
the cowl wasn't to sit too high.
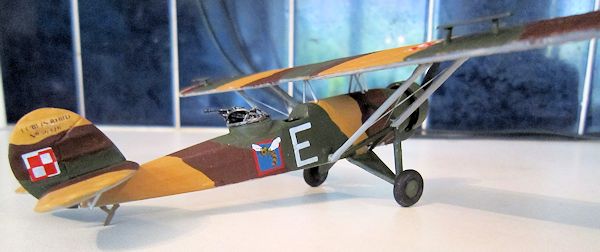
And finally, the Scarff ring and defensive machine gun. There isn't one. So the
spares box was raided for suitable looking item, painted in black and
dry-brushed gunmetal.
I
settled back with a sigh of triumph, only to notice two dimples sitting there
unfilled in the aileron upper surfaces. Looking at pictures, I realised there
were some aileron winglets mounted on struts above
 them. I don't know the
technical term for them, but assume they are to assist aileron movement at high
speed. In the case of this machine, high speed would be about 110 mph, or what
modern pilots call “stalling”.
them. I don't know the
technical term for them, but assume they are to assist aileron movement at high
speed. In the case of this machine, high speed would be about 110 mph, or what
modern pilots call “stalling”.
I
was now left in that state well known to amateur car mechanic's after
re-assembling the car. There are always a few cogs still sitting there. The box
still had half a dozen struts which I could not identify, and assorted blobs of
plastic still attached to the sprues. It was the defining moment of the build to
bin them all.
| CONCLUSIONS |
I get the same feeling at finishing this sort of kit as mountaineers describe
when they have reached the summit of the Eiger in a Force Ten gale. Models of
any Polish aircraft are thin on the ground, and if you want a 1/72 version of
this type, then this is the almost only game in town, though I believe that
Ardpol do a resin version which I have never seen. I notice that this company
they also do a 1/72 all-silver
machine with floats, a addition which would up the ante a little in terms of
suicidal missions. Not for nothing was this aircraft designated Number 13.
There is also the old 1/48 version which Scott Van Aken has built elsewhere on
this website and looks very nice.
| REFERENCES |
en.wikipedia.org/wiki/Lublin_R-XIII
wp.scn.ru/en/ww15/o/235/29/1
ww2photo.se, which reveal that the aircraft didn't always have those aileron
winglets, which I wish I had known before starting.
And
histomil.com for some pictures of spectacularly crashed Lublins, in case you
tire of building this model and decide to recreate what the Luftwaffe did to it.
And some burned out examples, which the Poles did to their own aircraft.
There are also any number of websites with a build of the Mirage 1/48 Lublin, which make for handy reference.
September 2013
If you would like your product reviewed fairly and fairly quickly, please contact the editor or see other details in the Note to Contributors.