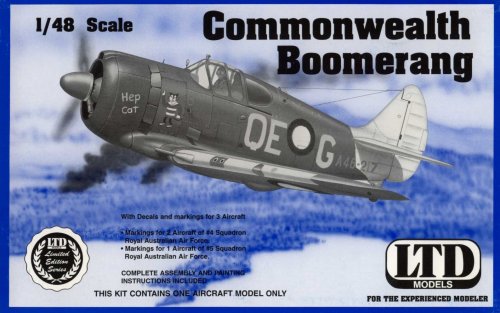
LTD 1/48 Commonwealth Boomerang
|
KIT # |
9806 |
|
PRICE: |
$12.96 - (Original retail $24.99) |
|
DECALS: |
Three aircraft |
|
REVIEWER: |
|
|
NOTES: |
Short run Multimedia kit w decals by Microscale |

|
HISTORY |
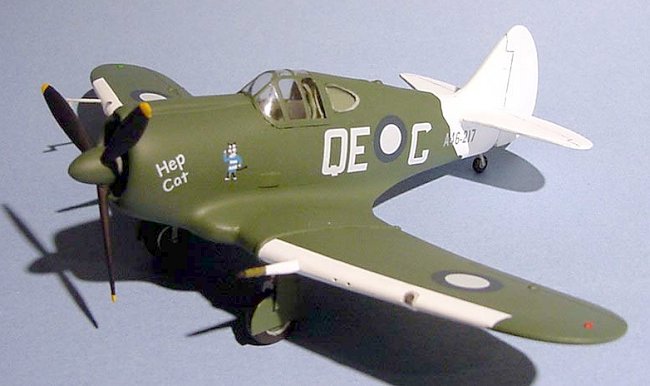
The Boomerang was developed from the Wirraway around the Pratt & Whitney R-1830 (largest engine available at the time in Australia) as a stopgap fighter to protect the country from the Japanese onslaught. The first CAC-12 was flown a mere 14 weeks after the design had been approved and a total of 250 were to be built by Commonwealth Aircraft in Fishermen’s Bend.
While unable to fight the nifty Zeke in a dogfight, the little Boomerang was extremely manoeuvrable and was employed in valleys and mountainous regions as an interceptor, a photo-recon bird and a ground attack fighter. The art of close-air support was brought close to perfection with the CAC-12, as it operated under Army control in the fierce jungle battles in South East Asia.
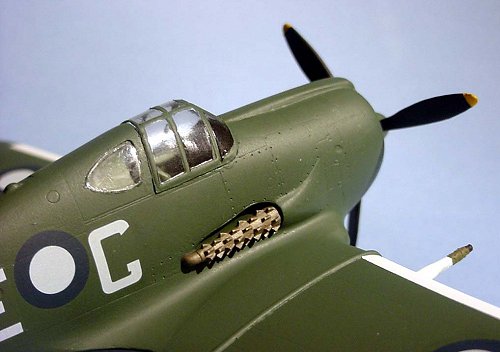
The Boomerang could fire upon its prey with 4 Browning .303 machine guns and 2 20mm Hispano canons, and it could carry either a 500 pounder or a supplementary tank under the fuselage. The pilot was well protected by thick armour plates around the cockpit, enabling him to always return to base with his Boomerang!
|
THE KIT |
 In a side-opening box, you get
the standard Eastern Europe limited-run kit. Sprue gates are thick, and
flash is present on almost all the parts. You get everything to make a
CAC-12, plus a belly tank and bulged tyres. The tyres are the only low
down of this kit, being moulded in two halves, which will make the
threads disappear once the sanding is complete. However, Harvard/T-6
wheels will do just the same. Interior details is OK, with moulded on
side details in the cockpit. Again, a T-6 kit would prove handy to spice
it up a bit! The wheel wells are nice, with adequate detailing,
including a separate central truss, but the super detailers will have a
bal here adding all the hoses and wires. The engine is moulded in two
parts, one for each row of cylinders. The propeller is in whole piece,
but major clean up is needed to make it fit to the spinner.
All the clear parts are vac formed, with a spare provided for each of them. The decals are by Microscale and are thus excellent, but the white seems a bit translucent, more on that later.
Finally, the instruction sheet is top notch, but the iconography is rather strange, with lots of trim to fit advices and a caution symbol represented by a skull and crossbones! I never thought that modeling airplanes was that dangerous!
|
CONSTRUCTION |
I started by joining
sub-assemblies together, such as the engine and the cockpit’s rear
bulkhead. The power plant was painted Model Master Gun Metal and the
cockpit bits Model Master RAF Interior Green (but It could have been US
Interior Green, I took a guess here), along with the cockpit sidewalls.
The instrument panel and the gun sight were coated with Flat Black. The
pilot’s seat and the control stick were painted with Medium Grey, and the
rudder 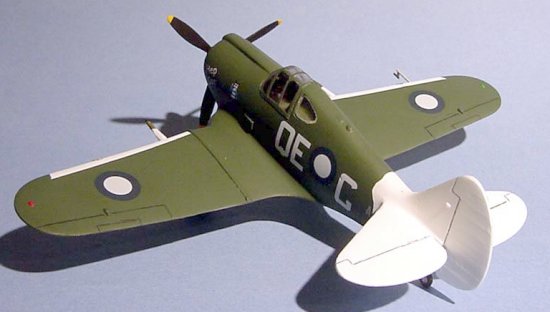 pedals were painted Aluminium, after which the instrument panel
was dry-brushed with the same colour to pick up the details. I
assembled the cockpit, and dry fitted it to the fuselage, and the “Trim
to fit” advice from the instruction sheet came into play. Since I had a
complete sub-assembly, I had to proceed with extreme care to reduce the
width of the floor. Even so, I had to Dremel out some of the fuselage
away to ensure a good fit. Don’t do like me, dry-fit everything before
gluing it in place! I painted the rear window plates RAF Interior Green
and glued them in place.
Returning to the engine, the details where picked up with Chrome Silver, then the crankcase was painted with Neutral Gray. The firewall and the inside of the cowlings were painted Aluminium, but not before I had fitted the floor of the air intake in place just under the top of the nose. The firewall had to be sanded quite a bit to make it fit, and the engine was glued in place to it. The cockpit was put in place and the fuselage halves were closed. Be careful to align the engine properly (it can be quite a challenge) because mine is slightly off-set and it shows… Oh well, I still have one other Boomerang on which to get it right!
We now come to the kit’s most difficult area, the wings.
The way the kit is designed, the
wing comes in 5 parts: 2 outer top sections, 2 lower sections and one
lower center sections. The 3 lower parts all feature so-called
“alignment tabs” to ensure the right dihedral. Well, the problem is that
the tabs just don’t fit. What I did is that I cut them and sanded the
soon to be glues area smooth, and simply but join them with Ambroid
Pro-Weld. Once the glue was set, I made some reinforcement strips out of
styrene stock and glued them to the
 inside of the wing along the joints.
Well, I though I had done a great job, the sub-assemblies actually fitted
into the fuselage without too much troubles. But, but, the dihedral I
got was all wrong and I found out only after painting, when the aircraft
was on its wheels. Too late to go back! Here is what I suggest to avoid
such a problem. Arm yourself with tape, a good ink pen (with a felt tip
if possible) and a piece of strong cardboard the length of the wingspan
and at least 3 inches tall. Fix the lower portions of the wing together
using the tape, make sure it’s all straight, then use the pen to trace
the right dihedral on the cardboard that will be cut to make a template.
After that, sand the tabs away, glue them like I did using the cardboard
as a template. That way, you should have everything straight!
I glued the top of the wheel wells in the fuselage before adding the wings, and I glued the rear of the wells and the middle separator before closing it up. I then coated everything with Model Master Interior Green, including the inside of the gear doors. I added the lower portion of the wings first, and then fitted the top parts. The fit is not incredible, but not bad either. Styrene rods of various widths were melted in the bigger seams with Pro-Weld, then Tamiya Putty was used to finish all the seams on the wings and the fuselage. Then it was time to glue the stabs on, and for that, the plan has you drill holes to use very primitive locating pins to assist the installation. I sanded everything smooth, used my Humbrol glue to put the two stabs in place and align them, then Ambroid Pro-Weld was flooded in the seams to ensure a strong bond. Again, the seams were dispatched with Tamiya Putty. I also glued the wing canons, the fit was very good, I used Humbrol Glue as filler with very little sanding required to blend them in the leading edge of the wing.
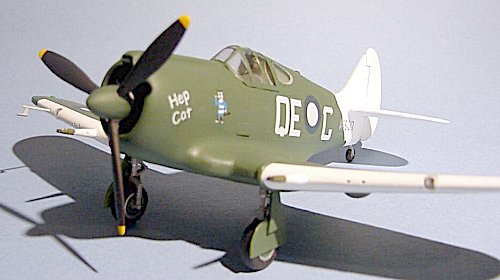 The wheels were separated from
the sprues, cleaned up and the seam was filled in and sanded. If you
can, swap them for a pair of T-6/Harvard wheels for you’ll loose all the
treads once the sanding is over. The bulged one are a little better,
since they come as one piece, but they do look to bulged to me, as if
they were inflated with just a little bit of air. The propeller was
cleaned up, and if you don’t have a Dremel too, you’re in for a lot of
fun! There is a big chunk of plastic that must be removed in order to be
able to fit the spinner, and then sanding will take care of the gaps.
Before masking everything off, take time to clean the little side windows, but be careful not to remove the totality of the small lip, or you will not be able to fit them. On the plan, the skull and crossbones indicate great danger at this stage. Also, make sure that you paint the aforementioned lip interior or exterior colour before you glue the windows, it will make the model less silly looking once it’s finished (you can see in the pictures the difference near the windows)!
I painted the wheel wells Model Master Interior Green and the landing gear struts Testor Aluminium (small jars). The wheel wells were masked, along with the canopy and I sent the aircraft to the paint shop.
|
CAMOUFLAGE |
Thanks to Pierre-André, I tried a new technique to apply the paint scheme’s white tail and wing leading edges. First, shoot Tamiya IJN Grey as a primer, and then use Tamiya’s Flat White. I must say I’m totally impressed with this way of doing white, since you need a lot fewer coats compared to using Floquil Reefer White. The white sections were masked and I used Gunze FS 34092 for the main camouflage colour. This provides a near perfect match in my opinion.
|
FINAL CONSTRUCTION |
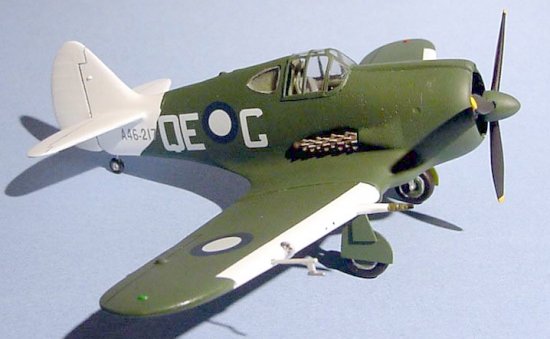
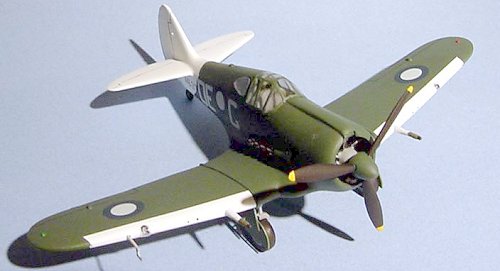 I unmasked the white sections and
was relieved to see that no over spray had made its way under the masks.
I painted the propeller blades Model Master Flat Black with Insignia
Yellow tips and detailed the wing canons with Model Master Olive Drab and
Gun Metal. I painted the superbly cast resin exhaust with Model Master
Jet Exhaust and I replicated the aluminium rims on the wheels so
characteristic of the Harvard series with Aluminium paint and gave the
tail wheel a coat of the same colour before gluing it in place. The
three tyres were painted Flat Black.
I re-drilled the propeller and the landing gear locating holes to give them a little bit more depth and tried to glue the struts in place. I said tried because I had to do it at least 4 different times until a heavy mix of Cyano and Humbrol Glue secured them in place. I then drilled the wheel’s axle holes and glued them in place. The exhaust was secured in place with Cyano and it’s a drop fit. Lastly, I glued the Pitot tube in place.
I sprayed Future the whole aircraft and it was time for the decals.
|
MARKINGS |
They are thin and in register, but the white is translucent. Unless you can scrounge up replacement roundels and codes, they’ll have to do. They go on the model without any troubles and reacted very well with Micro Sol afterwards. A coat of Poly Scale Flat sealed the model.
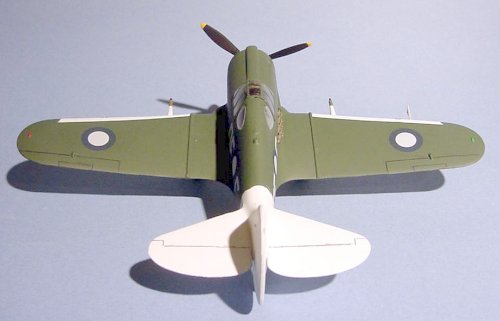 I removed the window masking and
admired my beautiful (if not slightly crooked!) Boomie.
|
CONCLUSIONS |
This kit poses no great difficulties, but you have to proceed slowly, dry fit and trim lots of parts, especially the engine/cockpit/wings triumvirate. The painting poses no particular problems and as a plus is quickly made. I recommend this kit to anyone looking to make his debut in the limited-run world.
May 2003
Copyright ModeingMadness.com.
|
REFERENCES |
GREEN, William. Warplanes of the Second World War, “Fighters Volume One”, Macdonald, London, 1960.
If you would like your product reviewed fairly and quickly, please contact the editor or see other details in the Note to Contributors.