| THE KIT |
Hasegawa’s 1/32 Spitfire Mk. Vb was my first serious, big modeling project in 1976. The local hobby shop had it, an Airfix Modeling Guide on RAF camouflage and matching Pactra Military Colors for the No. 601 Sqdn. desert LF Mk. V on the box top.
I was hooked.
After building three of these in the intervening decades, I decided I really wanted a1/32 Mk. IX and was able to trade for a new kit (thanks, Gary Fairfull). This was around 1998, and I came across two things that gave the project the final push: Paragon’s resin Mk IX conversation set and a copy of Morgan and Shacklady’s “Spitfire: A History.”
I got around to cutting plastic in 2002 and finished it in 2015 after more research and some rebuilding of completed parts. In that time, PCM issued their Mk IX series and Tamiya issued their Spitfire, so you can thank me for advancing the range of available kits.
I refer readers to the MM kit review section for details on the contents, but it holds up well after 50 years even against the Hobby Boss Mk. V. It still suffers from shallow wheel wells and sink marks in the aft upper chord of the wings. The cockpit, by modern standards, still isn’t that bad except for the floor.
The fun part is the subvariant options: Vokes or Aboukir depot dust filters, standard carb intake and clipped or standard-span wingtips. The kit also was the basis for an HF Mk. VI with extended wingtips and a four-bladed propeller and spinner.
Paragon’s conversion set (long out of production) provides in a sand-colored resin:
- Three-part resin nose – left and right halves and underside fairing
- Vokes Aero-Vee late carb-supercharger intake filter
- Pair of six-stack fishtail exhausts
- Separate Mk. VIII/XIII teardrop rudder
- Separate late-style double-kinked elevators
- Wheels
- Mk IX-style spinner and separate prop blades
- Large and later Martin Baker feed upper wing cannon bulges
- Second full-sized underwing radiator fairing and associated wing plug
| CONSTRUCTION |
 Construction
began by cutting away the kit nose forward of the firewall joint – the
Paragon instructions point out the cut line. It can be a little tricky
because you need to keep the forward wing root fairings intact. Patience
came in handy here.
Construction
began by cutting away the kit nose forward of the firewall joint – the
Paragon instructions point out the cut line. It can be a little tricky
because you need to keep the forward wing root fairings intact. Patience
came in handy here.
I left a little excess material forward of the line and filed and test fitted until the main resin halves fit. There’s a molded casting flange at the rear of the node halves that helps locate the resin parts to the fuselage parts.
After taping the fuselage halves together, I began fitting the three nose parts together. After super-gluing them to a basic fit, I set that assembly aside, untaped the fuselage halves and started the cockpit.
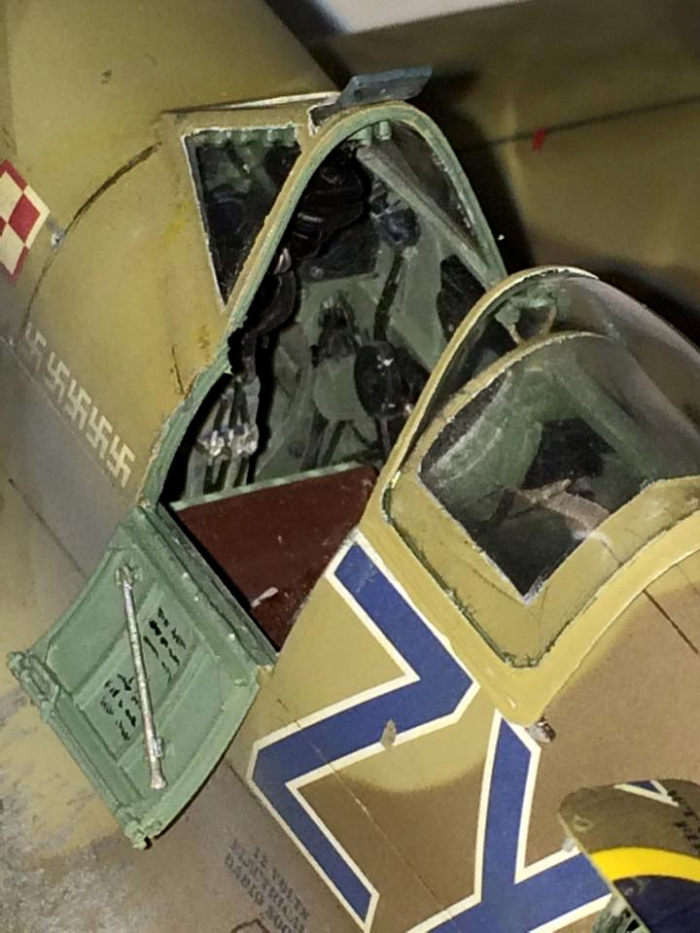
I replaced the cockpit floor with a more open structure instead of the kit floorboard. I cut off the seat’s flare holder and installed the Cutting Edge flexible harness along with a scratchbuilt inertia reel cable for the harness adjustment.
I also added a hose to the oxygen bottle on the cockpit’s upper rear starboard side and a gunsight spare lightbulb holder at the upper forward starboard side. Wiring bundles were added to the cockpit sides. The fun part was adding an internal windscreen armor session with a piece of clear CD case plastic. I filed grooves around the armor edges to represent the bolt hole slots.
The headrest was removed and the resulting hole in the cockpit frame removed. The kit has a decent voltage regulator that mounts on the read of the frame, but I scratchbuilt a new regulator later in the project (three, actually, for this project, the PCM Mk. IX and an ongoing Mk XII conversion that still languishes in my shelf of doom).
I decided to open the radio compartment and add the mount rack, a scratchbuilt radio and basic cabling. Using .010 styrene sheet and strip, I built a new hatch with fasteners and hinge for later painting, decaling and installation.
After painting with Model Master enamels and Citadel acrylics, I installed the cockpit and radio and closed up the fuselage.
I then cut out the wing gear wells and Mk. V oil cooler area. Sheet styrene formed new wheel wells, although I left the gear leg recesses in place.
The kit wing radiator fairing, when viewed from the front, has splayed sidewalls that probably were a concession to being able to pop the wing out of the molds. Sooooo… I cut the kit radiator away as well. At the time, I was worried more about the external look of the conversion so I didn’t attempt the recessed upper radiator duct trunks. I installed the Paragon wing plug and an .040 styrene sheet plug with internal plastic tab reinforcements and cyano glue reinforcements.
For the radiator fairings, I pulled out my 1/48 ICM Spitfire IX kit and started measuring and scaling up dimensions and profiles on graph paper to build new fairing shells from .010 styrene. I built up new radiator core faces to install, painted the faces and fairing interiors and cemented them to the wing. Later, after most of the wing reconstruction, I added putty gusset fairings at the radiator/wing joints.
I removed the upper wing B-style cannon bugles from the upper and lower wing parts, filling the lower holes with sheet plastic backing and cyano filler. The upper holes were backed with sheet plastic and the wing parts assembled. After rescribing the wings, I filled the upper bulge holes with more sheet plastic before adding the Paragon cannon bulges and cleaning up those areas.
I brought the fuselage and wing assemblies together and started fitting the resin nose. It took a fair bit of adjustment, plastic shimming and Milliput to even out things, and I had to recontour the upper cowling a bit with more Milliput.
 By
this time, I’d gotten a copy of an Air International article on Spitfire Mk.
IX cowling variations that was a real eye-opener. Short form: I decided I
wanted a Supermarine-style early productionized cowling with the early-style
enlarged carb-supercharger scoop. A laminated block of styrene, lots of
carving, Dremeling and sanding and a bit of test fitting provided a passable
scoop.
By
this time, I’d gotten a copy of an Air International article on Spitfire Mk.
IX cowling variations that was a real eye-opener. Short form: I decided I
wanted a Supermarine-style early productionized cowling with the early-style
enlarged carb-supercharger scoop. A laminated block of styrene, lots of
carving, Dremeling and sanding and a bit of test fitting provided a passable
scoop.
After I finished that step, I bought the Pacific Coast Models Mk. IXc. It included the early style scoop, and mine was pretty darned close.
New cannon barrel fairings were made from shaped styrene tube and brass tube barrels and installed in holes drilled in the wing leading edge along with blanked-off outboard cannon fairings, I also drilled holes in the upper wing for the gear-up-down post indicators, installing the posts later after decaling and finishing.
I cut the elevators from the kit stabilizer parts and installed them in a drooped position after final painting. This was to be an early production Spit, so I kept the single-kink kit elevators. The Paragon set provides the later double-kink elevators, though.
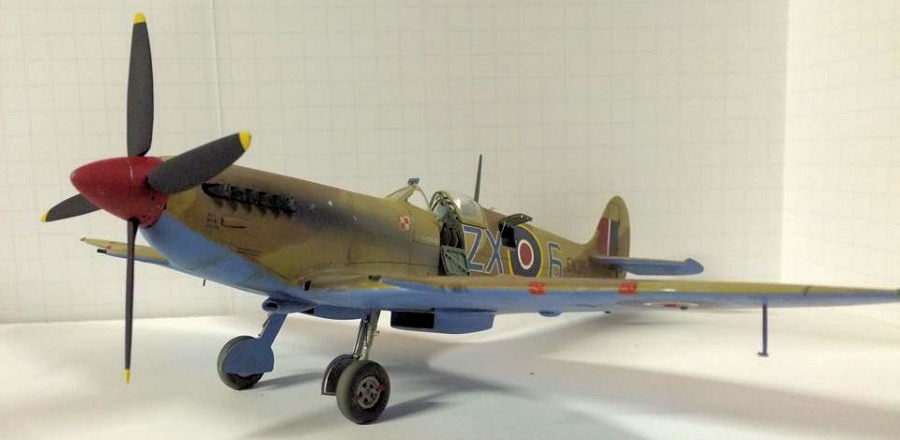
Around 2014, I had been building the PCM kit in parallel and decided on a D-Day RCAF markings option from Eagle Editions’ decals. That freed up the No. 601 Polish Flight decals from the PCM sheet. Providentially, some research showed that the Polish Flight’s Spits were probably Supermarine-production F.IXA’s. A brief aside: Research in the Morgan and Shacklady book and the Air International article showed that early Spitfire IX’s often were referred to as F.IXA’s – optimized for “high” altitude and lower-altitude F.IXB’s. The A and B did not refer to wing armament, and the designation later fell back into Mk. IX.
F.IXA’s also had their port wing-root gun cameras replaced with a fuel cooler after that subvariant showed a propensity for fuel vapor lock when fuel tanks warmed in the sun. A fast climb to 20,000 to 30,000 feet could lead to engine cutout, thus the cooler installation to condense the fuel. I drilled an enlarged hole in the wing root during construction and installed a piece of ¼” styrene tube capped with brass mesh.
Mk IXs still had the four .303 caliber machine guns along with two 20 mm Hispano cannon, so I drilled out the appropriate holes and sanded off the kit representations of the fabric patches over the 0.303 machine gun ports. I drilled out the holes for the machine gun blast tubes and installed stretched styrene tubes.
The Polish Flight F.IXAs also did not have Vokes filters, just the original carb scoop. From photos I could find, many F.IXAs still had the Coffman starter bulge on the starboard cowling just aft of the propeller, so I left the cast-on fairing intact.
The Paragon propeller blades looked a bit thin in cross section to my eye, so I used them as templates to cut and shape new blades from .030 sheet. They were painted and installed later on the Paragon spinner.
Photographs of Polish Flight IXs suggested that they had the IFF mast under the starboard wing instead of the ‘cheese cutter’ fuselage-to-stabilizer wires, so a piece of brass wire was installed under the wing after painting and finishing.
The kit landing gear legs have always been a weak point of the Hasegawa Spitfire Vs, and the extra resin from the conversion was not going to help matters. A set of Scale Aircraft Conversion gear legs for the Hasegawa Spitfire, bent slightly at the mounting pegs, took care of that issue.
| COLORS & MARKINGS |
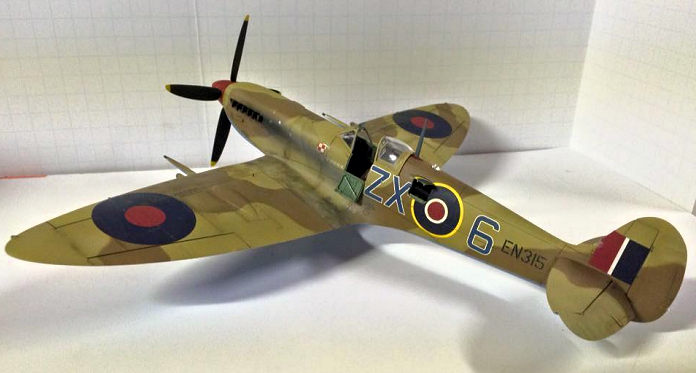 Painting
was done with Model Master enamels – RAF Dark Earth, Middle Stone and Azure
Blue were lightened about 10% with flat white and airbrushed using raised
tape masks. After clear coat of future were allowed to cure, decals were
applied with Micro Set and Micro Sol using kit national markings and PCM’s
squadron markings, stencils and serial numbers.
Painting
was done with Model Master enamels – RAF Dark Earth, Middle Stone and Azure
Blue were lightened about 10% with flat white and airbrushed using raised
tape masks. After clear coat of future were allowed to cure, decals were
applied with Micro Set and Micro Sol using kit national markings and PCM’s
squadron markings, stencils and serial numbers.
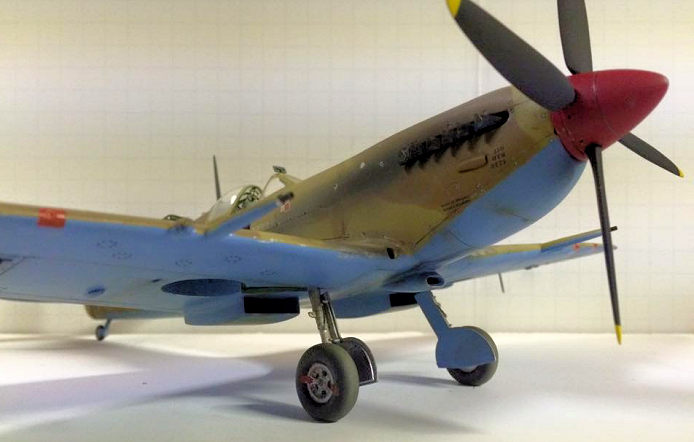
The wheel wells were sprayed Azure Blue.
The PCM decals for ZX-6 went on like good Cartograph decals usually do, and I used some of the Hasegawa stencil decals for the wing and bonding marks.
After the decals had dried and excess adhesive and solvent residue swabbed off with damp Q-tips, the model got a couple of airbrushed coats of Testors Dullcote. Weathering included a spray mist of mineral spirits tinted with flat white, a panel line pin wash of distilled water, Future and a bit of black acrylic paint,
I installed Quickboost Mk IX fishtail exhausts painted black and brushed with Testors Steel enamel and drybrushed lightly with rust Model Master Leather enamel. I used Q-tips to apply exhaust stains with the first layer being black pastel, A second layer of dark brown pastel was followed by a narrower streak of light gray pastel to simulate lead from burnt aviation gasoline.
Oil stains on the underside were made by brushing a mix of Payne’s gray and burnt sienna oils in streaks from the nose underside aft. Fuel spillage from the upper nose filler cap was simulated by a thin wash of gray enamel streaked down and along the port side of the nose.
Wing root wear was done using a Prismacolor silver pencil and a Q-tip.
The canopy hood had been masked inside and out and sprayed with RAF interior green and outside with the appropriate camo color.
| CONCLUSIONS |
It was fun, but I’m too old to do another Mk IX conversion like this. The work here helped sharpen my skills and gave me a better understanding of details on later mark Merlin Spits, especially for those Mk XII and Seafire LF. IIIc Hasegawa conversions lurking in my stash. With the Tamiya Mk. IX out and about, you don’t have any excuse to build a great-looking Spit IX.
| REFERENCES |
“Five to Nine - Evolving the Spitfire”, Air Enthusiast Magazine, September - October 2001 Issue
“Spitfire: The History”, Morgan and Shacklady, ISBN-10 : 0946219486