| KIT #: | 8410 |
| PRICE: | $14.00 |
| DECALS: | One option |
| REVIEWER: | Francisco Santoro |
| NOTES: | Snap kit |
| HISTORY |
 From the kit's instructions: "The Supermarine Spitfire in one of the
most famous aircraft from World War Two, and one of the most importants as well!
Starting service in 1938, various models of the Spitfire served throughout to
the end of the war in 1945 and continued on until 1954! Our model that you have
is the Mark I Spitfire, which served in the Battle of Britain as Britain's best
fighter. Only limited numbers of them were available during this fierce air
battle, and they did their duty! The height of the battle was August 13th 1940,
known by the name of "Eagle Day," and fighting continued uninterrupted until
October 31st!" Etc...
From the kit's instructions: "The Supermarine Spitfire in one of the
most famous aircraft from World War Two, and one of the most importants as well!
Starting service in 1938, various models of the Spitfire served throughout to
the end of the war in 1945 and continued on until 1954! Our model that you have
is the Mark I Spitfire, which served in the Battle of Britain as Britain's best
fighter. Only limited numbers of them were available during this fierce air
battle, and they did their duty! The height of the battle was August 13th 1940,
known by the name of "Eagle Day," and fighting continued uninterrupted until
October 31st!" Etc...
| THE KIT |
 The kit comes in a top opening box, with the boxart of Spitfire EBoQ
shooting down a German Heinkel He 111. There're two sprues of tan and smooth
plastic with rather heavy panel lines, and a single clear canopy rattling inside
the thermosealed plastic bag.
The kit comes in a top opening box, with the boxart of Spitfire EBoQ
shooting down a German Heinkel He 111. There're two sprues of tan and smooth
plastic with rather heavy panel lines, and a single clear canopy rattling inside
the thermosealed plastic bag.
The instructions are of the foldable type with a history section, 5 construction steps in black and white, and a full painting guide as the last step.
Since this is a snaptite kit and made for kids, there're two options provided for the decals. One is a regular waterslide decal sheet, which is very glossy and has markings for Spitfire EBoQ. The other option is for the same aircraft, but it's a sheet containing peel-off stickers.
| CONSTRUCTION |
 I began by painting the "interior" of the kit in Interior Green (Revell
48). These were the seat, sidewalls and rear cockpit bulkhead. Once that was
dry, I inserted the shaft of the propeller on one side of the fuselage, and
glued both fuselage halves. While that dried, I began work on the wings.
I began by painting the "interior" of the kit in Interior Green (Revell
48). These were the seat, sidewalls and rear cockpit bulkhead. Once that was
dry, I inserted the shaft of the propeller on one side of the fuselage, and
glued both fuselage halves. While that dried, I began work on the wings.
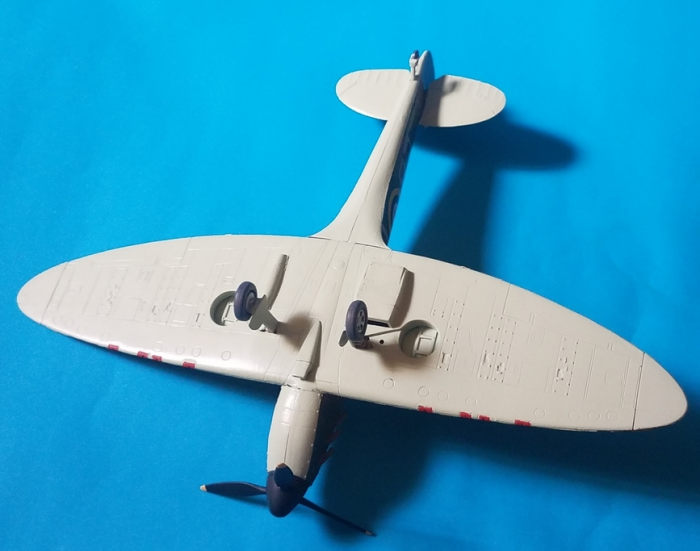
The wings come in a single lower piece and two upper halves. These were dry together, and the wheel wells received a coat of Sky matt (Revell 59 Sky).
Once the wings were dried, I mated them to the fuselage, which was a perfect fit. I glued at this stage the horizontal stabilizers too. Once I had a complete airframe, I began painting.
| COLORS & MARKINGS |
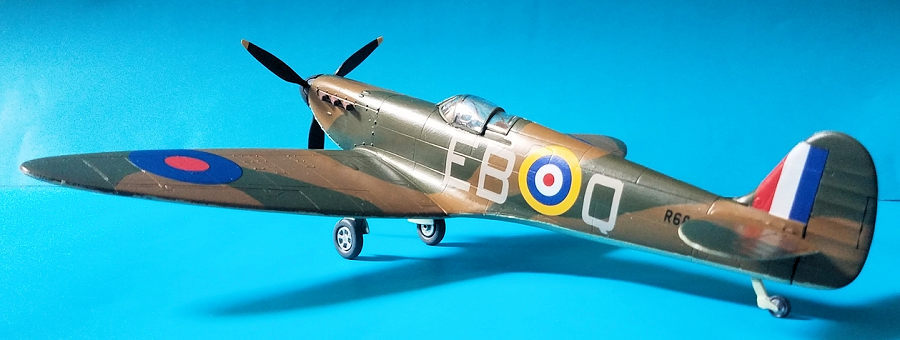
 The only decal option provided is for Lieutenant Eric Lock's Spitfire
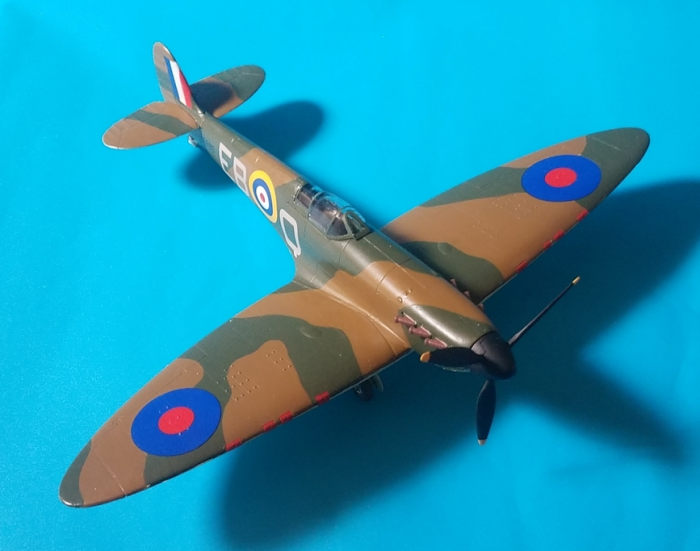
Mk.I R6885. The camouflage of this aircraft is of Dark Earth and Dark Green
uppers with Sky undersides. I used for the Dark Earth Revell 82, Revell 68 for
the Dark Green, and Revell 59 for the Sky. I first painted the dark earth areas,
then came the dark green ones, and finally the Sky undersides were painted. I
then gave the kit two coats of Revell gloss varnish and began decalling.
The only decal option provided is for Lieutenant Eric Lock's Spitfire
Mk.I R6885. The camouflage of this aircraft is of Dark Earth and Dark Green
uppers with Sky undersides. I used for the Dark Earth Revell 82, Revell 68 for
the Dark Green, and Revell 59 for the Sky. I first painted the dark earth areas,
then came the dark green ones, and finally the Sky undersides were painted. I
then gave the kit two coats of Revell gloss varnish and began decalling.
I was a bit apprehensive about the decals at first, since I didn´t know how they would behave. I needn't had worry, they peel from the backing sheet fast when using hot water, they give you time to position them correctly, and sink into the panel lines and raised details without the need of setting solutions. However, I didn´t let them enough time to dry properly, and I ended up changing the shape of a decal by accident. Photos of the kit will show the issue properlly.
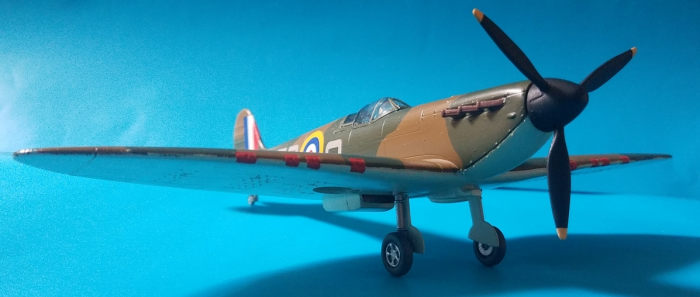
I painted the landing gear in a metallic colour, the landing gear doors were painted inside and outside with Revell 59 Sky. These were then glued in place and left to dry. The propeller was painted matt black with yellow tips, and then glued to its shaft. It spins :D.
| CONCLUSIONS |
I picked up this kit looking for a quick and hassle free build, and it didn´t disappoint. The low parts count and good fit all around made me have a fully painted and decalled model in three days. I´ll buy more of these kits for sure.
13 July 2020
Copyright ModelingMadness.com
If you would like your product reviewed fairly and quickly, please contact the editor or see other details in the Note to Contributors.