Revell 1/32 Spitfire IIa
| KIT #: | 3986 |
| PRICE: | 40$ |
| DECALS: | Two options |
| REVIEWER: | Francisco Santoro |
| NOTES: |
| HISTORY |
 From the instructions:
“The Spitfire was planned as a private venture fighter by R. J Mitchell
of the Supermarine Aircraft Company in 1937. The aircraft proposed to
meet Air Ministry Specification F.37/34 first flew in prototype form on
5th March 1936, and immediately impressed all who saw it. A first
contract for 310 Spitfires was issued in June of that year and, after
some production delays; the first aircraft reached 19th Squadron, Royal
Air Force, at Duxford in June 1938. These Mk.I aircraft initially had
two blade fixed pitch airscrews, but were later replaced by three blade
variable pitch units. At the start of World War Two, Spitfires fully
equipped nine RAF Squadrons, with the first enemy aircraft being shot
down on 16th October of 1939. By the beginning of the Battle of Britain
in July 1940, Spitfires equipped a total of 19 RAF Squadrons. As more
Spitfire contracts were awarded, production was dispersed to other
factories in the South of England and the huge purpose built facility at
Castle Bromwich near Birmingham. All 920 Spitfires Mk.IIs were built at
Castle Bromwich as well as large numbers of later marks, accounting for
well over half the total of 20351 Spitfires. The first Spitfire Mk.IIs
reached RAF Squadrons in August 1940 and took part in the offensive into
Europe (code named “Rhubarbs”) in the following December. The Spitfire
Mk.II differed from the Mk.I in having a more powerful Merlin engine, a
slightly ballooned canopy and an extra layer of bullet proof glass in
front of the windscreen. Later Spitfire variants served in all WW2
combat theatres, and many surplus examples were sold to air forces
around the world. Designed for the fighter role, the Spitfire Mk.IIa was
armed with eight 0.303mm Browning machineguns.”
From the instructions:
“The Spitfire was planned as a private venture fighter by R. J Mitchell
of the Supermarine Aircraft Company in 1937. The aircraft proposed to
meet Air Ministry Specification F.37/34 first flew in prototype form on
5th March 1936, and immediately impressed all who saw it. A first
contract for 310 Spitfires was issued in June of that year and, after
some production delays; the first aircraft reached 19th Squadron, Royal
Air Force, at Duxford in June 1938. These Mk.I aircraft initially had
two blade fixed pitch airscrews, but were later replaced by three blade
variable pitch units. At the start of World War Two, Spitfires fully
equipped nine RAF Squadrons, with the first enemy aircraft being shot
down on 16th October of 1939. By the beginning of the Battle of Britain
in July 1940, Spitfires equipped a total of 19 RAF Squadrons. As more
Spitfire contracts were awarded, production was dispersed to other
factories in the South of England and the huge purpose built facility at
Castle Bromwich near Birmingham. All 920 Spitfires Mk.IIs were built at
Castle Bromwich as well as large numbers of later marks, accounting for
well over half the total of 20351 Spitfires. The first Spitfire Mk.IIs
reached RAF Squadrons in August 1940 and took part in the offensive into
Europe (code named “Rhubarbs”) in the following December. The Spitfire
Mk.II differed from the Mk.I in having a more powerful Merlin engine, a
slightly ballooned canopy and an extra layer of bullet proof glass in
front of the windscreen. Later Spitfire variants served in all WW2
combat theatres, and many surplus examples were sold to air forces
around the world. Designed for the fighter role, the Spitfire Mk.IIa was
armed with eight 0.303mm Browning machineguns.”
| THE KIT |
 Inside Revell’s typical blue-coloured
side opening box come 16 sprues neatly packed in their own bags. 15 are in
light grey plastic and a single one is in clear plastic. There aren’t many
parts, less than 180, most of them being in on sprues F, G and Q. Parts are
molded in a softish grey plastic, easy to cut from the sprues and easy to
clean up. Instructions are of the old Revell style, coming in a thick black
and white booklet with a grand total of 71 construction steps. There’re two
decal options, both from 1941 post-Battle of Britain, Spitfire Mk.IIa “QVoJ”
and “YToL.” Both schemes are in the early camouflage scheme of dark earth,
dark green and sky.
Inside Revell’s typical blue-coloured
side opening box come 16 sprues neatly packed in their own bags. 15 are in
light grey plastic and a single one is in clear plastic. There aren’t many
parts, less than 180, most of them being in on sprues F, G and Q. Parts are
molded in a softish grey plastic, easy to cut from the sprues and easy to
clean up. Instructions are of the old Revell style, coming in a thick black
and white booklet with a grand total of 71 construction steps. There’re two
decal options, both from 1941 post-Battle of Britain, Spitfire Mk.IIa “QVoJ”
and “YToL.” Both schemes are in the early camouflage scheme of dark earth,
dark green and sky.
| CONSTRUCTION |
Most instructions start you
off with the construction of the cockpit, and this kit was no different. I
find myself painting several parts of different colours on the sprues to
speed up the painting process, such as the wheels, propellers and cockpit
parts. The wheels were painted in Steel (Revell Aqua 90) hubs and Revell
Panzer Grey 78 tyres, the propellers were painted black with yellow tips,
and the cockpit parts were painted Revell 48 Sea Green. The rudder pedals
were painted Steel, the instrument panel in black, and the control stick in
Interior Green with a matt black grip. While these p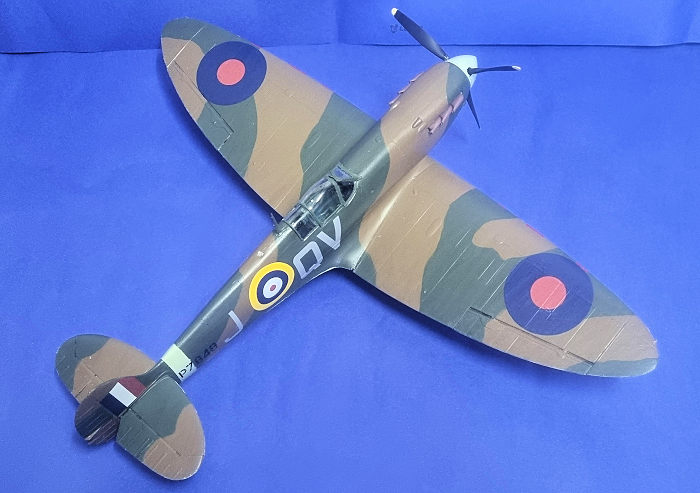 arts were drying, I
assembled the propeller, which had a sky blue nose cone. With the propeller
built, I assembled the cockpit. The fiddliest step of the cockpit was the
construction of the seat, which came in eleven separate parts. Once the seat
had been completed, I dedicated myself to gluing the smaller cockpit parts
to the sidewalls, and then I assembled the entire cockpit. This assembly was
then glued to one fuselage half, together with the tailwheel strut. Before
closing the fuselage halves, I added the propeller shaft. The halves were
taped together and left to dry.
arts were drying, I
assembled the propeller, which had a sky blue nose cone. With the propeller
built, I assembled the cockpit. The fiddliest step of the cockpit was the
construction of the seat, which came in eleven separate parts. Once the seat
had been completed, I dedicated myself to gluing the smaller cockpit parts
to the sidewalls, and then I assembled the entire cockpit. This assembly was
then glued to one fuselage half, together with the tailwheel strut. Before
closing the fuselage halves, I added the propeller shaft. The halves were
taped together and left to dry.
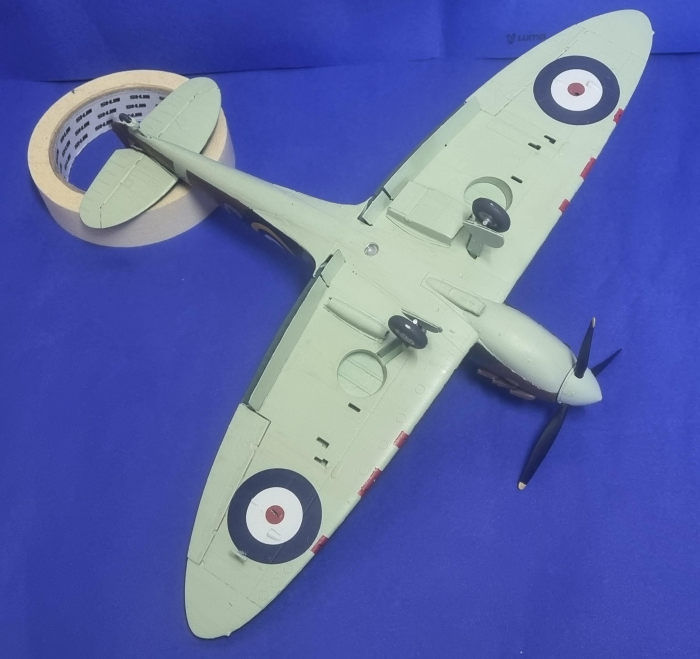
While the fuselage was drying, I began building the wings. These come in a lower single piece and two upper wings. Before gluing them, you must add the wheel well walls. I then added the wingtips and ailerons. The flaps were cut and glued in the extended position (not accurate for a Spitfire on the ground, but I like the way the aircraft looks like that). The wings were then added to the fuselage. This assembly left me with some gaps at the wingroots, so these and the fuselage seams were filled with CA glue. I then built up the tailplanes. The stabilizers need to have the outer sections cut (apparently these were different from the Mk.IX) to make them fit into the tailplanes.
Back to the fuselage and with the wings dried, I glued the carburetor and radiator intake to the wing.
| COLORS & MARKINGS |
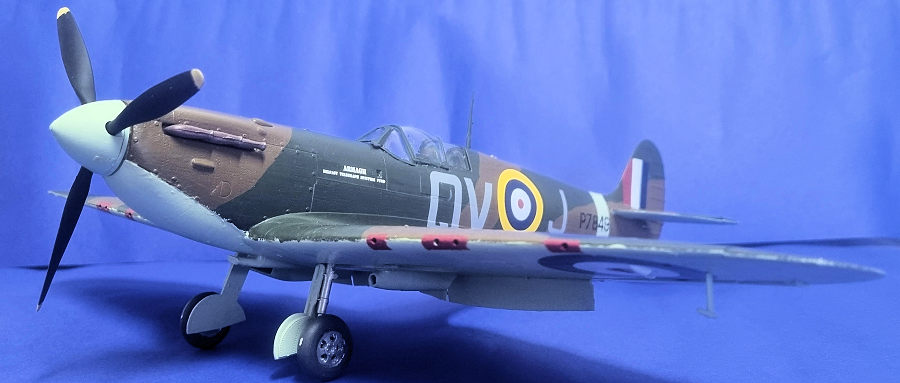
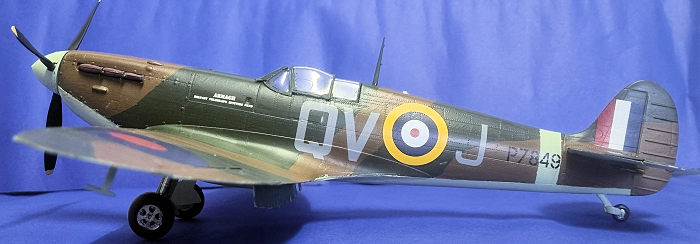
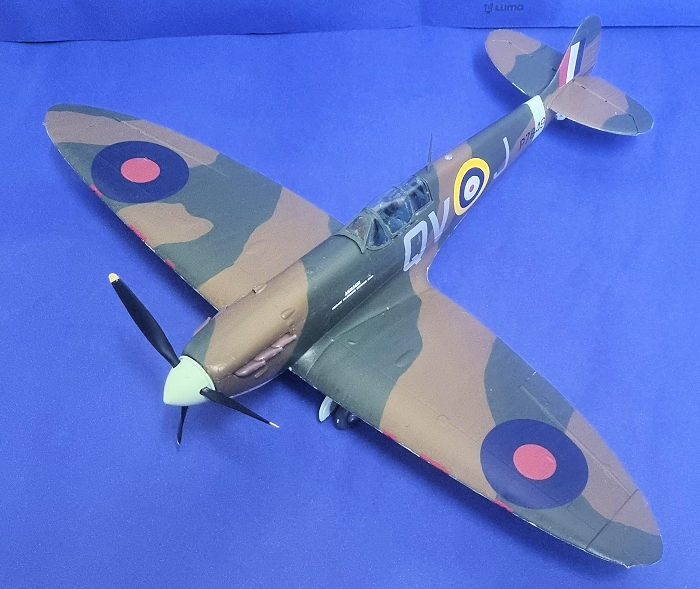 I chose to represent my model
as Spitfire Mk.IIa QVoJ from June 1941. This aircraft was painted in the
early dark earth, dark green and sky blue surfaces. I used Revell Aqua
colours 82 Dark Earth, 68 Dark Green and 59 Duck Egg Blue. The model was
then glossed and the decals were applied. Most of them didn’t need softening
solutions, except for the lower roundels, which needed to be applied over
two big bumps on the lower wing. After several coats of Microsol, all the
decals were set. The model was then matt coated.
I chose to represent my model
as Spitfire Mk.IIa QVoJ from June 1941. This aircraft was painted in the
early dark earth, dark green and sky blue surfaces. I used Revell Aqua
colours 82 Dark Earth, 68 Dark Green and 59 Duck Egg Blue. The model was
then glossed and the decals were applied. Most of them didn’t need softening
solutions, except for the lower roundels, which needed to be applied over
two big bumps on the lower wing. After several coats of Microsol, all the
decals were set. The model was then matt coated.
I glued the landing gear struts, gear doors and wheels, painted and glued the clear parts and a glued the propeller into place.
| CONCLUSIONS |
Revell’s new tool Spitfire is of very good quality, with all the parts mostly fitting neatly into place. Decals were of excellent quality. I`ll be buying for sure the Spitfire Mk.IXc and the new tool Hurricane whenever that one becomes available in Argentina.
Francisco
Santoro
7 April 2023 Copyright ModelingMadness.com. All rights reserved. No
reproduction in part or in whole without express permission from the editor.
If you would like your product reviewed fairly and fairly quickly, please contact the editor or see other details in the Note to Contributors.