| KIT #: | SH 72037 |
| PRICE: | $ |
| DECALS: | Two options |
| REVIEWER: | Nicolai Plesberg |
| NOTES: | Stoppel 72124 decals |
| HISTORY |
The
Supermarine Spitfire was build in several versions as both land-based and
carrier-based (the Seafire) mounting to 20000+ examples in roles as a fighter,
fighter-bomber or photoreconnaissance aircraft before and during WWII. The
camera installation in the PR variants usually consisted of two vertically
mounted F24 or F52 cameras and an oblique F24 camera installed above the others
and facing to port. For tactical reconnaissance missions two extra vertically
mounted cameras in special fairings in the wings could be carried. The Spitfire
PR Mk. XI actually shares features from Mks VIII and IX. The basis airframe was
the Mk. VIII with retractable tail wheel the tall pointed rudder (in late
production) and the unarmored PRU windscreen. It had a deepened nose fairing
containing a larger oil tank for the engine, which could be either the Merlin
61, 63 or 63A in early production examples or the high altitude Merlin 70 in
late production planes. The wings had no guns in them so the opportunity was
taken to increase internal fuel capacity by making the whole leading edge in
each wing to an integral fuel tank carrying an additional 66 gallons each.
Booster fuel pumps were added to each wing tank to make sure the fuel could flow
uninterrupted to the engine. They were covered by some teardrop shaped blister
fairings under the wings ahead of the gear bays. Together with the slipper drop
tanks, known from the Spitfire Mk IX, the range of the PR XI was increased
considerably. The PR.XI was built in 471 examples from November 1942 until
December 1944, when it finally was replaced in production of the much more
capable Griffon-powered PR.XIX. 16 of the
 essential
similar PR Mk X were built from April to May 1944, but its main difference was
that it had a pressurised cockpit – a feature from the high-altitude Mk VII.
essential
similar PR Mk X were built from April to May 1944, but its main difference was
that it had a pressurised cockpit – a feature from the high-altitude Mk VII.
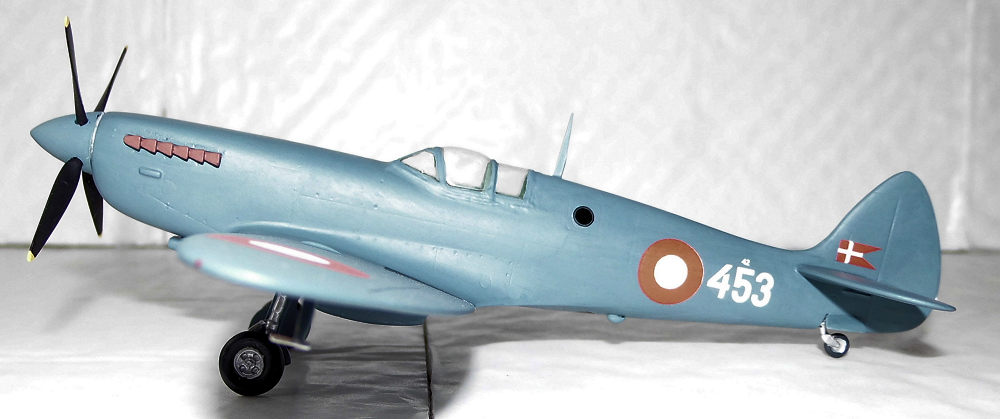
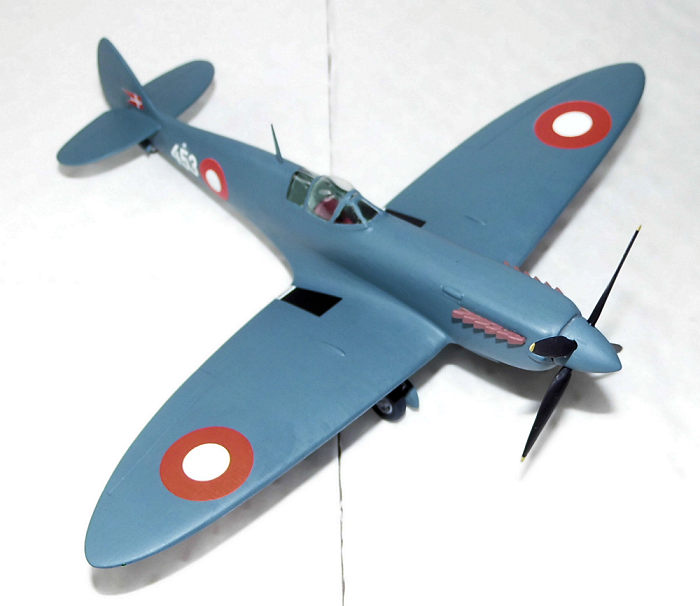
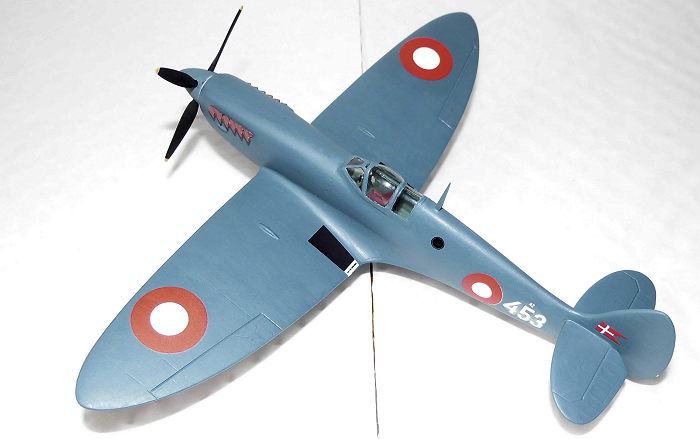
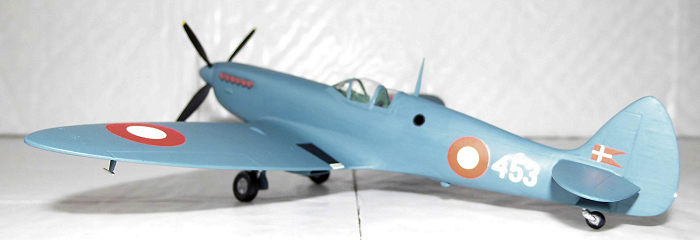
Following the end of World War II a lot of war equipment was superfluous and put on the cheap to those countries, which formerly had been occupied by the Germans and their allies, and which needed to rebuild their military capabilities. So also Denmark, whose pre-war equipment was gone during the occupation years. Most of the immediate post war aircraft consisted of British origins, among them were 38 Spitfire HF Mk. IXe and three PR Mk XI. In the first year of service they flew with their original RAF paint schemes and serial numbers; the only difference was in fact that the British insignia was replaced with Danish ones. When the Danish number system was introduced in 1948 the Mk. IXs were given the type numeral 41 and individual numbers running from 401 to 436 (two of the fighters had crashed before any number had been assigned to them) and the PR XIs given the type numeral 42 and individual numbers 451, 452 and 453. All of the PR XIs retained their RAF PRU Blue paint scheme throughout their career until all of them were retired on May 31 1955. Sadly none were saved as all surviving Spitfires were unceremoniously scrapped.
| THE KIT |
 This is
a so-called multimedia kit. It consists of 39 parts molded in light grey
plastic, 11 parts cast in a cream colored resin (not all to be used) and two vac
canopies. The plastic parts have fine engraved panel lines, but also some
imperfections, which need to be sanded away and restoring some lost surface
detail thereby is necessary. As this kit is a PR X the air intake for the
pressurised cockpit is also present (resin part 40), but as this is going to be
build as a PR XI this air intake is simply omitted as the PR XI had an
unpressurised cockpit. The instructions is typical Special Hobby; easy
understandable and with detail painting instructions for appropriate parts.
There is, however, one vague point – the positioning of the main gears could
have been shown more clearly! As this is going to be build as a Danish machine I
will not make any comments on the kit decals.
This is
a so-called multimedia kit. It consists of 39 parts molded in light grey
plastic, 11 parts cast in a cream colored resin (not all to be used) and two vac
canopies. The plastic parts have fine engraved panel lines, but also some
imperfections, which need to be sanded away and restoring some lost surface
detail thereby is necessary. As this kit is a PR X the air intake for the
pressurised cockpit is also present (resin part 40), but as this is going to be
build as a PR XI this air intake is simply omitted as the PR XI had an
unpressurised cockpit. The instructions is typical Special Hobby; easy
understandable and with detail painting instructions for appropriate parts.
There is, however, one vague point – the positioning of the main gears could
have been shown more clearly! As this is going to be build as a Danish machine I
will not make any comments on the kit decals.
| CONSTRUCTION |
As this
kit almost “screams” short run it means that parts need to be adapted so the fit
will be acceptable. This is exactly what I did first hand; removing the larger
parts from the sprues and cleaning (removing spruegates, flash or other
imperfections) and work on them until they’d fit together as intended. Wings
were glued together as the first of the larger parts. Interior parts were glued
together with slow drying CA glue and when set some sanding was necessary to get
the fuselage to close around the interior! The tail gear bay detail had to go
through the same treatment before it could be glued to the star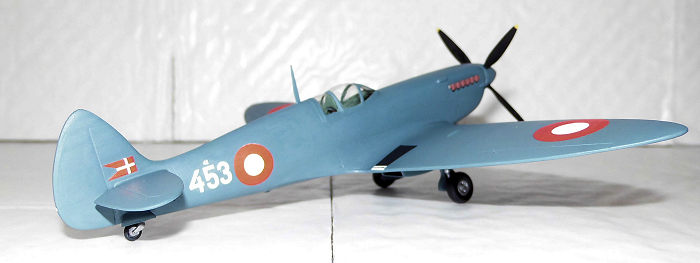 board
fuselage half. The seat needed to be raised a bit, so a plastic bit was utilized
to achieve that. The stick (resin part 36) was also glued to the interior at
this stage. The interior was painted with British Interior Grey Green and the
seat (temporary attached to a rod) painted red (Humbrol 73) – one coat for that
seemed enough. Gear bays and doors were painted PRU Blue (Humbrol 230). Some
flat black was painted on the hand grip on the stick and the instrument panel. I
also glued some shims on the inside of were the exhaust stacks should be placed
to ease that operation later.
board
fuselage half. The seat needed to be raised a bit, so a plastic bit was utilized
to achieve that. The stick (resin part 36) was also glued to the interior at
this stage. The interior was painted with British Interior Grey Green and the
seat (temporary attached to a rod) painted red (Humbrol 73) – one coat for that
seemed enough. Gear bays and doors were painted PRU Blue (Humbrol 230). Some
flat black was painted on the hand grip on the stick and the instrument panel. I
also glued some shims on the inside of were the exhaust stacks should be placed
to ease that operation later.
Next I dealt with the seams on the wings which required some finesse to be perfect. The seat was then glued to the interior and the spinner parts (front and rear) joined. You see the rear part of the spinner should in reality be joined to the propeller retainer and put in place before joining the fuselage halves, but the fit of these two parts seemed troublesome, so I decided to deal with the spinner single handed. It took some filler and sanding to get the spinner perfect. The prop blades were also cleaned up at the same time, but my plan was to paint them separately and then attach them. Just before I did that, I also dealt with the gear legs. The oleo scissors came as resin parts and were attached to the legs with CA glue. The radiator front / back grilles together with the prop blades were painted flat black and the inner part of the radiators (in front of the grilles) and the spinner went PRU Blue. The gear legs plus wheel hubs went silver. Tips of the prop blades went yellow and edges on tires (around hubs) were “edged” with tire black.
The next
step was to glue the finished interior to the left fuselage half and then
joining the fuselage halves. While that dried I trimmed the edges on one of the
vac canopies – it was done successfully, so I could add the second canopy to my
spares. The radiator grilles were then glued to the radiators after a slight
trimming session, as they were a bit too wide. Before gluing the gear doors to
the legs, I had to trim them because they were (again!) too wide to fit into the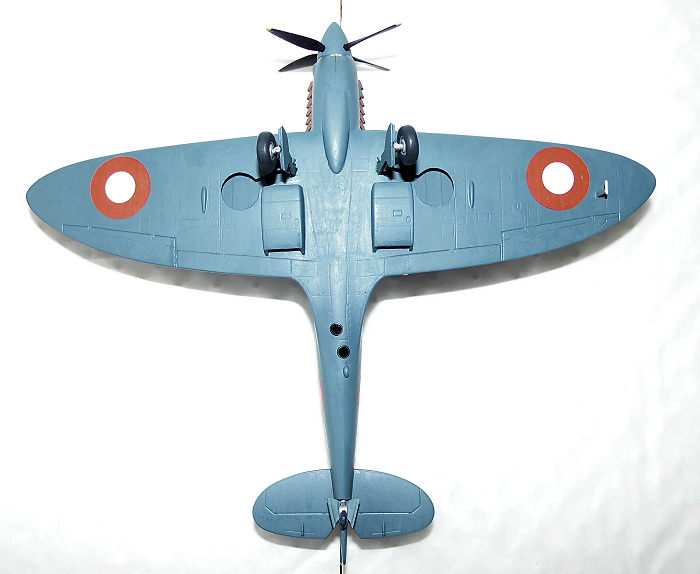 gear bays – some touch up with the PRU Blue became necessary. Doors could
finally be glued to the gear legs using slow drying CA glue. The wheels were
detached from the sprues and the mould line cleaned away. Then the rest of the
tires were painted tire black. The adhesive tape that had clamped the fuselage
together was removed and the seam was gluefilled from the inside, as much as
possible to strengthen the seam; I always do this whenever it’s possible because
it actually helps to prevent the seam from spring apart if an unlucky event
should occur. Some touch up of the green in the cockpit became necessary.
Afterwards I began to adapt the wings to the fuselage. When the wings could slip
on the fuselage, without influencing the dihedral, I glued them to the fuselage.
gear bays – some touch up with the PRU Blue became necessary. Doors could
finally be glued to the gear legs using slow drying CA glue. The wheels were
detached from the sprues and the mould line cleaned away. Then the rest of the
tires were painted tire black. The adhesive tape that had clamped the fuselage
together was removed and the seam was gluefilled from the inside, as much as
possible to strengthen the seam; I always do this whenever it’s possible because
it actually helps to prevent the seam from spring apart if an unlucky event
should occur. Some touch up of the green in the cockpit became necessary.
Afterwards I began to adapt the wings to the fuselage. When the wings could slip
on the fuselage, without influencing the dihedral, I glued them to the fuselage.
When wings had thoroughly set the seams were dealt with as per usual practice; I took a couple of sessions to get all things right, but when that was achieved the tail planes were glued in place using slow drying CA glue. I had, beforehand, made sure how they’d fit before committing the glue. As there are no slots and tabs for the tail planes some might argue to use a brass rod to strengthen the assembly, but unless the marrying surface is quite small compared to the size of the tail plane or one has the habit of picking up the model in its tail, it shouldn’t be necessary to do that. Some of the resin parts were also glued in place while I had the CA glue working; among them the Vokes Aero-Vee dust filter in the extended carburettor air intake – it demanded precision and elegance to position it correctly the first time, as CA glue is unforgiving if it is not done right the first time! Canopy was glued in place using clear gloss varnish. The canopy needed some slight fairing in at the windscreen, as there was a pretty large height difference; too big for the clear gloss to handle so some filler was carefully applied (some for the tail planes too). When set these things were sanded with the gentlest hand ever as scratching the windscreen now would be an absolutely NO GO!! However, it was achieved as planned and the airframe was then cleaned, but before I could mount the gear; I had to extend the legs by about a millimetre as the legs (with the doors attached) could not reach the mounting points in the gear bays! Some touch up with silver and PRU Blue came into play, but as soon as the gear had successfully been glued in place, and the canopy frames painted interior grey green, the model went to the paint shop.
| COLORS & MARKINGS |
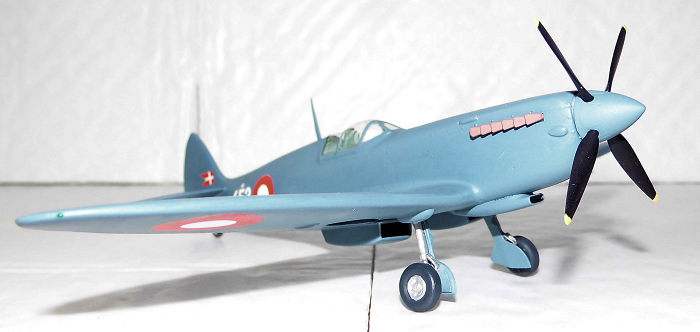 The
paint scheme on this one is quite simple; RAF PRU Blue all over the airframe so
this was accomplished with three coats. When the third coat had set the whole
surface was glossed using Humbrol Gloss Cote. When that had set the markings
went on. They performed admirably and there were no issues all; either regarding
printing as well as performance. Upon completing decaling, I attached the last
details, such as the tail gear doors, antenna mast and pitot probe. Some detail
painting of the newly attached parts was done next and the exhaust stacks were
painted brick red. When set the decals were sealed with a gloss coat, including
the things touched up with PRU Blue to secure a uniform look. When that had
dried the whole model got the finishing flat coat.
The
paint scheme on this one is quite simple; RAF PRU Blue all over the airframe so
this was accomplished with three coats. When the third coat had set the whole
surface was glossed using Humbrol Gloss Cote. When that had set the markings
went on. They performed admirably and there were no issues all; either regarding
printing as well as performance. Upon completing decaling, I attached the last
details, such as the tail gear doors, antenna mast and pitot probe. Some detail
painting of the newly attached parts was done next and the exhaust stacks were
painted brick red. When set the decals were sealed with a gloss coat, including
the things touched up with PRU Blue to secure a uniform look. When that had
dried the whole model got the finishing flat coat.
| FINAL CONSTRUCTION |
 The
final bits consisted of gluing the exhaust stacks in place, painting the intake
of the Vokes Aero-Vee filter in flat black as well as a little touch up on one
of the prop blades. Another of the prop blades had to be reattached as it fell
off. Some small touch ups with the flat varnish was also necessary, but I could
at last attach the prop with some bluish colored sticky mass (probably something
similar to blu-tack). The camera port holes were glossed up again and marking of
the position lights and my Spitfire PR XI was finished.
The
final bits consisted of gluing the exhaust stacks in place, painting the intake
of the Vokes Aero-Vee filter in flat black as well as a little touch up on one
of the prop blades. Another of the prop blades had to be reattached as it fell
off. Some small touch ups with the flat varnish was also necessary, but I could
at last attach the prop with some bluish colored sticky mass (probably something
similar to blu-tack). The camera port holes were glossed up again and marking of
the position lights and my Spitfire PR XI was finished.
| CONCLUSIONS |
This kit is rewarding, but does require some experience, as there are no positive locators on the parts. It is, to my knowledge, the only (partially) injected 72 scale Spitfire PR.XI so if you want something else it must be an expensive all resin kit or scratch-building! The kit is recommended to those, who have reasonably experience in building such multimedia kits.
| REFERENCES |
The Illustrated Encyclopedia of Combat Aircraft of World War II by Bill Gunston, Tiger Books International PLC, London 1990, ISBN 1-85501-096-8
Forsvarets fly efter 1945, © FLV / tinbox 1987. This booklet does give some information of, among other types, the Spitfire in Danish service. Unfortunately it is only published in Danish so the value to others may be rather limited – not to mention about acquiring it!
24 August 2018
Copyright ModelingMadness.com If you would like your product reviewed fairly and fairly quickly, please
contact
the editor or see other details in the
Note to
Contributors. Back to the Main Page
Back to the Review
Index Page
Back to the Previews Index Page