Airfix 1/48 Spitfire PR.XIX
| KIT #: | A05119 |
| PRICE: | $30.00 |
| DECALS: | Two options |
| REVIEWER: | Torben Plesberg |
| NOTES: | Flygvapnet S 31 F 11 wing |
| HISTORY |
The Supermarine Spitfire was one of the true immortal aircraft of the WWII period. It was powered by either a Rolls Royce Merlin 12 cylinder Vee liquid cooled engine, or a later development of the Merlin: the Griffon engine.
The Spitfire was first and foremost a fighter plane. However, the airframe was also modified to do photo reconnaissance: no armament, camera equipment and extra fuel tanks to enhance the range. The Merlin powered Spitfire for photo reconnaissance was the PR XI, which had a more bulbous nose because of an enlarged oil tank. The Griffon powered photo reconnaissance version was the PR XIX, which was one of the fastest variants of the Spitfire, topping at 445 mph. The PR XIX happened to be the last Spitfire in RAF service, flying the last mission on April 1 1954 over Malaya. This particular aircraft, PS 888, is one of the options of the kit: “The Last”!
 The other option is an S 31 of the
Swedish Air Force, the Flygvapnet. The letter S is short for spaning, the
Swedish word for reconnaissance. During the war period, the Swedish
reconnaissance aircraft was the Italian light bomber, the Caproni Ca 313. All
these planes (+ 70) were phased out in 1945, because of rot in the wings, and
the successor was supposed to be the SAAB 18, a twin engine light bomber.
However, the SAAB 18 was by far not ready for the job, and it was possible
immediately to purchase the Spitfire PR XIX from the British postwar surplus
stocks. The Flygvapnet purchased 50 Spitfire PR XIX for the F 11 wing – and 60
Mosquito night fighters for the F 1 wing. Both the Spitfire and the Mosquito
were very popular with the Swedish pilots, even if the Mosquito suffered a high
rate of accidents.
The other option is an S 31 of the
Swedish Air Force, the Flygvapnet. The letter S is short for spaning, the
Swedish word for reconnaissance. During the war period, the Swedish
reconnaissance aircraft was the Italian light bomber, the Caproni Ca 313. All
these planes (+ 70) were phased out in 1945, because of rot in the wings, and
the successor was supposed to be the SAAB 18, a twin engine light bomber.
However, the SAAB 18 was by far not ready for the job, and it was possible
immediately to purchase the Spitfire PR XIX from the British postwar surplus
stocks. The Flygvapnet purchased 50 Spitfire PR XIX for the F 11 wing – and 60
Mosquito night fighters for the F 1 wing. Both the Spitfire and the Mosquito
were very popular with the Swedish pilots, even if the Mosquito suffered a high
rate of accidents.
The Spitfire served with Flygvapnet from 1948 to 1955, when it was succeeded by the SAAB S 29 C Tunnan, “the flying barrel”. The Swedes did not save a single Spitfire, as all aircraft were sold to Israel. Later it was very difficult to get one for the Flygvapnet Museum. However, in 1982 the Swedes swopped 5 Swedish aircraft with Canada for a single Spitfire PR XIX in poor condition. The aircraft had to be completely restored, before it could be exhibited. By now, the Spitfire is shown flying above a Tp 47 Catalina and with a MiG 15 attacking the Catalina, a reminder of the so called Catalina affair, see here.( A correction to the link: the Russian leader in 1991 was not Nikita Chrusjtjov, but president Boris Yeltsin!)
| THE KIT |
 The kit comes in a nice box with
a picture of “The Last” on the lid. The light grey sprues are very well done,
and so is the clear sprue with options for an open or closed canopy. The
instructions is an A4 leaflet of 8 pages. Page one is a short history of the PR
XIX Spitfire in 5 languages. Page two has assembly instructions in 12 languages,
and icon instructions, too. Pages three to eight show in 36 steps show to
assemble the model. The decal sheet has two options: RAF PS 888 “The Last”, and Flygvapnet F 11 wing “60”. The colors of the Swedish national markings are too
pale, and alternative markings are needed (Flying Colors sheet with Swedish
roundels 1:48). There is a sheet with four plane color drawings, showing the
colors and decaling of the two options.
The kit comes in a nice box with
a picture of “The Last” on the lid. The light grey sprues are very well done,
and so is the clear sprue with options for an open or closed canopy. The
instructions is an A4 leaflet of 8 pages. Page one is a short history of the PR
XIX Spitfire in 5 languages. Page two has assembly instructions in 12 languages,
and icon instructions, too. Pages three to eight show in 36 steps show to
assemble the model. The decal sheet has two options: RAF PS 888 “The Last”, and Flygvapnet F 11 wing “60”. The colors of the Swedish national markings are too
pale, and alternative markings are needed (Flying Colors sheet with Swedish
roundels 1:48). There is a sheet with four plane color drawings, showing the
colors and decaling of the two options.
| CONSTRUCTION |
Construction: The kit is close to perfection and if you just follow the instructions, you will end up with a nice replica of a very handsome aircraft. It is an easy build, and I have only a few comments to the steps. I painted all of the interior and details according to the instructions.
Step 11: Be careful to place the camera in the right position. It should be exactly in the center of the circular window on the fuselage behind the cockpit.
Step 14-15: The smaller of the two cameras should be to the rear. I must have made a mistake, because it was necessary to remove a little of the length of the lens, if the camera should be clear of the bottom window.
Step 16: If doing the Swedish Spitfire, it is a good idea to make a circular slot on the spinner, one and a half mm in front of the existing slot. This will make it a lot easier to paint the squadron color properly on the tip of the spinner. The parts of the propeller assembly fit very well. I put a circular piece of 0.25 mm plastic card between part A 2 and the front of the fuselage. This makes the spinner rotate without the slightest wagging.
 Step 17: It is possible to make
the door for the horizontal camera open for a diorama.
Step 17: It is possible to make
the door for the horizontal camera open for a diorama.
Step 18: I do not want pilot figures in my models.
Step 21: Be careful when gluing the fuselage halves together. The propeller assembly must be placed simultaneously with this operation.
Step 24: The pins of the tail planes must be sanded a little to avoid getting a dihedral.
Step 25: The exhaust racks may be pushed into the right position, if they are sanded a little. No glue is necessary.
Step 33: The landing gear legs are rather thin - and weak! Be careful not to break them at the bases. Metal legs would be preferable. Or the legs could be reinforced with a thin layer of Bondic, the new wonder repair gel, which hardens very quickly, when exposed to ultraviolet light. The wheel hubs should be with four spokes for the Swedish Spitfire.
Step 34: The model can be made: wheels up – or down. If the wheels are up, you avoid the problems mentioned in step 33.
Step 36: The canopy may be open or closed.
| COLORS & MARKINGS |
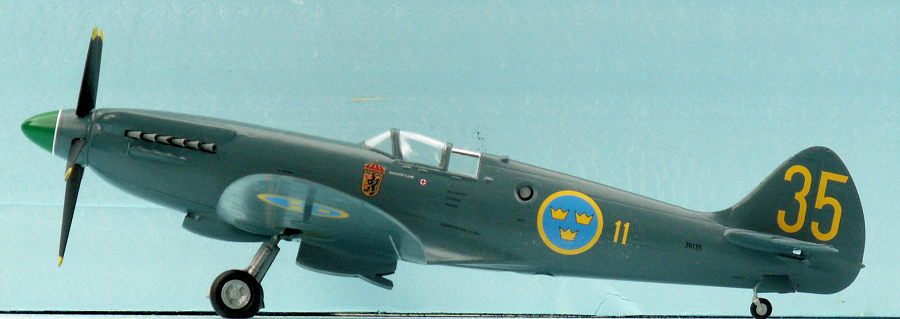
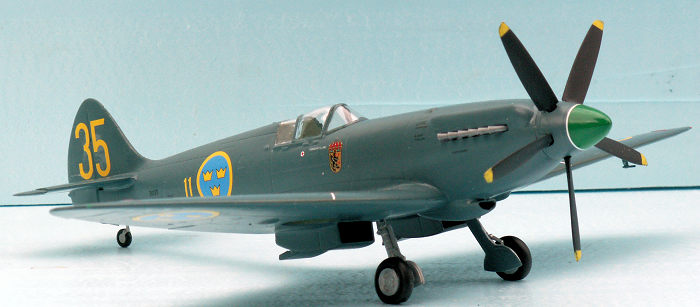
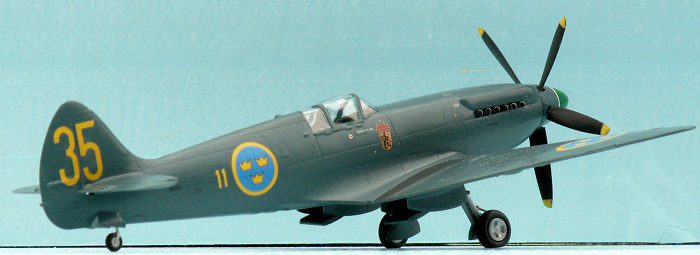
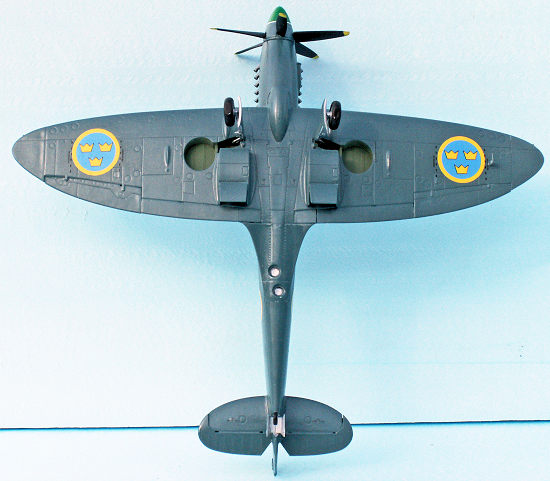 A Swedish
Spitfire PR XIX is PRU-blue overall, HB 230. The front part of the spinner is
either red, yellow, blue or green, depending on division (squadron). There was
usually a white stripe between the division color and the PRU-blue rear part of
the very large spinner. The exhaust racks are gun metal, HB 53 + stains of rust,
HB 113. Propeller blades are matt black, HB 33 with yellow tips, HB 24.
A Swedish
Spitfire PR XIX is PRU-blue overall, HB 230. The front part of the spinner is
either red, yellow, blue or green, depending on division (squadron). There was
usually a white stripe between the division color and the PRU-blue rear part of
the very large spinner. The exhaust racks are gun metal, HB 53 + stains of rust,
HB 113. Propeller blades are matt black, HB 33 with yellow tips, HB 24.
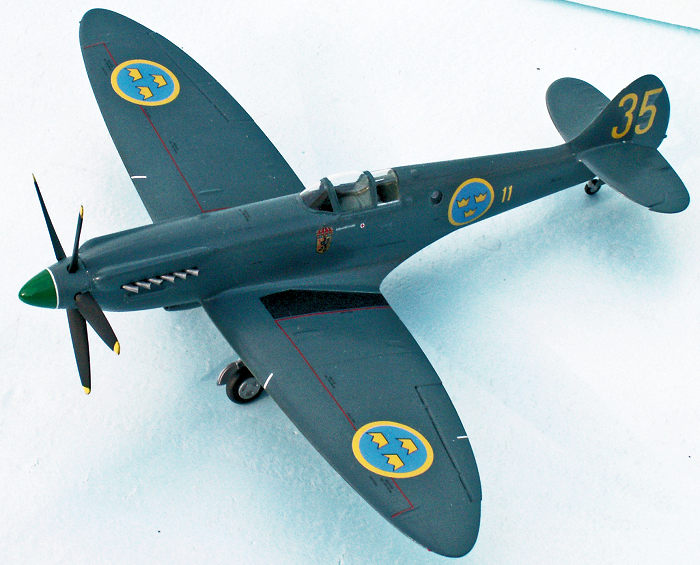
For a correct decaling, I bought the Moose Republic Decals sheet 48006 S 31 Spitfire PR XIX. This sheet covers all of the 50 Swedish Spitfires. I chose 31035 of the fourth division with emerald green spinner tip, HB 2. The sheet of MRD has even a set of national markings as supplied with the aircraft when delivered from Britain. These markings were not up to the Swedish standard size, and the colors were not quite right. However, the Swedes kept the “wrong” size of the national crown markings throughout the service time of the aircraft, even if the colors were corrected, when the aircraft got a touch up of the paint. The MRD team has really done a convincing research to produce this sheet, and with a folded A4 sheet showing 11 different aircraft + an anonymous aircraft showing the position of all stencils. A comprehensive text explains everything needed to make a correct S 31 throughout its career with Flygvapnet. An extra A5 sheet shows the interior of the cockpit and gives information of the propeller.
| CONCLUSIONS |
The Airfix kit of the Spitfire PR XIX 1/48 is highly recommendable to all modelers. Airfix has really done a superb job producing this flawless kit of the most striking version of the immortal Spitfire. The Moose Republic Decals sheet is also highly recommendable, if you want to do the S 31 of Flygvapnet. It was a pure pleasure to build, paint and decal this outstanding kit.
| REFERENCES |
Wikipedia: Supermarine Spitfire (Griffon powered variants)
The text of the instructions of
the MRD decal sheet S 31 Spitfire PR XIX.
Torben Plesberg
11 January 2021 Copyright ModelingMadness.com. All rights reserved. If you would like your product reviewed fairly and fairly quickly, please
contact
the editor or see other details in the
Note to
Contributors.