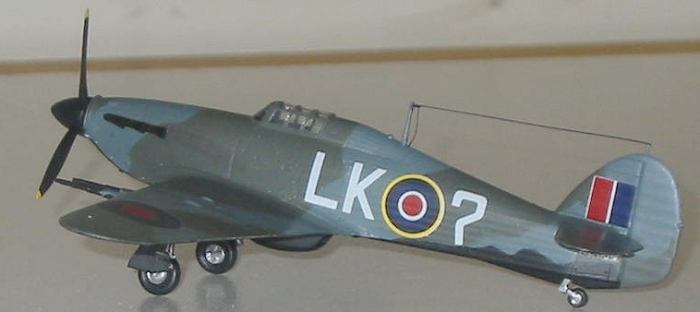
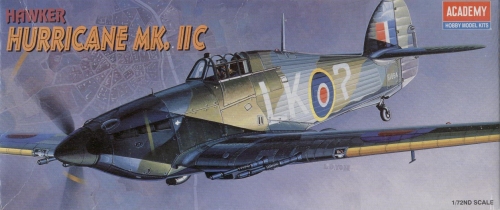
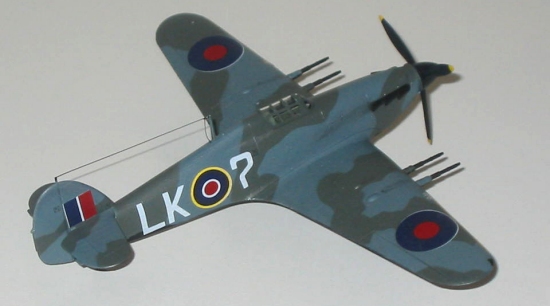
Academy 1/72 Hurricane IIc
|
KIT # |
FA 146 |
|
PRICE: |
$9.00 MSRP |
|
DECALS: |
Two options |
|
REVIEWER: |
Shervin Shambayati |
|
NOTES: |
|
HISTORY |
I am not going to add much to the history of Hurricane Mk.IIc as any of Tom Cleaver’s reviews of this famous airplane has more than enough information about this great aircraft. It suffices to say that as Hurricanes became obsolete in their primary role as day-fighters they were relegated to the tasks where either they were protected by first line fighters or they did not face enemy first line fighters. This meant that they switched to either ground attack roles (as in Mk.IID) or to night operations (as in this kit).
|
THE KIT |
 The Academy Hurricane IIC comes in three finely
engraved gray sprues and one clear sprue. The instructions comes in
single folded sheet with construction steps shown graphically with color
callouts in both BS and FS standards except for when the color is generic
(black and yellow). The markings are for two aircraft: a day-fighter
from 1941 and a night fighter from 1942. In both cases they have the top
colors of ocean gray and dark green. The only difference is that the
night-fighter has a black underside instead of the neutral gray of the
day-fighter. The decals in my sample were off-register and I should have
replaced them with after-market decals.
The Academy Hurricane IIC comes in three finely
engraved gray sprues and one clear sprue. The instructions comes in
single folded sheet with construction steps shown graphically with color
callouts in both BS and FS standards except for when the color is generic
(black and yellow). The markings are for two aircraft: a day-fighter
from 1941 and a night fighter from 1942. In both cases they have the top
colors of ocean gray and dark green. The only difference is that the
night-fighter has a black underside instead of the neutral gray of the
day-fighter. The decals in my sample were off-register and I should have
replaced them with after-market decals.
|
CONSTRUCTION |
Before I get into the construction of this model I would like to say that the first model that I recall building that did not look like a toy and more like a scale replica of an aircraft was a Frog Hurricane II kit (with options for B and C versions with both bombs and rockets and moveable control surfaces). Ever since then I had had a soft spot for the four canon version of the Hurricane. I also have a soft spot for night-fighters. So when I saw this model available for $6.00 on-line I bought it. I then found an excuse to build it when Modeling Madness had its “It’s the Weather” contest. Now to the construction.
As usual the construction started with the cockpit.
Although the cockpit has side consoles as well as a nicely detailed
control stick, there are no details on the consoles but that is okay as
there is not much 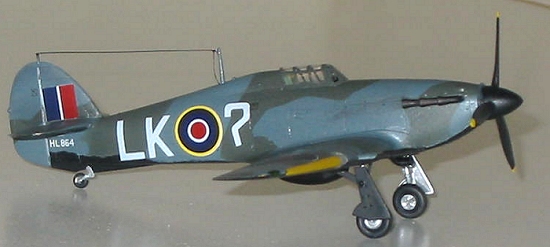 seen through the small birdcage canopy. I first painted
the cockpit parts and the sidewalls of the cockpit on the fuselage halves
with Model Master II British interior gray. I then removed the paint from
the mating surfaces of these parts and cemented them together. I then
attached the wing parts together and attached the cockpit interior to it.
The wing is a three piece affair with two top halves for each wing and a
single bottom part.
seen through the small birdcage canopy. I first painted
the cockpit parts and the sidewalls of the cockpit on the fuselage halves
with Model Master II British interior gray. I then removed the paint from
the mating surfaces of these parts and cemented them together. I then
attached the wing parts together and attached the cockpit interior to it.
The wing is a three piece affair with two top halves for each wing and a
single bottom part.
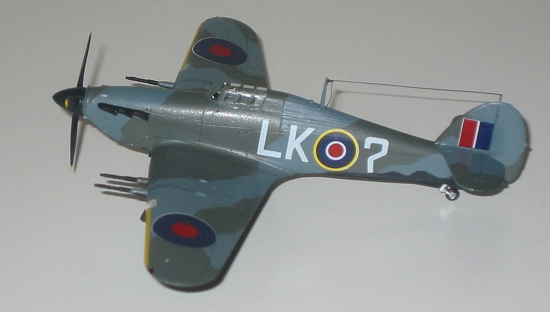
Next I put the propeller together and put it along with the instrument panel between the two fuselage halves. I then connected the wings and the tail planes to the fuselage along. Attaching the wings to the fuselage was the only time that I used any putty. As I centered the wing on the fuselage during the dry-fit I noticed that there were gaps between the fuselage and both wings. However, after fiddling around a bit I noticed that I could eliminate the gap on the left wing without too much trouble so I cemented the wing that way and filled the gap on the right wing with Squadron white putty. I then attached the radiator and the oil-cooler under the fuselage and the canons to the wings. The instructions make sure that the canons are connected to the wing correclty. In all these steps I used only very light sanding to get rid of the seam lines as the fit was nearly perfect.
Next I painted shroud over the instrument panel black and attached the windshield and the canopy to the fuselage with Testor’s clear parts glue after I had dipped them in Future and had masked the clear areas with Parafilm-M. I then painted the wing leading edges yellow with Tamiya flat yellow acrylic paint and painted the wheels, the wheel-wells and the landing gears and the landing gear doors Model Master Chrome silver. I then masked the leading edges and wheel wells with Tamiya masking tape. Now the model was ready for its paint job.
|
COLORS & MARKINGS |
 I first painted the underside of the aircraft and
the propeller Model Master flat black. I then masked the propeller and
the underside of the aircraft. I then made paper masks for the camouflage
pattern and put Tombo multi-glue on their back. Once dried Tombo
multi-glue has a tackiness similar to that on the back of the Post-it
notes. This allows for very easy masking. I then painted the top of the
fuselage with Model Master II British Ocean Gray. After it was dried I
put the paper masks on my model and painted the uncovered areas with
Model Master FS 34079. After the green was dried I removed all the masks
except for those on the canopy and the windshield and the wheel wells. I
then airbrushed the whole aircraft with Future. After a day I put on the
decals. As I had mentioned the decals were out of register with some
white showing both around the roundels and the tri-color on the tail.
After the decals were on I airbrushed the whole plane with Acryl flat
coat. I then removed all the masks and brush painted the tips of the
propeller yellow with Tamiya acrylic flat yellow.
I first painted the underside of the aircraft and
the propeller Model Master flat black. I then masked the propeller and
the underside of the aircraft. I then made paper masks for the camouflage
pattern and put Tombo multi-glue on their back. Once dried Tombo
multi-glue has a tackiness similar to that on the back of the Post-it
notes. This allows for very easy masking. I then painted the top of the
fuselage with Model Master II British Ocean Gray. After it was dried I
put the paper masks on my model and painted the uncovered areas with
Model Master FS 34079. After the green was dried I removed all the masks
except for those on the canopy and the windshield and the wheel wells. I
then airbrushed the whole aircraft with Future. After a day I put on the
decals. As I had mentioned the decals were out of register with some
white showing both around the roundels and the tri-color on the tail.
After the decals were on I airbrushed the whole plane with Acryl flat
coat. I then removed all the masks and brush painted the tips of the
propeller yellow with Tamiya acrylic flat yellow.
|
FINAL CONSTRUCTION |
 I painted the tires with Gunze tire black and after
it was dried I attached the wheels to the landing gears. I then attached
the landing gears and the gear doors to the aircraft with superglue. I
also painted the back of the location of the wing lights on the wing with
Tamiya acrylic silver and attached the clear parts with Testor’s clear
parts glue. I also made a radio wire with stretched sprue, attached it
with superglue and painted it black. I dry brushed silver on the walking
area on the left wing. I added exhaust stains with a thin wash of black.
I also added gunfire stains around the cannons with a black wash on top
and with a gray wash on the bottom. My model was done.
I painted the tires with Gunze tire black and after
it was dried I attached the wheels to the landing gears. I then attached
the landing gears and the gear doors to the aircraft with superglue. I
also painted the back of the location of the wing lights on the wing with
Tamiya acrylic silver and attached the clear parts with Testor’s clear
parts glue. I also made a radio wire with stretched sprue, attached it
with superglue and painted it black. I dry brushed silver on the walking
area on the left wing. I added exhaust stains with a thin wash of black.
I also added gunfire stains around the cannons with a black wash on top
and with a gray wash on the bottom. My model was done.
|
CONCLUSIONS |
This is a neat little kit. It looks like a Hurricane, however there are a couple of minor problems that I have found with the kit after I had finished it. For one thing it does not have the rearview mirror. Another thing is that it does not have the plates that block the exhaust flash from the pilot’s vision on the night fighter version of this aircraft. These, along with the decals detract a little from this model but overall I thoroughly enjoyed this model as it went together with minimum amount of fuss and looks very nice once finished. Definitely recommended.
August 2004
Copyright ModelingMadness.com. All rights reserved. No reproduction in part or in whole without express permission.
If you would like your product reviewed fairly and fairly quickly, please contact the editor or see other details in the Note to Contributors.