|
KIT: |
Revell 1/32 Spitfire I/II |
|
KIT # |
5516 |
|
PRICE: |
$23.00 MSRP |
|
DECALS: |
Two aircraft |
|
REVIEWER: |
|
|
NOTES: |
I am a retired U.S. Naval Flight Officer (22 yrs) with over 3,000 hrs and 250 carrier arrested landings in the Lockheed S-3B Viking aircraft. |

|
HISTORY |
 The Spitfire was a premier fighter
in the aerial combat during WWII and etched it's place in history during
the Battle of Britain.
|
THE KIT |
This is essentially the Hasegawa kit (MK V) with additional parts to build the MK I or II versions. The major differences being in the prop, nose cone, wing/wing tip, and lower engine shroud areas.
For a look in the box, please visit the preview provided by your editor.
|
CONSTRUCTION |
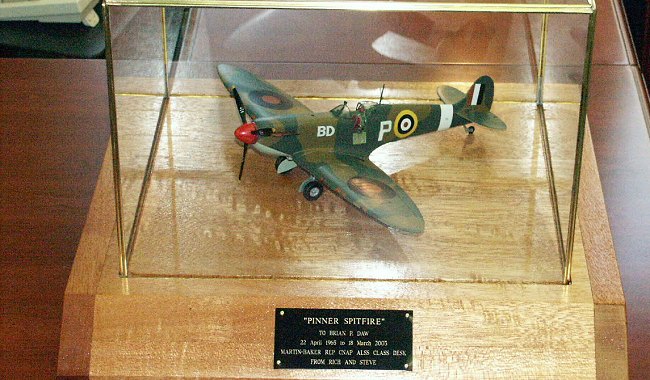
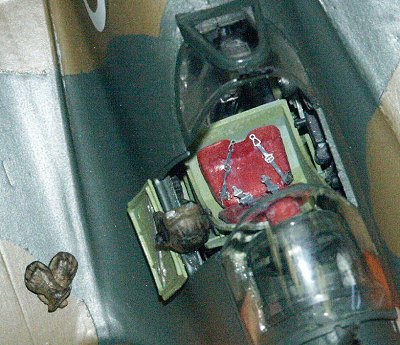
The kit is basically out of the box with some minor scratchbuilding (seat cushions), aftermarket seat belts and resin bulge tires. I bored out the pilot figure head with a Dremel tool leaving the helmet. Additionally, the gloved hands were removed and the bottoms sanded to make them lay flat. Both were painted, weathered and placed on the canopy rail and left wing root, respectively.
 I typically start all aircraft projects with the
cockpit area. Then the inside of the fuselage halves are primed and
painted the desired/recommended color(s). Once the seat, instrument
panel, control stick, rudder pedals, side panels, etc. are primed/painted
and assembled the entire "tub" is cemented to one side of the fuselage.
Then the other major component assemblies (prop/spinner, wings/wing tips, horizontal stabs, landing gear, canopy/frame, engine shroud, etc.) were sanded and primed (as necessary). Overall, the part fits were very good with two exceptions: There were major gaps where the wings meet the fuselage at the wing root, and where the lower, aft engine shroud meets the lower fuselage. Both areas required extensive gap filling and sanding.
Now the fuselage halves were joined. At this point the major components are added and any last gap filling, sanding and repriming is completed. Then masking (as required) and painting is completed. The canopy and clear upper lighting lens, rear view mirror, and radio antenna were glued on with Elmer's white.
|
CAMOUFLAGE & MARKINGS |
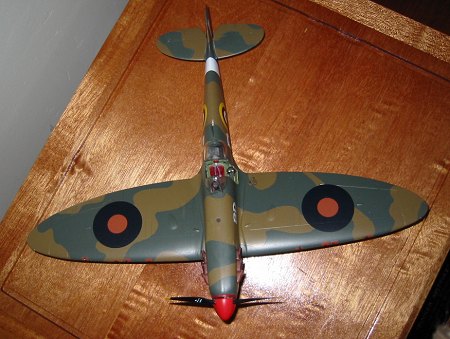
All painting and
drybrushing of the cockpit/interior and fuselage exterior was done with
the recommended Testor's RAF WWII acrylics and a final coat of clear
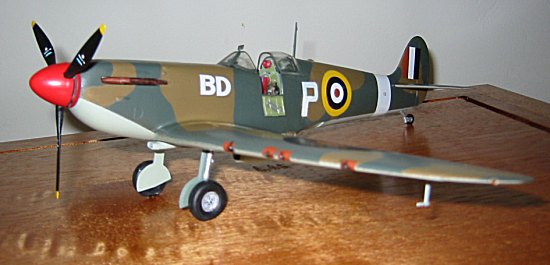
semi-gloss. I did some minor kit bashing regarding decals. Since I
intended to give the model to a colleague from Britain (a WWII British
aircraft enthusiast) upon the occasion of his retirement, I wanted to
personalize it. I put his initials (BD) on the fuselage along with a P
for his hometown (Pinner) in England. As some readers may know, many
Spitfires were named for villages (towns) in England because the
townspeople donated pots, pans, etc. that were melted down to be used to
produce aircraft in support of the war effort.
|
CONCLUSIONS |
You will see some minor flaws (skills are still a little rusty) and also had some problems with masking tape pulling off parts of some decals. I did some paint touch up and it looked acceptable. Overall, I was happy with the final result considering it had been over 20 years since I took on a project.
Note: Photos and handmade Philippine mahogany base provided by Mr. Steve Byars.
June 2003
If you would like your product reviewed fairly and quickly by a site that has over 200,000 visitors a month, please contact me or see other details in the Note to Contributors.