| KIT #: | 2734 |
| PRICE: | $ |
| DECALS: | Three options |
| REVIEWER: | Gilles Pepin |
| NOTES: | Reboxed Hasegawa kit |
| HISTORY |
Italeri 1/48 Typhoon Ib
| KIT #: | 2734 |
| PRICE: | $ |
| DECALS: | Three options |
| REVIEWER: | Gilles Pepin |
| NOTES: | Reboxed Hasegawa kit |

| HISTORY |
A Tale of
Two Typhoons:
A tribute to F/L
Peter Roper

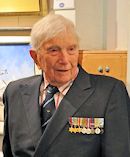
Peter Roper
then (Manston, 1944), and now (Canadian Aviation Heritage Centre, 2015)
Squadron Leader Peter Roper, a Montreal (Canada)
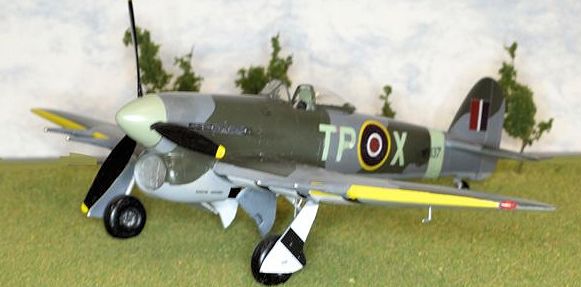
doctor, flew Hawker Typhoons Mk.Ib (late) during WWII. While flying TP-X (serial
number MN137) on night patrol, he experienced engine trouble and belly-landed
short of the runway at West-Malling on March 06, 1944. TP-X was damaged beyond
repair (DBR in RAF lingo) but F/L Roper was relatively unharmed. On June 07,
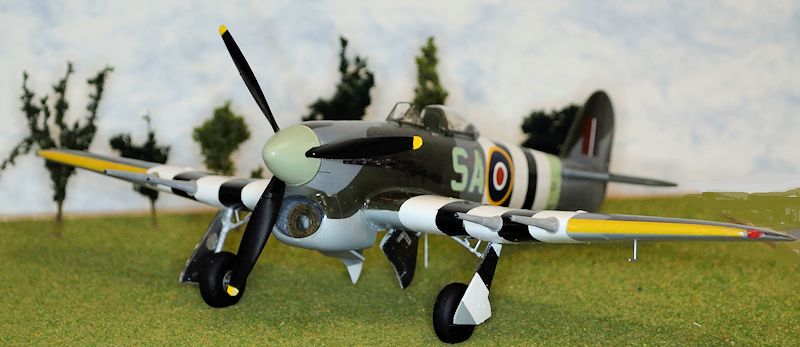
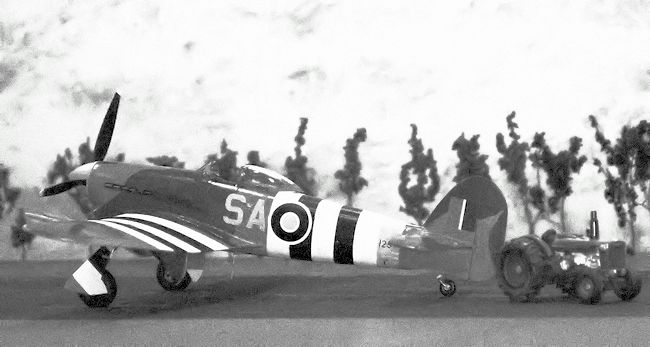
1944 (D-Day+1), he 'borrowed' the personal aircraft of Group Captain Denys
Gillam, code letters SA-Q (serial number MN125); F/L Roper was "itching to get
in the fray" as he was not, ex-officio, part of ops; quote: "I was his assistant
in charge of all operations for 20 Sector, including 123 and 146 Wings; I flew
with him as his No. 2 on a few occasions and he said I could fly his aircraft if
needed; he was away at a conference on D+1, so I assumed his agreement." "Shot
down by flak near Villers-Bocage (Calvados, France), picked up by local French
and German S.S., hidden and succored by locals until recaptured. Joined up with
Patton's 3rd Army on August 04; rejoined 198 Sqdr. as F/L in Holland in 1945."
View the comprehensive CBC (Canadian Broadcasting Corporation) interview,
conducted on the 70th anniversary of D-Day:
http://www.cbc.ca/m/touch/canada/montreal/story/1.2666607
| THE KIT |
TP-X
was built strictly OOB, except for the custom decals. More on the decals later.
SA-Q,
on the other hand, was built using the following aftermarket items:
1.
Eduard 49 684 Typhoon Mk.Ib
Bubbletop S.A. 1/48 scale detail set for ITALERI 2734
2.
Quickboost 48468 1/48 Hawker Typhoon Seat w/Safety Belts
3.
AMLM 49 015 Hawker Typhoon Mk.Ib/Late
Camouflage painting masks
5.
Master 1/48 Air Master Series
48083 Hawker Typhoon Mk.Ib late type cannons
6.
CanMilAir custom decals (invasion
stripes painted; decals used for proper positioning)
 Other after-market items available are numerous;
entirely up to you. After-market RPs are a must, as the kit-supplied rockets are
adequate but, just like the cannons, will inevitably fail the "prototypical"
test. As well, resist the temptation to use resin cockpits, as none could
replicate the true tubular cockpit structure of the actual Typhoon cockpit, and
the kit sub-assembly, when "dressed up" with some of the cockpit components of
the Eduard 49 684 detail set, is a real winner. And, best of all, it fits!
Essentially, the Italeri 2734 is a rebox of the
Hasegawa Typhoon Mk.Ib Bubbletop 9060 (JT60), minus the 4-bladed propeller. An
excellent review by Tom Cleaver can be found
here.
| CONSTRUCTION |
Cannons first
SA-Q only:
I prepared the leading edges by simply removing the kit cannon fairings with a
fine saw, and followed the Air Master instructions. "Drill proper holes (3.70
mm) ...": I used a new 9/64" bit, and enlarged the resulting holes slightly to a
snug fit with a rat tail file. Attach cannons with a generous amount of cement,
and carefully adjust according to instructions. Any slight imperfection
remaining once the cannons are attached can be sanded down, and the supplied
flanges will make quick work of finishing
 the cannon 'task' with most
satisfactory results. I 'painted' the cannons and flanges using
Vitry Ultracolor (France) nail polish, color
#19, thinned with Tamiya Lacquer Thinner (thinned paint is too thick; the fine
details on the cannons would be 'lost').
Note the hollowed Air Master cannons feature.
And those flanges: difficult to improve upon.
No matter how hard one tries,
OOB no match for Air Master cannons
The PE cannon flanges were attached to the leading edges using generous amounts
of, you guessed right, Future floor wax. Et voila!
Spent shell chutes
TP-X:
OOB. SA-Q: I carefully hollowed these out
with a fine chisel and fresh X-acto blades. A word of caution: as the cannons
are attached after the invasion stripes are painted, make sure that the cement
used to attach said cannons does not run inside the lower wing and ooze out
through the 8 opened chutes; to play it safe, cover these chutes with Tamiya
masking tape (I learnt the messy way!)
Eduard 49 684
detail set
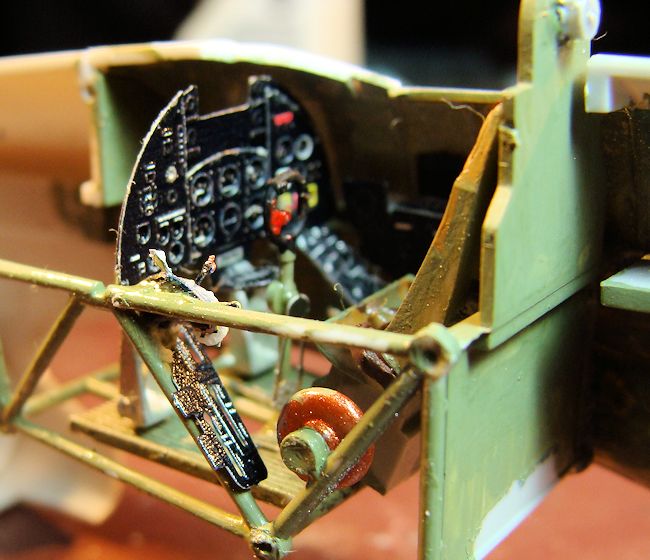 The interior set is promoted as 'self-adhesive'. Hmm. The only adhesiveness was
the occasional annoyance of any of its components to stick to one's fingers.
Future floor wax, and in generous doses. And the levers, well-intentioned
conceptually, have an almost negative usefulness/aggravation ratio. I managed to
install two red #31 fuel cocks, using CA, before moving on. I did not use any of
the seat components, as I installed the excellent
Quickboost 48468
1/48 Hawker Typhoon Seat w/Safety Belts
(painted appropriately)
in lieu of
the kit-supplied seat.
The compass
and its table are
a very
noticeable touch, as are the throttle controls. Rudder pedals add-ons? Only your
hairdresser will know.
The
'exterior' set provides nice wheel wells details. Other components used were the
canopy slide guide, radiator intake meshing (#s 50 and 56), brake lines, landing
gear doors details, and the gun-sight mount (a word of caution: when removing
the kit-generated instrument panel hood, leave 1/16" on each side to facilitate
its installation from above; do not even try to rig this part from below as
suggested by Eduard). I added a chin pad to the gun-sight, using malleable putty
adhesive.
| COLORS & MARKINGS |
After smoothing the Tamiya Fine Surface Primer
with a soft cotton cloth (airflow direction), both models were painted the same
(just as they probably were at the factory):
·
Undersides: Tamiya XF-83 Medium
Sea Gray 2 (RAF)
·
Upper base: Tamiya XF-54 Dark Sea
Grey
·
Upper camouflage: my own brew of
Tamiya XF-58 Olive Green and XF-61 Dark Green
Earn your stripes:
Two reasons NOT to use
the kit-supplied invasion stripes:
1)
these are 10mm wide; they should be 9mm; does not sound like such a big
difference save that, over a full panel of 5 stripes, the accumulated total is
5mm (3/16"); that translates to 9 scale inches!
…
and
2) they are DECALS!
Earn your stripes the honest
old-fashioned way by painting them. There are numerous web sites on how best to
accomplish this important task. I must confess that TP-X was completed using the
correct high visibility CanMilAir decals; a question of learning curve and
expediency; conclusion: I will NEVER use decal stripes again.
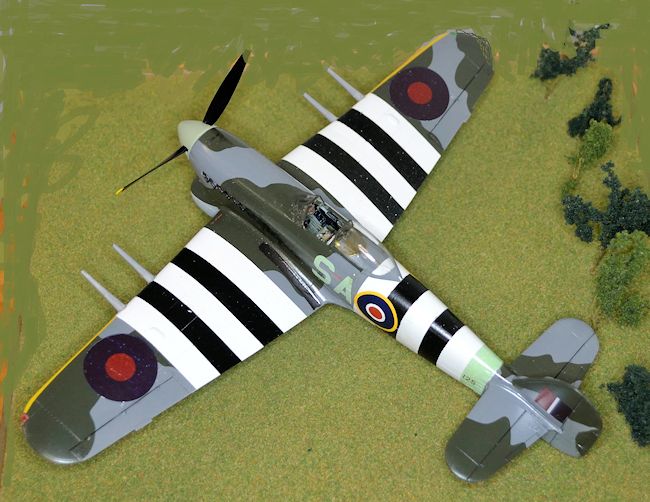
Planning the painting of both aircrafts, I had
decided to use the yellow leading edge stripe decals. These went on beautifully,
thanks to the good people at J.& J. (read Future floor wax).
AML camouflage masks are as prototypical as one could hope. I compared their coverage with drawings contained in 'Camouflage & Markings, RAF Northern Europe 1936-45', Number 4, pages 81, 83, and 85. I suspect this publication was the source document for AML. When applying masks to the 'fish plate' area of the tail, make sure to also cover the fuselage band area, as Sky-colored decals are not sufficiently opaque to remain the correct color when applied over the darker camouflage paint. Highly recommended as is, unless you prefer non-prototypical fuzzy edges to the darker paint outlines. Your call.
Both TP-X
and SA-Q
are commissioned models. Hence, custom decals were produced by CanMilAir,
a London (Ontario) supplier of exquisite renditions for RAF/RCAF models in any
scale. I used their invasion stripes for positioning the masking tape. Consult
William Burns' extensive and informative web site: www.canmilair.com
| REFERENCES |
·
Hawker Typhoon: The Combat History
Richard Townshend Bickers. ISBN 1 85310 908 8; Airlife Publishing Ltd,
Shrewsbury, England, 1999
·
Camouflage & Markings RAF Fighter Command Northern Europe 1936-45
James Goulding and Robert C. Jones. No
ISBN number; Ducimus Books, London,
England, 1970-1971
·
Typhoon/Tempest in action Aircraft Number 102
Jerry Scutts. ISBN 0 89747 232 2; Squadron /Signal Publications, Carrolton,
Texas, USA, 1990
The Canadian Aviation Heritage Centre is the only museum located in Québec
(Canada) dedicated to the restoration of historical aircrafts, the preservation
of aviation artifacts, and the commemoration
of those who made significant contributions to Quebec and Canada’s aviation
heritage
Gilles Pepin
July 2015
If you would like your product reviewed fairly and fairly quickly, please contact the editor or see other details in the Note to Contributors.