Fondiere Miniatures 1/48 Hampden
| KIT #: | 6056 |
| PRICE: | $60.00 or so. Currently OOP |
| DECALS: | Two options |
| REVIEWER: |
Pierre-André Boillat |
| NOTES: |
A real challenge – almost two years in the making! |
| HISTORY |
Based on the Air Ministry specification
B.9/32 of 1932 (the same which was the base for the Vickers Wellington),
the Handley Page Hampden twin-engine bomber was first flown on June 21,
1936. Two weeks after this first flight, an order for 180 Hampden MkIs
was placed, the type entering service in September 1938. At the
beginning of WWII, 226 Hampdens were serving in 8 different RAF
squadrons. At first well-liked for its good handling characteristics,
speed (410 KmH), manoeuvrability and defensive armament (4 .303 MGs),
the sleek and modern (for the late 30’s) Hampden quickly showed its
limits as soon as it entered combat, like so many aircraft of this
troubled period. It suffered heavy losses against German fighters, which
caused its withdrawal from day bombing operations.
The Hampdens continued their career as night bombers over
Germany and were also used to drop mines into the North Sea until Bomber
Command handed them over to Coastal Command in 1942, after which it
soldiered on as a maritime patrol aircraft and torpedo bomber. After
Squadrons 144 and 455 RAAF were sent to the Soviet Union to protect
convoys, 23 Hampdens were left behind wh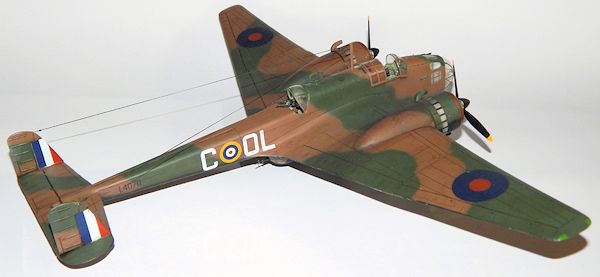 en the crews went back to
Britain and were used by the Soviet Naval Aviation for anti-shipping
duty until the end of 1943.
en the crews went back to
Britain and were used by the Soviet Naval Aviation for anti-shipping
duty until the end of 1943.
The type was also flown by the RCAF, RAAF, RNZAF and the Swedish
Air Force (only one machine in this case). After the war, the remaining
200 Hampdens were brought to Canada where they ended their career as
bombing and gunnery trainers.
150 Napier Dagger engined Hampdens were built under the name
Hereford, but the new engines proved to be highly unreliable and most
were retrofitted to Hampden standards, the remaining ones serving for
training only.
Of the 1’430 built aircraft, 714 Hampdens (half the total
production) were lost, 1077 crew being killed in action and 739 being
reported missing. Two RAF servicemen, Flight Lieutenant Rod Learoyd and
Sergeant John Hannah were awarded the Victoria Cross for their gallant
deeds during the battles of 1940.
Before switching to the Avro Lancaster and becoming famous for
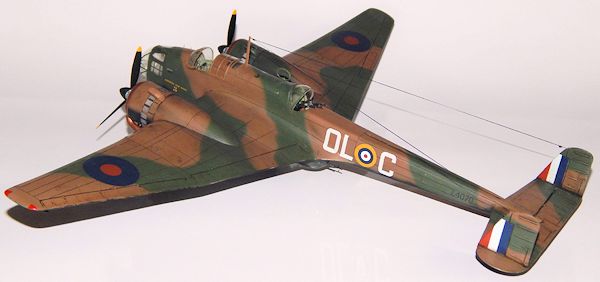
leading the “Dambusters” raid, Guy Gibson served in a Hampden squadron.
This model depicts an aircraft he flew.
| THE KIT |
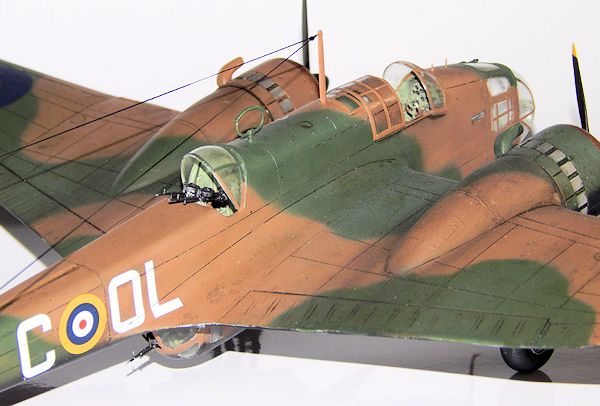
Being an amateur of less famous aircraft with an original look, I always was
quite a fan of the “Flying Suitcase” (as its crews dubbed it) and wanted to
build one, if possible in 1/48 (at the time, the Airfix antique in 1/72 was
the only alternative, and the superior Valom effort didn’t exist yet).
 acformed prop
blades, you name it)… everything but the basic airframe had to be made from
scratch. Being courageous but no glutton for punishment, I gave up. At least
it wasn’t too expensive.
acformed prop
blades, you name it)… everything but the basic airframe had to be made from
scratch. Being courageous but no glutton for punishment, I gave up. At least
it wasn’t too expensive.
Then came the Fonderie Miniature kit from France. Still hanging on to my
dream of a 1/48 Hampden, I ordered one. As it’s often the case with larger
FM models, it’s basically an injected version of the Sanger vacform, but
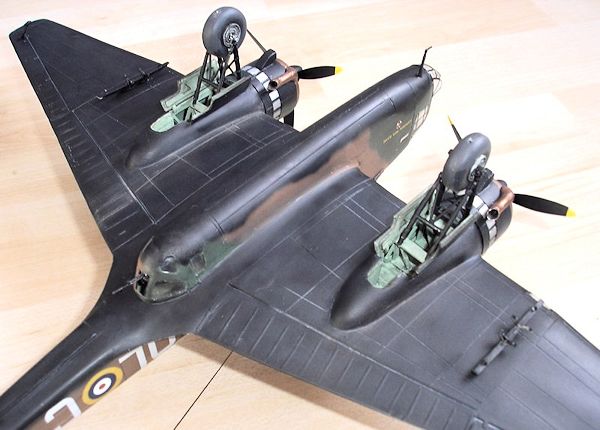
fortunately, with several improvements, like acceptable resin engines and
wheels, white metal detail parts (MGS, landing gear legs, crew seats,
cockpit sidewalls, exhaust pipes, air intakes) which, while rather crude,
are good enough to “do the job”. A pair of very nice “porcupine” exhausts is
also included for the Coastal Command version – these two joined the spares
box.
| CONSTRUCTION |
This time, I honestly can’t place the obligatory sentence “I first assembled
the cockpit”. On this kit, everything has to be dry-fitted, tested, twisted
and forced in place. So I first assembled the wings to help this
dry-fitting, and continued with the rather difficult installation of the
internal parts (you get no positioning holes and the instructions sheet is…
hmm… sketchy at best. Plus, fit is more the result of luck than of anything
else and several glitches (like fuselage openings which don’t have the same
shape on both sides) quickly become obvious. However, with a bit of patience
and creativity, you end up with an assembled fuselage, a set of wings (with
engines) and tail planes.
 After looking down in this abyss, you either shelve the kit
or call…
After looking down in this abyss, you either shelve the kit
or call…
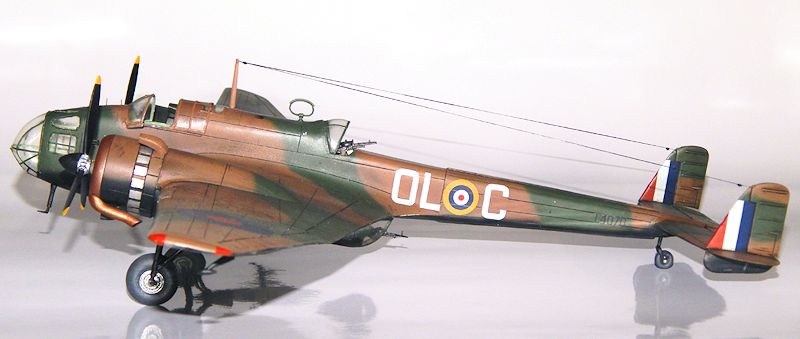
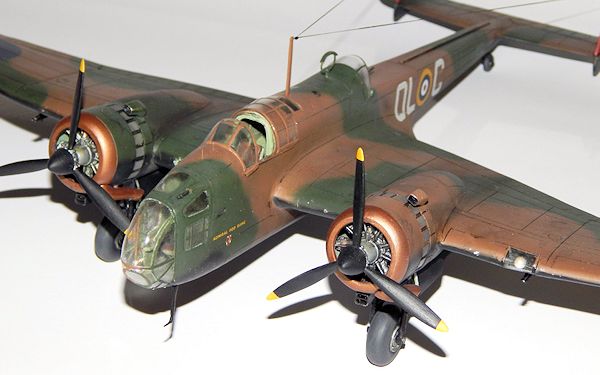
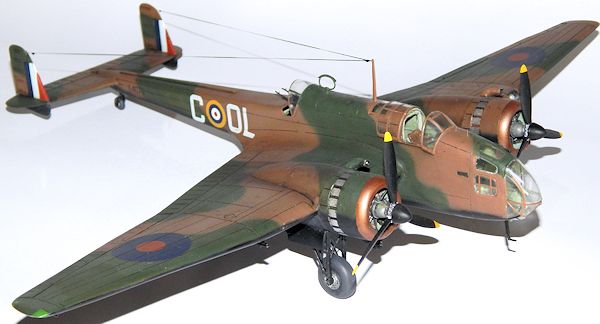
| COLORS & MARKINGS |
| FINAL CONSTRUCTION |
| CONCLUSIONS |
 So,
after a long struggle and an even longer break, I have a rather nice-looking
1/48 Handley Page Hampden proudly sitting in my model cabinet. I know it’s not
perfect and I can’t imagine what the more talented modellers among you guys
would make of it, but after taming this beast and forcing it into shape, I
didn’t feel like spending more months adding all the bells and whistles. The
model is rather large (roughly the size of a Ju88 in the same scale), looks
impressive and recaptures the unique form of the “Flying Suitcase” pretty well.
Was it difficult? Yes. Was it worth it? Yes, indeed. Let’s call it the price of
originality. Would I build another FM kit? Why not, as long as they’re the only
game in town.
So,
after a long struggle and an even longer break, I have a rather nice-looking
1/48 Handley Page Hampden proudly sitting in my model cabinet. I know it’s not
perfect and I can’t imagine what the more talented modellers among you guys
would make of it, but after taming this beast and forcing it into shape, I
didn’t feel like spending more months adding all the bells and whistles. The
model is rather large (roughly the size of a Ju88 in the same scale), looks
impressive and recaptures the unique form of the “Flying Suitcase” pretty well.
Was it difficult? Yes. Was it worth it? Yes, indeed. Let’s call it the price of
originality. Would I build another FM kit? Why not, as long as they’re the only
game in town.
| REFERENCES |
Chaz
Bowyer, « Hampden Special », Ian Allan Ltd, 1976
Wikipedia
If you would like your product reviewed fairly and fairly quickly, please contact the editor or see other details in the Note to Contributors.