Novo/Frog 1/72 Westland Lysander III
| KIT #: | F193 |
| PRICE: | 20DKK |
| DECALS: | Two options |
| REVIEWER: | Nicolai Plesberg |
| NOTES: |
| HISTORY |
Instead of giving you a breakdown description of the development of the Westland Lysander, I will give you a specific one of the plane I chose to model, namely the one owned by the Shuttleworth Collection in the UK.
It was one of 225 built
under licence by the National Steel Car Corporation Ltd, at Malton,
Ontario in Canada and was used by the RCAF as a target tug with the
serial 2355. After the war all Lysanders were struc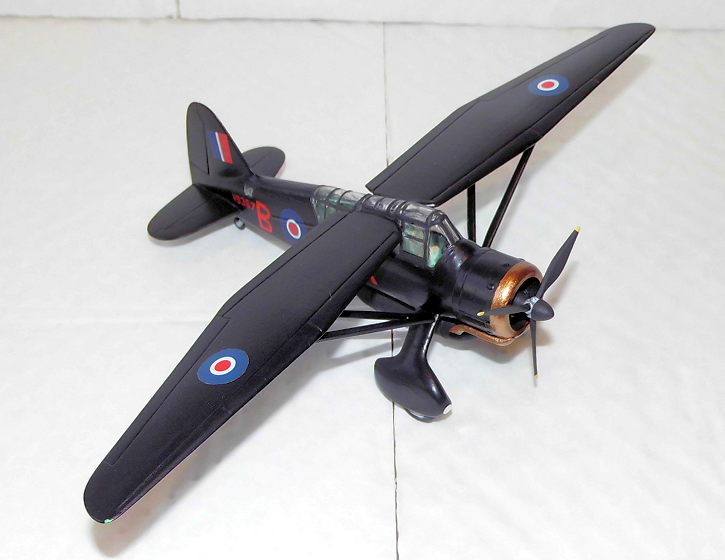 k off charge and sold
to those who wanted a Lysander in their collection. So also for Wes
Agnew, a former RCAF instructor, who acquired 2355 and kept it until
1971 where Sir William Roberts, on behalf of the Strathallan Collection
in Scotland, purchased the plane. It arrived in the UK in October 1971
and was registered G-AZWT. Work to restore it commenced, but it wasn’t
until December 1979 that G-AZWT flew again. It was painted as V9441, a
Lysander operated by No 309 (Polish) Squadron and was airworthy for a
few years, but was grounded in 1986. It was bought by the Shuttleworth
Collection in 1998. It has been fully restored to flying condition and
equipped with a dummy long range belly fuel tank as well as an agent’s
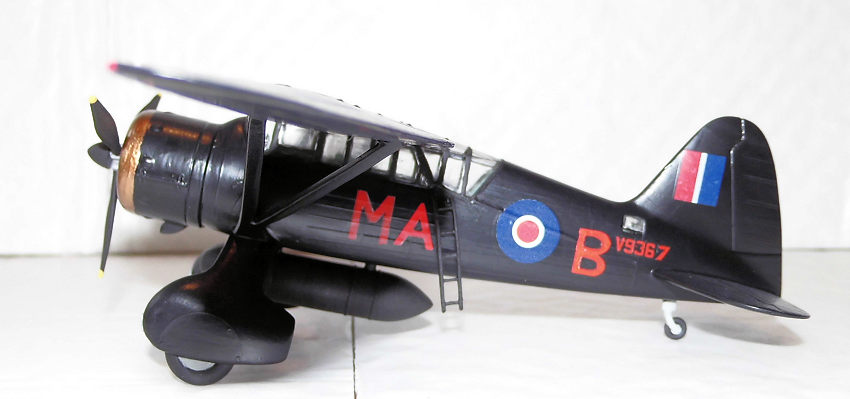
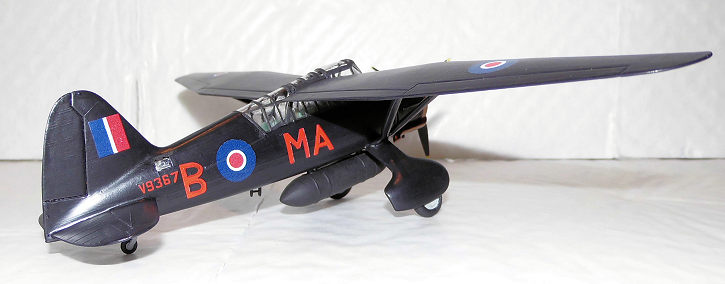
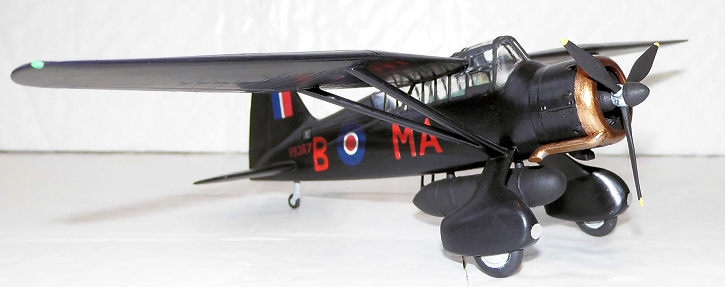
ladder and painted to represent V9367 / MA-B, the plane flown by Pilot
Officer Peter Vaughan-Fowler of 161 Squadron; one of the special
operations Squadrons operating the SCW (Special Contract Westland) spy
variant of the Lysander.
k off charge and sold
to those who wanted a Lysander in their collection. So also for Wes
Agnew, a former RCAF instructor, who acquired 2355 and kept it until
1971 where Sir William Roberts, on behalf of the Strathallan Collection
in Scotland, purchased the plane. It arrived in the UK in October 1971
and was registered G-AZWT. Work to restore it commenced, but it wasn’t
until December 1979 that G-AZWT flew again. It was painted as V9441, a
Lysander operated by No 309 (Polish) Squadron and was airworthy for a
few years, but was grounded in 1986. It was bought by the Shuttleworth
Collection in 1998. It has been fully restored to flying condition and
equipped with a dummy long range belly fuel tank as well as an agent’s
ladder and painted to represent V9367 / MA-B, the plane flown by Pilot
Officer Peter Vaughan-Fowler of 161 Squadron; one of the special
operations Squadrons operating the SCW (Special Contract Westland) spy
variant of the Lysander.
| THE KIT |
There is really no surprise on this one; Frog’s old classic just produced by Novo after Frog’s demise in 1976.
The kit features fine raised panel lines, a decent interior for the time (some might call it a full interior of this time) with floor, seats, fuel tank (between the seats), stick, instrument panel and mount for the rearward firing machine gun. The instructions clearly show which parts to use for what variant; either a Mk.I or a Mk.III can be constructed from this kit. The decals; well is there any reason to mention them? Actually yes, but I will later come with further details regarding them. Now on to construction.
| CONSTRUCTION |
This is a kit
where subassemblies really dominates the beginning of construction as
interior, tail planes, wings and external fuel tank were glued together.
Furthermore I adapted a piece of thick sprue to trap the propeller retainer
inside the engine, so the propeller could be omitted until the latest
possible st age (this was actually quite easy to do).
Interior / cockpit walls in fuselage halves were painted British Interior Grey Green (Humbrol 78) while engine, propeller blades and inside of cowling went flat black. Edges of wings and tail planes were sanded and a little filler used here and there to get them right. Also a few sink marks on the wings were eliminated as they would show if not dealt with. The seam on the cowling was also smoothed out with some filler and sanding. The rear fuselage windows were glued in at this stage as well. The undercarriage parts were cleaned from some flash and washed before painting them. The coloring of those parts was by the way grey and black. Seatbelts made from Tamiya tape were cut out and added to the seats and painted khaki. When all these things were to my satisfaction, I glued the fuselage and gear parts together. As always a little filler and sanding on the seams was necessary to get them invisible but as soon as this was accomplished the cowling was glued to the fuselage.
The next step was to attach the canopy, but there were some gaps I wanted to minimize, so a few plastic shims were glued to the cockpit opening on the fuselage and sanded to an exact fit with the canopy when dry. The canopy itself was cleaned after the few scratches present had been polished out and then glued to the fuselage using ordinary plastic glue. I normally use either Humbrol Gloss Cote or no 35 polyurethane Gloss Varnish to do this, but in this case I chose to use glue because the canopy has to support the weight of the wings and I wanted to be sure of the durability of the joints of the canopy / fuselage. The horizontal tail planes were also attached to the fuselage at this stage.
After dealing with the
seams I glued the gear in place on the fuselage using slow drying CA glue.
The wing support struts were cleaned and a few ejector pin marks eliminated
with filler. At this stage I painted the canopy frames flat black. I should,
however, of course have painted them interior grey green first, but for some
 unknown reason I did not do this. This is a minor quibble though, but
nevertheless should be done; at least if it is in 1/48 or larger scale
you’re modeling in.
unknown reason I did not do this. This is a minor quibble though, but
nevertheless should be done; at least if it is in 1/48 or larger scale
you’re modeling in.
Probably the biggest challenge in this kit is the attachment of the wings and the supporting struts. This operation requires a bit ingenuity and patience as it will reflect the efforts put in the kit overall plus the finished model’s appearance; you know, wings sticking identically out from the fuselage and not in separate directions!! I chose to glue wings and struts in place at the same time. To do this with the maximum of working time I used my ordinary plastic glue, Faller Super Expert, which is a liquid bottled glue and easy to work with. Adhesive tape is also a great help in fixing the wings in place while the glue sets. It worked fairly well as I had made some dry fitting sessions to make sure how things would actually fit. The following seam filling session must also be done with the utmost care as transparent parts are involved! It was executed with modeling finesse and the last touch ups with the flat black on the frames and final cleanup of the airframe went through before the model went to the paint shop.
| COLORS & MARKINGS |
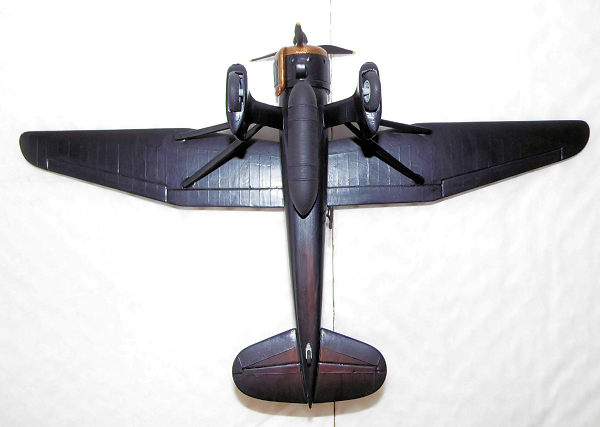 The paint job on this one
is easy; just black all over except the cowling front plus the exhaust pipe.
To save a working session, I chose to use
gloss black which went on
in two coats (plus the usual touch ups!). When the paintjob was to my
satisfaction the decals went on. They were a mixed bunch from my dungeon;
the national insignia markings were the easiest ones to find but the letters
and serial numbers were more of a challenge; it required a number of
modifications of the letters actually used as well as a bit of recoloring
them, as the color tone was not quite right either. Some of the decal edges
had an unexpected white rim so they were over painted with gloss black using
a very fine brush.
The paint job on this one
is easy; just black all over except the cowling front plus the exhaust pipe.
To save a working session, I chose to use
gloss black which went on
in two coats (plus the usual touch ups!). When the paintjob was to my
satisfaction the decals went on. They were a mixed bunch from my dungeon;
the national insignia markings were the easiest ones to find but the letters
and serial numbers were more of a challenge; it required a number of
modifications of the letters actually used as well as a bit of recoloring
them, as the color tone was not quite right either. Some of the decal edges
had an unexpected white rim so they were over painted with gloss black using
a very fine brush.
When decals and paint touch ups had dried the whole model got a coat of Humbrol Matt Cote except the cowling to have a spot to hold on! The cowling front plus the exhaust pipe got a couple of coats of antique bronze (Humbrol 171), the ladder and fuel tank painted flat black. Final touch up with the Matt Cote (including the cowling) plus attaching the last items including the landing lights, which were punched out of aluminumtape, and my spy Lysander was finished.
| CONCLUSIONS |
 The kit itself is actually
quite nice and has a pretty good fit for a kit of that age, but do require
some experience regarding proper handling of the wings / wing struts
assembly. The kit decals were discarded, but I actually found out by
curiosity, because the printing did not look like the usual Novo “quality”,
but looked “glossy” so they turned out not to be as bad. I soaked one of the
fuselage decals with letters and roundel in between, and it did not scatter
immediately as I had expected but stayed pretty much together even though
the baking paper had sunk to the bottom of the saucer. Only when I pricked
to the floating decal with my tweezers it did break up, so the conclusion
was that these decals would have worked quite well if prepared with decal
film or simply a coat of varnish, but just because I wanted to model
Shuttleworth’s Lysander, I didn’t have to use them anyway.
The kit itself is actually
quite nice and has a pretty good fit for a kit of that age, but do require
some experience regarding proper handling of the wings / wing struts
assembly. The kit decals were discarded, but I actually found out by
curiosity, because the printing did not look like the usual Novo “quality”,
but looked “glossy” so they turned out not to be as bad. I soaked one of the
fuselage decals with letters and roundel in between, and it did not scatter
immediately as I had expected but stayed pretty much together even though
the baking paper had sunk to the bottom of the saucer. Only when I pricked
to the floating decal with my tweezers it did break up, so the conclusion
was that these decals would have worked quite well if prepared with decal
film or simply a coat of varnish, but just because I wanted to model
Shuttleworth’s Lysander, I didn’t have to use them anyway.
| REFERENCES |
Article on Wikipedia, the Online Encyclopedia.
Profile Publications no 159: The Westland Lysander, © Francis K. Mason 1967
Also a “Shuttleworth” special edition of Revell’s (ex-Matchbox) 1/32 Lysander kit from 2003, commemorating the 75th anniversary of the Shuttleworth Collection, had a sheet included in the box explaining the story of the Collection’s Canadian-built Lysander – the one I chose to model.
21 September 2017
Copyright ModelingMadness.comIf you would like your product reviewed fairly and fairly quickly, please contact the editor or see other details in the Note to Contributors.