I am a fan of the Hawker Hurricane. I guess my love for
this"Kite" finds its origins to my fathers journey to England via the U.S. and
then Canada to join the RAF as a young man in 1940. His dream was to fly the
Hawker Hurricane. He ended up in Bomber
 Command but for years as a child
growing up in Ohio he talked about the Hurricane. He felt that the Hurricane
was the greatest aircraft in the RAF inventory and the true hero of the Battle
of Britain. So I ended up living my fathers dream vicariously by studying
this old war bird and building replicas of it.
Command but for years as a child
growing up in Ohio he talked about the Hurricane. He felt that the Hurricane
was the greatest aircraft in the RAF inventory and the true hero of the Battle
of Britain. So I ended up living my fathers dream vicariously by studying
this old war bird and building replicas of it.
I have built 5 of the outstanding Hasegawa 1/48 scale
rendition of the Hurricane and have approximately 25 waiting in line to be
built. Some may consider that an obsession ( my wife does!) but when you
consider the many different versions and the many different countries that
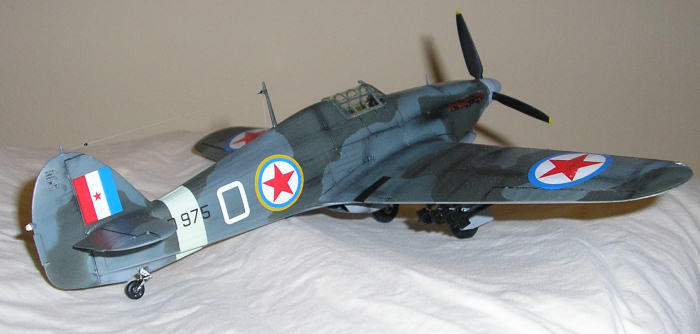
flew it, then it makes for a very a very interesting collection. My latest
addition was the construction of a Hurricane Mk.IV that belonged to No. 351
Sqd. (Yugoslavian) Royal Air Force. This unit consisted of Yugoslavian and
Croatian crews who were able to find their way to allied lines. The squadron
was formed in July 1944 and flew mostly ground support missions in Italy and
the Balkans. They flew over 900 missions during this period losing 5 pilots
killed or captured.
The Hasegawa Hurricane Mk.IV "Far East Theater" (
Special Version, kit number 09347) offering is truly the only kit available
with which to build this late war version . While the kit comes with a very
nice resin armored radiator, as found on the Mk. IV, the only ordinance that
comes with the kit are bombs and not the rockets that No. 351 Sqd. often
carried. This would have to be rectified along with find decals that were
accurate. Both problems would be satisfactorily solved!
I began building the kit in the way I am most
comfortable, with the cockpit. The Hasegawa Hurricane has an excellent
cockpit. There are some very nice aftermarket cockpit kits for the Hurricane
but the truth is, the kit version is more than satisfactory once you add the
seat harnesses. It is very difficult to see much of the cockpit anyway after
construction is completed. The kit only comes with a closed canopy. In order
to make the area just aft of the dimensionally correct Hasegawa was forced to
build the decking behind the cockpit too thick to slide a canopy over. It was a
choice the company apparently made in order to guarantee the accuracy of the
model. A thinner aftermarket canopy can be used if you do open up the
cockpit .
 The construction of the cockpit is
pretty straight forward. The cockpit tub is of tubular design just like the
original aircraft. The seat backplate, instrument panel, rudder pedals, floor
board and assorted parts come included. I painted all of the parts before
construction using Testors RAF Interior Green (no.2062)as the base coat. A
black wash was used to bring out the details on the cockpit tubing and
sides. The instrument panel was then painted flat black then a thin, carefully
applied, coat of silver "Rub-n-Buff" was added to
bring out the instrument dials. Using "Rub-n-Buff" on the tip of your finger
works well for me. I seem to have much better luck with this method
than simply dry brushing silver paint. After painting and detailing comes the
careful construction of the cockpit tub. I recommend that you attach the seat
harness to the seat then place the seat on the backplate. I then attach the
seat/backplate to the floorboard. This makes it easier to properly align the
tubular sides with the rest of the cockpit assembly. The entire assembly fits
easily on to the fuselage side to await further assembly.
The construction of the cockpit is
pretty straight forward. The cockpit tub is of tubular design just like the
original aircraft. The seat backplate, instrument panel, rudder pedals, floor
board and assorted parts come included. I painted all of the parts before
construction using Testors RAF Interior Green (no.2062)as the base coat. A
black wash was used to bring out the details on the cockpit tubing and
sides. The instrument panel was then painted flat black then a thin, carefully
applied, coat of silver "Rub-n-Buff" was added to
bring out the instrument dials. Using "Rub-n-Buff" on the tip of your finger
works well for me. I seem to have much better luck with this method
than simply dry brushing silver paint. After painting and detailing comes the
careful construction of the cockpit tub. I recommend that you attach the seat
harness to the seat then place the seat on the backplate. I then attach the
seat/backplate to the floorboard. This makes it easier to properly align the
tubular sides with the rest of the cockpit assembly. The entire assembly fits
easily on to the fuselage side to await further assembly.
With cockpit assembled and fitted onto the fuselage
side, the halves may now be fused together. The fuselage comes together, as all
Hasegawa kits do, superbly. Because Hasegawa offers several versions of the
Hurricane, there are different nose sections of the fuselage that corresponds
with the version being built. The different nose sections are fitted to the
fuselage just forward of the cockpit. Use a little care when joining the front
and rear sections together. If you are not careful it is possible that the
front and rear sections could be cemented in place unevenly causing a slight
lip to occur on the side. It really is not a design flaw of the kit, it would
occur because of human error if you are moving to quickly ( yes, I speak from
experience!). After the fuselage is completed, the wings can be assembled.
Once again this is pretty straight forward work with no real surprises. I
painted the wheel wells prior to the wing assembly as the wells are a separate
piece. When painting the inside of the wheel wells and the landing gear
doors/pants remember that the correct color is silver and NOT interior green!
photographic and written documentation is very consistent that interior green
was not used on these areas.The landing gear is also well done. Each gear
assembly comes with 5 parts ( including the wheel itself) and several of them
are small but with patience they fall together with little difficulty. At
this point let me make a quick suggestion on your landing gear struts. Paint
them black and use that silver "Rub-n-Buff" on them. The highlight effect
looks very realistic!
 This brings me to the only real complaints I have with
the kit, which are minor and easily corrected.
This brings me to the only real complaints I have with
the kit, which are minor and easily corrected.
First of all, check the landing gear covers for large
ejector pin marks. They are found on both doors and should be filled in prior
to painting. My other issue I have is with how the center of the wing on the
bottom joins the center/bottom of the fuselage. Since the rear portion of the
Hurricane was fabric, the area where the wing joins the fuselage on the bottom
has seam line the is perpendicular to the fabric lines. In order to get rid
of the seam line and still maintain the integrity of the length wise fabric
line you must be careful to not sand away the fabric effect. What I have ended
up doing was taking care of the wing joint seam line and re-scribing the
fabric lines. I did not find that very enjoyable!
Now for the it issues I had to face to build the version
I wanted to replicate. This was really the easy part! In order to build the
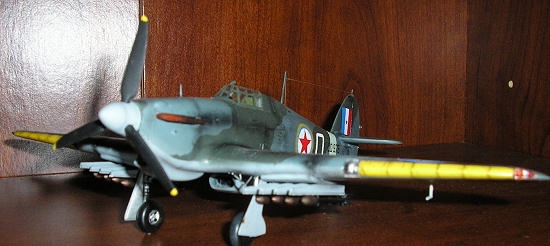
version of the Mk.IV that I wanted, I had to find rockets. I was able to
scavenge the appropriate rockets, rocket rails and blast plates from a 1/48
scale Hasegawa Hawker Typhoon kit I have in my collection ( at least I build
other things besides Hurricanes!). These fit fine with very little alteration
done on the blast plates. The blast plates were commonly seen on RAF aircraft
engaging in close support missions using rockets. These plates protected the
wings from the blast of the rocket engines. The alterations simply consisted
of sanding the piece to create a better fit on a Hurricane's wing.
In finishing the model, I addressed my other concern,
the proper markings. I always enjoy this part of the building process the
best. When I reach this point, I get a chance to see my project finally
develop into what I had hopefully envisioned. It was no different this time.
To paint the model in the proper colors, I used Testor's Model Master paints.
There has been some misinformation over the years that the Mk.IV's used by
No.351 Sqd. were painted in the RAF Desert Scheme of Midstone and Dark Earth
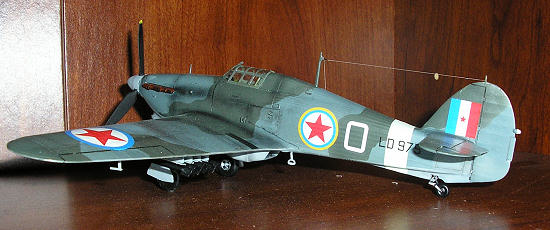
Brown. These aircraft were actually camouflaged in the standard RAF Day
Fighter Temperate Scheme of RAF Dark Green and Ocean Grey upper surfaces with
Medium Sea Grey undersurfaces. As usual, the Testor paints went on smoothly
and looked 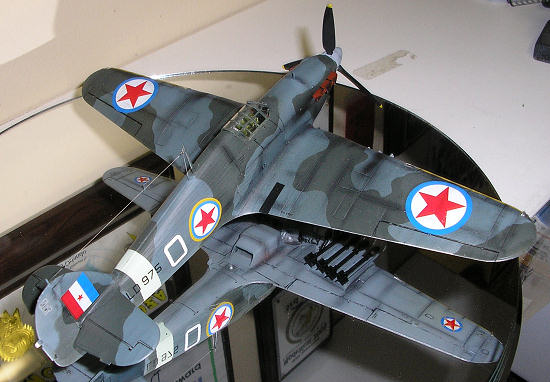 terrific. I used "silly Putty" as a mask for the camouflage. If
you have never used this medium as a mask, I would recommend it. As long as
you have a pattern you can visualize, you can mold the "silly-putty" into any
pattern you want. It is inexpensive and re-useable! After the painted dried
and cured and coated the kit with Testors Glosscoat in preparation for the
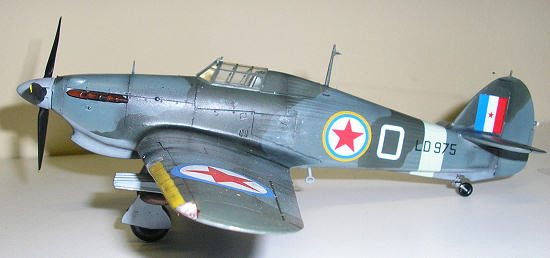
decals. Now comes the best part, the decals. I obtained a selection of decals
depicting a 351 Sqd Hurricane Mk.IV from a company known as "Lift-Here
Decals". All I can say is WOW!! "Lift-Here" specializes in producing decals
from lesser known air forces . It seems they are especially good at re-creating
air forces in the Balkans during World War Two. In this case, Yugoslavia was
the decal of choice. These decals were thin and went on without even the
slightest hint of trouble. They easily took to Microset and Microsol. The
colors were accurate and well proportioned. These decals truly made the
finished product a show piece in my opinion. My thanks to Mr. Ken Heck, who
was able to provide these decals via the manufacturer at a very reasonable
price!! If you find yourself wanting to create an aircraft found in that
region during World War Two, I highly recommend this company.
terrific. I used "silly Putty" as a mask for the camouflage. If
you have never used this medium as a mask, I would recommend it. As long as
you have a pattern you can visualize, you can mold the "silly-putty" into any
pattern you want. It is inexpensive and re-useable! After the painted dried
and cured and coated the kit with Testors Glosscoat in preparation for the
decals. Now comes the best part, the decals. I obtained a selection of decals
depicting a 351 Sqd Hurricane Mk.IV from a company known as "Lift-Here
Decals". All I can say is WOW!! "Lift-Here" specializes in producing decals
from lesser known air forces . It seems they are especially good at re-creating
air forces in the Balkans during World War Two. In this case, Yugoslavia was
the decal of choice. These decals were thin and went on without even the
slightest hint of trouble. They easily took to Microset and Microsol. The
colors were accurate and well proportioned. These decals truly made the
finished product a show piece in my opinion. My thanks to Mr. Ken Heck, who
was able to provide these decals via the manufacturer at a very reasonable
price!! If you find yourself wanting to create an aircraft found in that
region during World War Two, I highly recommend this company.
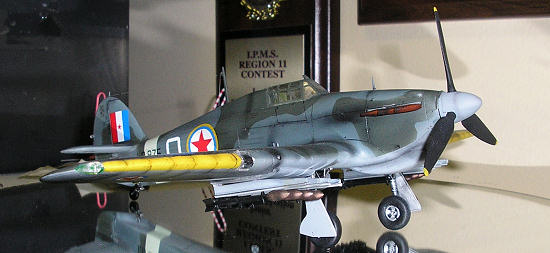
I then took steps to properly weather and highlight the
models exterior. By using a thin drafting pencil and black pastel chalk I
carefully the aircrafts highlighted panel lines. I then used a thin spray of
black to create stains along gun ports and engine exhausts. A coat of Testor's
Dullcoat was used to take the sheen of the model. The final touch was using 1
pound monofilament fishing line as the antenna wire.
 I spent around 18 hours total building this kit and it
looks like a Hurricane. This was my fifth Hasegawa Hurricane and I have
enjoyed building it. I already looking forward to the next one. Romanian or
Belgian??? I have plenty of choices!
I spent around 18 hours total building this kit and it
looks like a Hurricane. This was my fifth Hasegawa Hurricane and I have
enjoyed building it. I already looking forward to the next one. Romanian or
Belgian??? I have plenty of choices!
Larry Lawson
September 2006
Copyright ModelingMadness.com. All
rights reserved. No reproduction in part or in whole without express
permission from the editor.