Monogram (Now Revell) 1/48 Spitfire II
|
KIT # |
5239 |
|
PRICE: |
$9.85 |
|
DECALS: |
Two aircraft |
|
REVIEW : |
|
|
NOTES: |
|
|
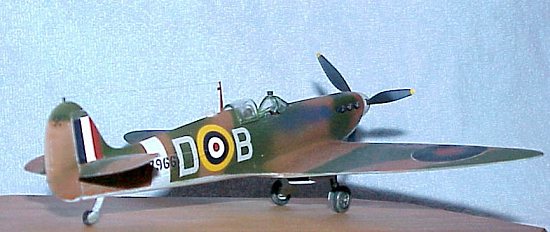
HISTORY |
Enough has been written on the Supermarine Spitfire, both on this site and elsewhere, that I don’t have to repeat it and bore the modeler. Suffice it to say that the version that I built is the aircraft of Douglas Bader during the closing months of the Battle of Britain, following his exploits in the Hurricane Mk I, with the colorful portrayal of the boot kicking ol’ Adolf in the seat of the pants. Capt. Bader had lost his legs in a flying accident before the war, and as he really desired to fly for his country and RAF Fighter Command was short on pilots, he was outfitted with a pair of artificial legs. His adversaries in the Luftwaffe respected him so much that after he was shot down over France in 1942 and captured, Adolf Galland allowed an RAF plane to drop another pair of artificial legs to him in captivity.
|
THE KIT |
 Although far surpassed
both in quality and detail by the Tamiya offering of the Mk I, the Monogram Spit
has surprisingly decent detail. The kit comes with two sprues of light grey
injection molded plastic with raised panel lines. One clear sprue contains the
cockpit and dorsal landing beacon (which my floor, the infamous model partus
eatumupus, swallowed). All are packaged in one clear plastic bag, with the decal
sheet lying outside in the box.
Although far surpassed
both in quality and detail by the Tamiya offering of the Mk I, the Monogram Spit
has surprisingly decent detail. The kit comes with two sprues of light grey
injection molded plastic with raised panel lines. One clear sprue contains the
cockpit and dorsal landing beacon (which my floor, the infamous model partus
eatumupus, swallowed). All are packaged in one clear plastic bag, with the decal
sheet lying outside in the box.
The interior sidewalls have good, although a little shallow, detail on both fuselage halves.
|
CONSTRUCTION |
I started by painting the cockpit area of the two fuselage halves in a custom mix of Model Master enamels to get a close resemblance to British Interior Green, then picked out individual details such as throttle quadrants and knobs in various shades of green, flat black, and green-grey. The instrument panel had surprisingly good raised detail, so I painted it flat black and dry brushed the instrument faces silver to bring out the detail. A decal is provided for the instrument panel, but I discarded it in favor of painting. Drops of Crystal Clear would have really made it stand out, but I didn’t have any, so I settled for drops of Elmer’s Glue-All instead.
Assembly was very straight forward, and the directions clear. Overall fit was good, although there was a little space at the horizontal stabilizer to fuselage joins. Gap filling super glue took care of that. However, before these were glued on and fuselage halves joined, I elected to cut the rudder and stabilizer flaps for repositioning. I goofed a little in my cutting of the flaps though, and had to use putty and Zap-a-Gap to fill the wide spaces that I created from my cutting. I also cut out the door on the port side of the fuselage at the cockpit area, as I was going to leave the cockpit displayed open.
|
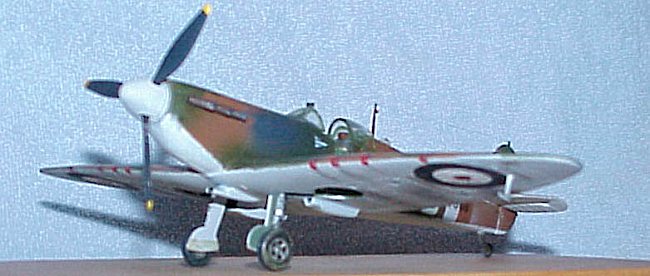
PAINT & DECALS |
 After two coats of
primer, I painted the bottom of the aircraft with a mix of flat white and light
grey with a few drops of sky blue to resemble the sky color that the Spitfire
had on its ventral surfaces. After this had all dried for a day, I cut index
cards for the top camouflage pattern of brown and green, which I applied with
Scotch tape prior to airbrushing. The technique worked pretty well. This was
followed by two coats of Testors Gloss Coat prior to decaling. I left the prop
and spinner and the canopy off up to this point.
After two coats of
primer, I painted the bottom of the aircraft with a mix of flat white and light
grey with a few drops of sky blue to resemble the sky color that the Spitfire
had on its ventral surfaces. After this had all dried for a day, I cut index
cards for the top camouflage pattern of brown and green, which I applied with
Scotch tape prior to airbrushing. The technique worked pretty well. This was
followed by two coats of Testors Gloss Coat prior to decaling. I left the prop
and spinner and the canopy off up to this point.
The decals were on the thick side, but with good color and registration. However, if you decide to use them, as I did, cut as closely as possible around the roundels. I didn’t and ended up with very noticeable silvering (one must learn the basics well when one is an amateur). The decals settled pretty well with Solvaset. I let them dry for a day, wiped the aircraft down, and followed with three coats of Testors Dullcoat to seal the decals, but I could not get rid of the silvering. Aftermarket decals would be a good consideration here.
|
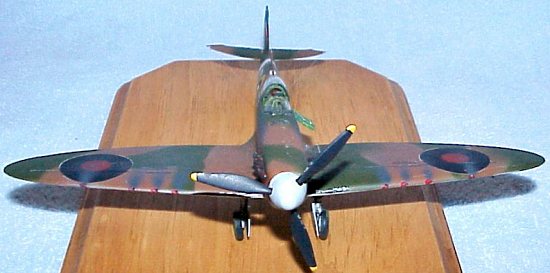
FINAL ASSEMBLY |
After the application of the final dull coats, I attached the prop, spinner and canopy halves. I used thin wire running along the main landing gear to resemble brake lines, which I painted flat black. I weathered the leading edges with Testors aluminum, along with the leading edges of the prop, and used thinned black and grey for exhaust staining and gun smoke stains. I drybushed Polyscale Mud on the tires and bottom of the gear doors to resemble the muddy airfields that Doug Bader took off from from time to time.
|
CONCLUSIONS |
I grew up building Monogram kits, so I am rather fond of them. I still believe that they are a good value for the money, if you are skilled in modification work and scatchbuilding. As an added plus, they lend themselves pretty well to the plethora of aftermarket goodies you can get for them. As far as overall detail, however, they can’t hold a candle OOB to the models from Tamiya, Hasegawa, and Accurate Miniatures. But for a rank amateur like me who still has a lot to learn in modeling, they’re a good starting point.
Copyright ModelingMadness.com. All rights reserved. No reproduction in any form without express permission from the editor.
If you would like your product reviewed fairly and fairly quickly, please contact the editor or see other details in the Note to Contributors.
Back to Reviews Page 2025