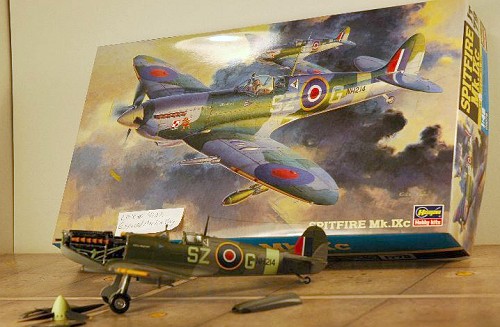
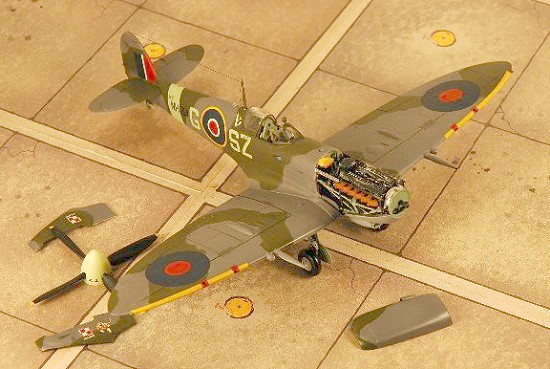
Hasegawa 1/48 Spitfire IXc
| KIT: | Hasegawa 1/48 Spitfire IXc |
| KIT #: | 9079 |
| PRICE: | $22.98 MSRP |
| DECALS: | See review |
| REVIEWER: | Andrew Garcia |
| NOTES: | CMK Resin and etched set used. A great kit. |
| HISTORY |
There’s little I can add to the history of the Spitfire. We all know there are volumes written on this classic W.W. II fighter. She’s a beauty and in plastic very well represented. (Having done so many times, this is the lazy man's way of getting out of writing some sort of lengthy background section! :o). Ed )
| THE KIT |
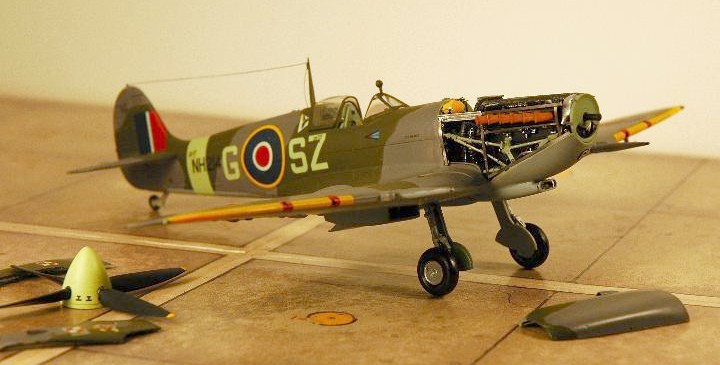
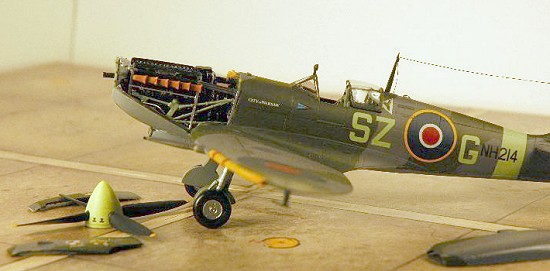
The Hasegawa 1/48 scale Spitfire Mk. IXc (Kit 09079) was an enjoyable kit build. By incorporating the CMK Resin set # 4102, which added a Merlin 61 resin engine in an exposed condition, I continued my pursuit of modeling W.W. II aircraft with their power plants detailed and exposed. I was well aware of all the controversy and measurements taken of the Hasegawa kit when it was initially released. There is a visible shortening of the fuselage that does cause consternation among the modeling community. There is a very nice resin fix available from Loon Models for the fuselage length error. I chose to focus on the front end and with uncertain results pending chose not to fix the fuselage length problem on this build saving it for another Hasegawa Spitfire Mk. IXc where the focus would not be on an exposed engine and the frontal area but on the entire aircraft where the shortened fuselage can affect your aesthetic pursuit of plastic perfection. Al in all, I like this kit because it captures the grace and beauty of a fabulous aircraft. Aside from the loss of the elegant long lines in the rear fuselage, Hasegawa gave us one fine example to model.
| CONSTRUCTION |
 The Hasegawa kit
is a quick and easy build with no vices found with the Hasegawa components.
The cockpit was detailed using Eduard pre-painted RAF etched seat belts.
The instruments were taken from the kit decal sheet by punching them out
using the Waldron punch and die set and applying them to a flat black
painted kit instrument panel. This is followed by some Supersol decal
solvent to get them to conform to the dial faces. Even the kit decals
worked well! I used the kit decals rather than after market decals since I
have experienced some problems recently with after market decals lacking in
adhesive and being so brittle they shatter like old kit decals! I used the
Superscale finishing system of Superset and an occasional Supersol
application to embed the kit decals over a few panel lines. When the
instruments are very visible in a kit I prefer to use an Eduard etched with
acetate backing component for best results. The Spitfire has a tight
cockpit so only the flashlight in hand contest types would notice – maybe.
The Hasegawa kit
is a quick and easy build with no vices found with the Hasegawa components.
The cockpit was detailed using Eduard pre-painted RAF etched seat belts.
The instruments were taken from the kit decal sheet by punching them out
using the Waldron punch and die set and applying them to a flat black
painted kit instrument panel. This is followed by some Supersol decal
solvent to get them to conform to the dial faces. Even the kit decals
worked well! I used the kit decals rather than after market decals since I
have experienced some problems recently with after market decals lacking in
adhesive and being so brittle they shatter like old kit decals! I used the
Superscale finishing system of Superset and an occasional Supersol
application to embed the kit decals over a few panel lines. When the
instruments are very visible in a kit I prefer to use an Eduard etched with
acetate backing component for best results. The Spitfire has a tight
cockpit so only the flashlight in hand contest types would notice – maybe.
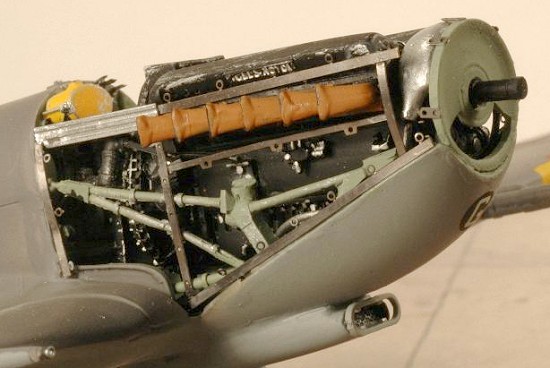 The CMK resin
components and etched metal frets were amazingly detailed. Fit was very
good with only the carburetor air intake scoop and the lower cowling join
to the fuselage requiring additional attention. It took some extra effort
to get them to blend together, as they should on this aircraft. I was also
concerned about the sturdiness of the attachment point for the lower engine
cowling since it supports the engine and takes some stress from handling
activities such as sanding and gap filling in the fuselage join. My
solution was to cut and bend some guitar wire and embed it in epoxy glue,
then attaching the CMK resin component to the Hasegawa kit parts. The resin
firewall and Merlin engine sit on top of this portion and it presented no
problems during construction other than some filing and sanding for fit.
The only additional detailing I added to the CMK parts consisted of some
lead wire representing the inflow and outflow pipes into the coolant
wrap-around tank found on the upper front of the Merlin 61 engine thanks to
the photo references I used.
The CMK resin
components and etched metal frets were amazingly detailed. Fit was very
good with only the carburetor air intake scoop and the lower cowling join
to the fuselage requiring additional attention. It took some extra effort
to get them to blend together, as they should on this aircraft. I was also
concerned about the sturdiness of the attachment point for the lower engine
cowling since it supports the engine and takes some stress from handling
activities such as sanding and gap filling in the fuselage join. My
solution was to cut and bend some guitar wire and embed it in epoxy glue,
then attaching the CMK resin component to the Hasegawa kit parts. The resin
firewall and Merlin engine sit on top of this portion and it presented no
problems during construction other than some filing and sanding for fit.
The only additional detailing I added to the CMK parts consisted of some
lead wire representing the inflow and outflow pipes into the coolant
wrap-around tank found on the upper front of the Merlin 61 engine thanks to
the photo references I used.
| COLORS & MARKINGS |
I used the Hasegawa kit decals for a Spitfire Mk. IXc from No. 316 (Polish) Squadron, Royal Air Force.
Testors RAF Interior Green enamel (No. 2062) was used along with their Metalizer paints for metal surfaces. I used Testors #1161 Glosscote and # 1162 Dullcote Lacquers for the final decal stage and finish coat. The overall colors are Gunze # 330 Dark Green , # 331 Dark Sea Gray and # 335 Med. Sea Gray.
| CONCLUSIONS |
 This conversion
was a bargain in cost and the time required turning the parts into a
finished aircraft surprisingly small given the initial appearance of
complexity. By reinforcing the attachment of the kit plastic to the resin
lower cowling, I avoided the potential problem of investing a great deal
of time, effort and money into a potential last minute snap-crack and Oh,
no loss. Not this time! The kit has taken quite a bit of handling in
stride. I am grateful someone at CMK had the foresight to release this
conversion since the Rolls Royce Merlin was after all the heart of the
Spitfire!
This conversion
was a bargain in cost and the time required turning the parts into a
finished aircraft surprisingly small given the initial appearance of
complexity. By reinforcing the attachment of the kit plastic to the resin
lower cowling, I avoided the potential problem of investing a great deal
of time, effort and money into a potential last minute snap-crack and Oh,
no loss. Not this time! The kit has taken quite a bit of handling in
stride. I am grateful someone at CMK had the foresight to release this
conversion since the Rolls Royce Merlin was after all the heart of the
Spitfire!
| REFERENCES |
For this project I looked for specific photographs depicting Spitfires under construction or maintenance. I was rewarded with a few good ones. Spitfire In Action No. 1039 by Squadron Books page 27 has an excellent large sized photograph of a plane under construction at the Castle Bromwich plant. Osprey Aircraft of the Aces No. 5 Late Marque Spitfire Aces 1942- 45 pgs. 22, 26 and 27 had some additional pictures I found useful. The final pictures I used came from a very clear photo of a Spitfire Vb with an exposed engine undergoing maintenance found on page 30 of Koku Fan magazine February 1996.
November 2004
If you would like your product reviewed fairly and quickly, please contact me or see other details in the Note to Contributors.