Special Hobby 1/32 Tempest V
| KIT #: | SH 32049 |
| PRICE: | $62.00 |
| DECALS: | Four options |
| REVIEWER: | John Summerford |
| NOTES: | 2016 boxing, BarracudaCast nose and intake ring, CMK wheels and seat, plus Eduard cockpit parts used. |
| HISTORY |
Sydney Camm, the chief designer at Hawker Aircraft Limited, started developing a follow-on aircraft to the Typhoon in 1941, which was later dubbed the Tempest. After teething problems and design improvements, the Mark V version was operational with three squadrons in time for D-day. It was used extensively as a fighter bomber and V-1 destroyer. The design was further developed into the Sea Fury.
| THE KIT |
 Sprues of
gray plastic are sealed in two bags. A third bag has the clear parts and is
inside the smaller bag. Total parts called for is 171. Mold seams are almost
non-existent and the detail is very crisp. A sprue of rockets is included,
however they are not mentioned in the instructions, so you are on your own in
locating their placement.
Sprues of
gray plastic are sealed in two bags. A third bag has the clear parts and is
inside the smaller bag. Total parts called for is 171. Mold seams are almost
non-existent and the detail is very crisp. A sprue of rockets is included,
however they are not mentioned in the instructions, so you are on your own in
locating their placement.
Unfortunately, the spinner is too large and shaped incorrectly, throwing off the taper of the nose. Also, the radiator opening in the chin is too large.
The decal sheets are sealed in their own bag.
A much more extensive history than described above is in Czech and English is on the first page of the glossy, 16-page instruction booklet. Pages 2-3 have part maps covering eight gray sprues and one clear. Parts not needed for the Mk. V are crossed out. Assembly is covered in eight pages and consists of 46 steps. Four pages are devoted to painting and decaling and the final page illustrates CMK upgrade parts. Paint call-outs are for Gunze Sangyo and Alclad II colors.
| CONSTRUCTION |
Before removing any parts from any sprue, the cockpit and wheel well parts were given a coat of primer and sprayed acrylic British interior green. Still not looking at the instructions yet, the resin nose got a test fit. The test revealed some work for later.
 It takes 16
steps to build the very detailed cockpit. It is a kit in itself. Getting the
framework aligned and square is a challenge. I spent about eight hours on it and
used CMK’S resin seat and Eduard’s instrument panel instead of the kit parts. I
also spent nearly an hour getting the assembly to fit in the fuselage. By
holding the fuselage up-side-down and keeping the tail together, the cockpit
area can be dropped into place. Somehow, I managed to create a bowed right side,
so the back face was sanded down. I found the rear bulkhead to be two wide and
that was narrowed. The retaining ridges for the front bulkhead on the inside of
the fuselage halves were ground off. The last modification made was to scrape
off about an inch of the aft end of the bottom stringers. Before inserting the
cockpit, the tail wheel well was installed and then the fuselage closed up.
It takes 16
steps to build the very detailed cockpit. It is a kit in itself. Getting the
framework aligned and square is a challenge. I spent about eight hours on it and
used CMK’S resin seat and Eduard’s instrument panel instead of the kit parts. I
also spent nearly an hour getting the assembly to fit in the fuselage. By
holding the fuselage up-side-down and keeping the tail together, the cockpit
area can be dropped into place. Somehow, I managed to create a bowed right side,
so the back face was sanded down. I found the rear bulkhead to be two wide and
that was narrowed. The retaining ridges for the front bulkhead on the inside of
the fuselage halves were ground off. The last modification made was to scrape
off about an inch of the aft end of the bottom stringers. Before inserting the
cockpit, the tail wheel well was installed and then the fuselage closed up.
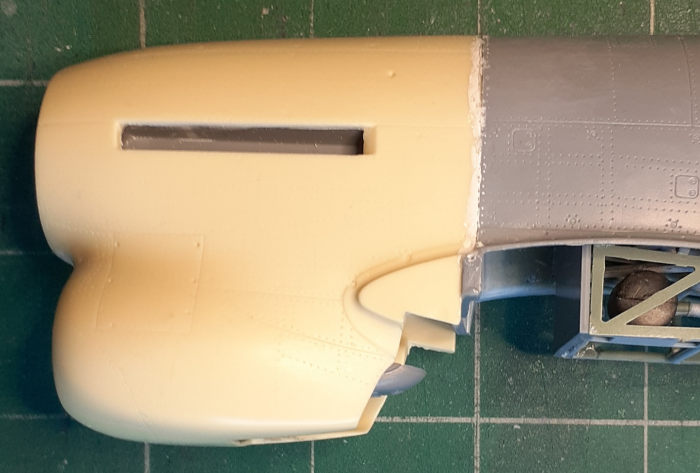
Building the nose is next. Getting the resin replacement to fit properly required material to be removed from the inside lip and at the wing root of both the nose and fuselage. Internal structure in the resin piece was ground off so that the front and rear radiator pieces could be installed. Fearing that vent door could be knocked off, it was saved for post painting attachment.
Moving to the wings, holes need to be drilled for the
drop tank mounts plus and underwing light installed. The walls of the wheel well
come in several pieces. Since the instructions do not describe a building
sequence, I was confused about which end overlaps the adjoining piece at the
corners. The forward walls, Parts H-21 and H-33, are illustrated from the blank
side in steps 28 and 29. The following i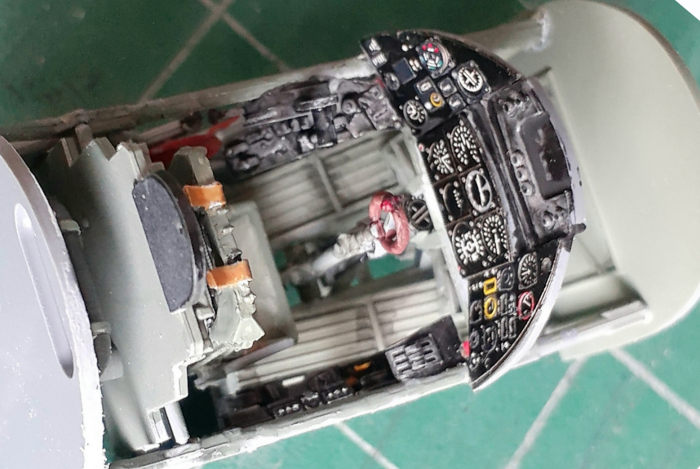 llustration,
in step 30, shows the inner face, but it is upside-down from the previous
images, so close attention must be paid to the proper orientation. I suspect
that the proper sequence is to install the forward side first, then the aft side
and the ends last. I found that the parts H-35 and H-37, that divide the wells
into two sections, didn’t align with the roof. Perhaps the upper wings should be
used as a jig when gluing them in place.
llustration,
in step 30, shows the inner face, but it is upside-down from the previous
images, so close attention must be paid to the proper orientation. I suspect
that the proper sequence is to install the forward side first, then the aft side
and the ends last. I found that the parts H-35 and H-37, that divide the wells
into two sections, didn’t align with the roof. Perhaps the upper wings should be
used as a jig when gluing them in place.
Because I didn’t build the wells properly. I spent a lot effort removing material in various areas to get the upper wings to fit. I also found that when it came time to glue the upper wings in place, the locating pins didn’t help and they were sanded off. Getting the wings to mate with the fuselage required sanding the wheel well walls and lower cockpit frame paper thin. Another important note; save parts H-41 and H-42, which hold the inner door actuator for later, since it is extended and prone to being knocked off. (I’m relating a bitter experience.)
After all that, cleaning up the wing to fuselage seam was easy. For some reason two sets of leading-edge panels come as separate pieces. These were glued in place after the seam was addressed.
Attaching the tail surfaces came next. It is possible to induce some droop in the elevators, however I didn’t find any photos of them in that position. The fit is OK. The cockpit, radiator, and wheel wells were masked in preparation for paint.
| COLORS & MARKINGS |
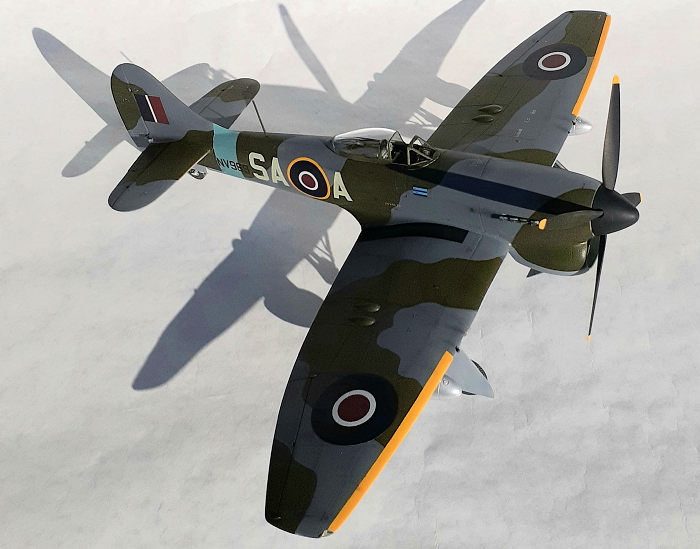
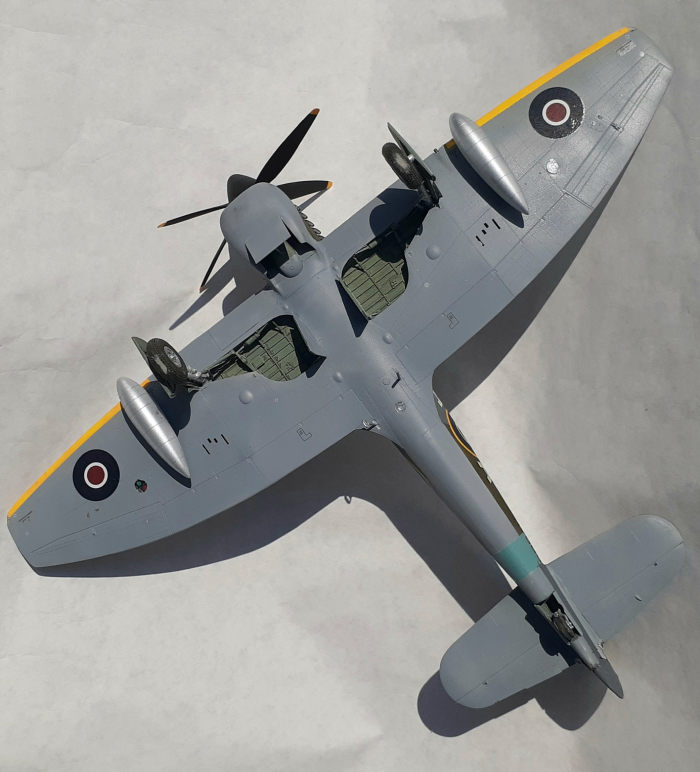
A coat of Mr. White Surfacer 1000 was sprayed over everything, revealing more work to do on seams. That done, the radiator intake was sprayed interior green and the wing leading edges received a coat of yellow. Those areas were masked and the underside given a coat of light gray. The topside was sprayed ocean gray, then masked for dark green.
I gave Mission Models primer a try painting the
canopy. They feature a clear primer, so that was sprayed on the masked clear
parts, then interior green followed by the outer colors. I consulted their w ebsite
for guidance on how to apply their products. (They do themselves a disservice by
burying instructions in a FAQ section. I suggest they used a separate dropdown
tab.) Even after scoring through the paint at the edges of the masking tape, I
experienced adhesion problems and had to touch-up several areas. I’m not sure if
it was me or the primer, so I’ll try it again next time.
ebsite
for guidance on how to apply their products. (They do themselves a disservice by
burying instructions in a FAQ section. I suggest they used a separate dropdown
tab.) Even after scoring through the paint at the edges of the masking tape, I
experienced adhesion problems and had to touch-up several areas. I’m not sure if
it was me or the primer, so I’ll try it again next time.
In my eagerness to use the resin nose, I forgot to remove the mold release residue, so patches of paint and primer peeled away when un-masking. A cotton swab and lacquer thinner cleaned up the exposed areas and paper masks employed for re-spraying the paint.
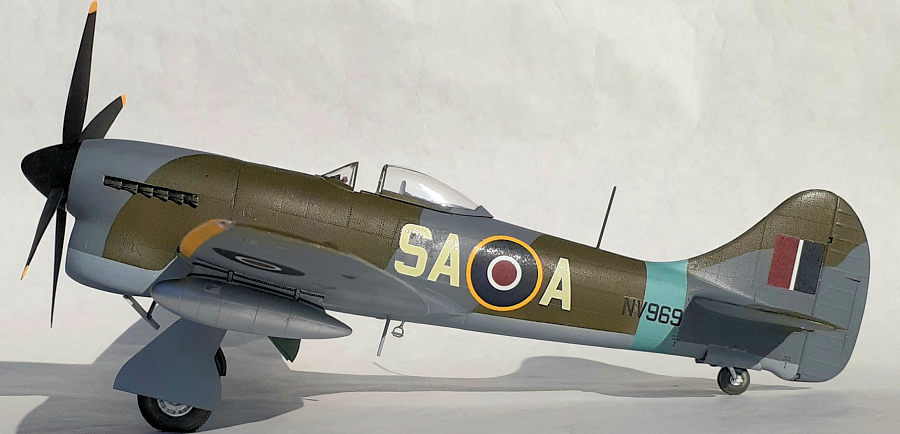
For the decals, I chose option one, mostly because I like the black spinner on that airframe. Unfortunately, this aircraft was destroyed in a crash less than a month after the German surrender. Being very glossy, a good coat of flat varnish is needed once the decals set. They worked fairly well.
A past curator at the Museum of Flight told me that the average life span of a combat aircraft in WWII was 90 days. This aircraft was in service by late 1944, so I kept the weathering at a minimum.
| FINAL CONSTRUCTION |
 Finally
satisfied with the appearance of the model, attention was paid to the underside.
Installing the landing gear, including the tail wheel and doors, was a bit
fiddly, but it all came together well. I did reinforce the major joints with
cyano glue. For the radiator vent door, one has the choice of opened or closed.
I chose the former. Other bits to add were the retractable step, ventral mast,
and drop tanks.
Finally
satisfied with the appearance of the model, attention was paid to the underside.
Installing the landing gear, including the tail wheel and doors, was a bit
fiddly, but it all came together well. I did reinforce the major joints with
cyano glue. For the radiator vent door, one has the choice of opened or closed.
I chose the former. Other bits to add were the retractable step, ventral mast,
and drop tanks.
On the topside, a dorsal mast must be fabricated and location hole drilled. The canopy hood snaps into the rails and can be movable if desired. Some trimming of the windshield front was needed for it to drop into place. The exhaust stubs fit so tight that glue was not required.
Parts and assembly jig for a corrected propeller come with the resin nose. Follow the instructions and it goes together easily. After that was painted and some slight weathering added, it was the last addition to the model.
| CONCLUSIONS |
This is a kit that demands close attention for precise fit. I’m quite pleased with the cockpit and radiator. I also think the after-market parts are worth the extra expense. Assembling the main wheel wells correctly is the biggest challenge with the kit.
I have over 42 hours in this build, a good chunk of that time correcting errors. Looking at the final result, I’m glad I spent the time on the project.
4 May 2021
Copyright ModelingMadness.com. All rights reserved. No reproduction without express permission.
If you would like your product reviewed fairly and fairly quickly, please contact the editor or see other details in the Note to Contributors.