Eduard 1/48 Tempest V series II
| KIT #: | 81122 |
| PRICE: | 40 Euros |
| DECALS: | Six options |
| REVIEWER: | Francisco Santoro |
| NOTES: | Cockpit tubing is extremely fragile. |
| HISTORY |
 The Hawker
Tempest is a British fighter aircraft primarily used by the Royal Air Force
(RAF) in the Second World War. The Tempest, originally known as the Typhoon II,
was an improved derivative of the Hawker Typhoon, intended to address the
Typhoon's unexpected deterioration in performance at high altitude by replacing
its wing with a thinner laminar flow design. Since it had diverged considerably
from the Typhoon, it was renamed Tempest. The Tempest emerged as one of the most
powerful fighters of World War II and was the fastest single-engine
propeller-driven aircraft of the war at low altitude.
The Hawker
Tempest is a British fighter aircraft primarily used by the Royal Air Force
(RAF) in the Second World War. The Tempest, originally known as the Typhoon II,
was an improved derivative of the Hawker Typhoon, intended to address the
Typhoon's unexpected deterioration in performance at high altitude by replacing
its wing with a thinner laminar flow design. Since it had diverged considerably
from the Typhoon, it was renamed Tempest. The Tempest emerged as one of the most
powerful fighters of World War II and was the fastest single-engine
propeller-driven aircraft of the war at low altitude.
Upon entering service in 1944, the Tempest was used as a low-level interceptor, particularly against the V-1 flying bomb threat, and as a ground attack platform, in which it supported major events such as Operation Market Garden. Later, it successfully targeted the rail infrastructure in Germany and Luftwaffe aircraft on the ground, as well as countering such attacks by German fighters. The Tempest was effective in the low-level interception role, including against newly developed jet-propelled aircraft such as the Messerschmitt Me 262."
| THE KIT |
The models comes in a top opening box with a very good boxart. All the parts come inside a single bag, while the clear ones come inside their own bag. There's also a fret of photoetch parts and masks for the cockpit.
 Instructions
are of typical Eduard Profipack style, a thick booklet with an extensive history
text at the front, plus a full colour assembly guide and decal placement
instructions.
Instructions
are of typical Eduard Profipack style, a thick booklet with an extensive history
text at the front, plus a full colour assembly guide and decal placement
instructions.
There's a total of six decal options:
1) Hawker Tempest Mk.V JN862 "JFoZ."
2) Hawker Tempest Mk.V JN803 "SAoD."
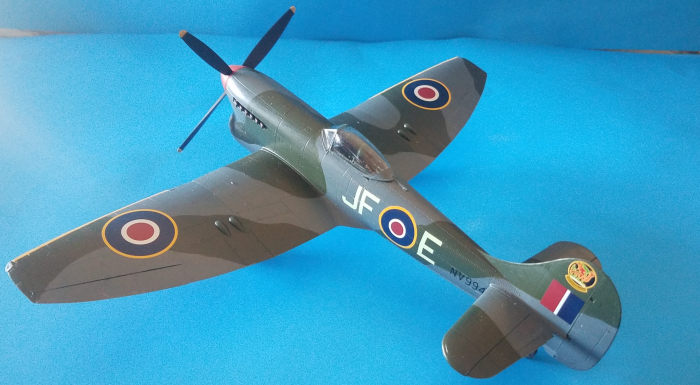
3) Hawker Tempest Mk.V NV994 "JFoE."
4) Idem as 3, but with red spinner and Squadron Leader badge on the tail.
5) Hawker Tempest Mk.V NV708 "JCB."
6) Hawker Tempest Mk.V EJ865 "W2oY."
| CONSTRUCTION |
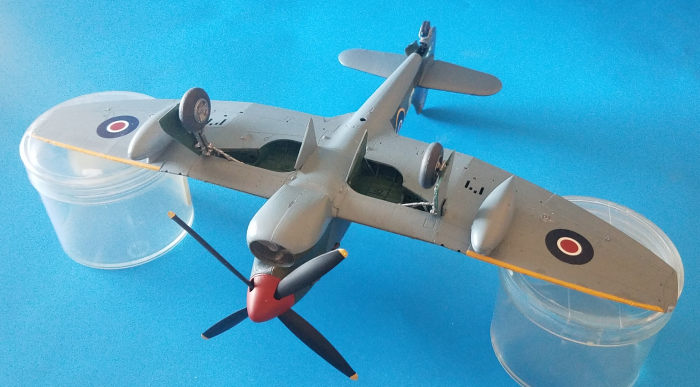
I began building this kit not on the cockpit, but on the lower part of the wings. These two have grooves for installing the wheel well walls, each consisting of five main parts, and five smaller parts. These were glued together, and then I glued the upper half of the wings to the lower half. After finishing this assembly, I left the wings to dry and turned my attention to the cockpit.
 I
began the cockpit by painting all the required parts in Interior Green (Revell
48), and picking out all the small details in black. Once all that was done, I
glued the pieces together and placed them into the rear bulkhead of the cockpit.
Instead of using the PE parts for the rudder pedals, I checked the instruction
sprue map and managed to find the plastic rudder pedals, so I used those. I then
painted the instrument panel in flat black (Revell 08) and glued it together.
I
began the cockpit by painting all the required parts in Interior Green (Revell
48), and picking out all the small details in black. Once all that was done, I
glued the pieces together and placed them into the rear bulkhead of the cockpit.
Instead of using the PE parts for the rudder pedals, I checked the instruction
sprue map and managed to find the plastic rudder pedals, so I used those. I then
painted the instrument panel in flat black (Revell 08) and glued it together.
Next step on the build was to install the cockpit tubing. These two parts are extremely fragile, and need to be cut very carefully. In spite of trying to be careful, I broke both of them, so I wasn´t able to install the instrumentation. I was able to install the instrument panel luckily.
I then built up the radiator and the tail wheel well, which were propmtly glued into place. I then closed the fuselage halves, something that didn't present any issues. After that, I glued the wings to the fuselage, and then attached the horizontal stabilizers, ailerons and rudder in place. These pieces were then left to dry for a bit, and then I began painting the model.
| COLORS & MARKINGS |
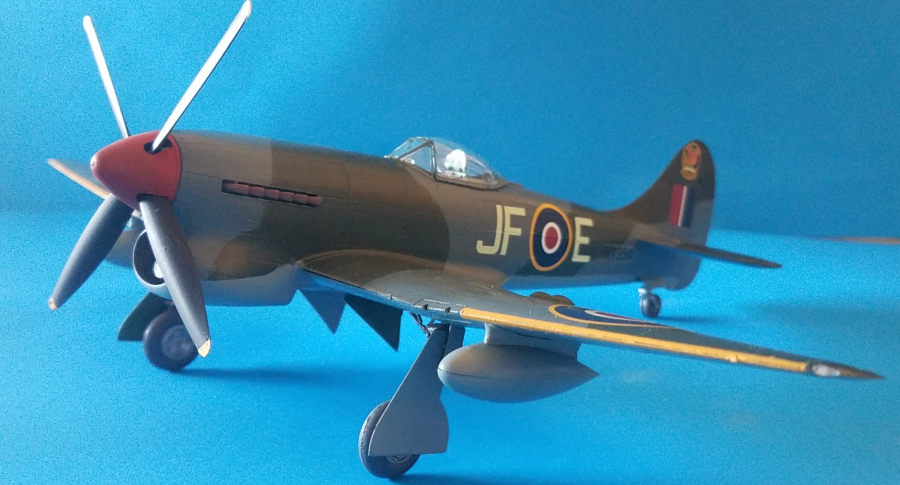
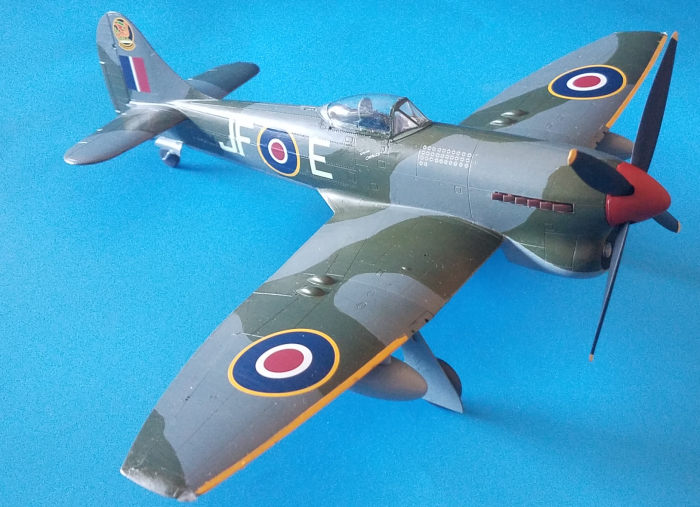
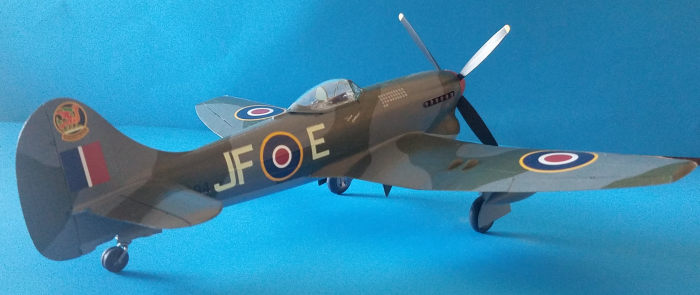
I had chosen to paint this aircraft as Pierre Clostermann's "The Grand
Charles" (option D on the instructions). I painted first the areas in Extra Dark
Sea Grey (Revell 79), and then the areas in RAF Dark Green (Revell 68). The
undersides were painted with Revell 57 Grey. The last step on the painting was
to add the yellow leading edge bands. It was at this time that I painted the
wheel wells in Interior
 Green (Revell
48). I then brushed the entire aircratf with two coats of Revell's gloss
varnish, to prepare the surface of the aircraft for the decals.
Green (Revell
48). I then brushed the entire aircratf with two coats of Revell's gloss
varnish, to prepare the surface of the aircraft for the decals.
Being Cartograf decals, they behaved perfectly well, and sunk into the panel lines and raised rivets perfectly with some Microsol. Had the decals been from in-house Eduard, I´m pretty sure they would have sticked as soon as they had been placed on the surface. With the decals on, I brushed two coats of Revell's matt varnish.
I painted the landing gear struts in aluminium, the gear doors with the underside colour, and painted the wheels with aluminium hubs and RLM 66 (Revell 78) tyres. The landing gear proved to be a very sturdy construction, and takes the weight of the model well without sagging. I also painted and glued the exhaust stacks with Revell 83 Rust. The last pieces to be added were the clear parts and the underwing fuel tanks.
| CONCLUSIONS |
This kit is the definitive version of the Tempest in 1:48. In spite of my self inflicted difficulties, I enjoyed building this kit. TBH, I only bought it because of the markings for Clostermann's aircraft.
| REFERENCES |
https://en.wikipedia.org/wiki/Hawker_Tempest
1 June 2021
Copyright ModelingMadness.com. All rights reserved.
If you would like your product reviewed fairly and fairly quickly, please contact the editor or see other details in the Note to Contributors.