Trumpeter 1/48 Whirlwind I
| KIT #: | ? |
| PRICE: | NZ$41.40 |
| DECALS: | ? |
| REVIEWER: | Michael Rohde |
| NOTES: |
| HISTORY |
The first of two Whirlwind prototypes took to the air
on 11th October 1938. Westland's new design was interesting on several accounts:
It was the RAF's first twin engined fighter and had a lower altitude
 performance
better than that of any contemporary single seat fighter. Furthermore, its four
20 mm nose mounted cannon gave it a weight of fire of 600lb( 272kg) per minute,
firepower superior to that of any other fighter in the world at that time.
performance
better than that of any contemporary single seat fighter. Furthermore, its four
20 mm nose mounted cannon gave it a weight of fire of 600lb( 272kg) per minute,
firepower superior to that of any other fighter in the world at that time.
Production deliveries began to No. 263 Sq. at Drem in July 1940 and the squadron began immediately to eliminate the inevitable bugs in a new airframe and engine- the Rolls Royce Peregrine. Problems were also experienced with the cannon ,but the squadron scored its first confirmed success with the destruction of a Arado 196 floatplane on 8the February 1941,although a Whirlwind pilot was lost. Deliveries were slow, as a result of a shortage of engines, and only eight Whirlwinds had been received by the RAF at the end of 1940.
No. 137 Sq. was the second (and only other) squadron to be equipped with the type. This unit was formed at Charmy Downs on 20th September 1941 with a nucleus of No. 263 Sq. personnel.
 The
fighter showed excellent performance at low altitude, but this advantage was
lost when fighter combat moved to higher altitudes. The Whirlwind proved useful
for light bombing operations and fighter sweeps. By 1940 it had become obvious
that the Whirlwind had its drawbacks, engine unreliability being high on the
list, while high landing speeds restricted the number of airfields it could use.
The initial order of 200 was cut to 112, and a second order was cancelled with
the last production aircraft flying in January 1942.
The
fighter showed excellent performance at low altitude, but this advantage was
lost when fighter combat moved to higher altitudes. The Whirlwind proved useful
for light bombing operations and fighter sweeps. By 1940 it had become obvious
that the Whirlwind had its drawbacks, engine unreliability being high on the
list, while high landing speeds restricted the number of airfields it could use.
The initial order of 200 was cut to 112, and a second order was cancelled with
the last production aircraft flying in January 1942.
In June 1943 No. 137 Sq. was re-equipped with rocket -firing Hawker Hurricane IV's while No. 263 Sq. gave up its Whirlwinds for Hawker Typhoons in December of that year.
Some experimental work had taken place with Whirlwinds: the second prototype undertook night- flying trials with No. 25 Sq. ( a Blenheim Mk I F unit) between May and July 1940;The first prototype was tested with an aramament of twelve Browning 0.303in ( 7.7 mm) machine guns; and another had a 37 mm cannon installed. One Whirlwind survived the war, being under civilian markings as a Westland hack during 1946-7, and finally scrapped.
| THE KIT |
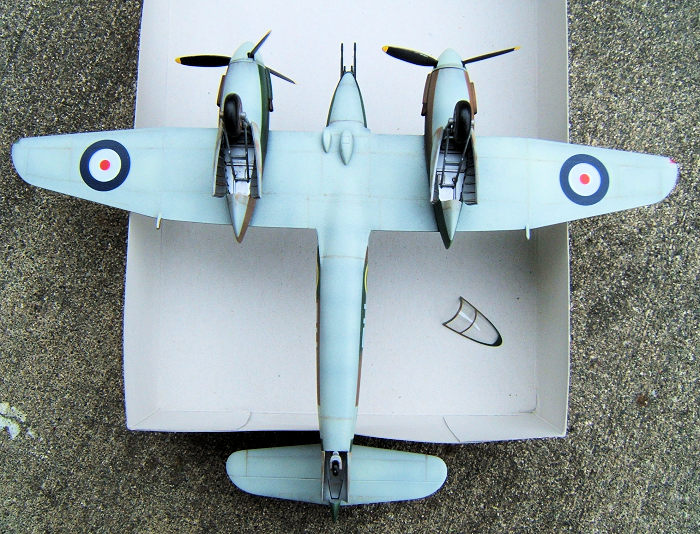
This kitset comes inTrumpeter's usual sturdy cardboard box and contains 4 frames moulded in light grey plastic and one frame carrying clear parts. Total parts count comes to 70. Surface detail is crisp and there are no sink marks to deal with. This kit is , due to its simplicity,suitable for less experienced modellers. Decals for two options are provided. Instructions are clear and easy to follow and a painting and markings guide is provided as well.
| CONSTRUCTION |
 As per
plan I started with the cockpit . The entire cockpit was painted in Tamiya
interior green and the instrument panel and control stick in flat black. To
highlight surface details I applied some careful dry brushing using Tamiya flat
aluminium. Unfortunately the gunsight is not supplied in the kit so I had no
other option but to scratch build one. To complete the interior I added a Eduard
seat harness.
As per
plan I started with the cockpit . The entire cockpit was painted in Tamiya
interior green and the instrument panel and control stick in flat black. To
highlight surface details I applied some careful dry brushing using Tamiya flat
aluminium. Unfortunately the gunsight is not supplied in the kit so I had no
other option but to scratch build one. To complete the interior I added a Eduard
seat harness.
Step 2 and 3 took care of the engine nacelles and the landing gear. In this case the landing gear assembly is put into place before the nacelles are closed up. Pre painting the interior with Tamiya chrome silver was done prior to that and panel liner brown and black was used to bring out surface details.
Step 4 deals with the fuselage. The cockpit, tail wheel well side walls and floor need a lick of paint ( Tamiya interior green)before we insert the cockpit assembly. The fuselage shells went together nicely and minute amounts of filler were needed to clean up the seams. The nose section with the gun ports come as a separate item and was glued on at that stage. The horizontal tail planes fitted really well and did not require any further work. The last item to fit was the rear cockpit decking( pre painted and dry brushed)
Step 5 . The wings are split into a main bottom section and two uppers. The oil cooler intakes are inserted before the wings go together. The fit was again very nice and cleaning up the leading and trailing edges was done in no time. Same applied to fitting the complete wing assembly to the fuselage.
 Step 6 .
The complete port and starboard nacelles are attached to the wings. Locating
pins help to align both items .The fit was great and did not require any filling
and sanding. I did , however ,dry fit the parts and , after minor adjustments,
glued them into place. I decided not to use the bomb racks provided in the kit
and plugged the holes with Evergreen rod and a bit of putty.
Step 6 .
The complete port and starboard nacelles are attached to the wings. Locating
pins help to align both items .The fit was great and did not require any filling
and sanding. I did , however ,dry fit the parts and , after minor adjustments,
glued them into place. I decided not to use the bomb racks provided in the kit
and plugged the holes with Evergreen rod and a bit of putty.
Step 7 and 8 deal with the bomb racks, antenna, landing gear doors and the propeller assembly. I prepainted these items and put them aside until I was finished with the overall camo scheme. Not much to say about these bits. Very straight forward.
Step 9 dealt with airbrushing the model. We are dealing with sharp demarcation line between lower duck egg blue surfaces and upper dark green / earth camo. I airbrushed the undersides first , let dry thoroughly and masked the lot before I continued with the upper surface. The wind shield and canopy were painted separately.
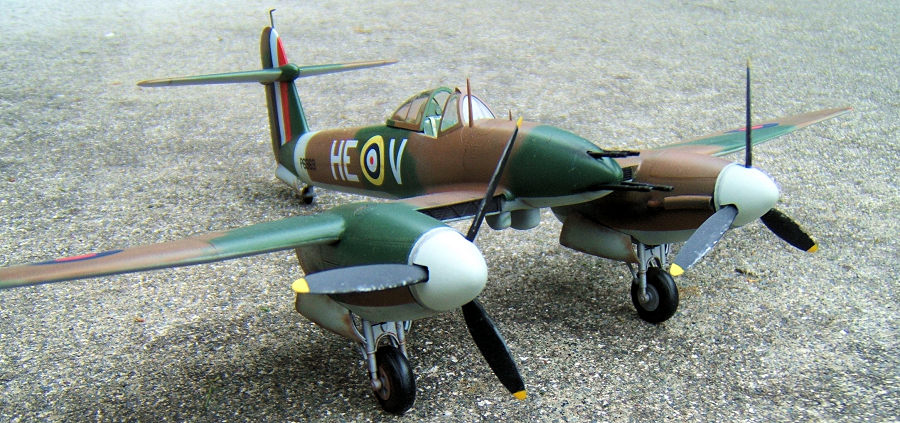
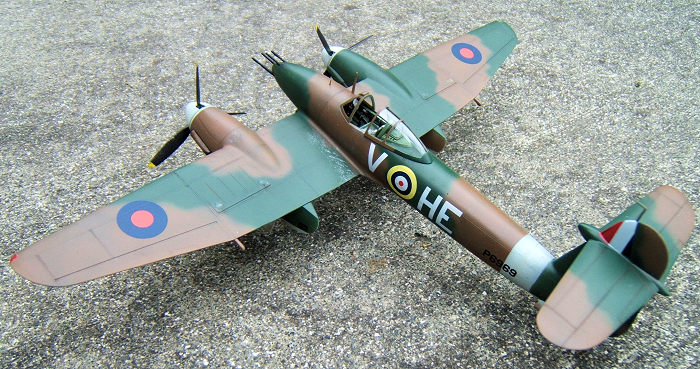
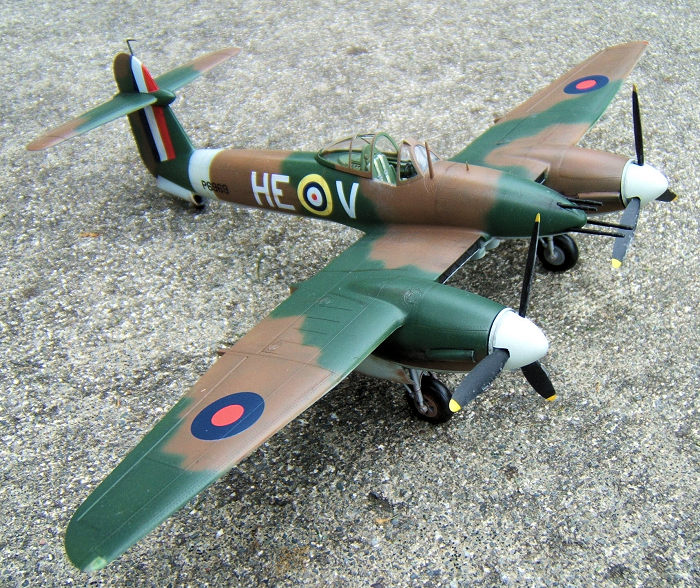
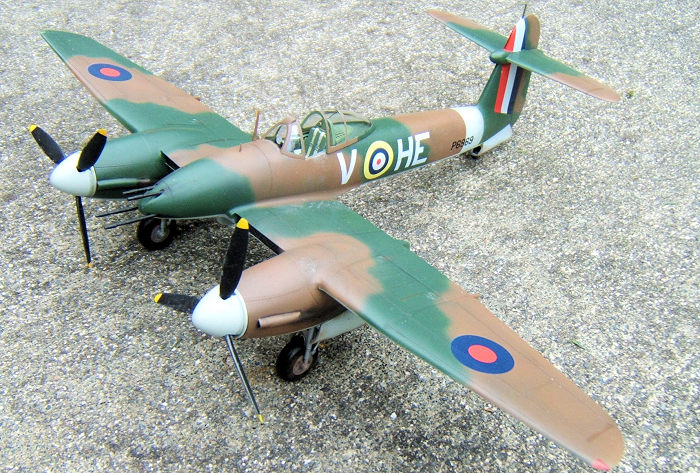
Step 10 : The decals . I have chosen the markings of No. 263 Sq.( I like the rather large tri color stripes in the vertical tail plane). The decals went on easy and settled well. I think the yellow rings on the fuselage roundels are too pale though.
The final touches were to add the gun barrels and landing gear doors and to apply some weathering using pastel and Tamiya panel liner plus some stippling with chrome silver on the wing roots to mimic wear and tear of the painted surfaces there.
| CONCLUSIONS |
A relaxing build this was and I can recommend this kit for its simplicity and unproblematic assembly.Great for newcomers to our hobby.
Michael
Rohde 6 August
2019 Copyright ModelingMadness.com If you would like your product reviewed fairly and fairly quickly, please
contact
the editor or see other details in the
Note to
Contributors.
Back to the Main Page
Back to the Review
Index Page
Back to the Previews Index Page