Airfix 1/72 Swordfish I
| KIT #: | . |
| PRICE: | £ |
| DECALS: | Two options |
| REVIEWER: | Michael Rohde |
| NOTES: | . |
| HISTORY |
On 17 thApril 1934 the prototype of the Swordfish ( K 4190) took to the air for the first time. Subjected to intensive testing , both in landplane and alternative floatplane form, the type was ordered into production in April 1935 with a first contract of 86 aircraft, to be named the 'Swordfish'.
The initial Swordfish Mk 1, built by Air Ministry Specification S38/34, was powered by a 690 hp Bristol Pegasus 3 M radial engine, driving a three blade fixed pitch metal propeller. The two bay bi plane wings were of all metal construction, fabric covered, with ailerons on both upper and lower wings, the bi plane configuration and its structural integrity maintained by robust interplane struts , flying and landing wires. For shipboard stowage the wings could be folded about rear spar hinges.
The tail plane unit was entirely conventional, with a strut braced tailplane, and fin and rudder of metal construction with fabric covering. The fuselage, with two open cockpits to accommodate the pilot forward and a crew of one or two aft, was also of metal construction, but covered by a combination of light alloy panels forward and fabric aft. Landing gear was of the fixed tailwheel type, with the individual main units each having a oleo shock absorber. These could easily be exchanged for an alternative float lading gear, consisting of two single step light alloy floats, each provided with a small rudder to assist directional control on the water.
 Swordfish
Mk 1's began to enter service with the Fleet Air Arm in June 1936, equipping
No 825 Sq. At the beginning of WW 2 th FAA had 13 Squadrons operational with
the Swordfish, 12 of these Squadrons at sea aboard the carriers HMS Ark
Royal, Courageous. Eagle, Furious and Glorious.
The Swordfish Units first saw action at the beginning of the Norwegian
Campaign in 1940. On the 11th
April torpedo carrying Swordfish went into action for the first time from
the carrier Furious. Two days later a catapulted Swordfish from HMS Warspite
sank the German submarine U-64.
Swordfish
Mk 1's began to enter service with the Fleet Air Arm in June 1936, equipping
No 825 Sq. At the beginning of WW 2 th FAA had 13 Squadrons operational with
the Swordfish, 12 of these Squadrons at sea aboard the carriers HMS Ark
Royal, Courageous. Eagle, Furious and Glorious.
The Swordfish Units first saw action at the beginning of the Norwegian
Campaign in 1940. On the 11th
April torpedo carrying Swordfish went into action for the first time from
the carrier Furious. Two days later a catapulted Swordfish from HMS Warspite
sank the German submarine U-64.
Before the end of 1940, Swordfish units have become involved in a different type of operation , under the guidance of RAF's Coastal Command. This involved mine laying and bombing attacks on German occupied Channel ports, carrying a crew of two and with auxilliary fuel tanks mounted in the rear cockpit. Also in 1940 came the supreme triumph of the Swordfish., the memorable attack on the Italian Fleet at anchor in Taranto harbour, made after reconnaisance sorties confirmed that six battleships, plus attendant cruisers and destroyers, were sheltering there.
On the night of 11th September 1940, 21 Swordfish were launched in two waves, with an hours interval between them. All of the aircraft had long range tanks added, limiting crew to two in each aircraft, and of the total four carried flares for target illumination, six had bombs, and eleven were armed with torpedoes. The attack was carried out under difficult conditions , the aircraft having to face barrage ballons and dense AA fire. Despite this , only two aircraft and crew were lost. Reconnaissance confirmed that the attack had dealt the Italian fleet a shattering blow: three battleships damaged severely, two of them under water, a cruiser and two destroyers received hits and two auxilliary vessels had been sunk. In the short space of one hour the balance of Naval power in the Mediterranean had been irrevocably changed.
The units involved in this famous mission were No's 813,815, 819 and 824 Sq's, all embarked on HMS Illustrious. The last of the torpedo attacks made by these aircraft came in 1942 , when a futile attempt was made to prevent the German battle cruisers Gneisenau and Scharnhorst and the heavy cruiser Prinz Eugen from passing through the English Channel eastward. Six Swordfish of No 825 Sq , led by Lieutenant Commander Esmonde, were detailed to make an torpedo attack. On their approach they ran into stiff resistance by AA fire and an umbrella of fighters making it clear to the Sworfish crews that their task was hopeless. Despite such odds, however, Esmond and his men pressed on.
 Not a
single Swordfish survived and it was nothing short of a miracle that five of
the eighteen crew members were rescued. All were subsequently decorated and
their gallant leader, Lt C Esmonde, was posthumously awarded the Victoria
Cross, the first to be given to a member of the FAA.
Not a
single Swordfish survived and it was nothing short of a miracle that five of
the eighteen crew members were rescued. All were subsequently decorated and
their gallant leader, Lt C Esmonde, was posthumously awarded the Victoria
Cross, the first to be given to a member of the FAA.
After this experience it was clear that the Swordfish was too vulnerable for carrying out torpedo attacks and a new role was sought for the type. This led to the redeployment of the Swordfish in an anti submarine warfare role ( ASW) using depth charges and the newly developed rocket projectiles.
The Swordfish Mk 2 entered service in 1943 and differed from the earlier version by having the lower wing strenghtened and metal skinned so it could carry and fire rocket projectiles without causing damage to the wing structure. The final production version was the Mk 3 , which mounted a radome carrying a scanner for its ASV) Air to Surface Vessel) Mk X radar between the main landing gear units. These upgrades to the old warrior brought new service life to the Swordfish and at the peak of its employment, equipped 26 Squadrons. At the beginning of 1945 there were still 9 Squadrons operating the Swordfish .
One of the highlights of Swordfish anti submarine operations was in September 1944 when Swordfish aboard the escort carrier HMS Vindex, escorting a convoy to North Russia, sank four German submarines in a single voyage.
Production ended in 1944, Fairey having built 692 and Blackburn 1699 units . On 21st May 1945 the last first line Swordfish Squadron was officially disbanded. All in all the Swordfish had a remarkable service history. In five years of war it had served as a torpedo bomber for the British fleet, as a shore based mine layer, as convoy protection from escort carriers, as a night flying flare dropper, as a rocket firing anti shipping and ASW aircraft , as well a for training and general utility duties.
| THE KIT |
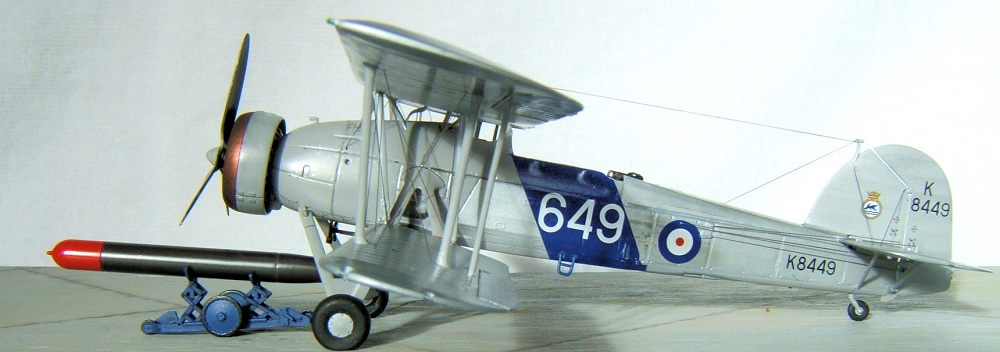
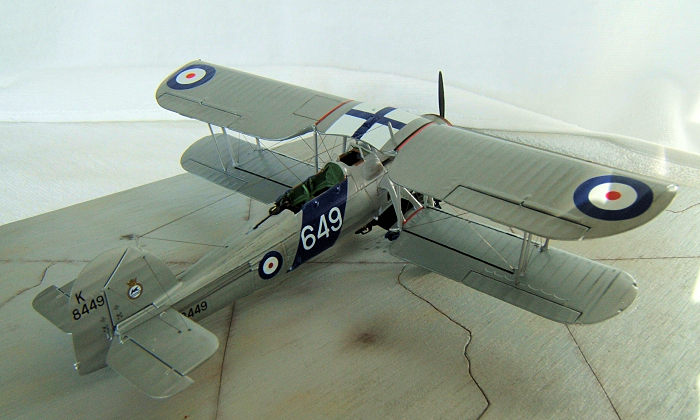
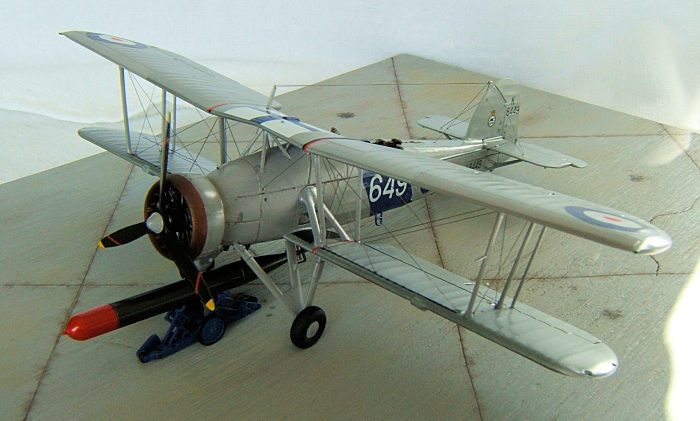
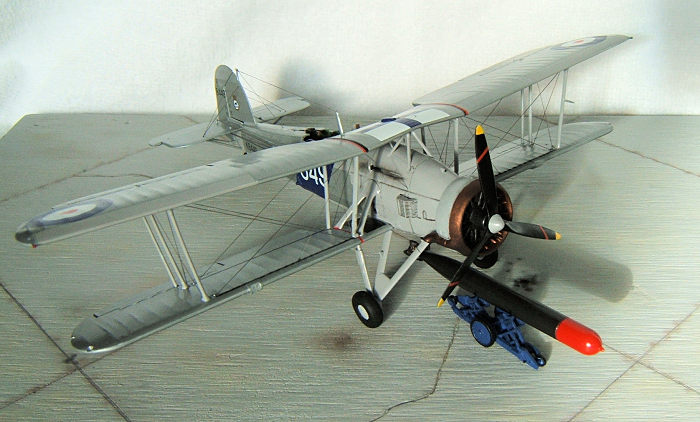
In the box we find 4 frames in light blue plastic and one frame in clear with 125 parts plus a decal sheet with two options: K 8449 No 820 Naval Air Squadron HMS Courageous March 1939, K 8393/ 5A No 824 Naval Air Squadron HMS Eagle November 1940,
A nice addition is the dolly provided for the torpedo. The instruction sheet is well laid out and easy to follow. The model can be built with wings in folded or unfolded position .
| CONSTRUCTION |
 As per
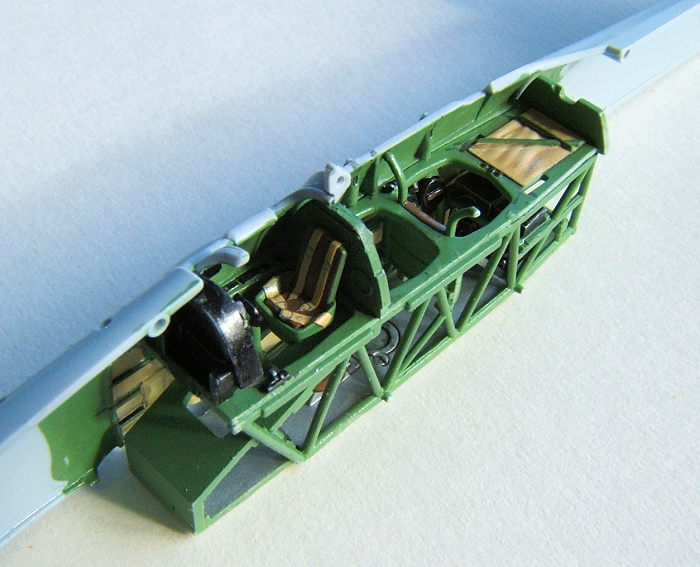
plan I started out with the cockpit. I separated all the parts from their
respective frames and prepared these for painting.
As per
plan I started out with the cockpit. I separated all the parts from their
respective frames and prepared these for painting.
After sufficient drying time I removed excess paint where individual parts are glued together and used mainly small amounts of super glue for that step. Extra care was taken to paint the tiny details on the radio set and the seat harness was fashioned out of masking tape with the buckles painted on with a very thin brush. Dry brushing to highlight surface detail and I used Panel line accent colour enhanced the overall apearance of the cockpit.
Adding the two small windows and the machine gun to the forward cockpit sidewalls was the next step before glueing the cockpit assembly into the right hand fuselage shell. The upper inner wing portions were glued to the bottom part of the fuselage. The instructions tell you to remove a tab on the interface to the outer wings if you decide to build the model with the wings unfolded.
Having done this I attached the fuselage bottom part and the decking behind the gunner,s position followed by the inner wing support struts and upper wing supports on the forward fuselage decking. Overall fit was good and very little filler was necessary to clean up seams. At this stage I made sure that the windshield had a good fit. Some fine adjustments had to be made to ensure this.
Engine and cowl assembly was pretty straight forward. All engine parts and propeller were painted and weathered , the completed cowling was painted separately and left to be installed at a later stage. The next section of the build involved tail plane and upper wing assembly.
 The
designers of this kit have found a clever way to install the upper and lower
wings. One has to insert the outer wing struts into a recess first before
bonding the two wing shells together. The center part of the wing carries a bar
which is glued to the lower shell first. That ensures a good alignment and does
strengthen the wing as well . At this stage the inner struts are glued into
recesses in the center wing which again makes the overall alignment with the
lower wing very easy.
The
designers of this kit have found a clever way to install the upper and lower
wings. One has to insert the outer wing struts into a recess first before
bonding the two wing shells together. The center part of the wing carries a bar
which is glued to the lower shell first. That ensures a good alignment and does
strengthen the wing as well . At this stage the inner struts are glued into
recesses in the center wing which again makes the overall alignment with the
lower wing very easy.
I drilled all the holes for the rigging wires and the strut bracing wires at the small marks indicated. To make absolutely sure I checked a set of Swordfish Walk Around photos to confirm the exact location of the attachment points. That was also done for all the control cables and bracing wires for the tail plane. Then I painted the upper wing assembly and the fuselage and left to dry.
| COLORS & MARKINGS |
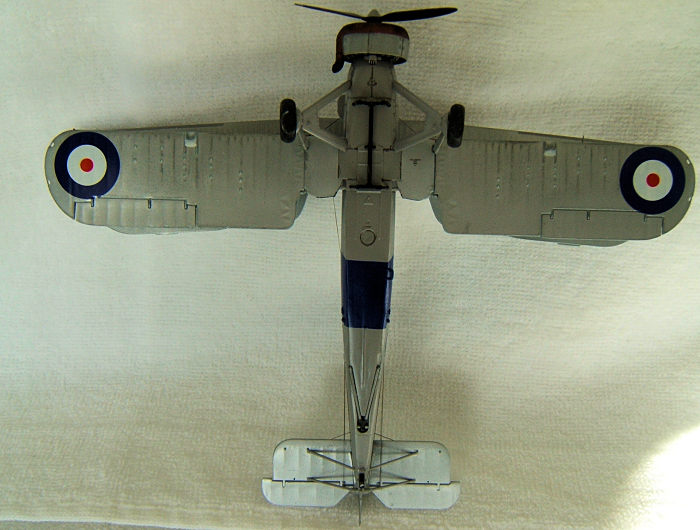
Since I decided to do the No 820Sq HMS Courageous 1939 version of the Swordfish, there was only the torpedo , the torpedo shackles and the dolly to take care of.
After the upper wing
assembly paint had dried I did what I call pre rigging: Flexible EZ line was cut
to the right length (measuring the distance between the attachment points with a
compass ) I attached the
 rigging
wires to their allocated holes . I made a small probe out of stretched sprue to
pick up a tiny drop of super glue just enough to fill the pre drilled hole
before inserting the rigging line. Doing this at this stage has the great
advantage that one has a lot of space to work in. This job would be somewhat
more difficult if upper and lower wing were already in place.
rigging
wires to their allocated holes . I made a small probe out of stretched sprue to
pick up a tiny drop of super glue just enough to fill the pre drilled hole
before inserting the rigging line. Doing this at this stage has the great
advantage that one has a lot of space to work in. This job would be somewhat
more difficult if upper and lower wing were already in place.
Having accomplished this step I moved on to install the upper wing first and then the lower wings. Having all the struts in good alignment made this a rather easy task compared with a lot of other bi plane kits I worked on in the past. Attaching the rigging wires to the holes in the lower wing was straight forward. The control cables and bracing wires for the tailplane were put into place after the rigging job for the wings was complete. The pre painted wheels were cemented into place it was time to apply the decals. These are of good quality and with the help of a bit of Microsol they settled down nicely. I left the decals to completely dry overnight and sealed these with a thin coat of clear the next day. Some mild weathering completed the job.
| CONCLUSIONS |
Airfix has done it again. This is my 8th 1/72 Airfix kit ( of the new generation) and it was fun to build.Highly recommended.
21 August 2018
Copyright ModelingMadness.com
If you would like your product reviewed fairly and fairly quickly, please contact the editor or see other details in the Note to Contributors.
Back to the Main Page Back to the Review Index Page Back to the Previews Index Page